Three years ago, I made cinnamon buns for the first time.
And the first time I made them, I must admit, it was a bit of a gory experience. Butter and sugar were all over the counters and my clothes and I was furiously beating confectioner’s sugar into glaze by hand at 2am.
Since then, I have made glazed cinnamon buns more times than I can count. Out of everything I bake, this is the recipe that friends and family request the most! But my first post about it is…well…awkward. Awkward photography and awkward ranting.
You deserve better.
So I’m dusting off the cinnamon bun recipe, sharing a few tips and tricks, and hopefully making your mornings more delicious!
 I often make these cinnamon buns for my MOPS group (because the original recipe makes about 50 buns, wow). I make them for sick friends and for celebrations, for snow days and even for fundraisers. I have been told many times that these cinnamon buns are the best cinnamon buns in the world.
I want you to make the best cinnamon buns in the world, too!
I’m not going to lie: it basically takes all day to do these right. But the good news is that you can mostly abandon them right up until time to roll the dough! You just need to start early and do a lot of waiting before you get to that point.
This recipe makes quite a lot of cinnamon buns. (To the tune of about 50.) For the purposes of writing about the recipe, I’m basically going to assume you are making the full amount. But it’s very easy to make half if you don’t want all those treats tempting you. They also freeze very well, if need be!
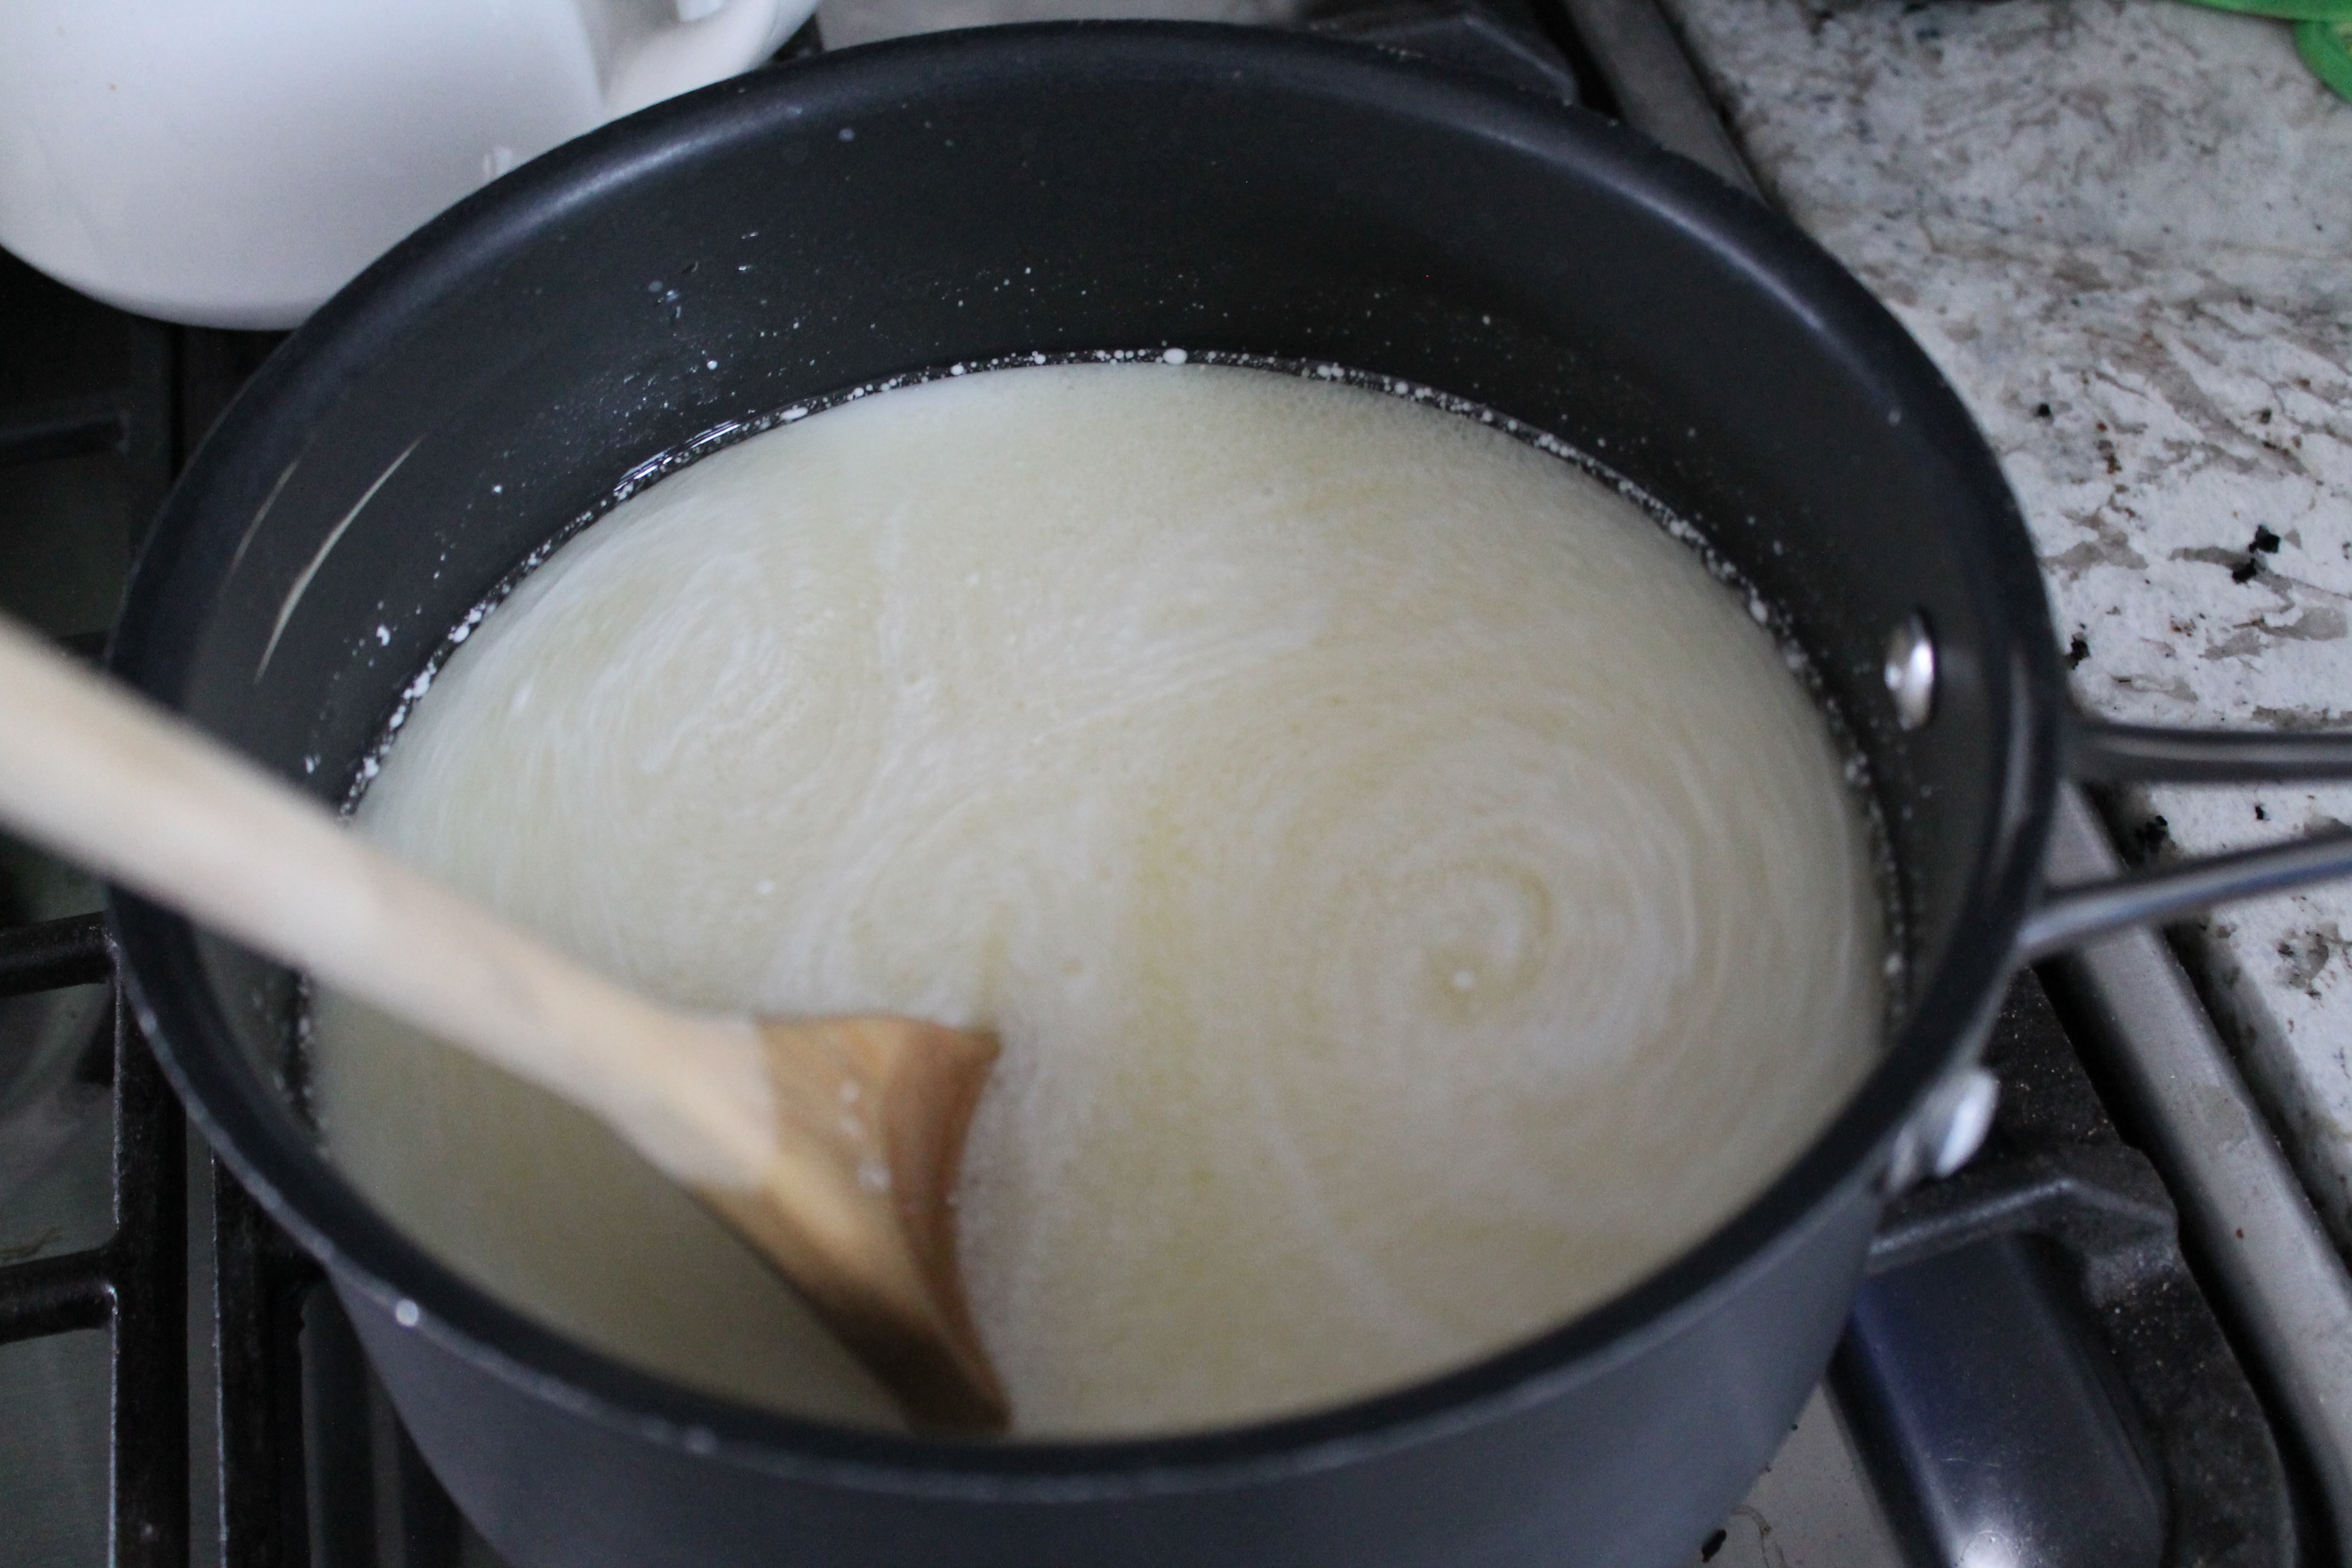 First, we scald whole milk with canola oil and sugar. Heat the mixture until the sugar completely dissolves. Stir the whole time. There’s nothing more disappointing than burned milk. The oil and the milk will never fully combine, but keep stirring until the mixture starts to appear slightly frothy and is barely steaming.
In case you were wondering, it is totally possible to make substitutions for the whole milk or canola oil. Once, I made these buns entirely vegan, using coconut milk and coconut oil! You could also substitute lower fat milk. But, if you do, if you make any substitutions, the dough might not be quite as soft and luxurious.
Keep in mind that these are not meant to be a health food. If you were looking for a wholesome breakfast, you are definitely in the wrong place. So go for it! Buy whole milk. Use canola oil. I dare you.
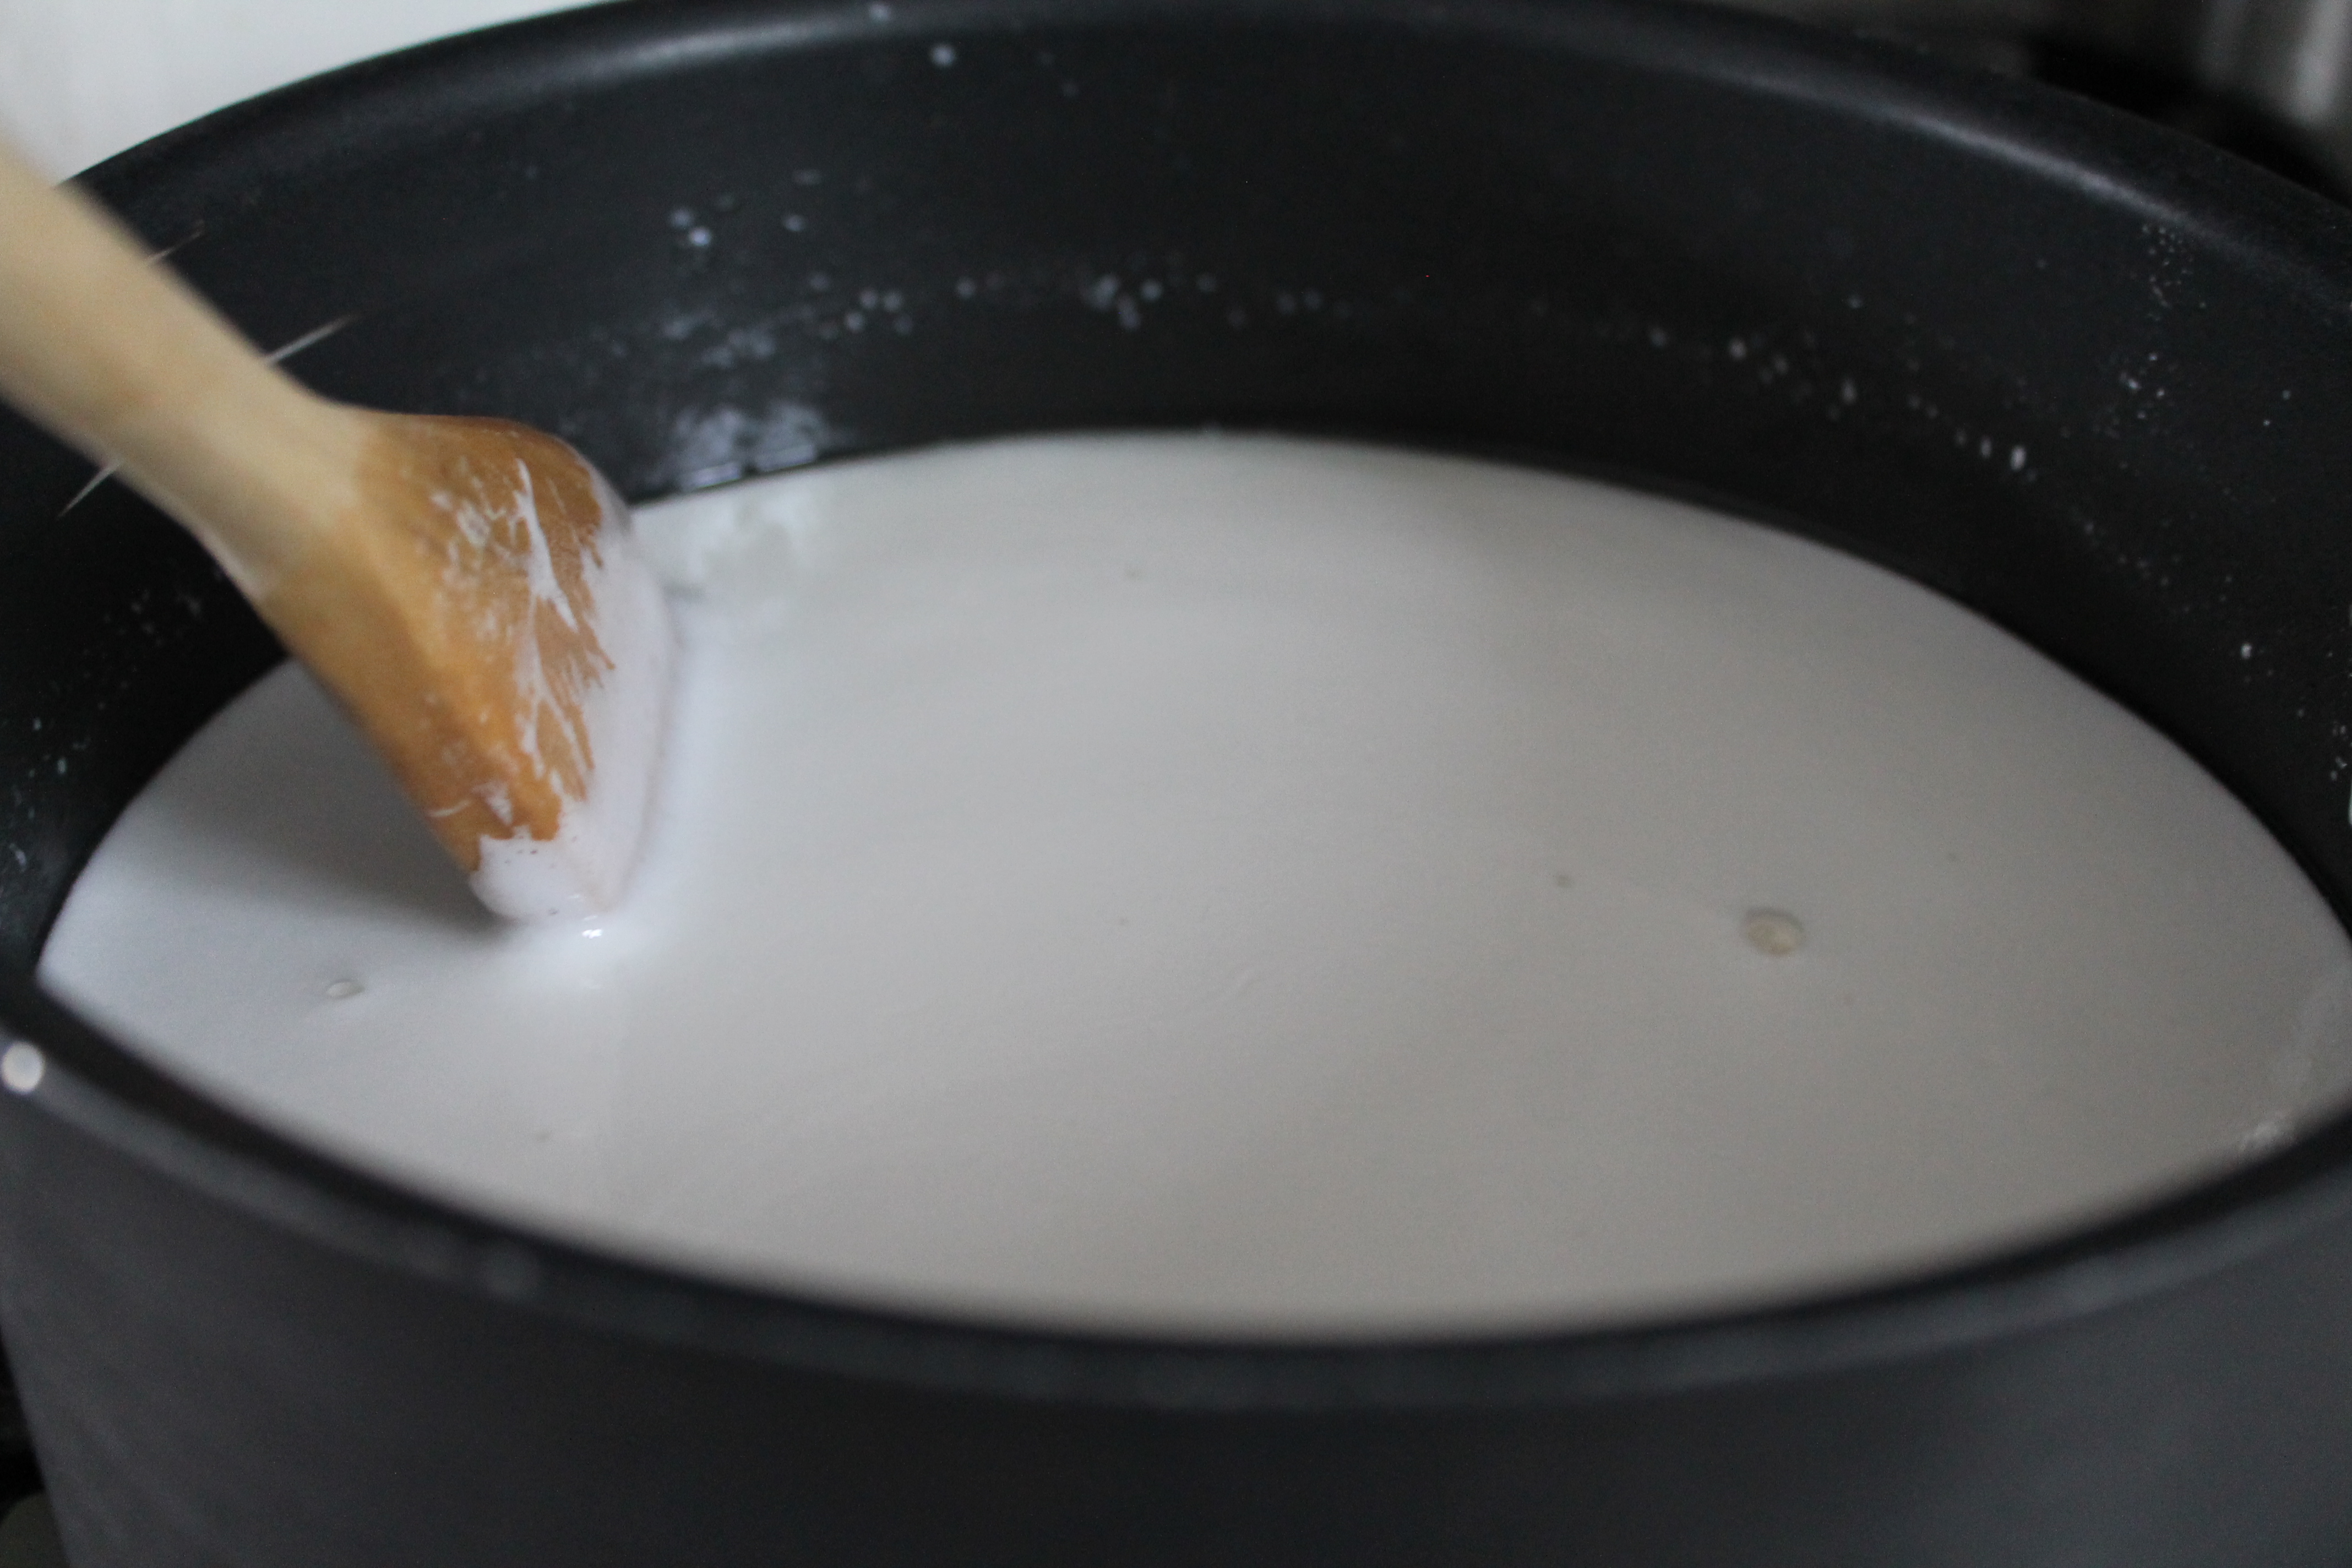 Once you reach the frothy/steamy state of your milk, immediately pour it into the bowl of your stand mixer.
Here is the first waiting period. You have to wait until the milk is just lukewarm before proceeding. This can take a few hours…because there is a lot of liquid! The reason you must do this is that very high temperatures will kill your yeast, and if your yeast is dead, of course your dough will not rise.
I come back and touch the outside of the bowl every half hour or so (okay, sometimes I get distracted and wait muuuch longer) to check the temperature. When the outside of your bowl is 10–20° or so above room temperature (which will feel warm, but not hot), it’s safe to move on to the next step!
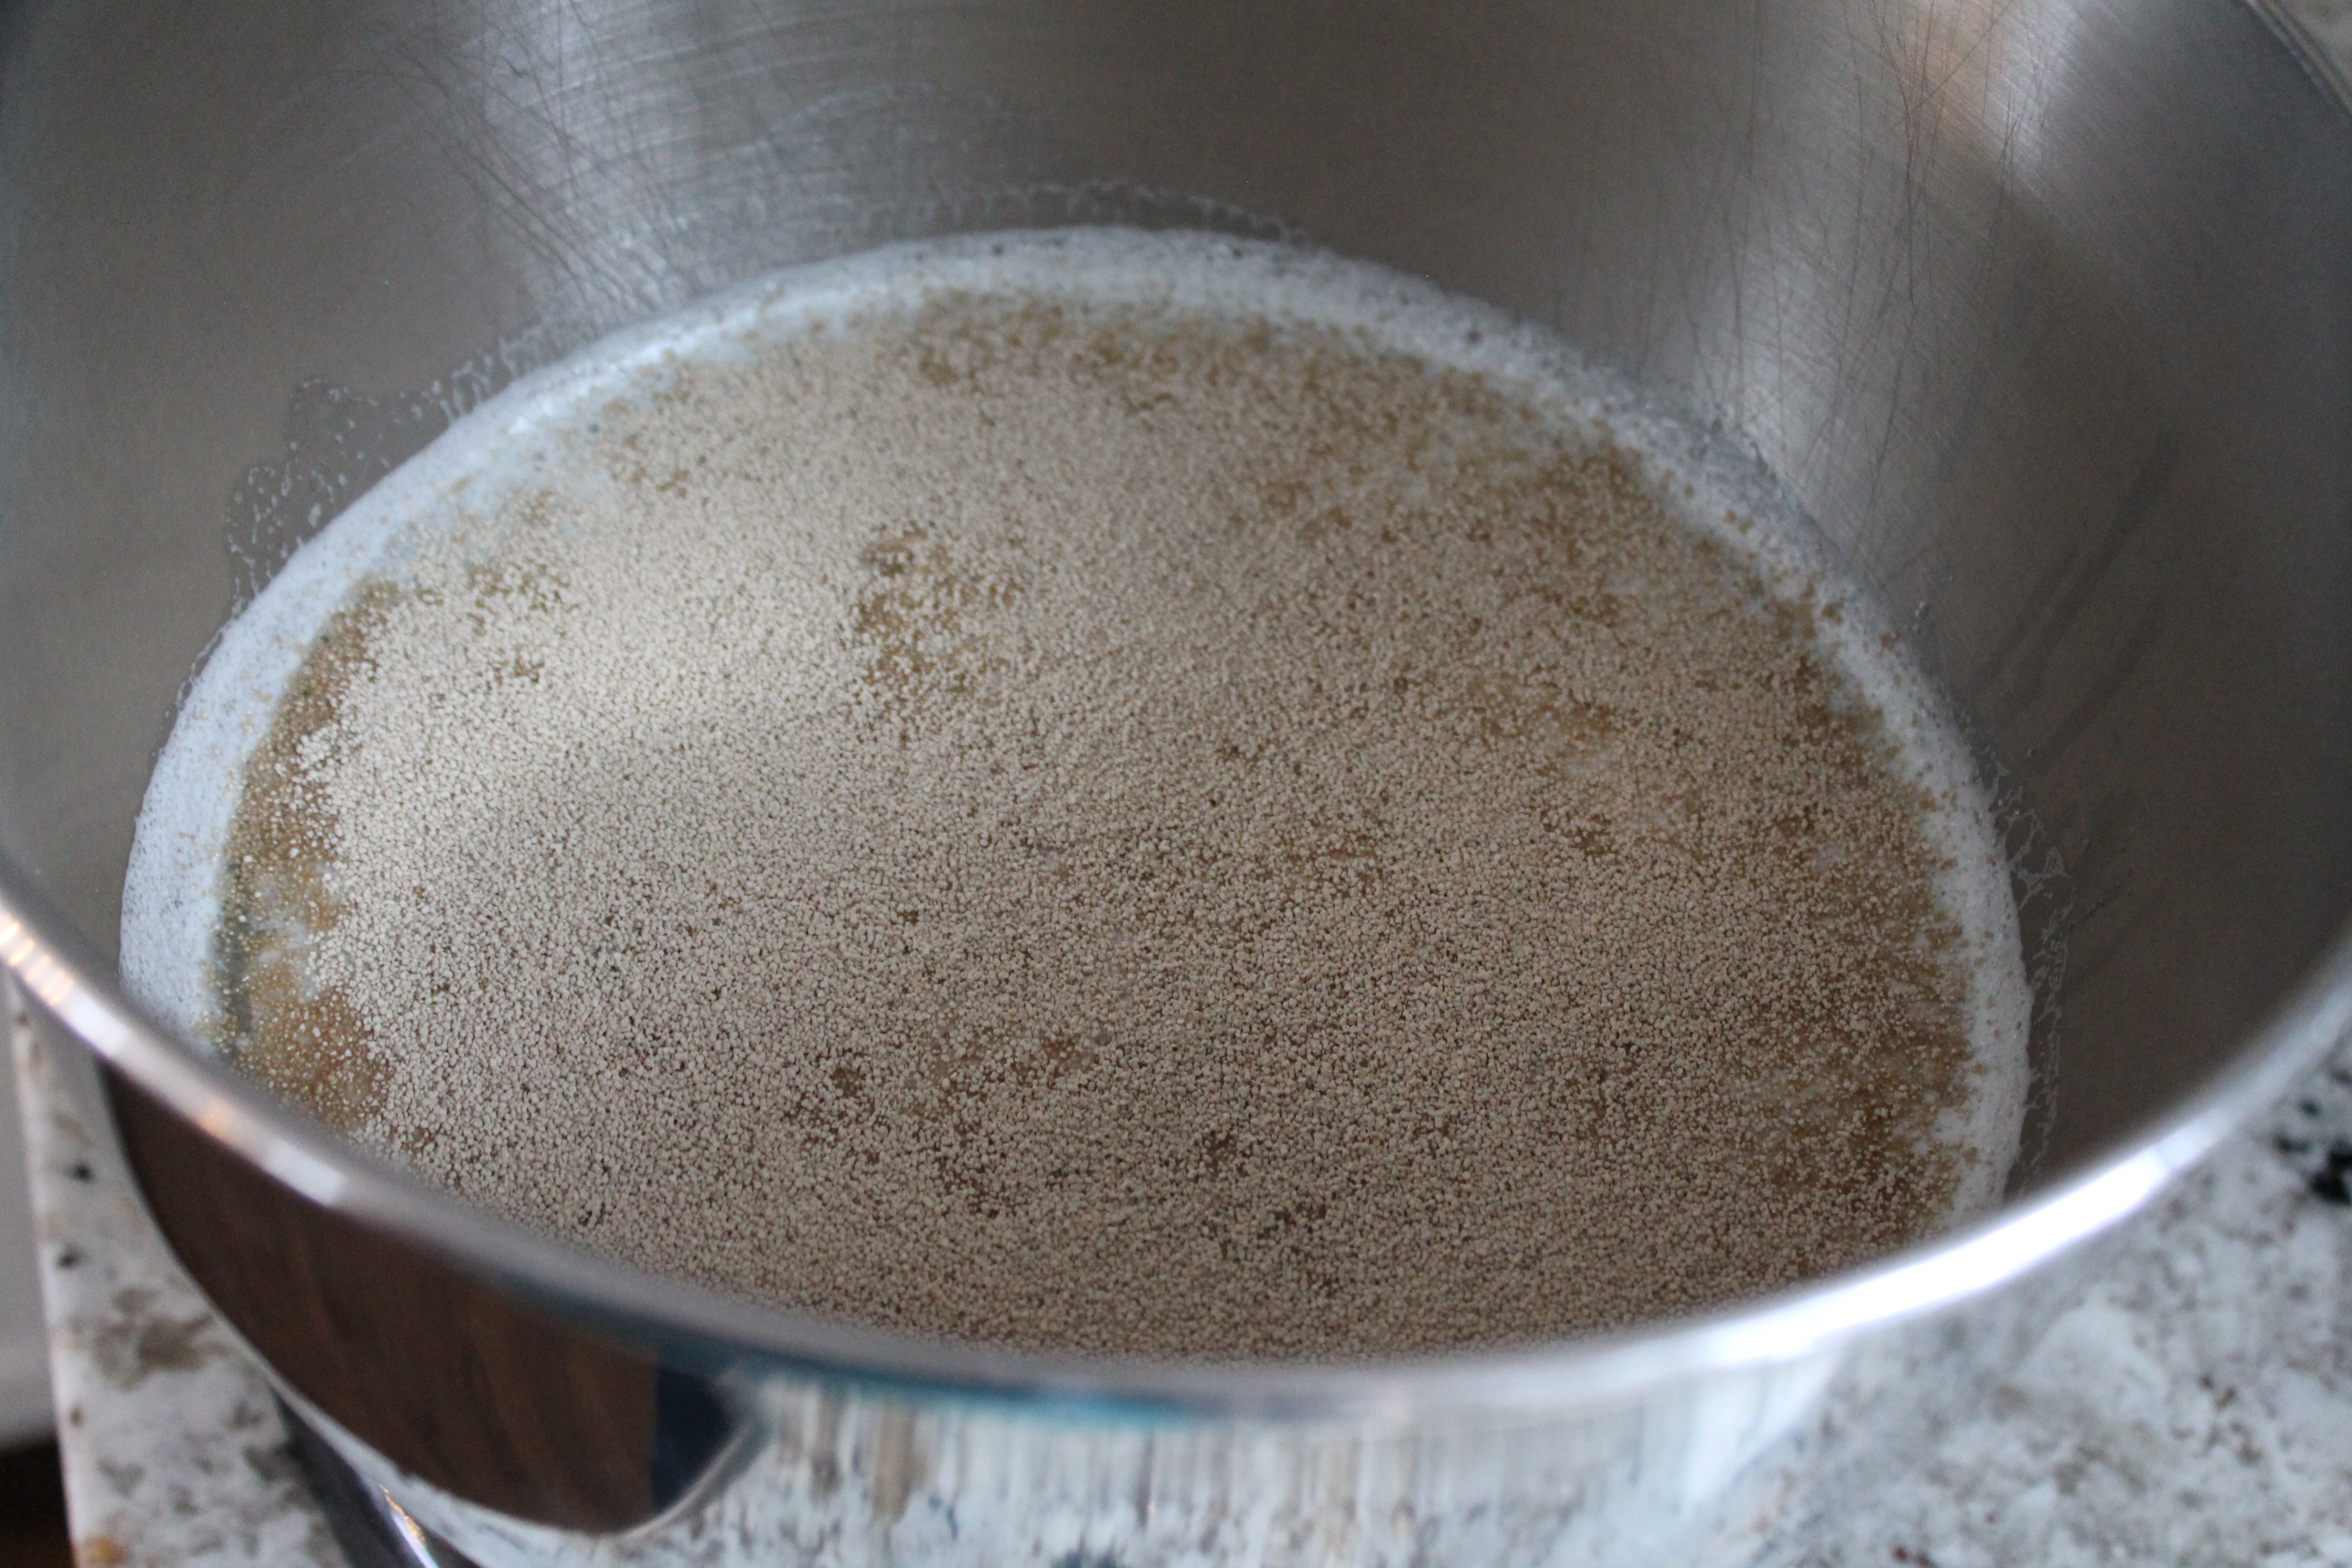 Sprinkle the yeast on top of the liquid. Let it sit for 1 minute (yes, just 1 minute: we are not allowing it to foam at this point) before adding 8 cups of flour.
I always use unbleached all-purpose flour. Any brand will do!
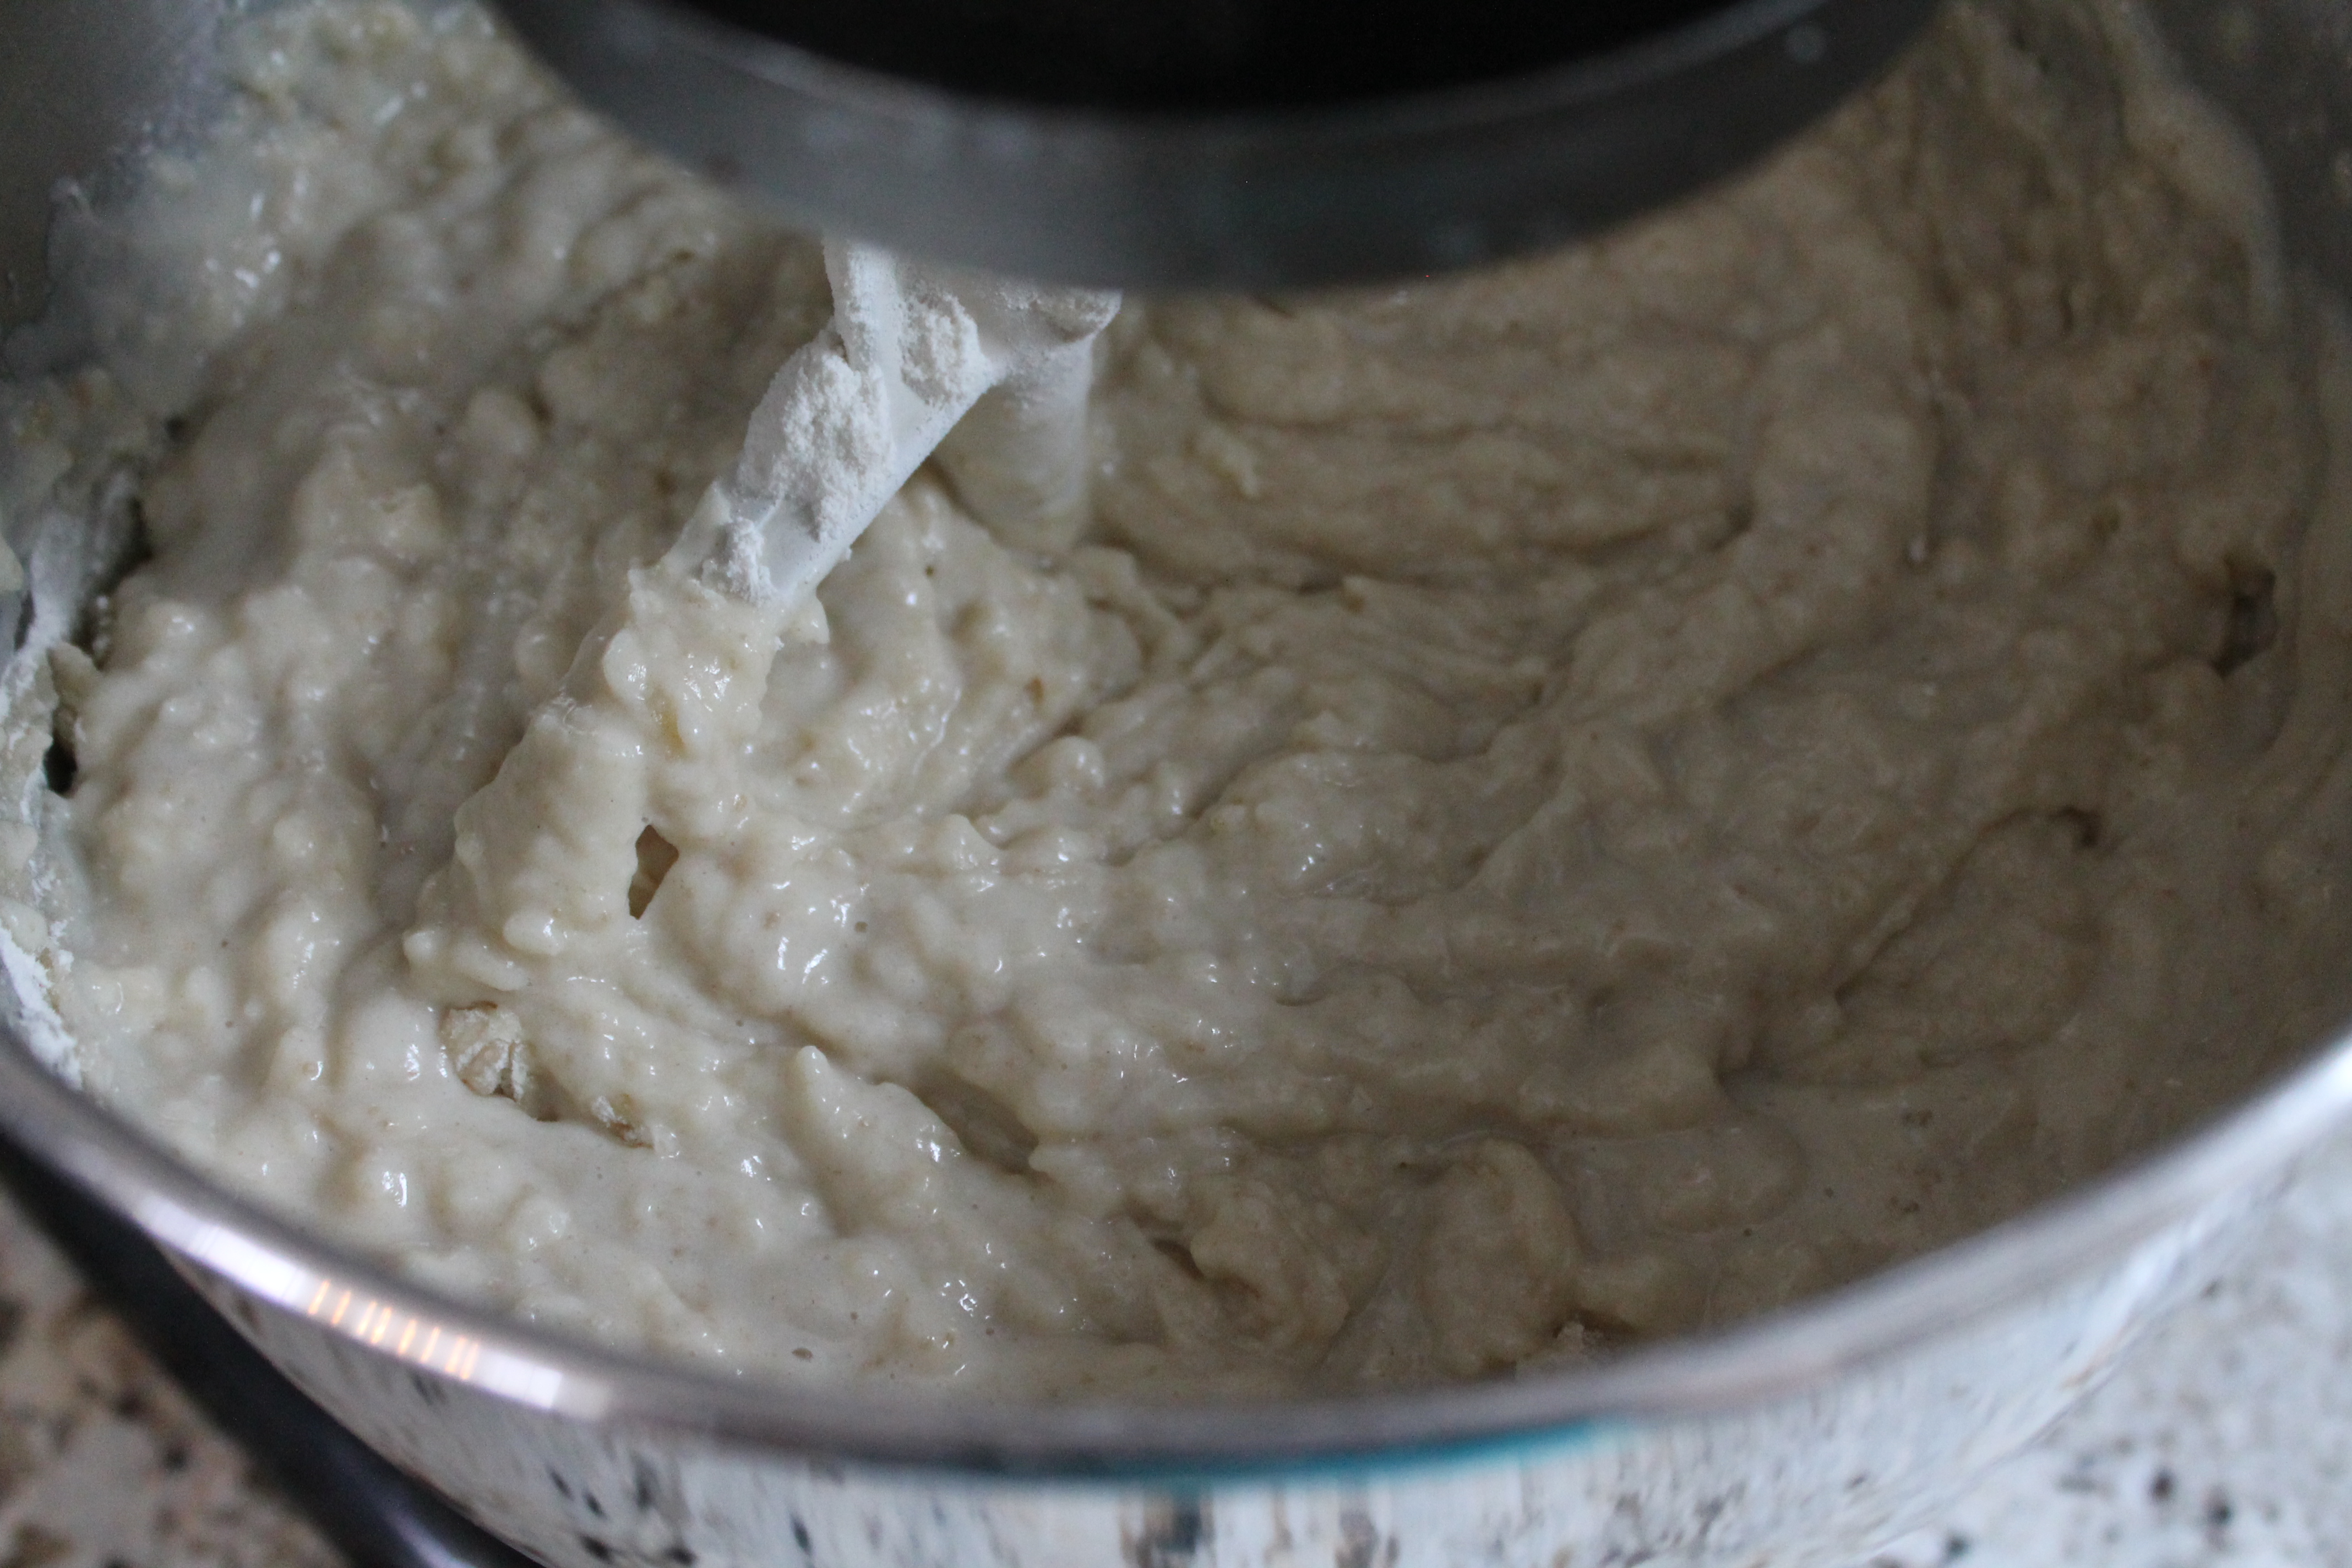 Mix the flour in using the paddle attachment on your stand mixer. Aim for a lumpy, wet dough, about the texture of a thick tapioca pudding. We don’t want to overmix the flour at this point. A looser dough will rise beautifully and result in a soft rather than chewy bread. Perfect for cinnamon buns.
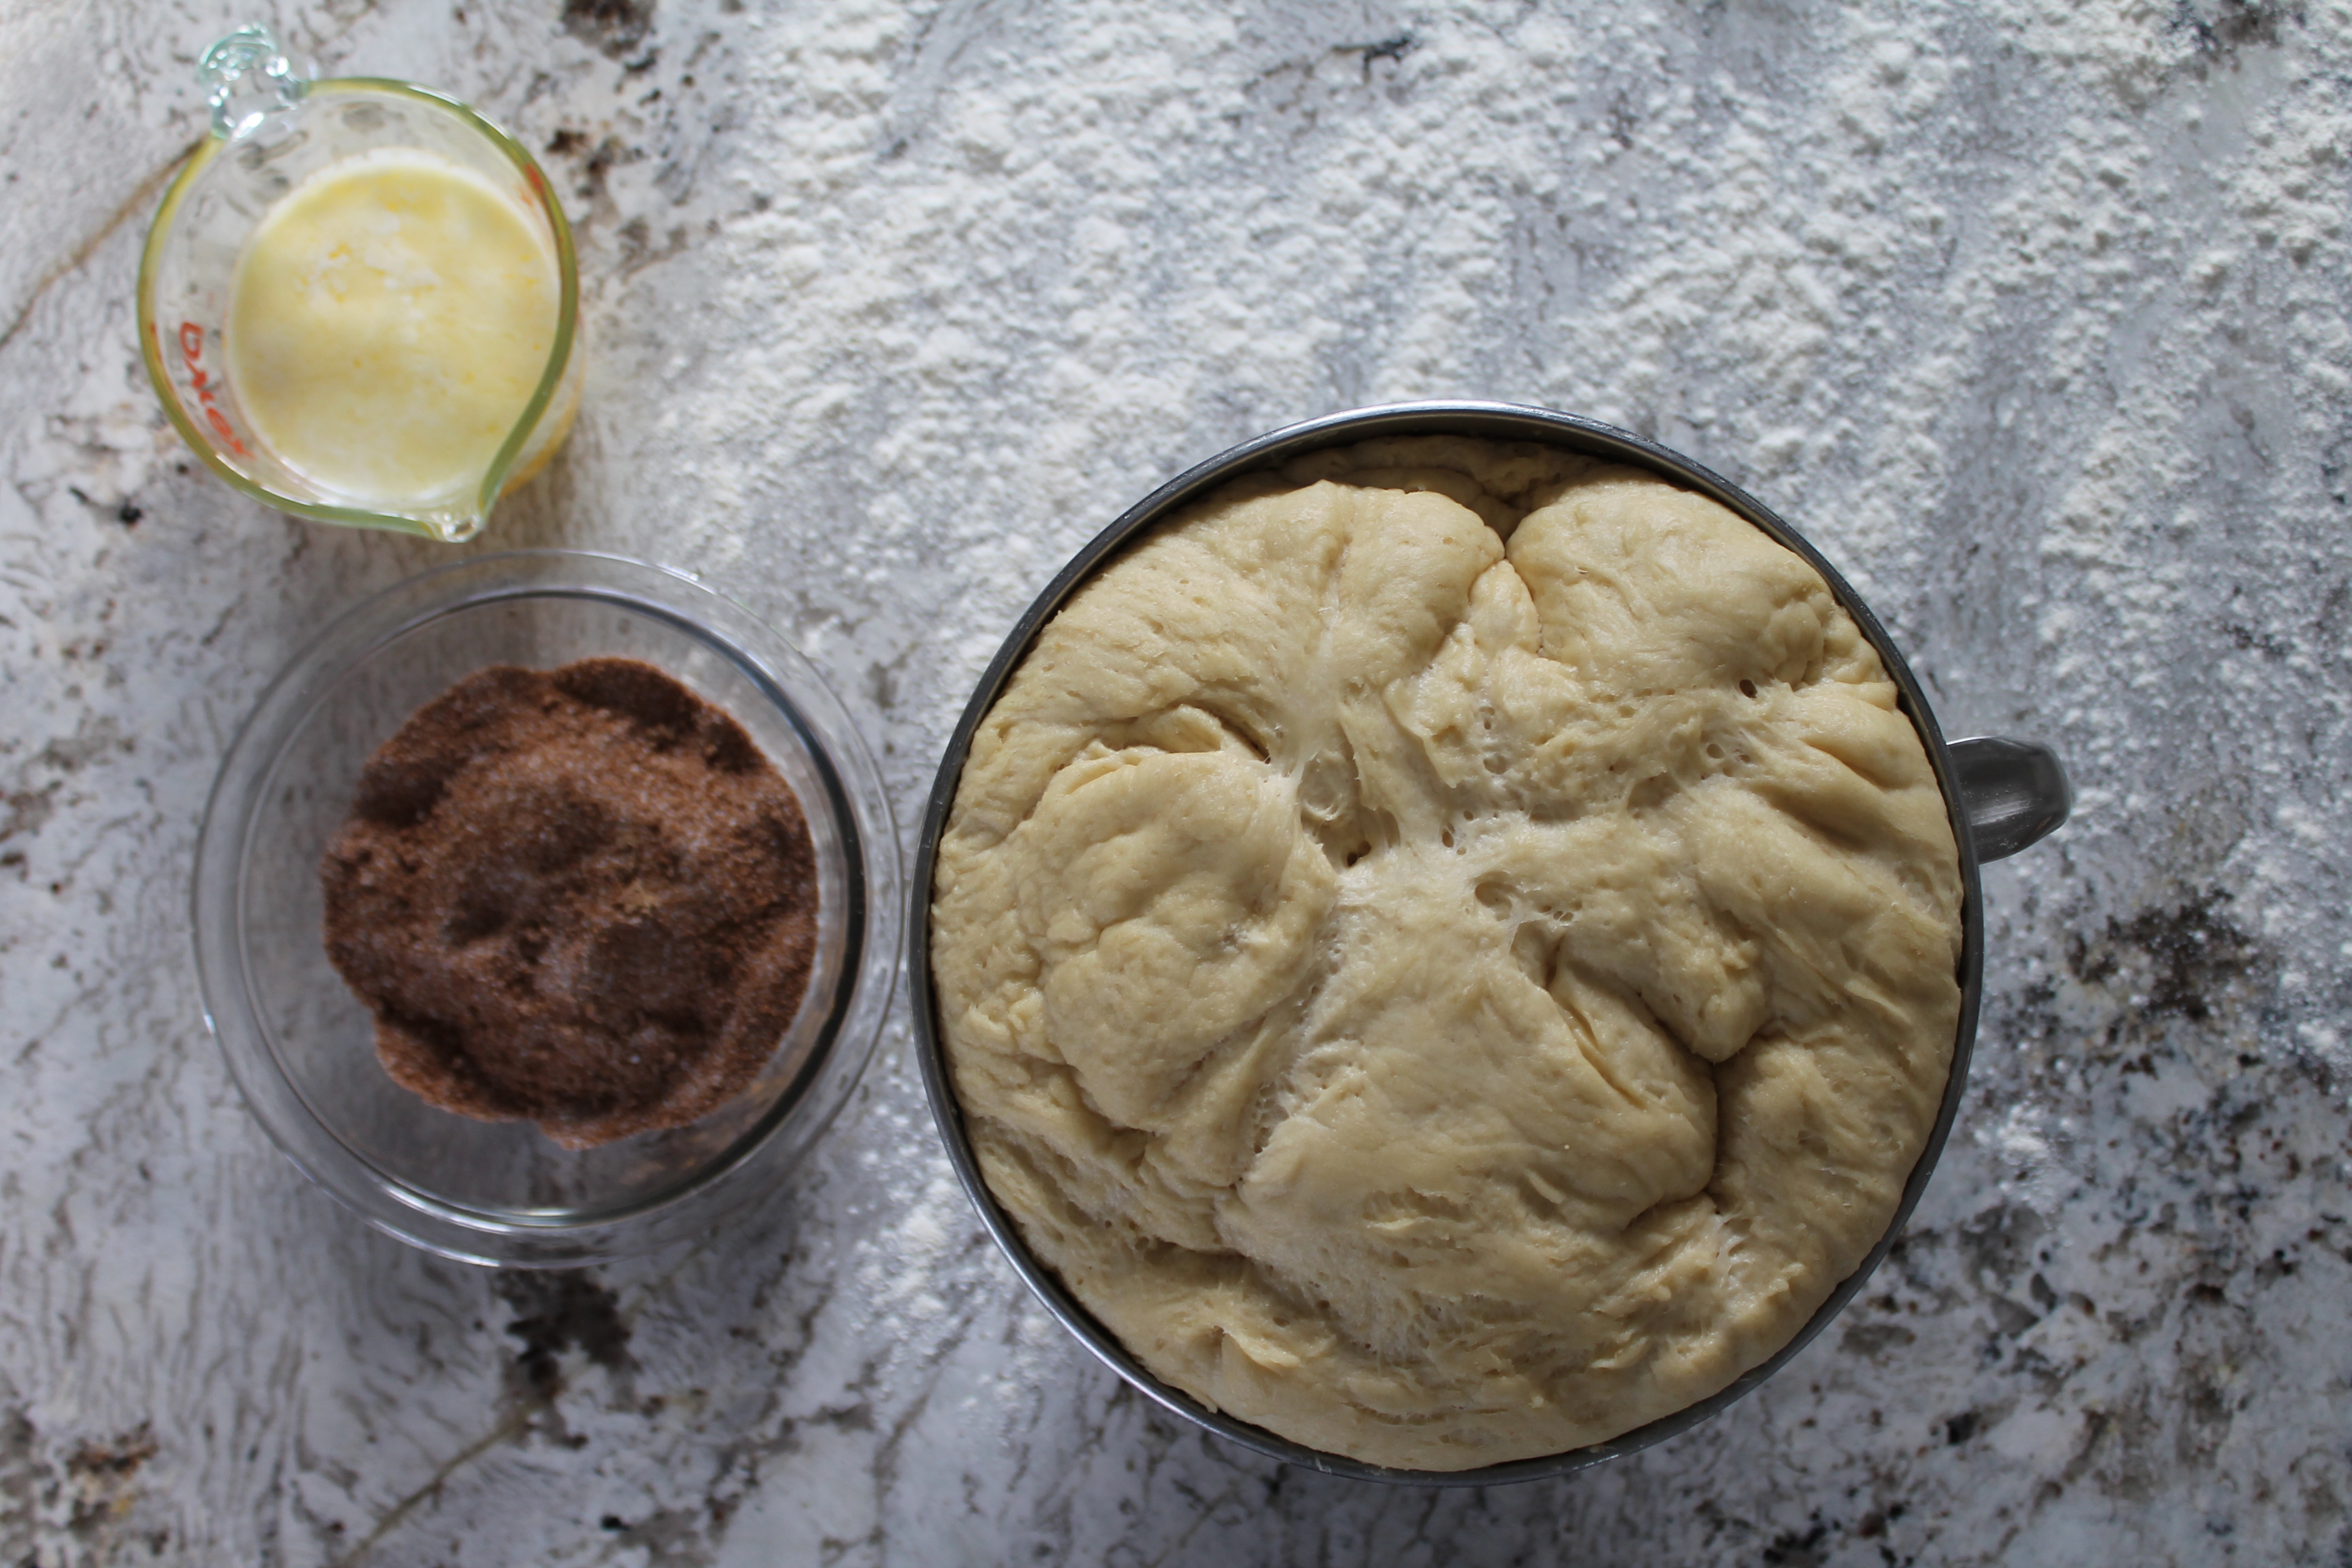
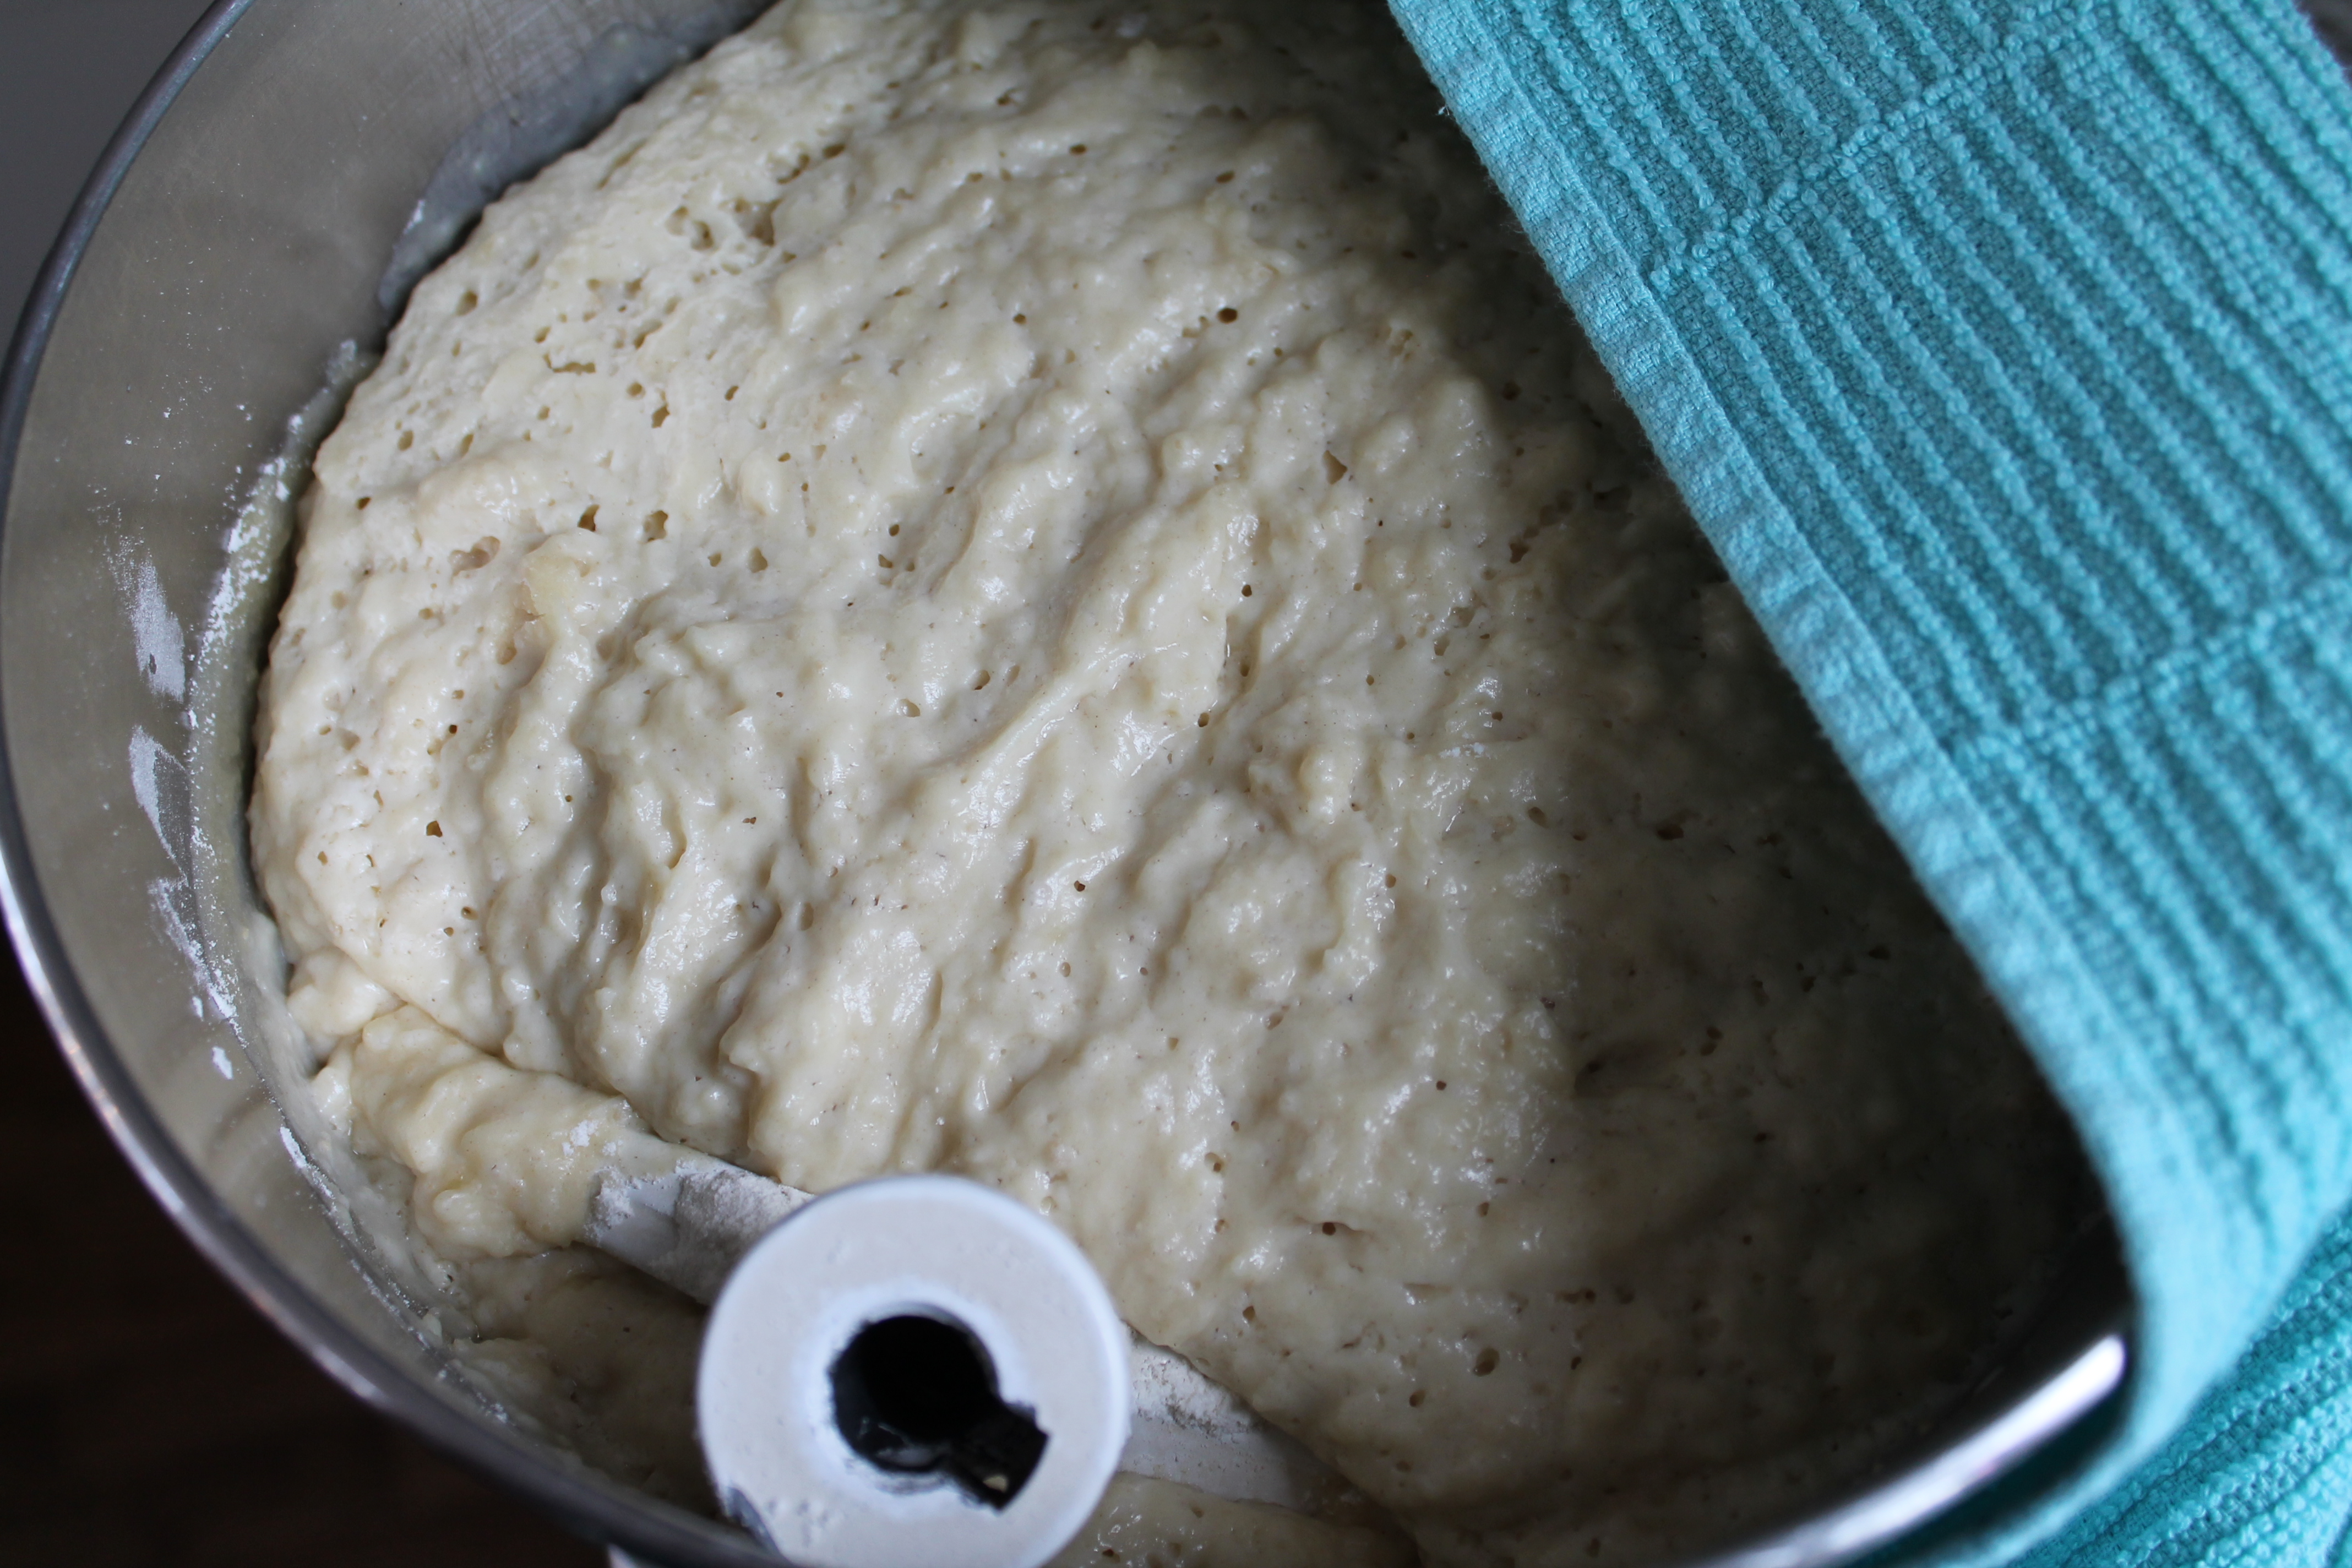 Cover the bowl (I usually leave the paddle tucked down into the dough, because we will need it later) with a clean towel and set it in a warm place to rise.
My favorite two rising tricks are: 1) turn the oven on to preheat—any temperature—for about 2 minutes, then turn the oven back off and place the covered bowl inside the oven to rise; and 2) place a glass of water in the back of the microwave and heat it for 2 minutes, then open the microwave and place the covered bowl inside along with the water to rise. For this bread, I prefer the moist environment of the microwave…but of course, that takes the microwave out of commission for an hour, which might not work for you.
Either way, allow the dough to rise for about an hour to an hour and a half, until it is at least doubled in size.
 When the dough is puffed, set the bowl back into the mixer stand. Add the remaining 1 cup flour, the salt, baking powder, and baking soda. The measurements “heaping” and “scant” are not super exact…if you don’t feel comfortable over- and under-filling your measuring spoons, then my advice is to level your measure, then add two pinches or subtract 1 pinch. (My super scientific measuring system: 1 pinch = about ⅛ tsp.)
Mix until the dough is completely even and thick.
Now cover the bowl with plastic wrap (or don’t…sometimes I skip this, which allows a bit of a hard shell to develop where the dough hits the air, but this isn’t really a problem when you roll the dough later). Place the dough in the fridge.
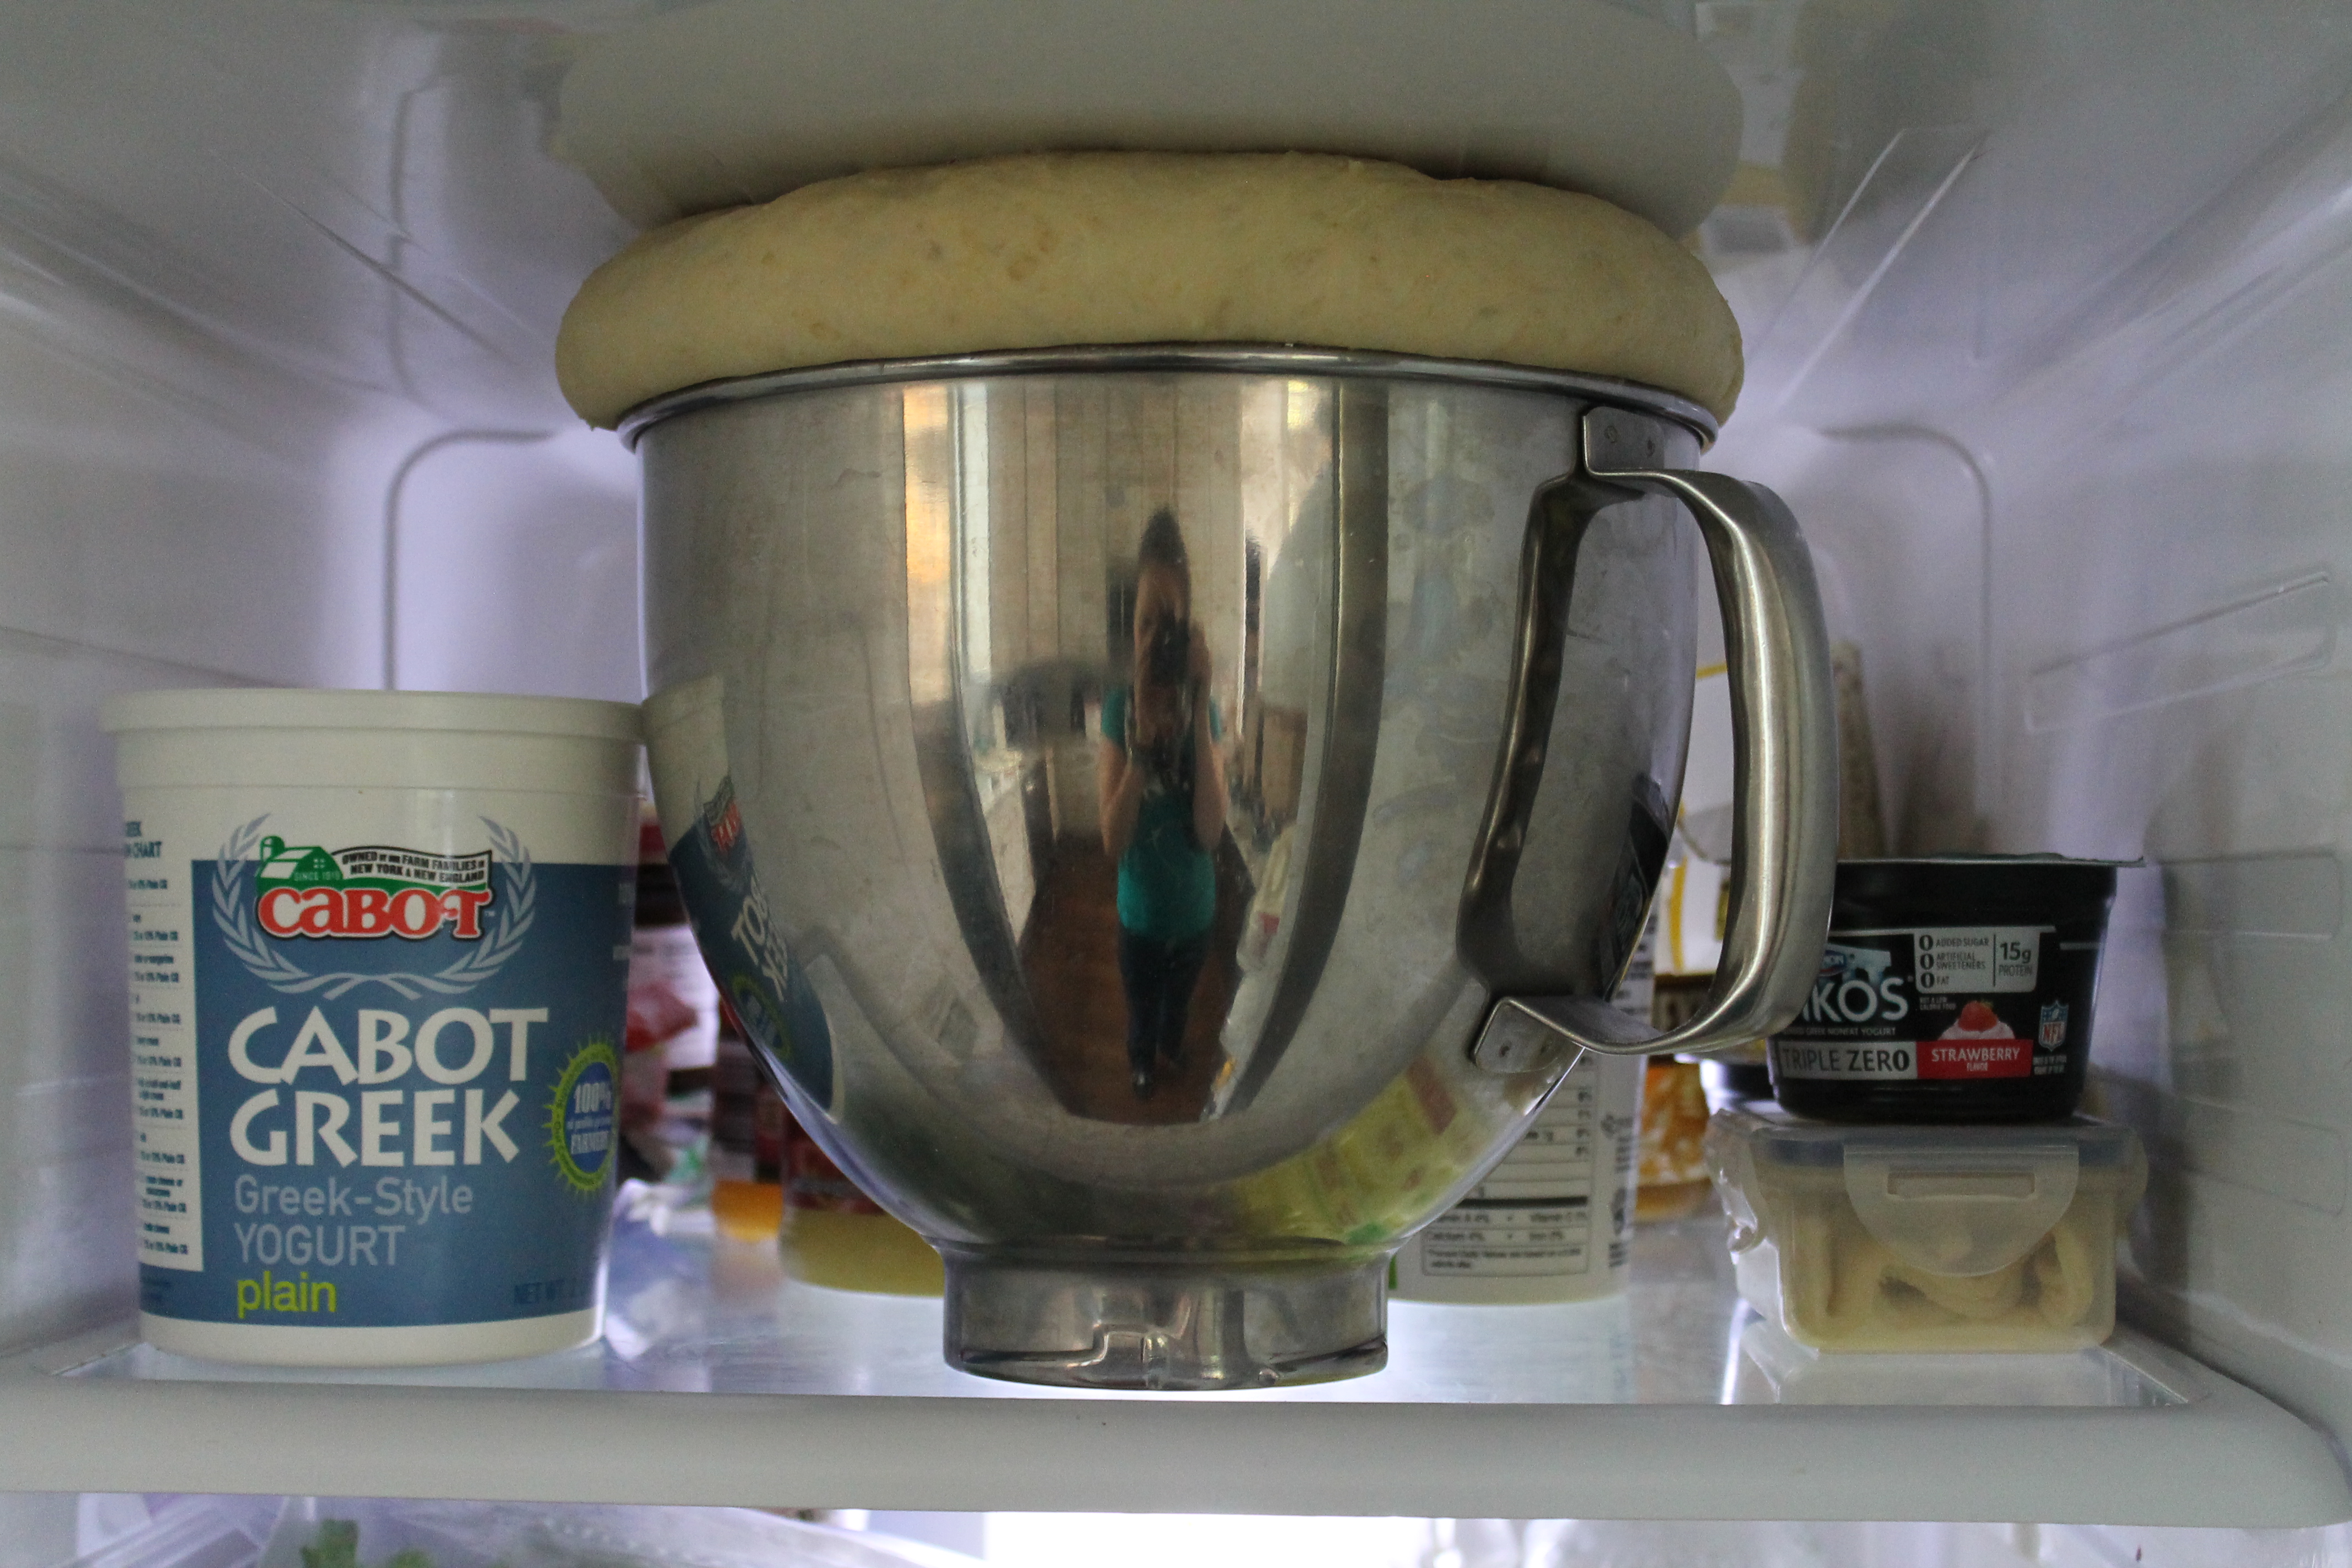 I suspect this is where I deviate from most cinnamon bun recipes. I always chill my dough for several hours, which adds to the rise time, but also makes it easier to work with come time to shape the cinnamon buns!
The dough will continue rising in the fridge, albeit slower and slower as it gets cold. After about two hours, it will be puffed above the rim of the bowl. (And possibly up to the shelf above. You might want to make sure that’s clean. Don’t judge me.) Punch it down. Stick it back in the fridge.
Every few hours after that, check the dough. Whenever it rises to the top of the bowl, just punch it back down. The dough can chill in the fridge up to 24 hours. I recommend chilling for a minimum of three hours before rolling out the dough. Three hours is enough time that the dough will have risen to the top at least once, and it will also be cold enough to handle without feeling sticky. (Of course, three hours could also be the perfect hole in your otherwise chaotic day! It could be juuust after your kids go to bed, leaving you free to smear your hands with melted butter and cinnamon sugar without said kids requesting to lick you. Or maybe that’s just me.)
 When the dough is nice and cold, and you are ready to roll your cinnamon buns…this is when the rubber meets the road, friends.
I recommend doing a bit of prep before rolling the dough, for the smoothest, easiest process. Start by lightly misting all of your baking dishes with cooking spray. I have sometimes found that the accelerant in the cooking spray can actually burn if you use too much oil, so I sometimes run a paper towel around the pans to spread the oil evenly and soak up any excess. You could also use real butter, which requires a few extra minutes over the spray.
A full batch of this recipe will require 4 casserole dishes (9″x13″) for baking. Several round cake pans and pie plates also work! I often use disposable pans so I can give some of the buns away.
It is also the right time to melt 1 cup of salted butter (always salted) and work together the brown sugar, white sugar, and cinnamon with your fingers. I usually warm the butter for about 1 minute in a microwave-safe bowl, which leaves a few solid pieces of butter swimming in a pool of hot butter. The solid pieces will melt on their own as they sit.
With a large knife, cut the cold bread dough in half. Scoop half of the dough out onto a lightly floured work surface, and return the remaining dough to the refrigerator.
The work surface. In our house, we are blessed to have stone countertops, which are naturally cold to the touch. This has made a huge difference in my cinnamon buns, because it helps keep the dough cool while I work, and allows the buttery sugar to set before I roll the dough up into a log. If you do not have stone countertops, don’t fear! You can still make beautiful cinnamon buns, but they may ooze a little while you work. That being said…it wouldn’t hurt to invest in a large stone pastry board, like this one (you may need to shape the buns in three batches rather than two if you are using a pastry board, in order to roll the dough thin enough).
How much flour is “lightly floured?” you ask. I usually use between ¼ cup and ½ cup, sprinkled around and patted around with my hands.
 Shape the dough into a loaf or a fat log. This will help you to roll the dough out into a rectangle instead of some other weird shape.
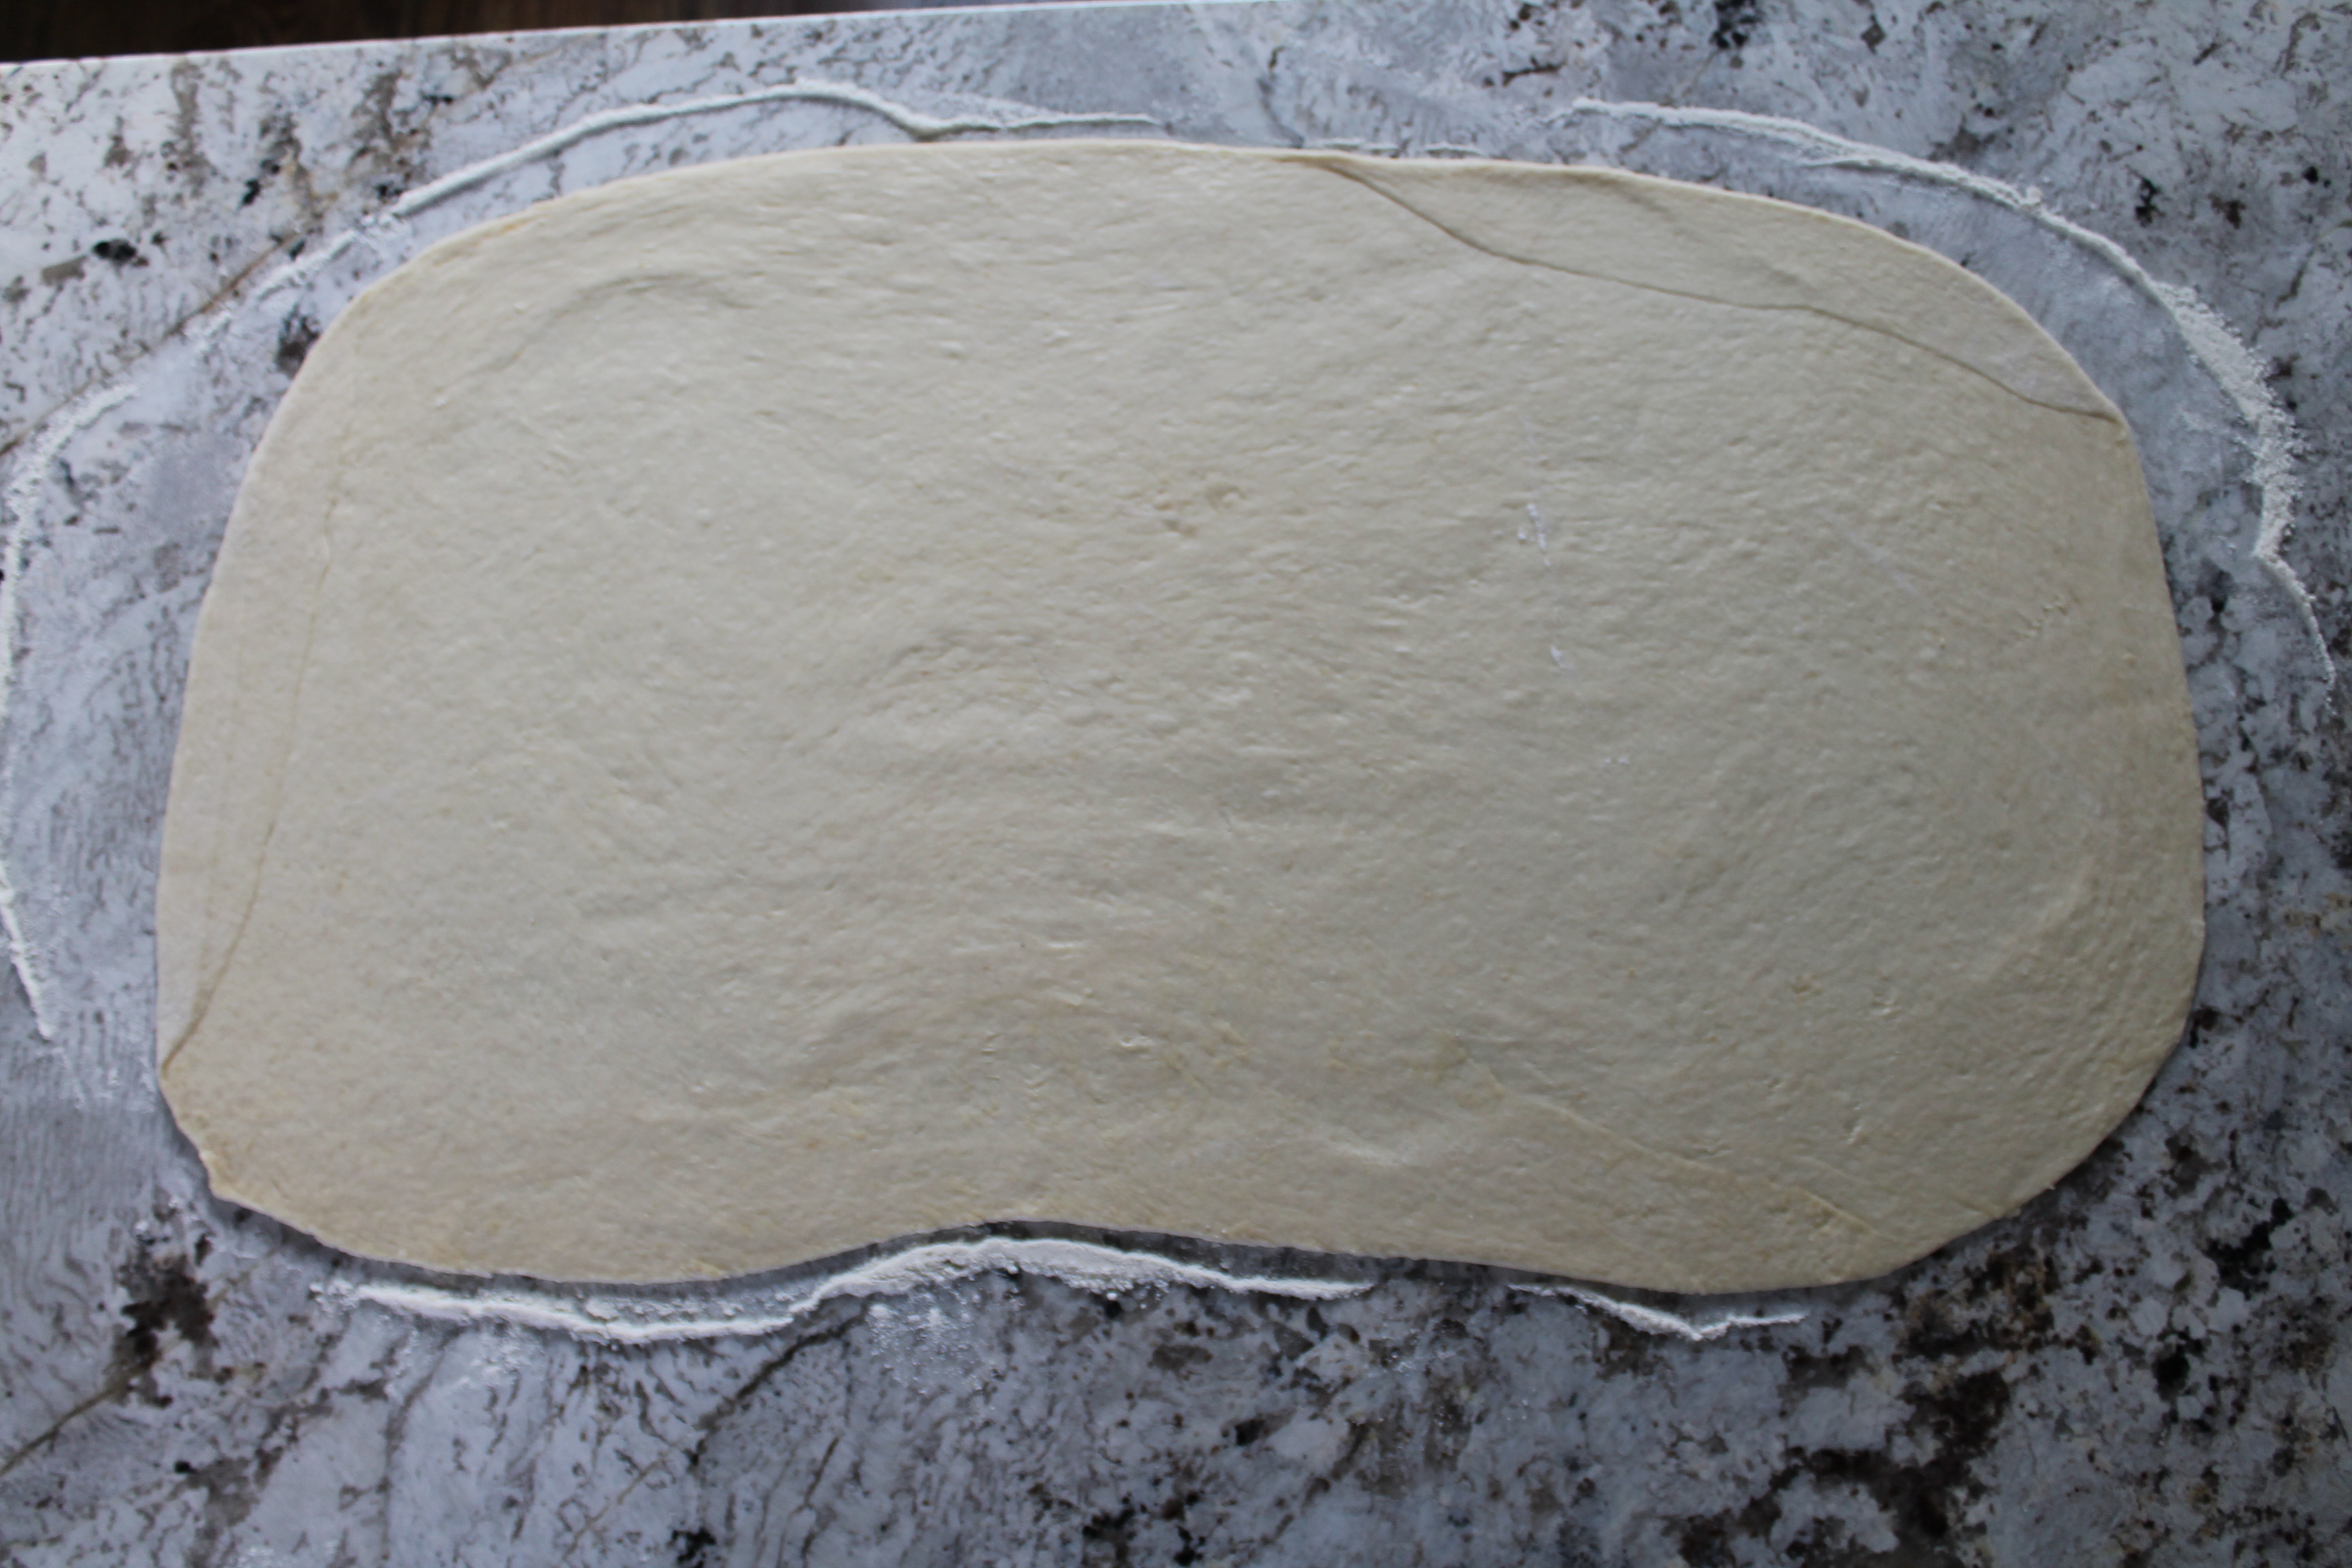 Roll the dough out as large and as thin as possible. I generally roll til it’s about 1″ thick, then flip it over so the top and bottom can both be nicely dusted with flour. The end goal is for the dough to be no more than ¼″ thick, about 26–30″ long and 15″ wide. The dough is soft, so it may spring back a little at the edges. That’s okay, just keep rolling it until it’s as large as you can get it.
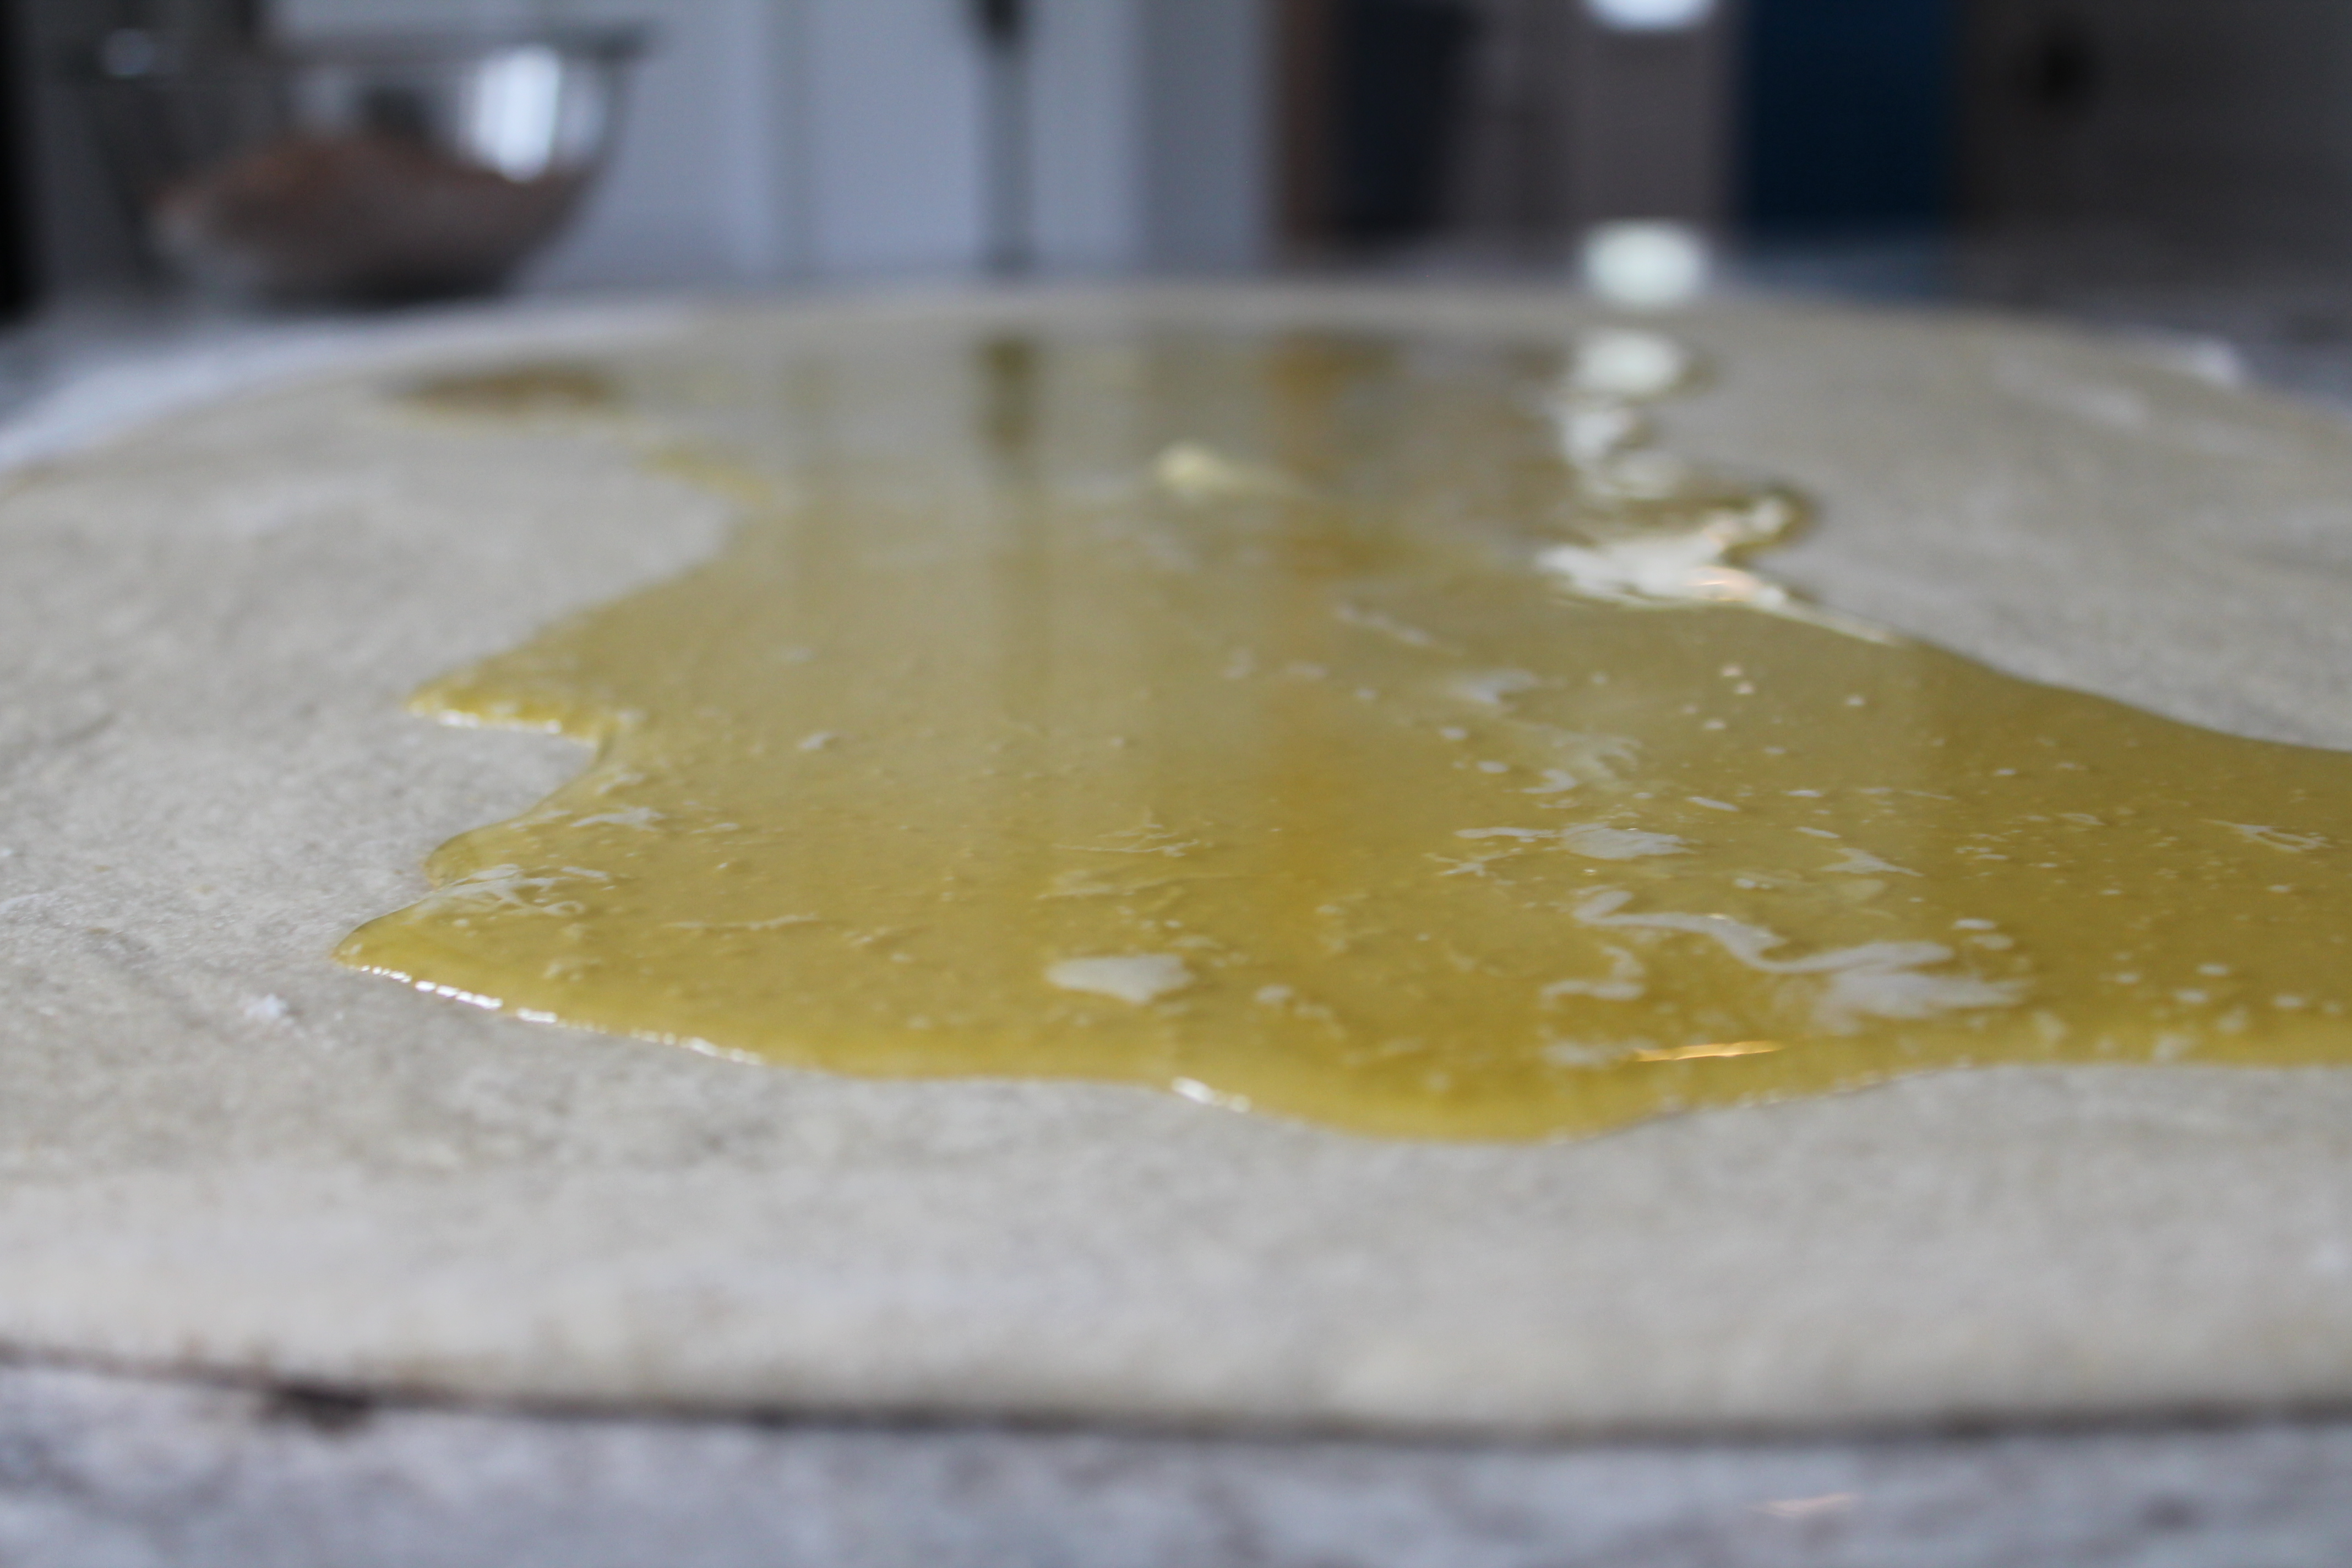 Pour the melted butter straight down the center in a line.
 Immediately pour the cinnamon sugar mixture over the butter.
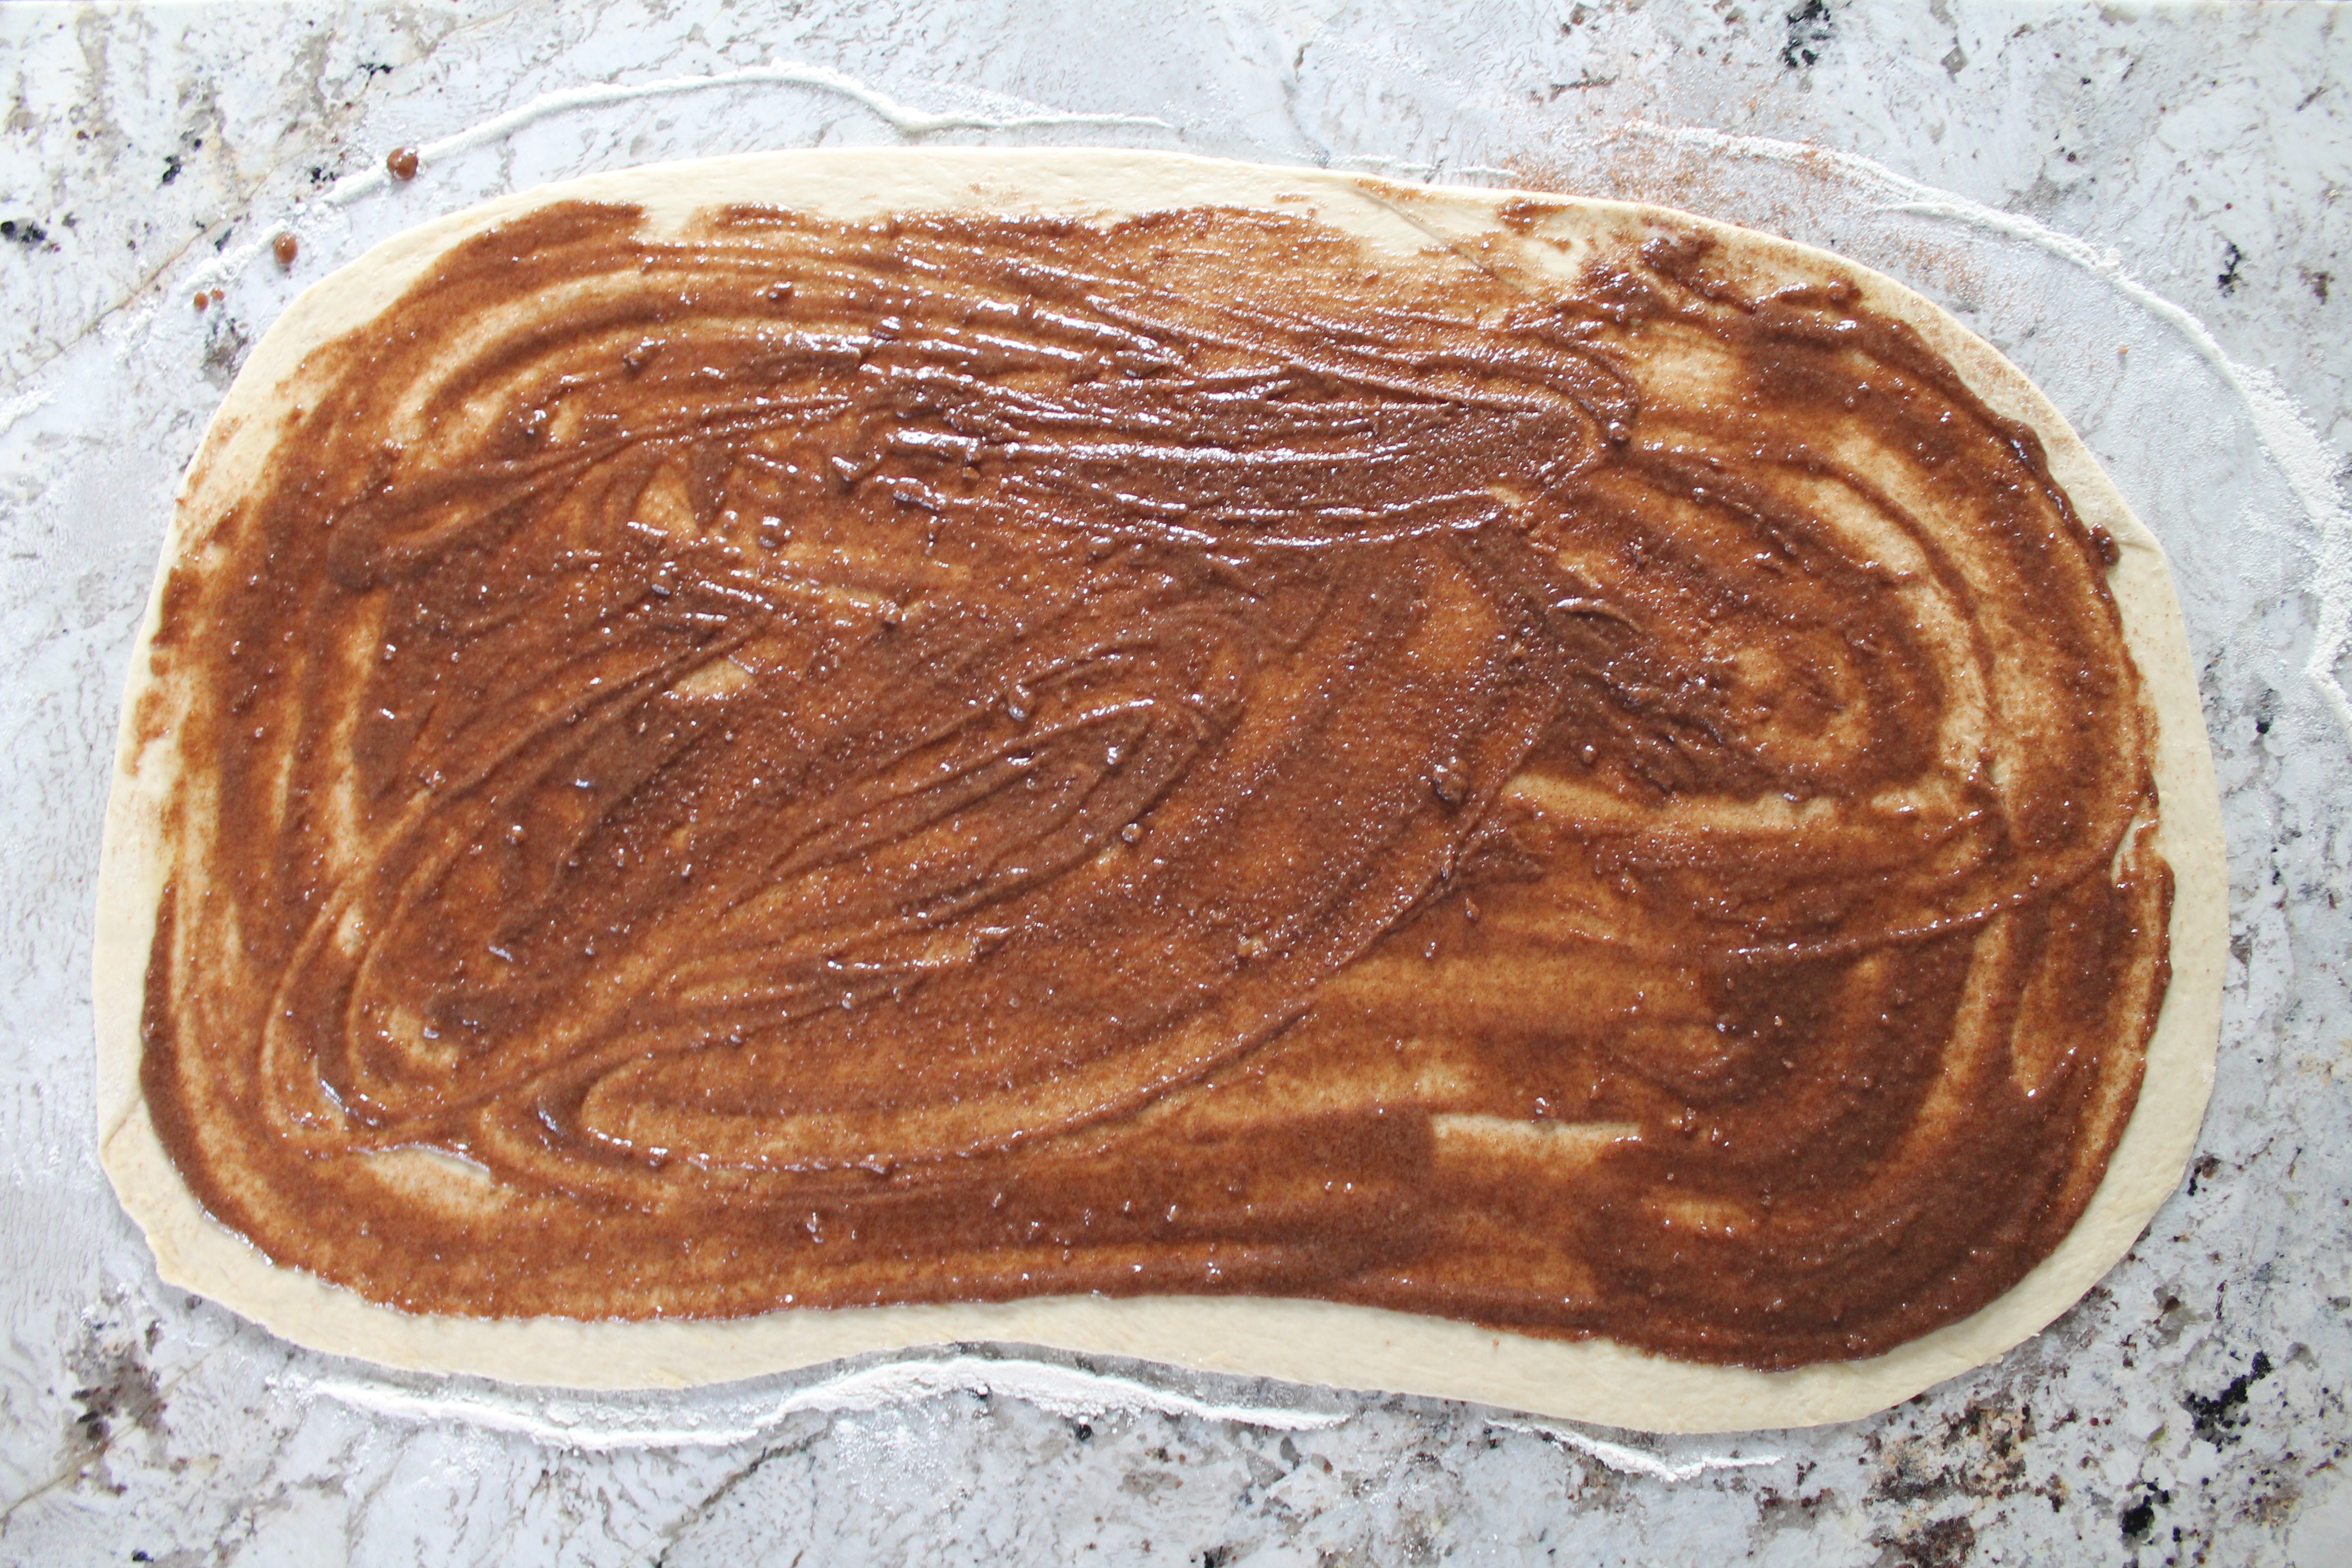 With your hands, work the butter and sugar together and spread them all the way to the edges of the dough rectangle.
Let this sit for a minute, so that the butter sets slightly and is less prone to puddling or dripping. This will help prevent the cinnamon sugar mixture from leaking out of your buns as you roll and cut them.
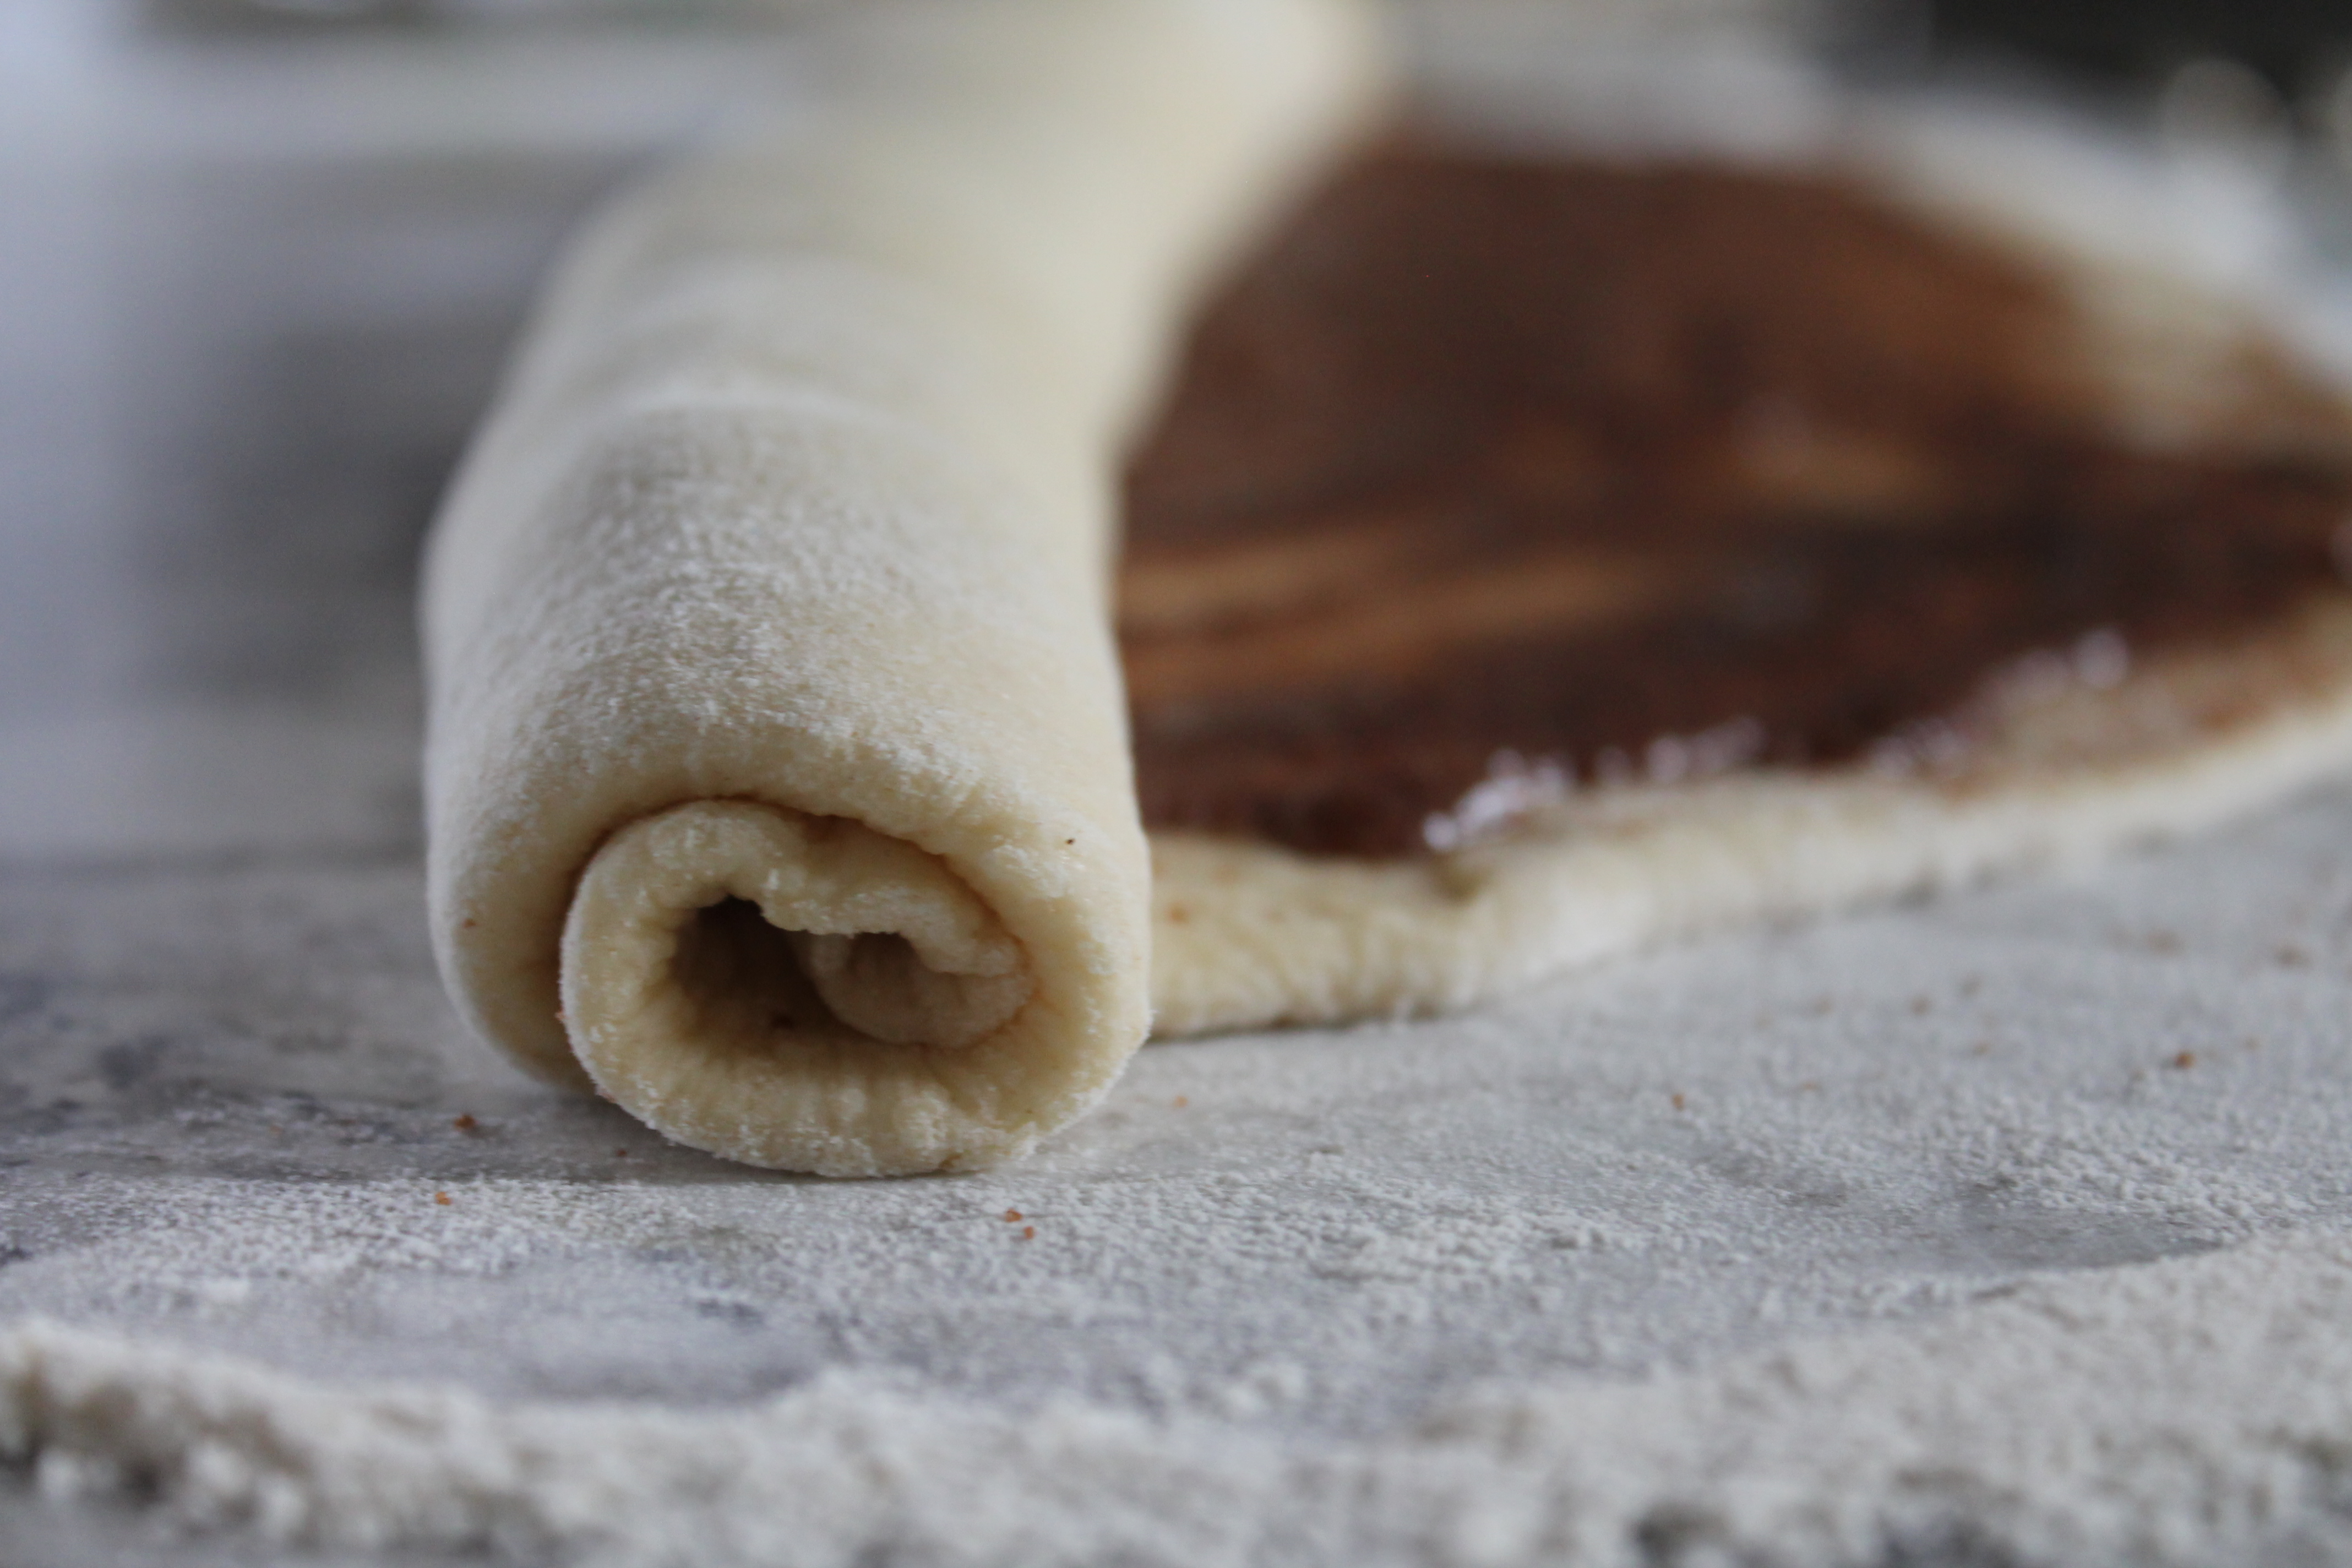 Roll up into a tight log. You can roll toward you or away from you, whichever seems most natural. I generally roll toward me, so I can keep an eye on how oozy my filling is. When you get to the end of the roll, pinch the seam to help seal it. No need to pinch together at the ends.
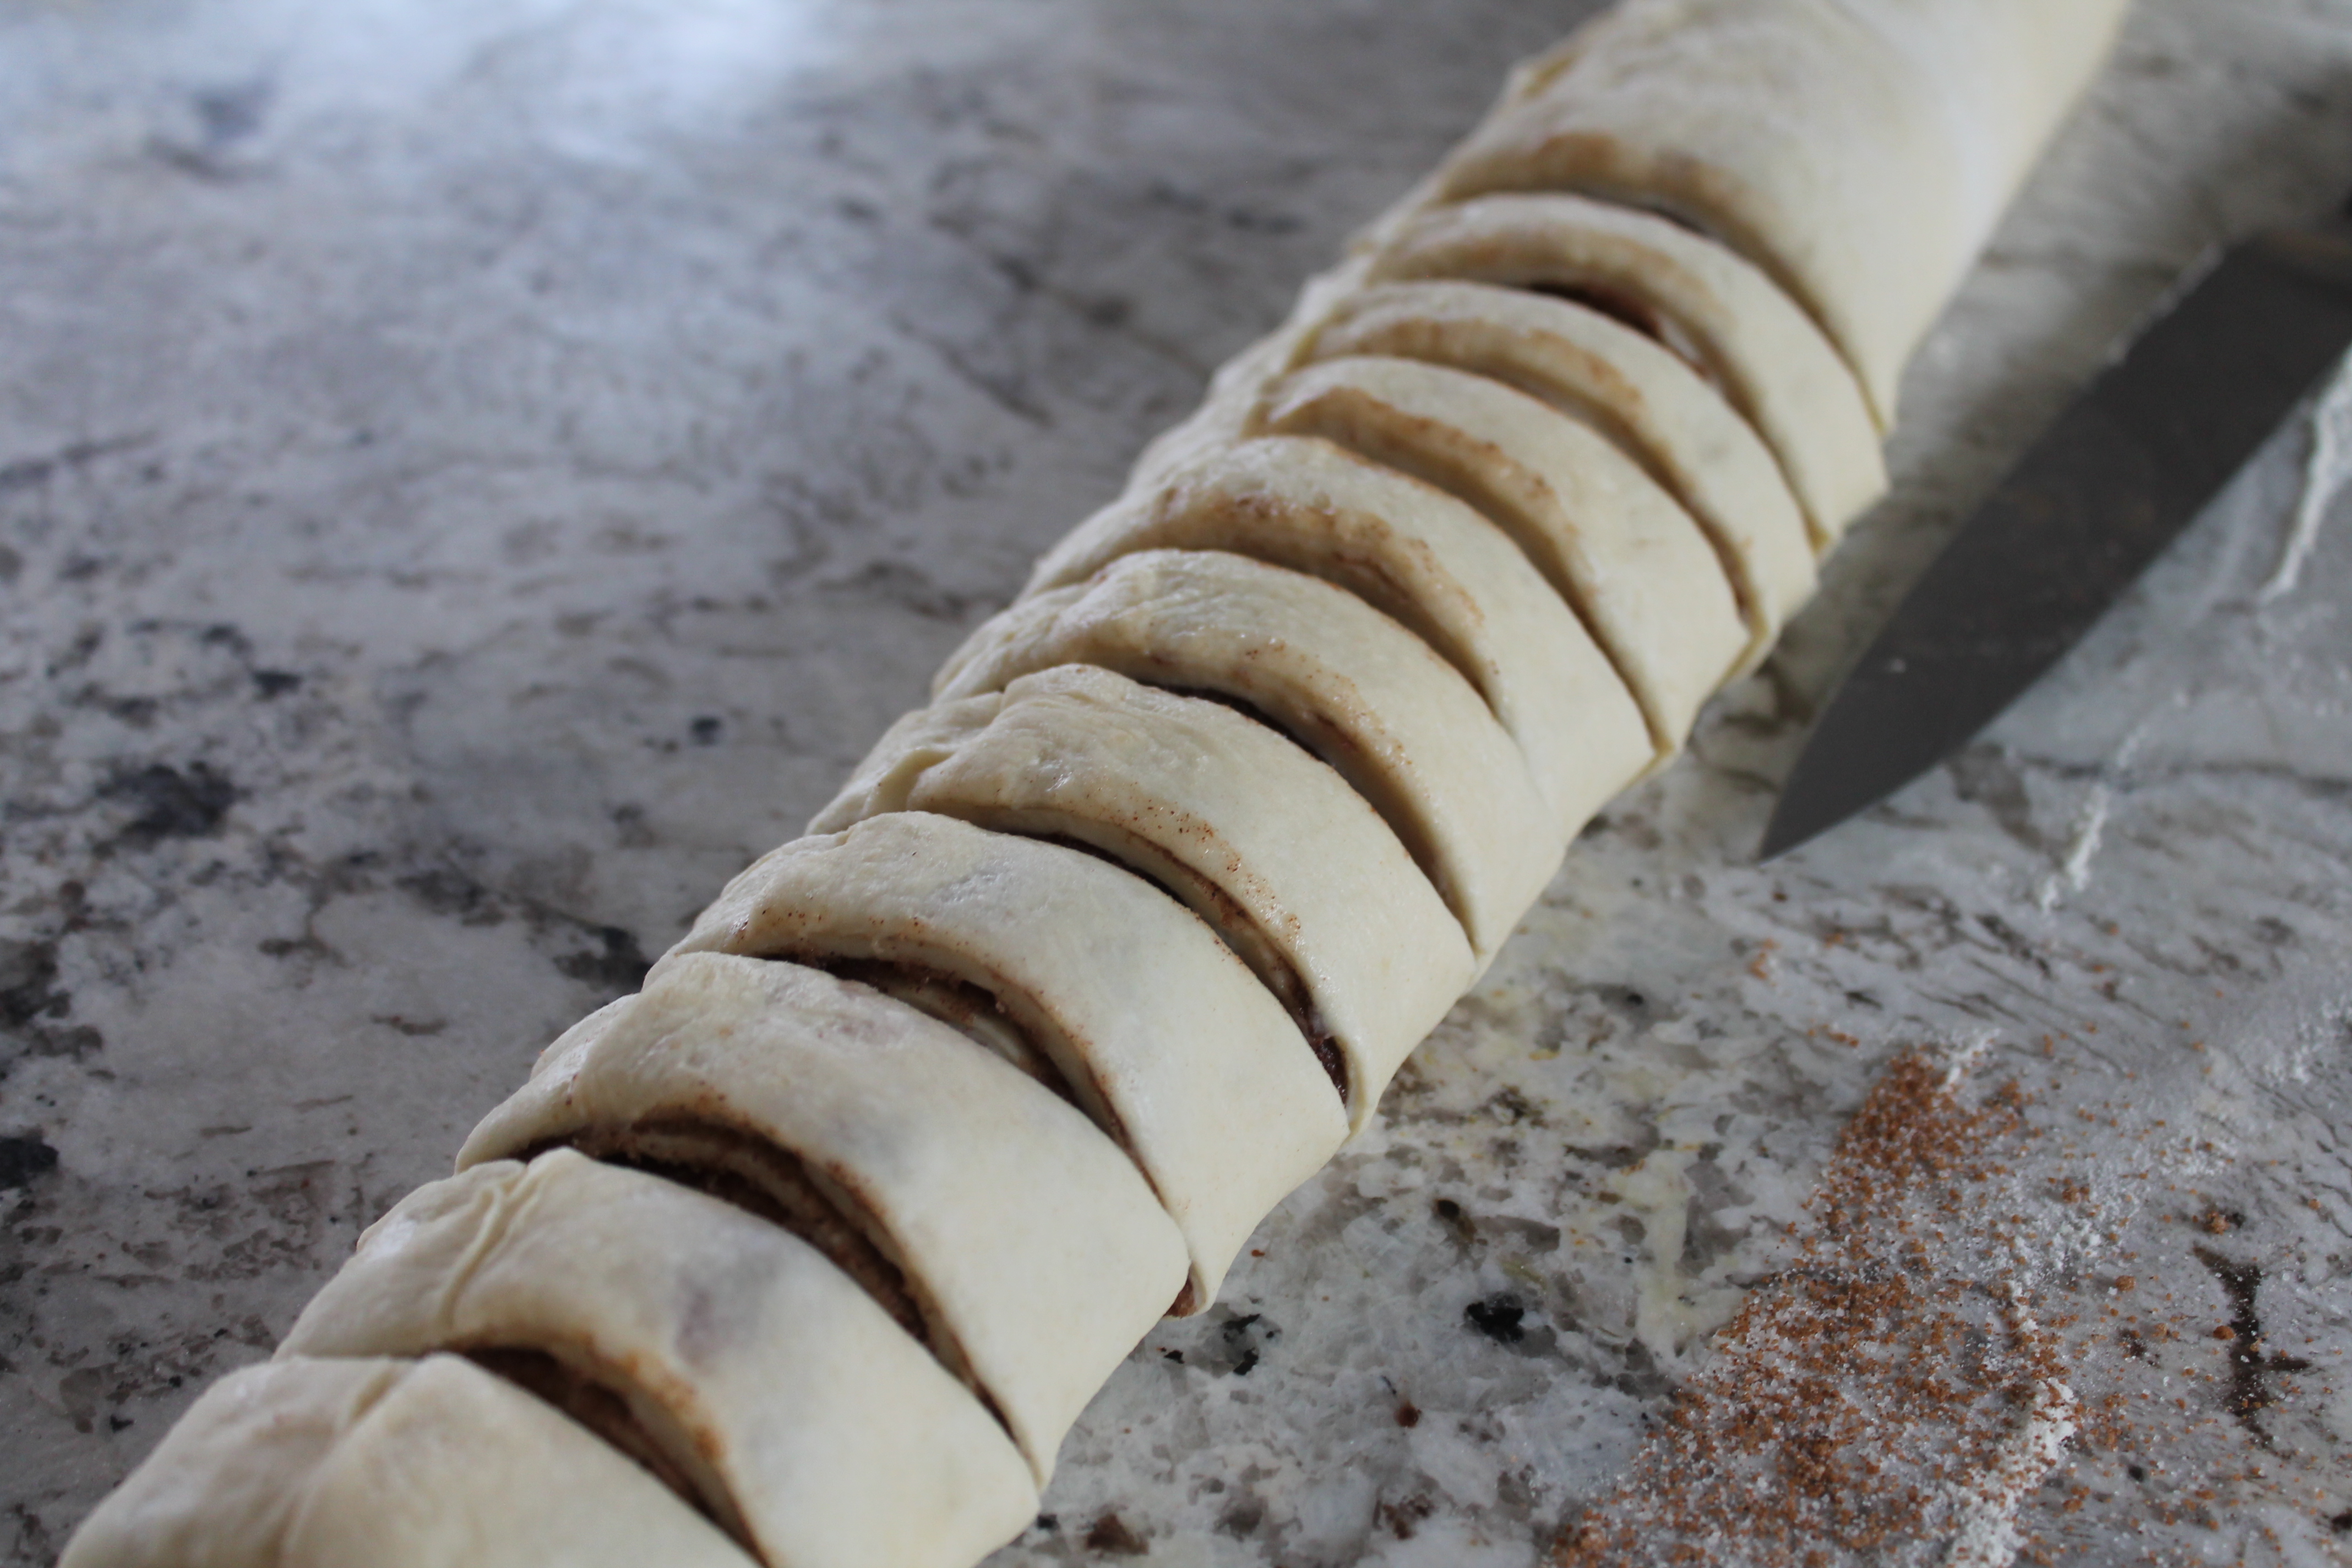 Cut the log into 1″ pinwheels. I know 1″ may seem pretty skinny, but the rolls will puff as they bake, and trust me, there will be more than enough to satisfy even the most fanatic of sweet tooths!
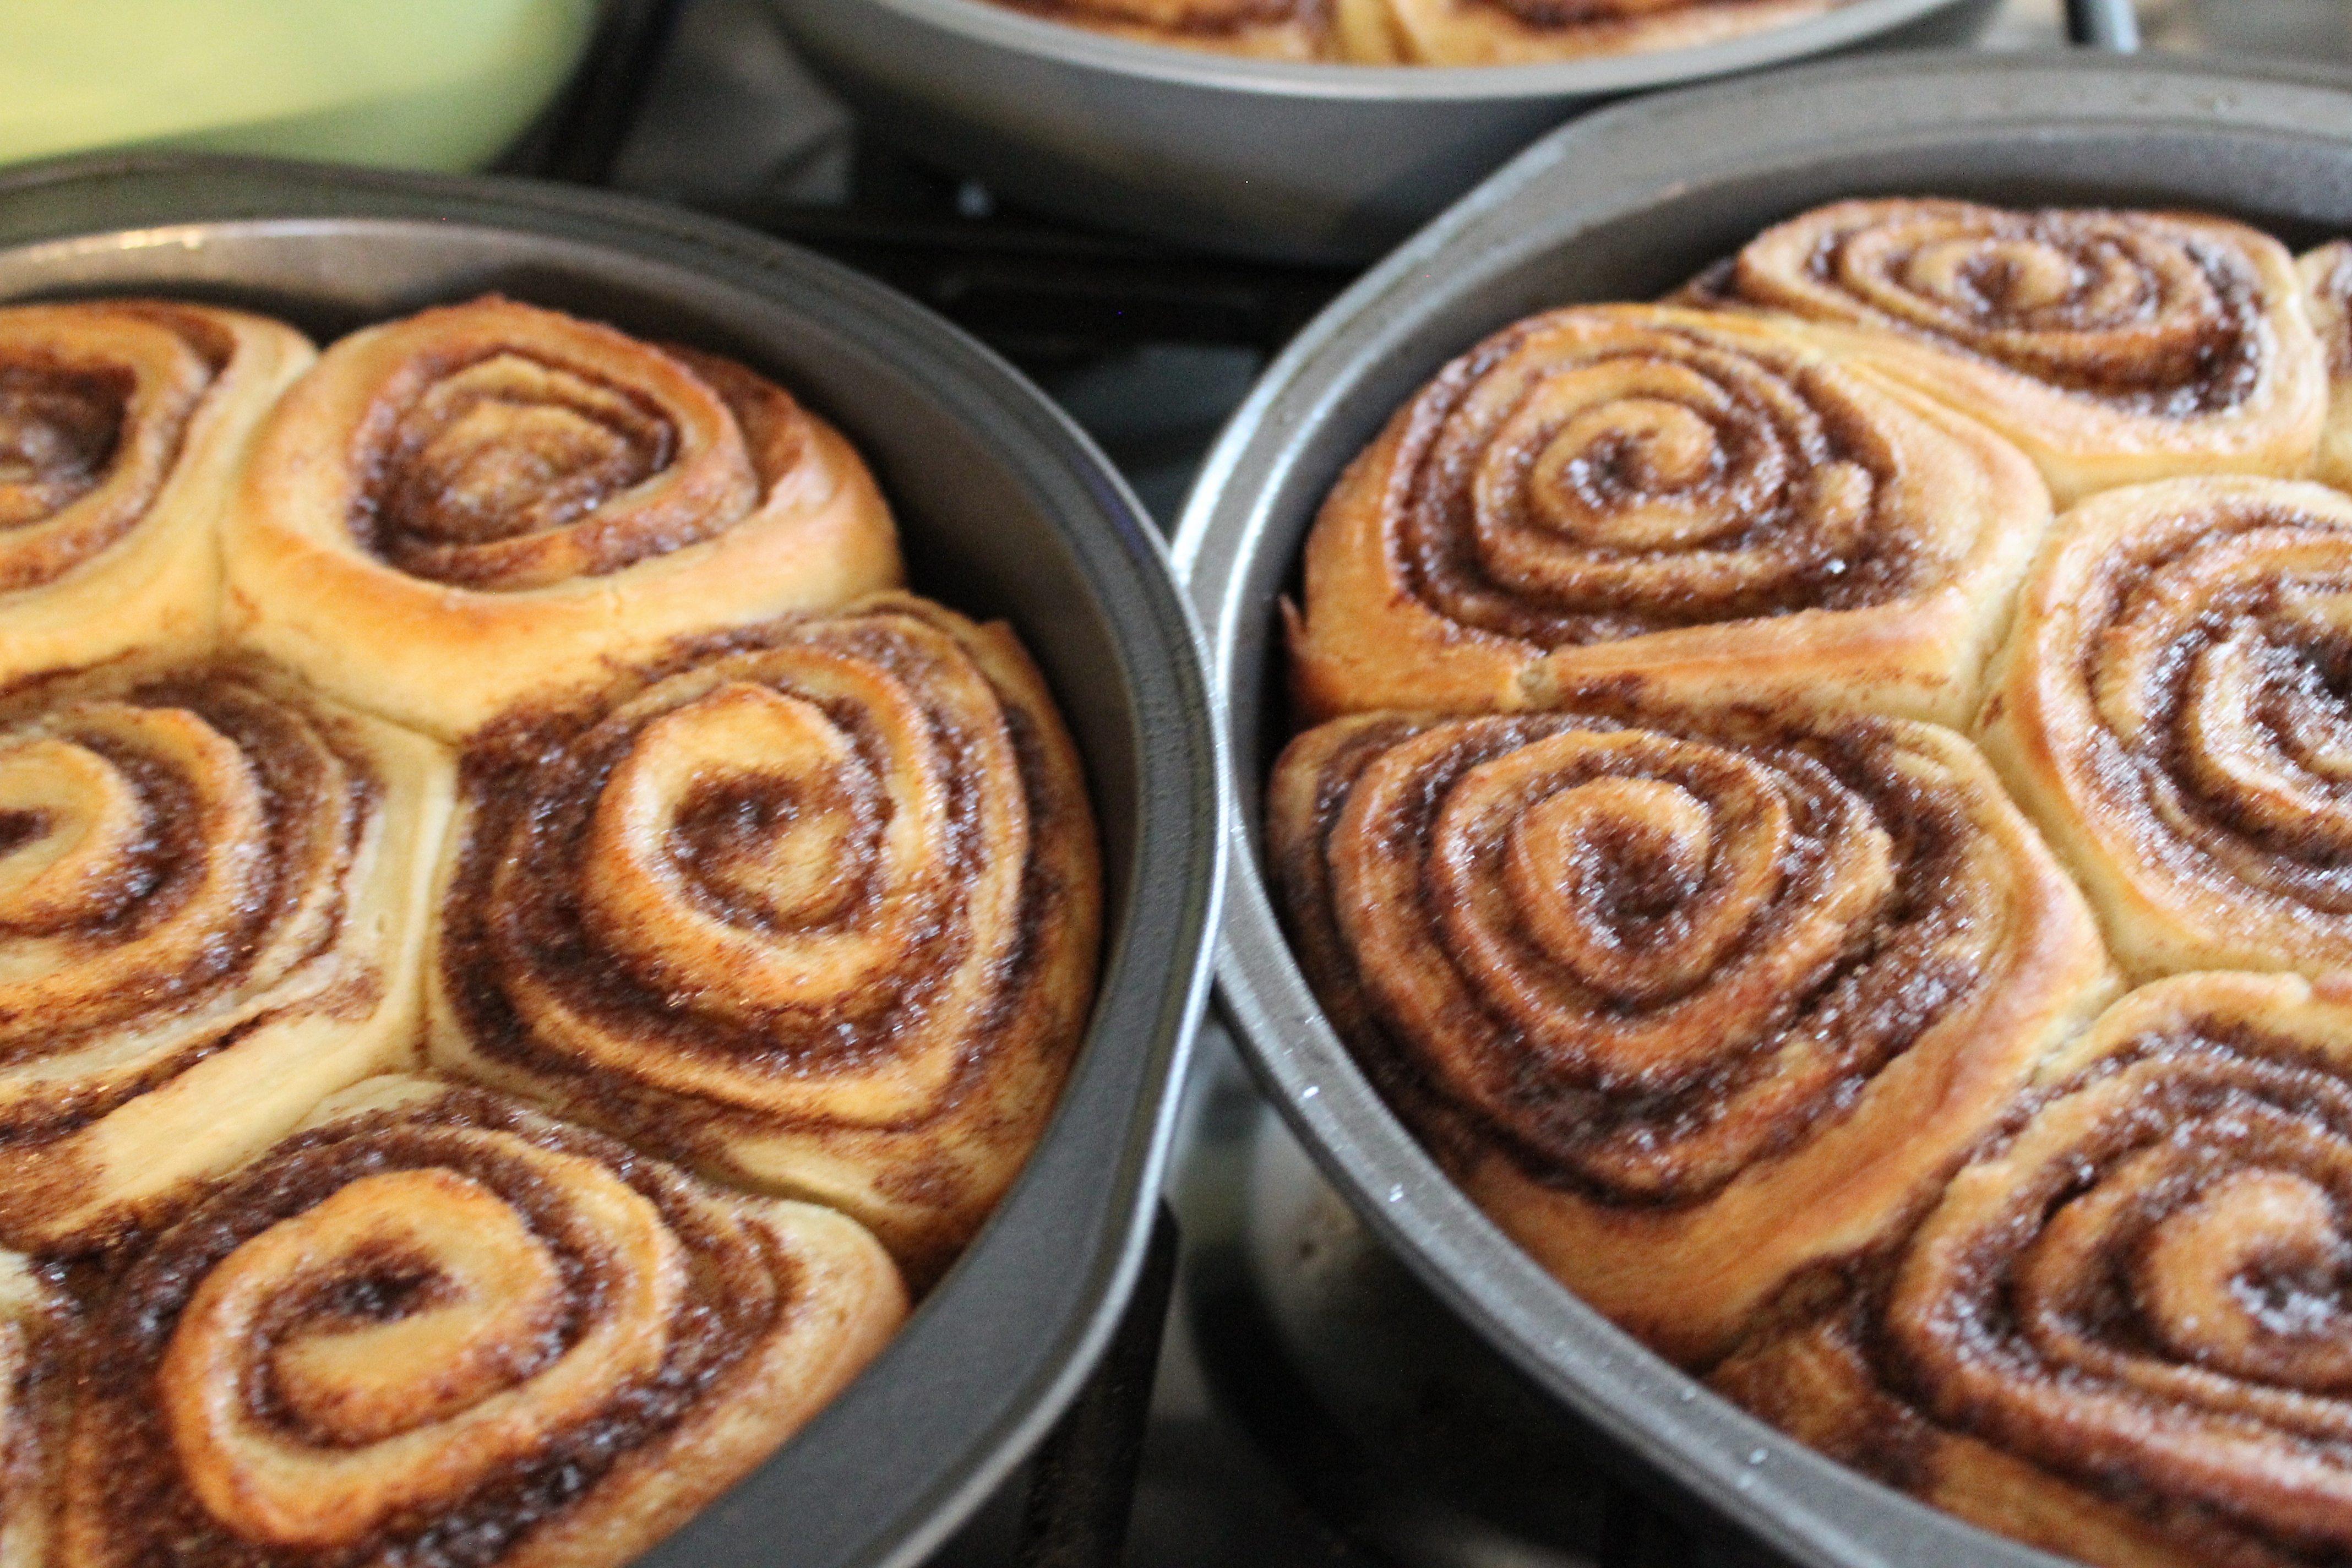
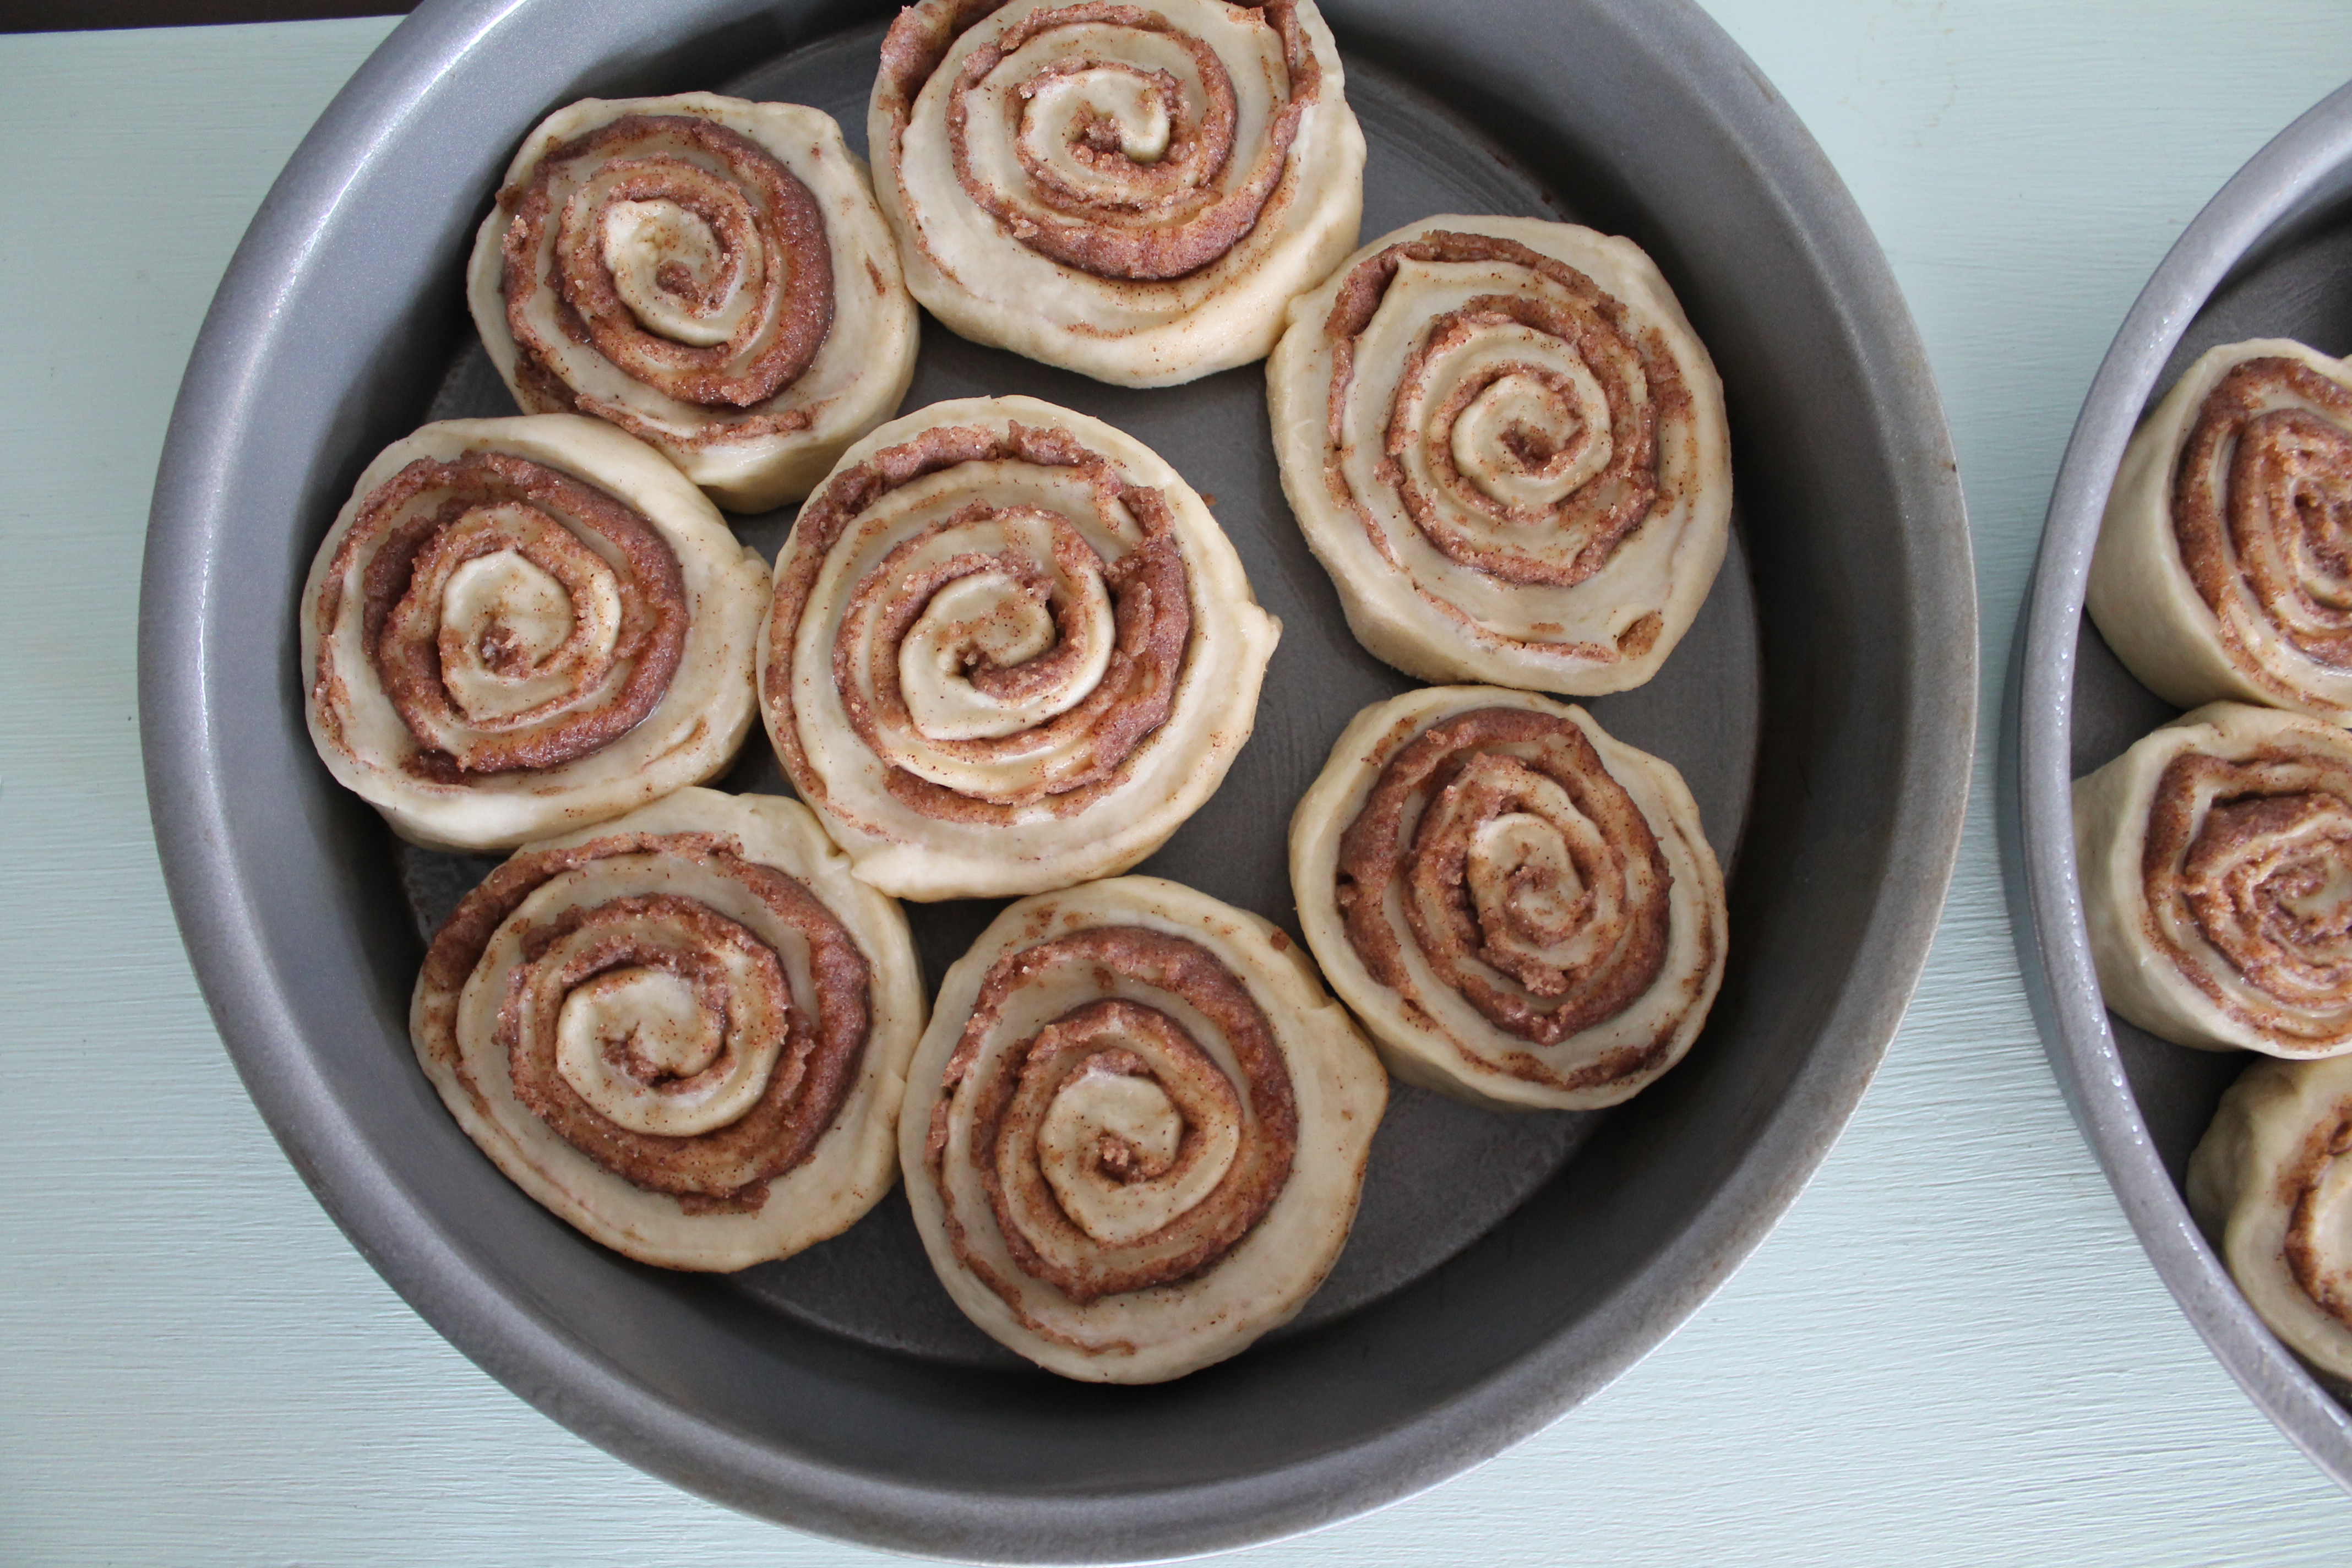 Transfer the buns carefully to the prepared pans. I generally try to make even rows, working in smaller buns with larger buns. Leave about 1″ between the buns so they can expand and bake through properly.
Repeat this process with the remaining butter, cinnamon sugar, and dough.
I usually end up with several odd little pieces at the very end, from the edges of the logs, where the dough is thicker and the filling is thinner. No problem! Just throw them into the pans, as well, and they will be smaller treats for smaller appetites.
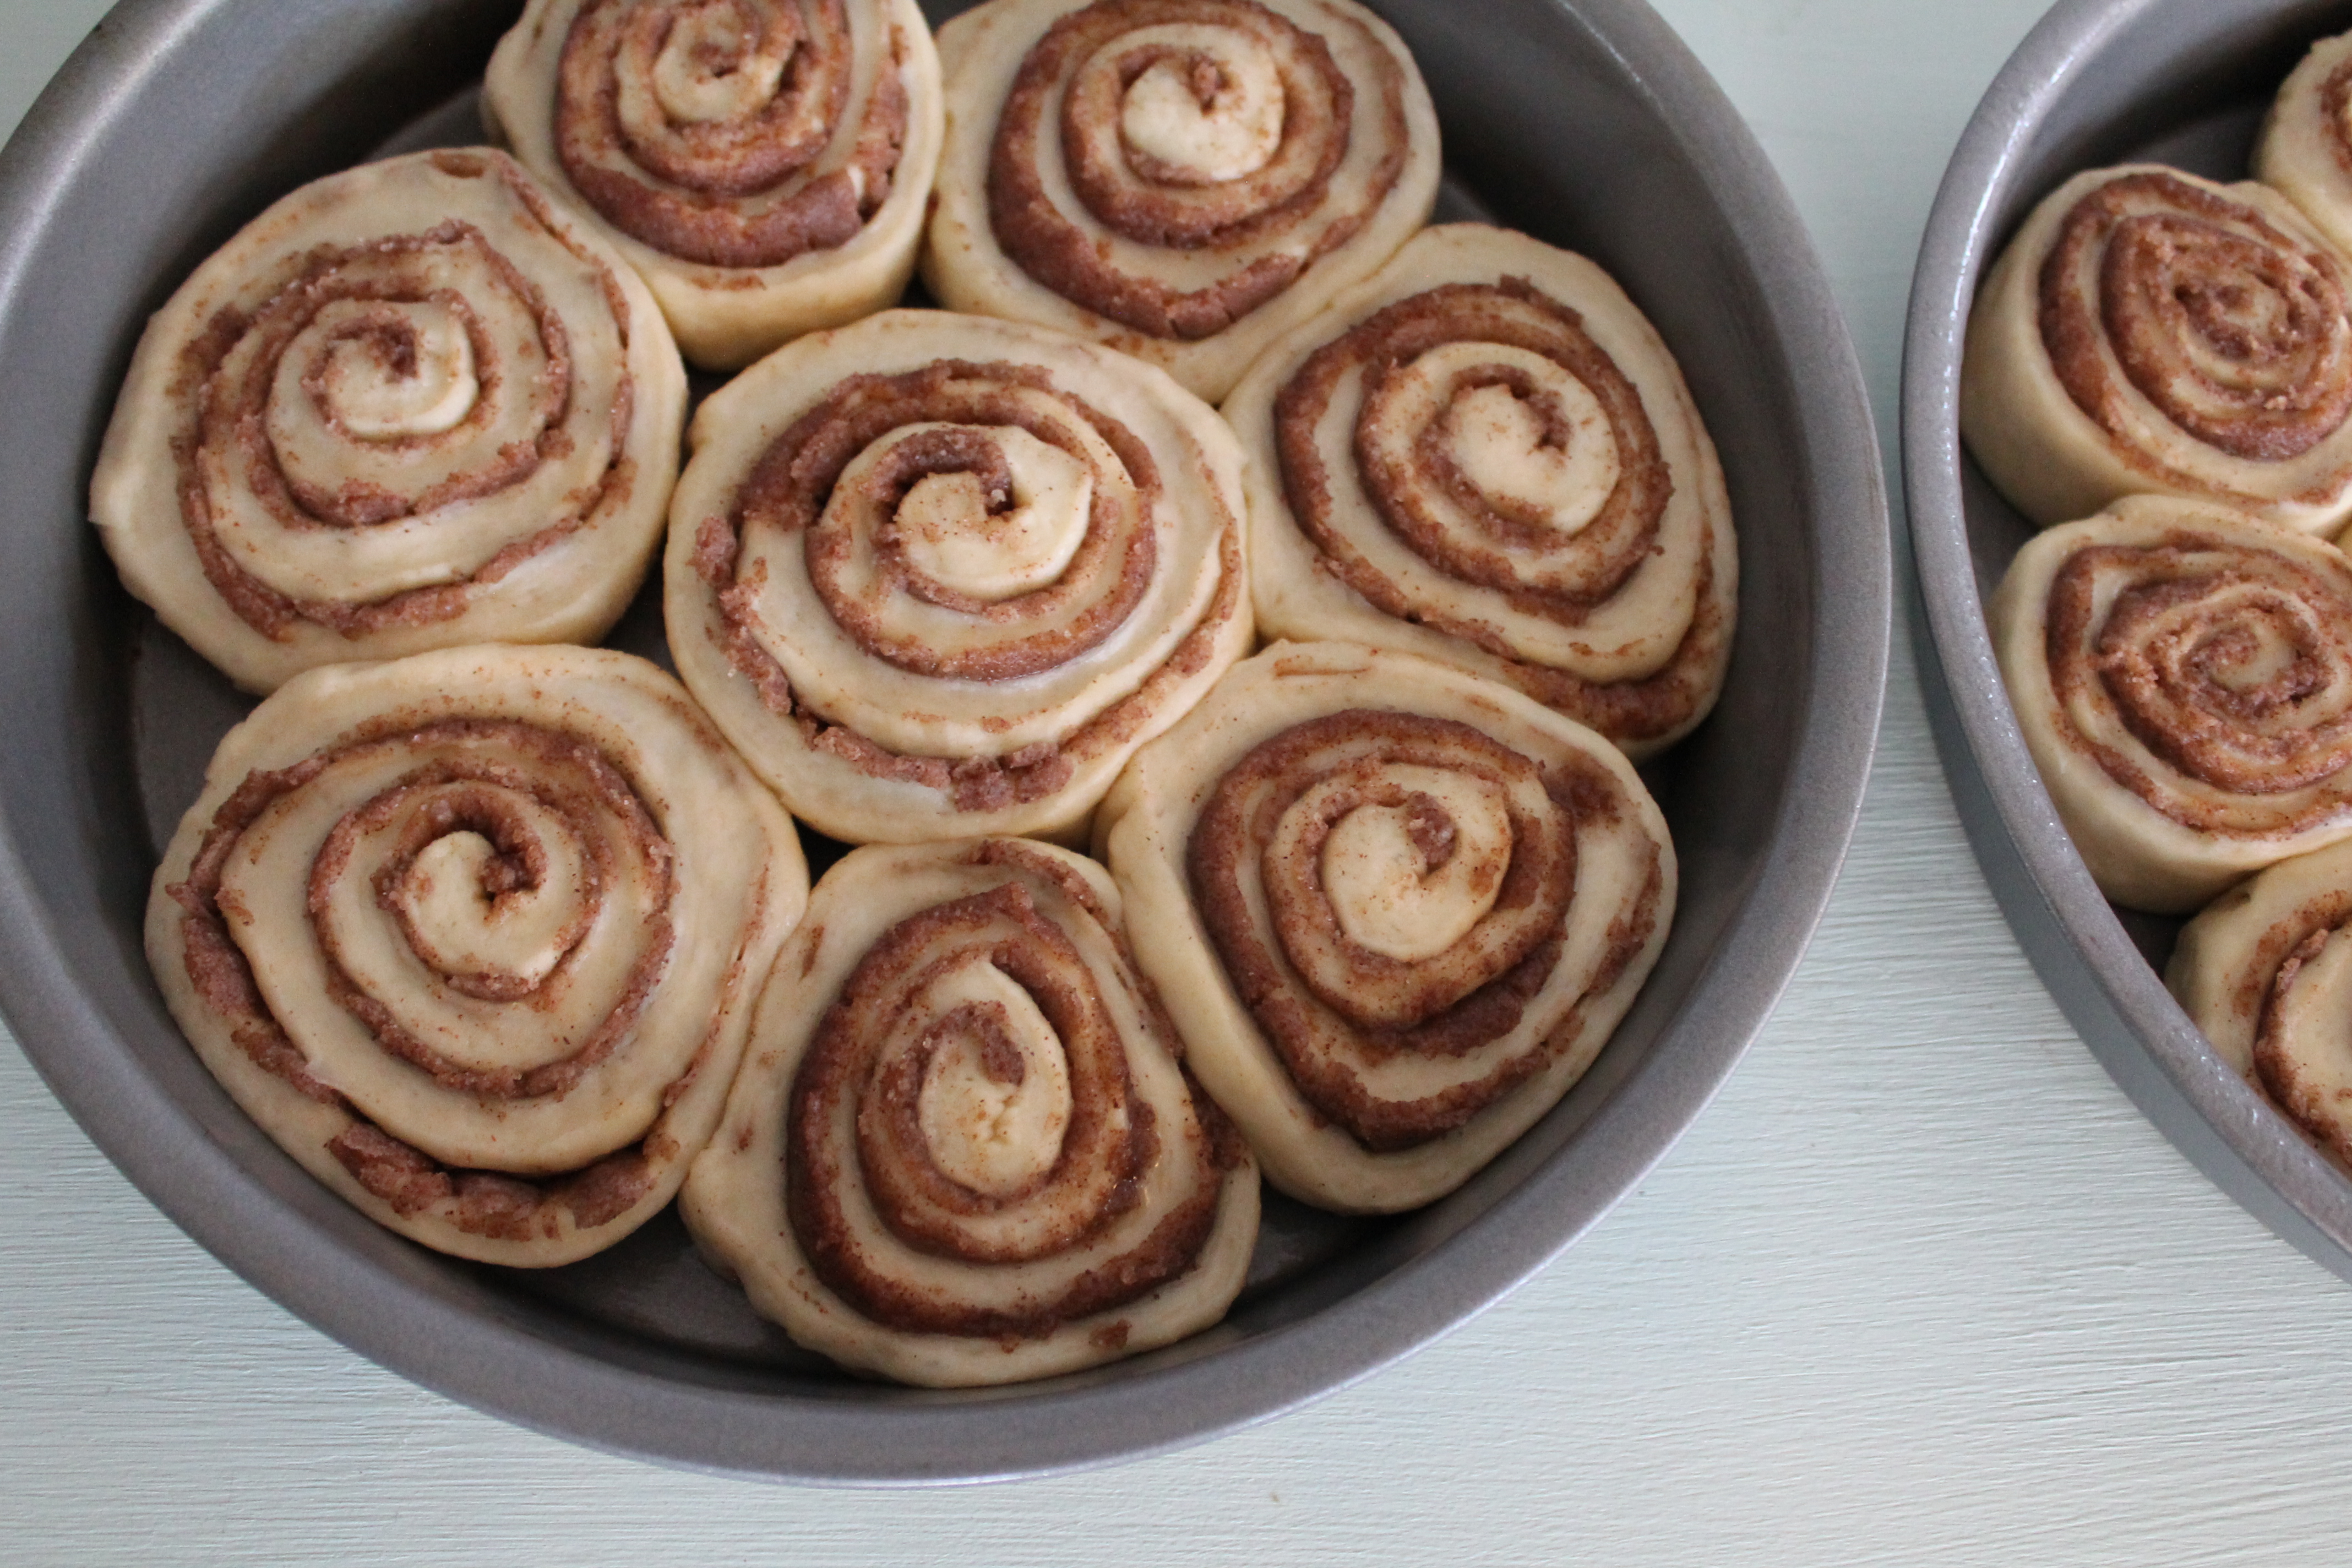 Let the rolled, shaped buns rise for 20 minutes after you place the last one in its pan. Yes, the first half of the dough will have a longer final rise than the second half of the dough. I don’t find that this matters too much, but you could make up for it by baking half of the buns at a time, if you are picky.
Do you have a convection oven? A convection oven has a fan in it, which circulates the hot air around the oven. I happen to have a convection oven, which is useful for baking a lot of cinnamon buns at once. (Assuming you made a full batch of buns, you now have four large pans of buns to bake! This definitely doesn’t fit on one oven rack.) If you do have a convection oven, arrange your buns on two racks in the oven and bake for about 17 minutes. You should check them and rotate them about halfway, as even with the convection feature, your oven will likely have hot spots that make some of the buns brown faster. When they are done, they will be golden on top and the sugar will be bubbling.
If you don’t have a convection oven and you made a full recipe of cinnamon buns, you can still bake them all at once, if you please. Place two trays of buns in the middle of the oven and two near the bottom of the oven. Your buns will need longer to bake completely, as the air will not circulate to all of the buns well. Make sure you rotate rotate them front to back/top to bottom in 10 minute intervals, and your buns will be done after closer to 25 minutes. Use your judgment and wait until they are golden on top to remove them!
 Here is the most golden advice a professional pastry chef once gave me: Underbaking is just as bad as overbaking. She observed that most home chefs have a fear of overbaking or burning breads and cakes, and as a result, they don’t allow their baked goods to caramelize and brown properly! But brown on top is beautiful and flavorful. Look for a nice, honey brown on your cinnamon buns to indicate that they are done.
While the buns are baking, you need to make a glaze. I always use a hand mixer for this, to save my arm.
Combine all of the liquids: melted butter, whole milk, brewed coffee, and vanilla. Add a pinch of salt.
Next, break open a 2lb. bag of confectioner’s sugar. You will need the whole thing. Add sugar in batches, about 1½–2 cups at a time, to the liquids, beating well between each addition. You do not need to sift this confectioner’s sugar! Using an electric mixer will beat out all of the lumps.
Continue adding the sugar and beating, scraping the sides of the bowl to incorporate everything well.
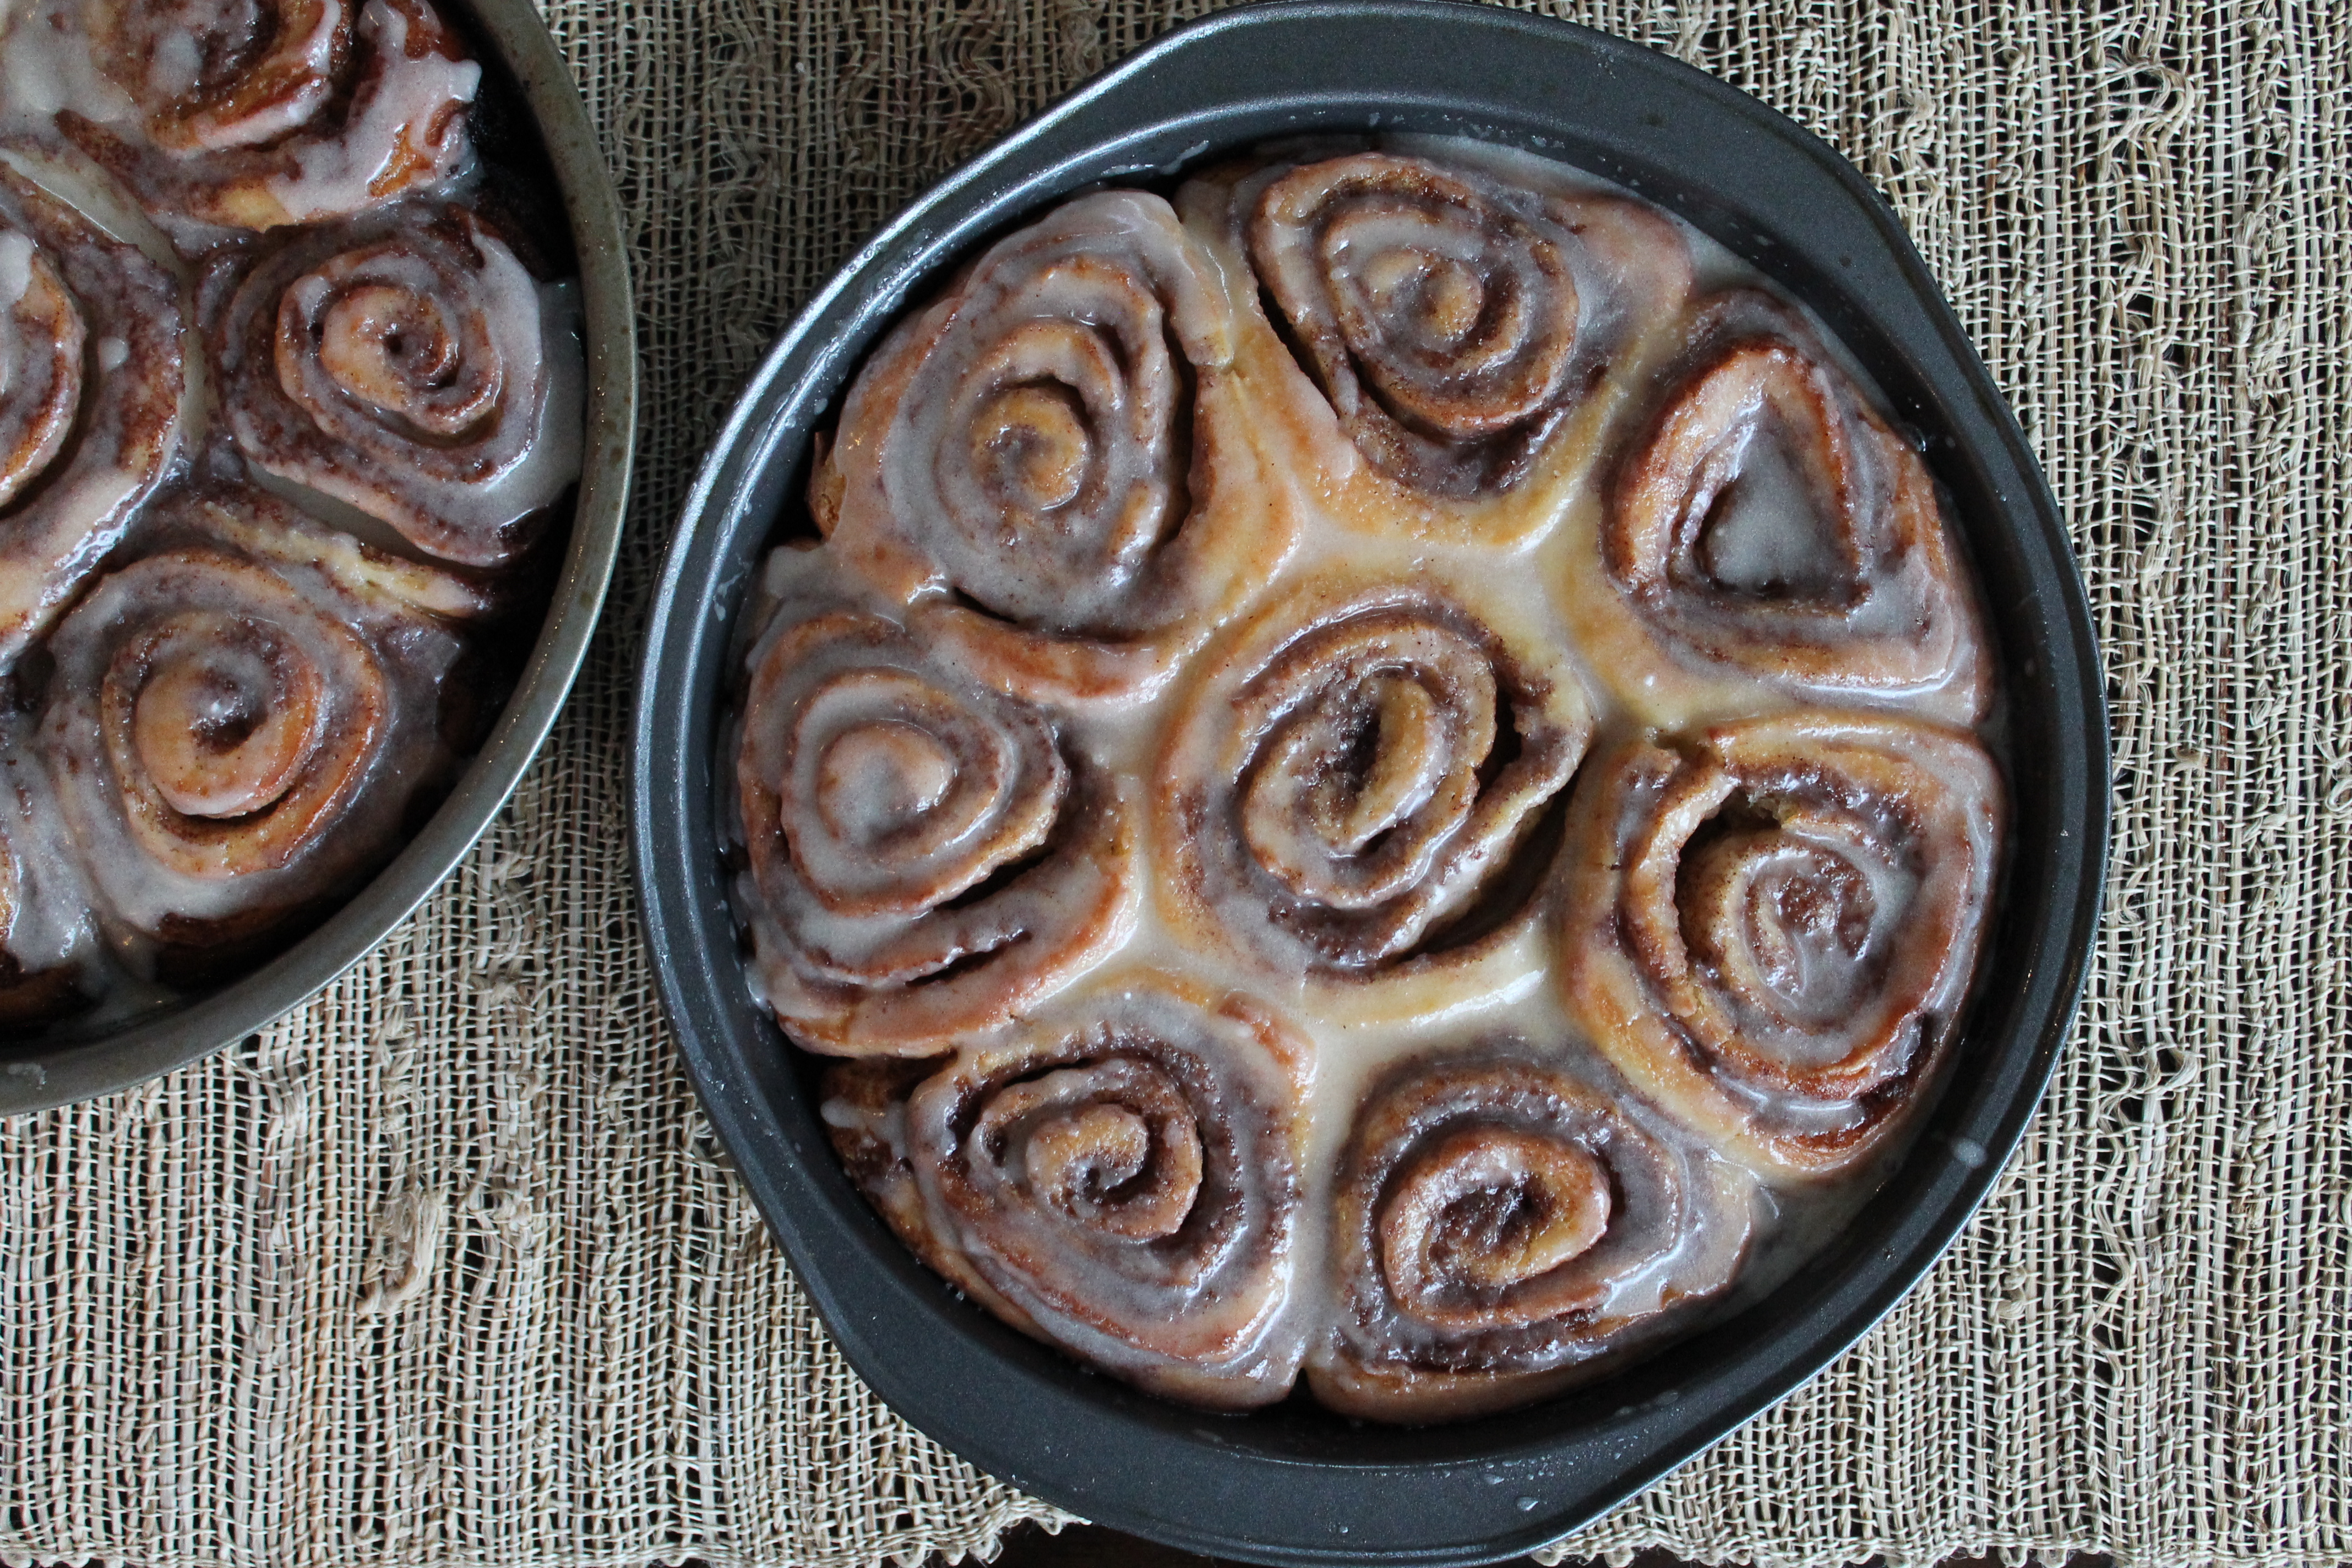
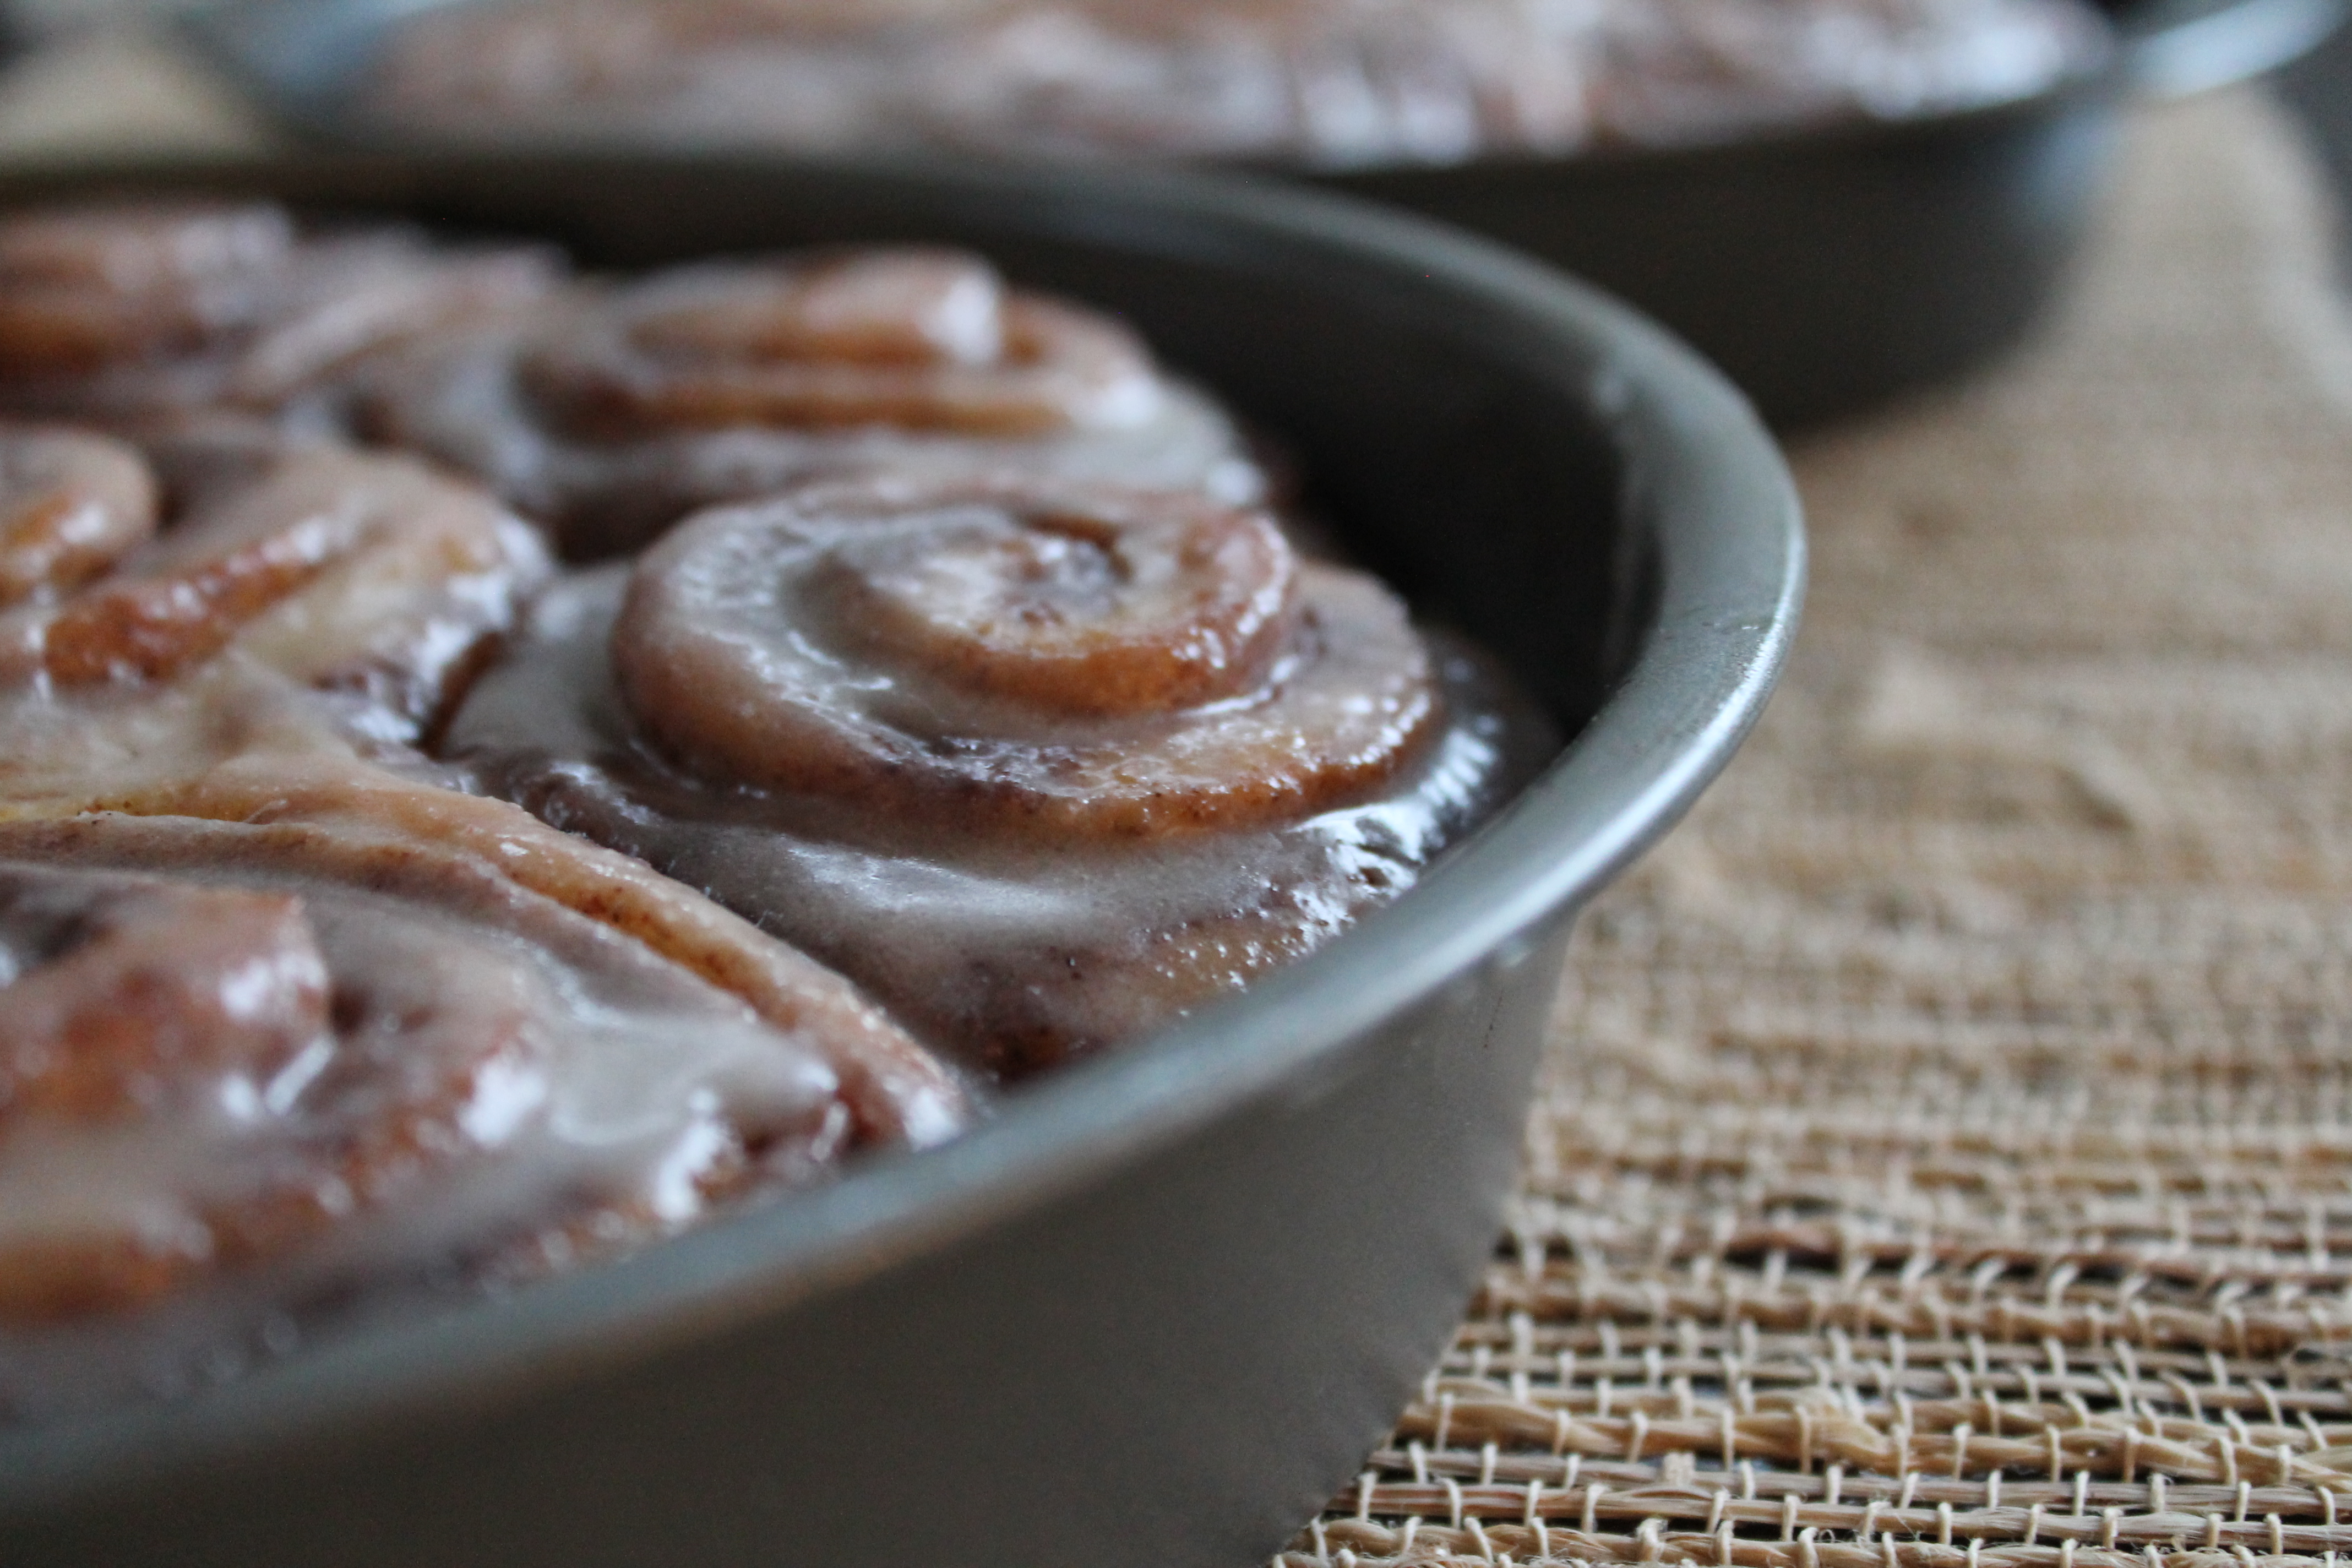
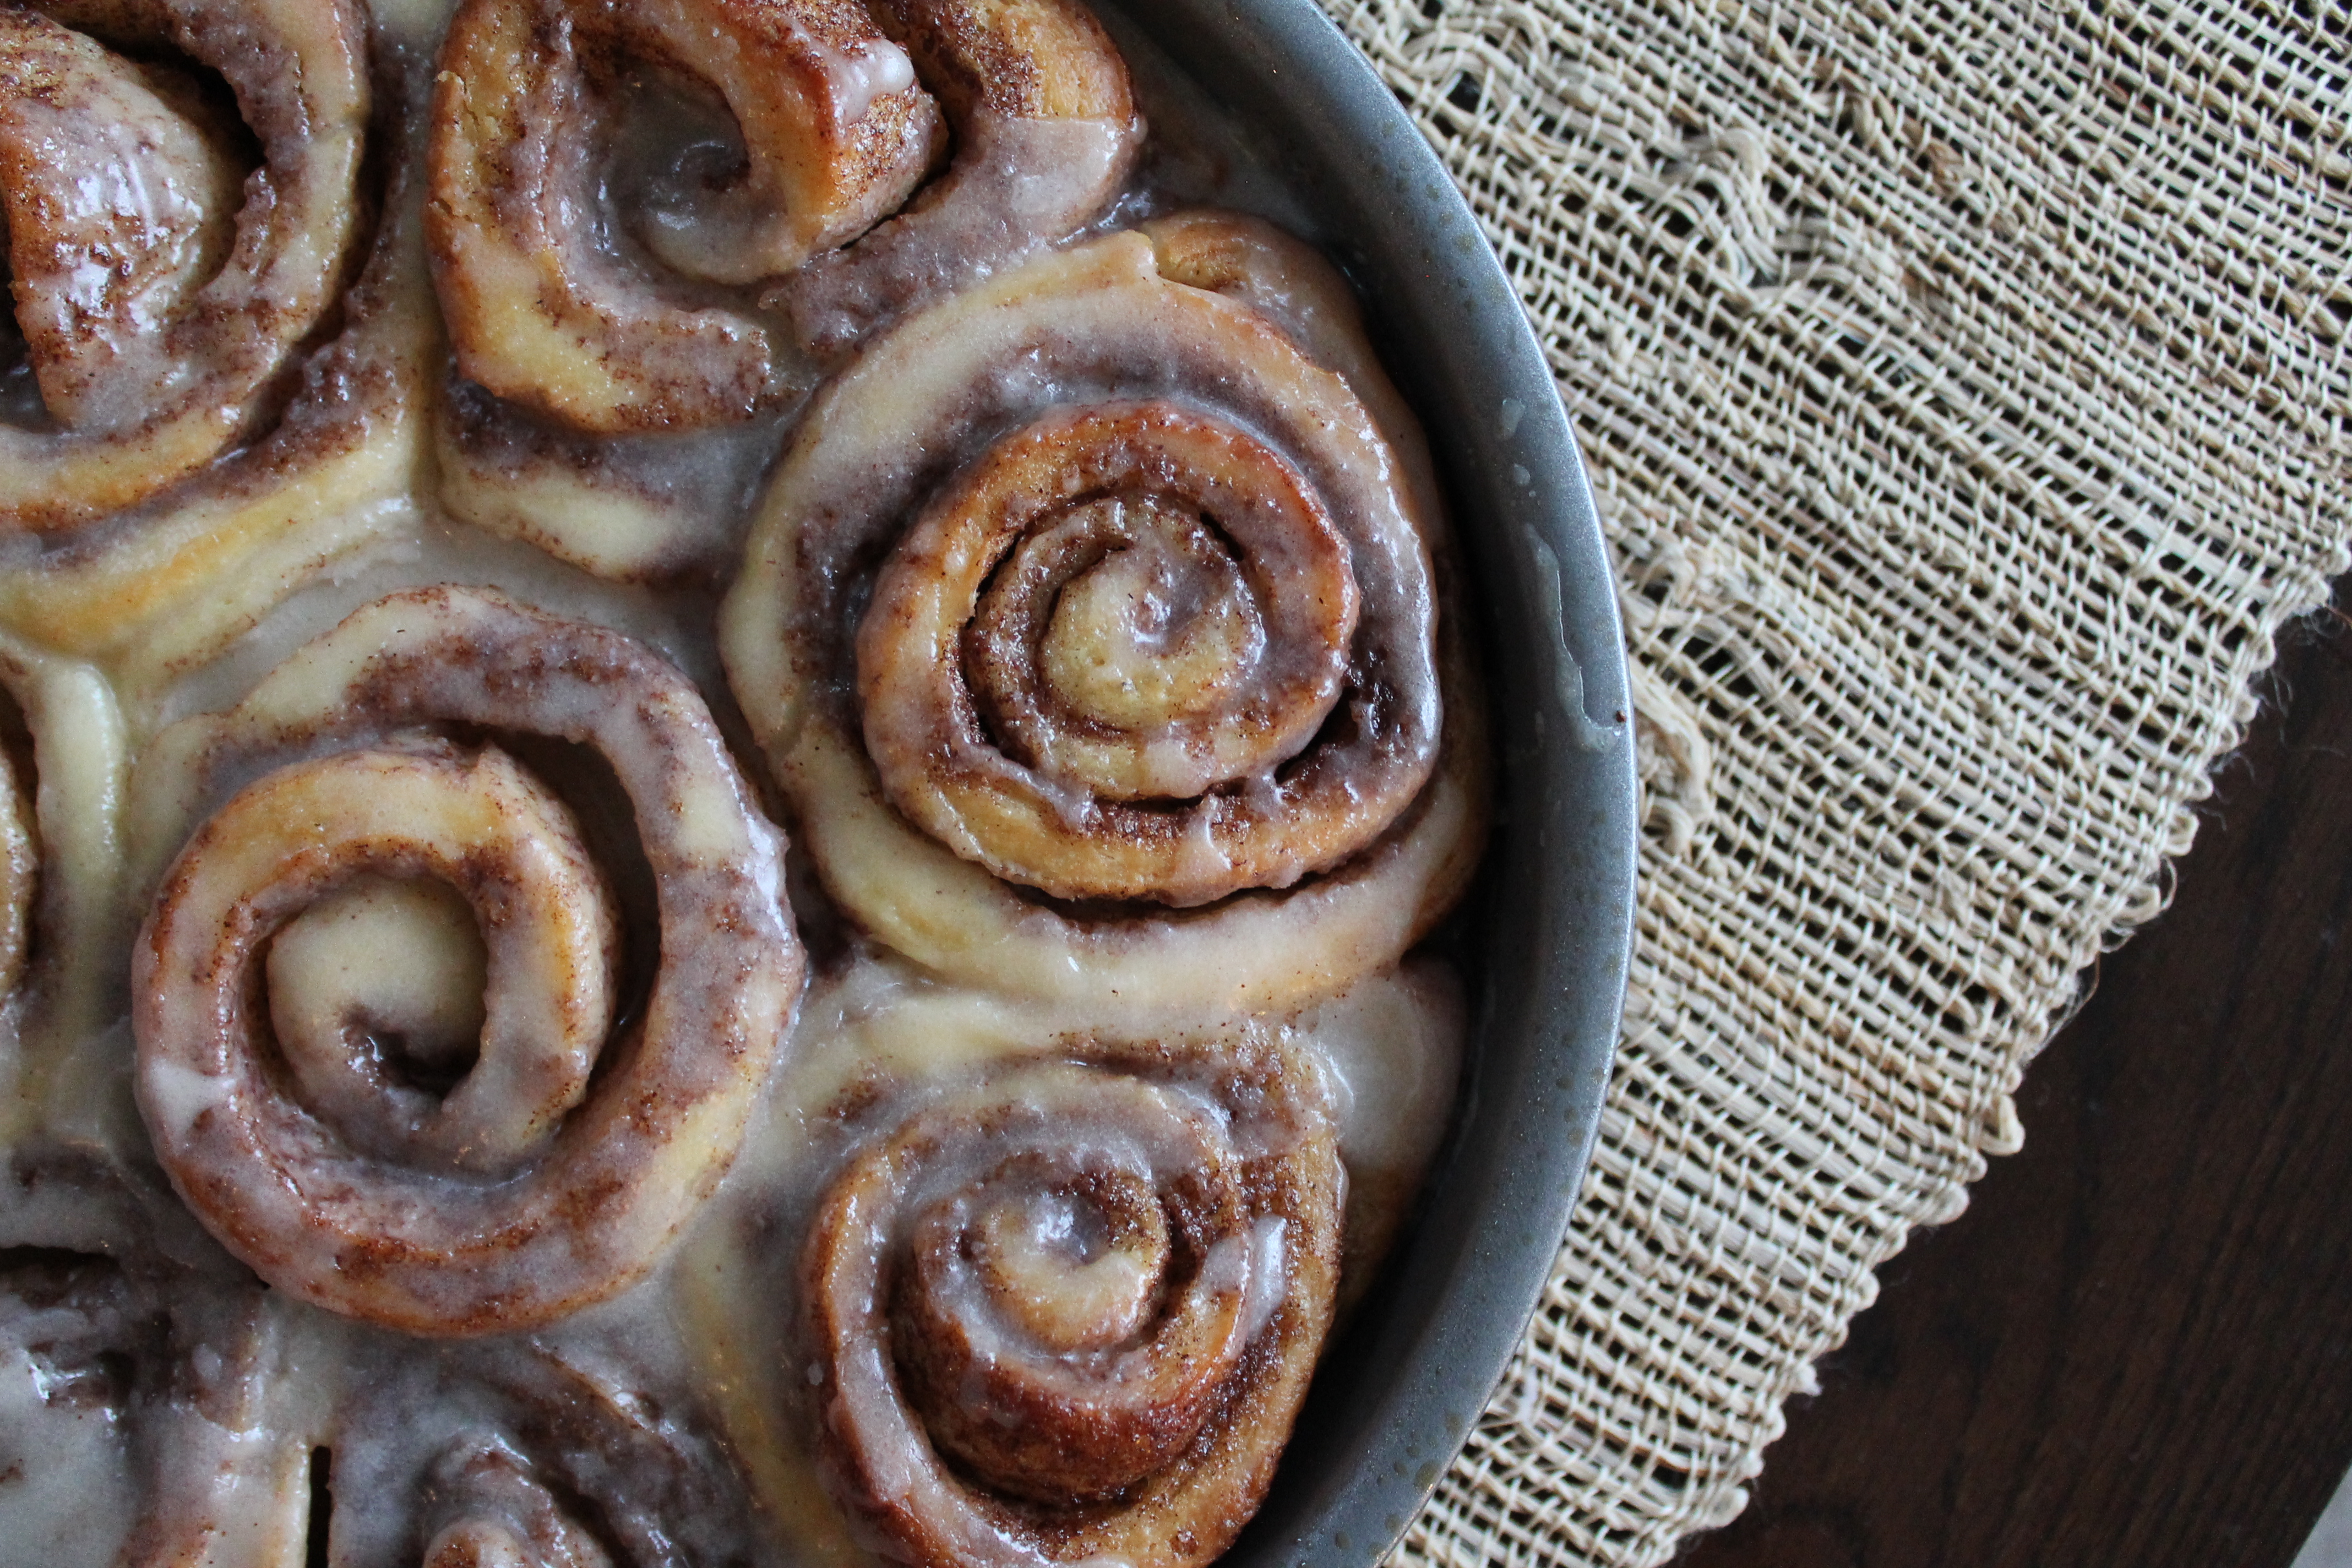
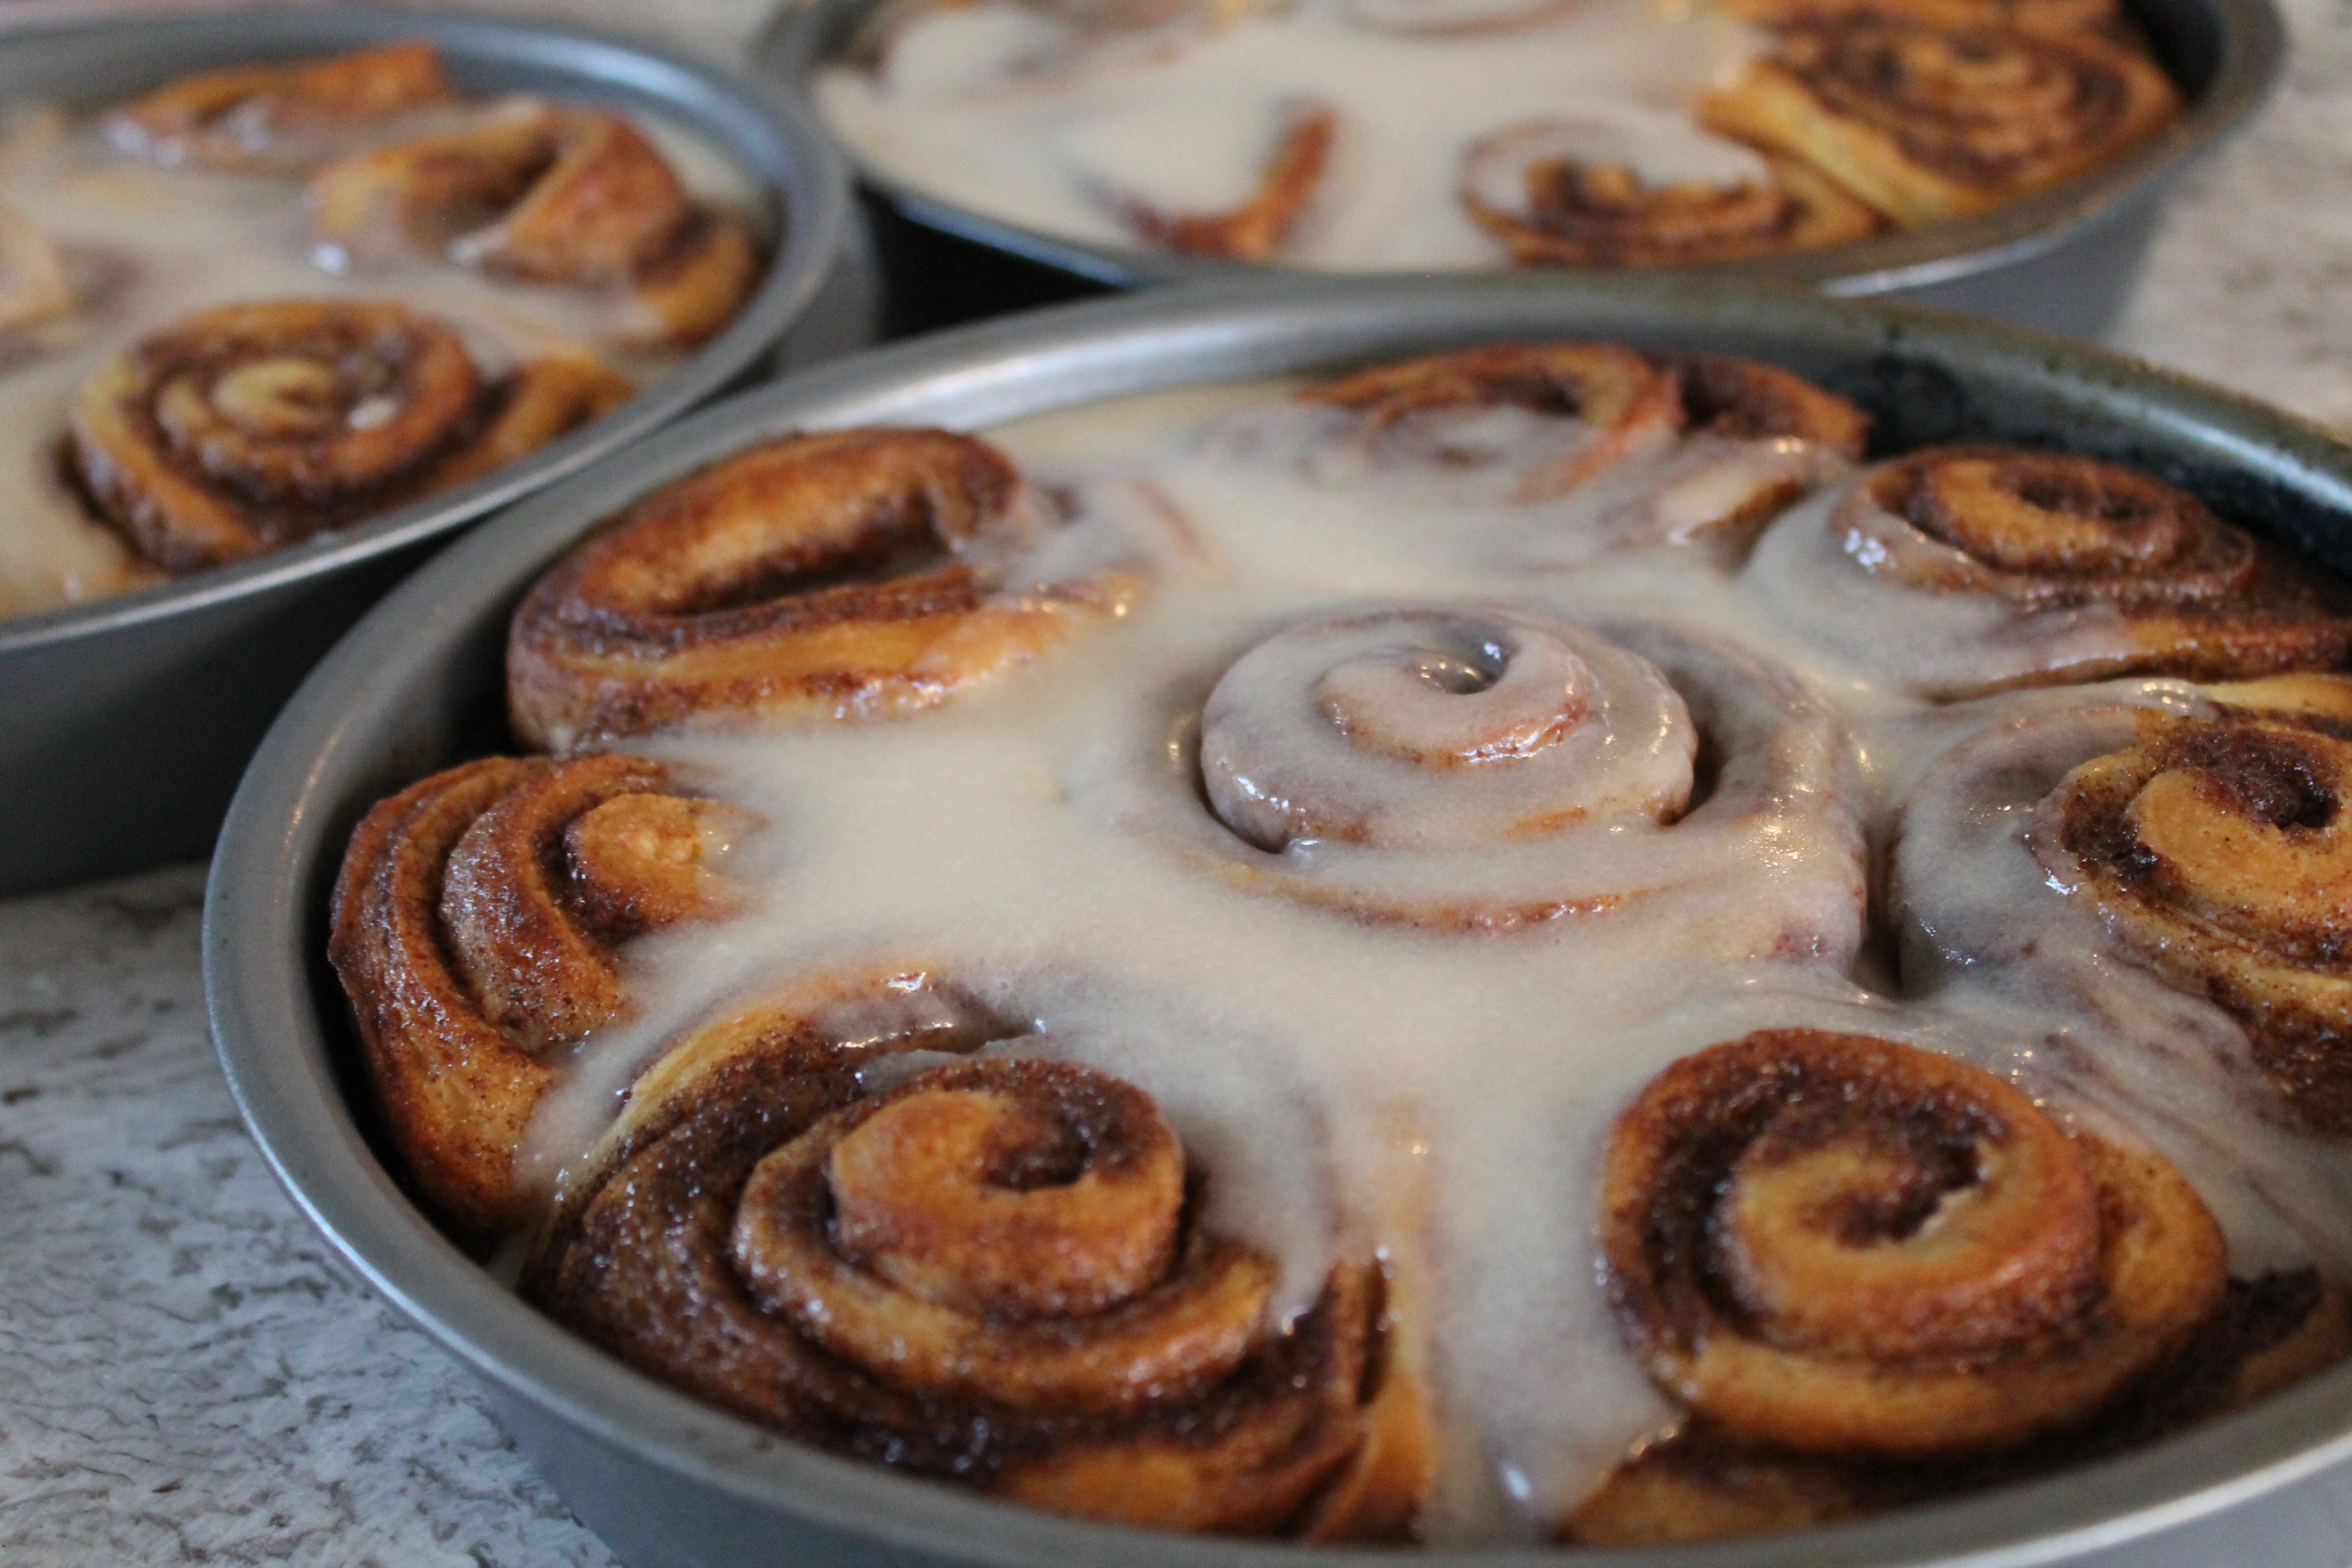 When the buns come out of the oven, immediately pour the glaze over the buns. Using a large spatula, spread the glaze to the very edges of the pan. It will melt and seep down into the buns, creating a delicious, sugary coating that makes the cinnamon buns gooey and tender and oh, so sweet!
 Serve immediately or allow to cool and then cover with foil or an airtight lid. You may leave these on the counter for up to 24 hours, but beyond that I recommend chilling to maintain freshness. If you freeze the buns, you can bake them just before serving for 20–25 minutes at 325°, so they will be warm and gooey. If you chill in the fridge, bake for 5–10 minutes at 325° to warm them before serving.
Glazed Cinnamon Buns
adapted from The Pioneer Woman Cooks: Recipes from an Accidental Country Girl
makes 40–50
Dough Ingredients:
4 cups whole milk
1 cup canola oil
1 cup sugar
4½ tsp. (2 packages) active dry yeast
9 cups unbleached, all-purpose flour, divided, plus extra for rolling
1 heaping tsp. baking powder
1 scant tsp. baking soda
1 tbsp. salt
Filling Ingredients:
2 cups salted butter
1 cup sugar
1 cup light brown sugar
¼ cup cinnamon
Glaze Ingredients:
6 tbsp. salted butter, melted
½ cup whole milk
¼ cup strong brewed coffee
2 tsp. vanilla extract
generous pinch salt
2 lbs. confectioner’s sugar
Directions:
For the dough, heat the milk, oil, and sugar in a medium saucepan over medium heat, whisking or stirring constantly. Allow the sugar to dissolve completely and bring the mixture to a low simmer; do not allow to boil. Immediately pour the milk mixture into a mixer bowl and cool to lukewarm, about 3 hours.
Sprinkle yeast on top of the lukewarm milk and let it sit for 1 minute. Add 8 cups of the flour. Stir until barely combined. The dough should look lumpy and a bit loose. Cover with a clean towel and set aside in a warm place for 1 hour to rise.
When the dough has puffed and doubled in size, remove the towel from the bowl and add baking powder, baking soda, salt, and the remaining 1 cup flour. Stir thoroughly to combine.
Cover the bowl with plastic wrap and chill the dough for 3 hours, or up to 24 hours. Check every few hours and punch the dough down if it has risen above the rim of the bowl.
When ready to shape the rolls, first melt half of the butter. In a separate bowl, thoroughly mix together ½ cup each white sugar and brown sugar with 2 tbsp. cinnamon.
Divide the dough in half and place half of the dough on a lightly floured surface. Shape the dough into a fat log, then roll out to a large, thin rectangle, about 26-30″ x 12-15″ and ¼″ thick.
Pour the 1 cup melted butter over the surface of the dough, immediately followed by the cinnamon-sugar mixture. Work the sugar and butter together with clean fingers, spreading to the edges of the dough. Try not to let any butter spill onto the work surface. Allow to sit for 1–2 minutes so that the butter can set slightly and will make for easier rolling.
Beginning at the farthest end, roll the rectangle up tightly into a 26″ long log. Use both hands and work slowly, being careful to keep the roll tight. If the filling happens to ooze out as you roll rather than staying put, don’t fret: you can always scrape it off the counter and drizzle it over the rolls after cutting them. Pinch along the final seam to seal the log together.
With a sharp knife, cut the log into 1″ slices. One log should produce about 25 rolls.
Spray the desired baking dishes lightly with cooking spray. Place the sliced rolls in the dishes, about 1″ apart. (12-15 rolls should fit in a 9″x13″ pan.)
Shape the remaining buns. Prepare the fillings, then roll out and roll up the second half of the dough. Cut the log into pinwheels and transfer to baking dishes.
Let the buns rise on the counter for 20 minutes.
Preheat the oven to 375°.
If baking more trays of rolls than will fit on a single rack in the oven, either a) turn on the convection fan in the oven and bake for 15-20 minutes, rotating the pans halfway; or b) bake for 22-25 minutes in a standard oven, rotating the pans from top to bottom and turning from back to front halfway. The rolls are done when the tops are honey brown and the filling seems to be bubbling at the bottom of the pan.
While the rolls are baking, prepare the coffee glaze! In a large bowl, whisk together melted butter, milk, coffee, vanilla extract, and a pinch of salt. Using a hand mixer or a whisk, blend in the sugar, a little at a time. Continue mixing until very smooth. The glaze should be thick but pourable.
When the rolls come out of the oven, generously drizzle the glaze all over the tops. Spread with a spatula as needed to ice the edges and corners of the pan. The warm buns will absorb some of the glaze until just a shiny sweet layer is visible on top and they are gooey in the middle.
Serve warm.
These cinnamon buns may be stored, covered, at room temperature for 24 hours. Or, they may be chilled or frozen, covered, until needed. To reheat from chilled, bake for 10 minutes at 325°. To reheat from frozen, bake for 20-25 minutes at 325°.
Enjoy!
- One year ago: Homemade Gnocchi with Summer Squash and Basil
- Two years ago: Chocolate Beet Cake
- Three years ago: Baked Churros with Hot Chocolate
- Four years ago: Marbled Mocha Coffee Cake
- Five years ago: Feta Alfredo
5 comments to “Glazed Cinnamon Buns Redux”
Anita - August 12, 2016
I’m drooling over this dish, looks really delicious!!!
Melissa - August 12, 2016
Thanks! I hope you give them a try!
chefceaser - August 16, 2016
Reblogged this on Chef Ceaser and commented:
I love this!
Liz - October 9, 2017
Kate F. made these this weekend for our Women’s Retreat, and they were amazing!!! I had to look up your recipe so I can give it to my husband for the next time he makes me breakfast. Thanks so much.
Melissa - October 10, 2017
So glad you liked them, Liz! I hope they are a huge hit in your house! 😉