My husband has been asking to make cheese danish for years.
You’d think I would have taken him up on that right away! I love to bake. I love to be bossy in the kitchen. I love cheese danish.
But for some reason, I felt intimidated. Do you ever feel paralyzed by the desire to do something absolutely perfectly the first time, to find the right recipe and execute it just right, and make the most delicious thing anyone has ever tasted?
I had made croissants exactly once: they were a lot of work, and in the end, they were only fine. Fine! How dare they. I knew that cheese danish was in danger of turning out the same way, so I put them on the back burner.
But this month, when I was cruising through Renee’s Kitchen Adventures for my Secret Recipe Club challenge, I spotted a cheese danish recipe…and I knew I would have to go for it. This recipe is somewhat unusual, as it uses puff pastry instead of a typical laminated, yeasted dough! This had the potential to be way simpler, and equally as delicious. Plus, I have been all about puff pastry lately.
Renee has a lot of beautiful recipes on her blog, and she has even published a few in magazines! Many of her recipes are Weight Watchers friendly. In fact, her version of these cheese danish is WW-friendly. In my version, I sort of threw that to the wind: I used homemade puff pastry, which is absolutely saturated with butter, skipped the low-fat dairy, and added a royal icing glaze. Yum.
 So. I love homemade puff pastry! It’s not hard to make, though it does take some time and it does require rolling. But the result, I think, is infinitely better than storebought pastry, which is typically not made with butter, and ultimately lacks the richness of a homemade, buttery version. (If you must buy puff pastry, go for Dufour, which is made with butter instead of shortening!)
More on homemade puff pastry at a later date.
Either way. Make sure your puff pastry is thawed, but keep it cool in the fridge until you are ready to roll/fill it.
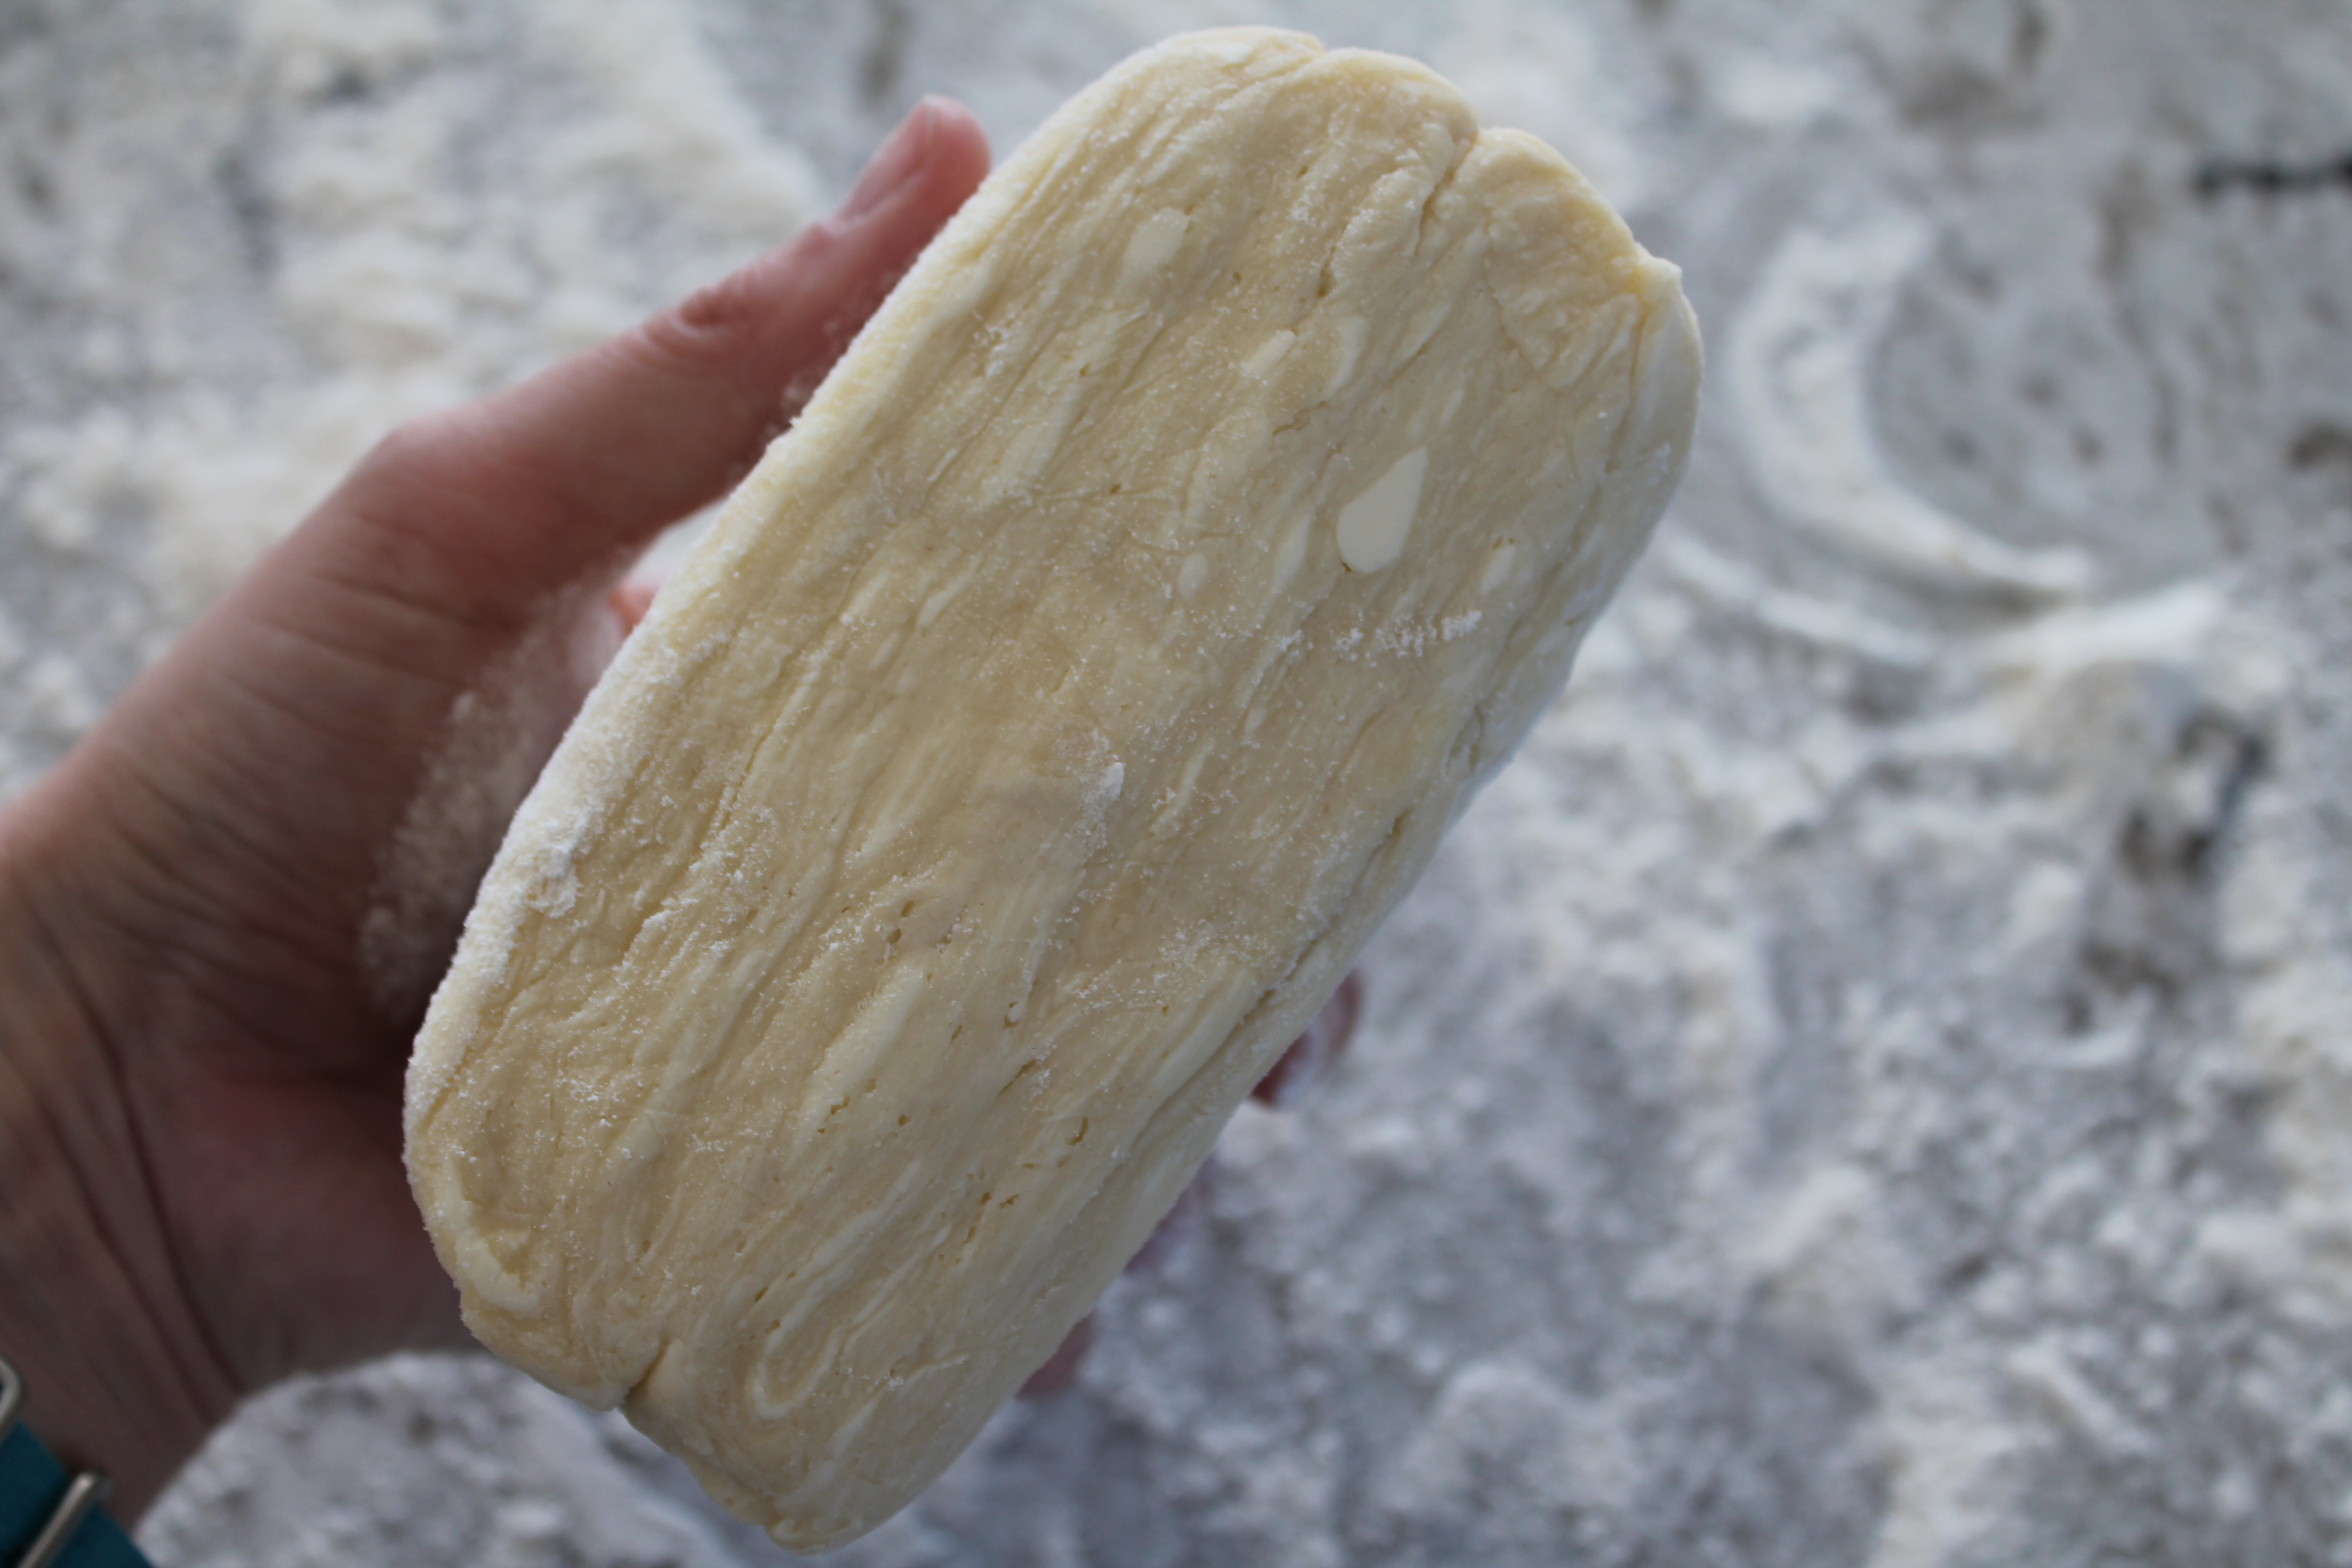
 So. If you are using homemade pastry, it’s likely in a big, thick brick right about now. Time to roll it out! (If you are using storebought pastry, you can just unfold it. Maybe give it a tiny roll or two if you want more delicate pastries, or just to flatten it a little. Presto bango, done.)
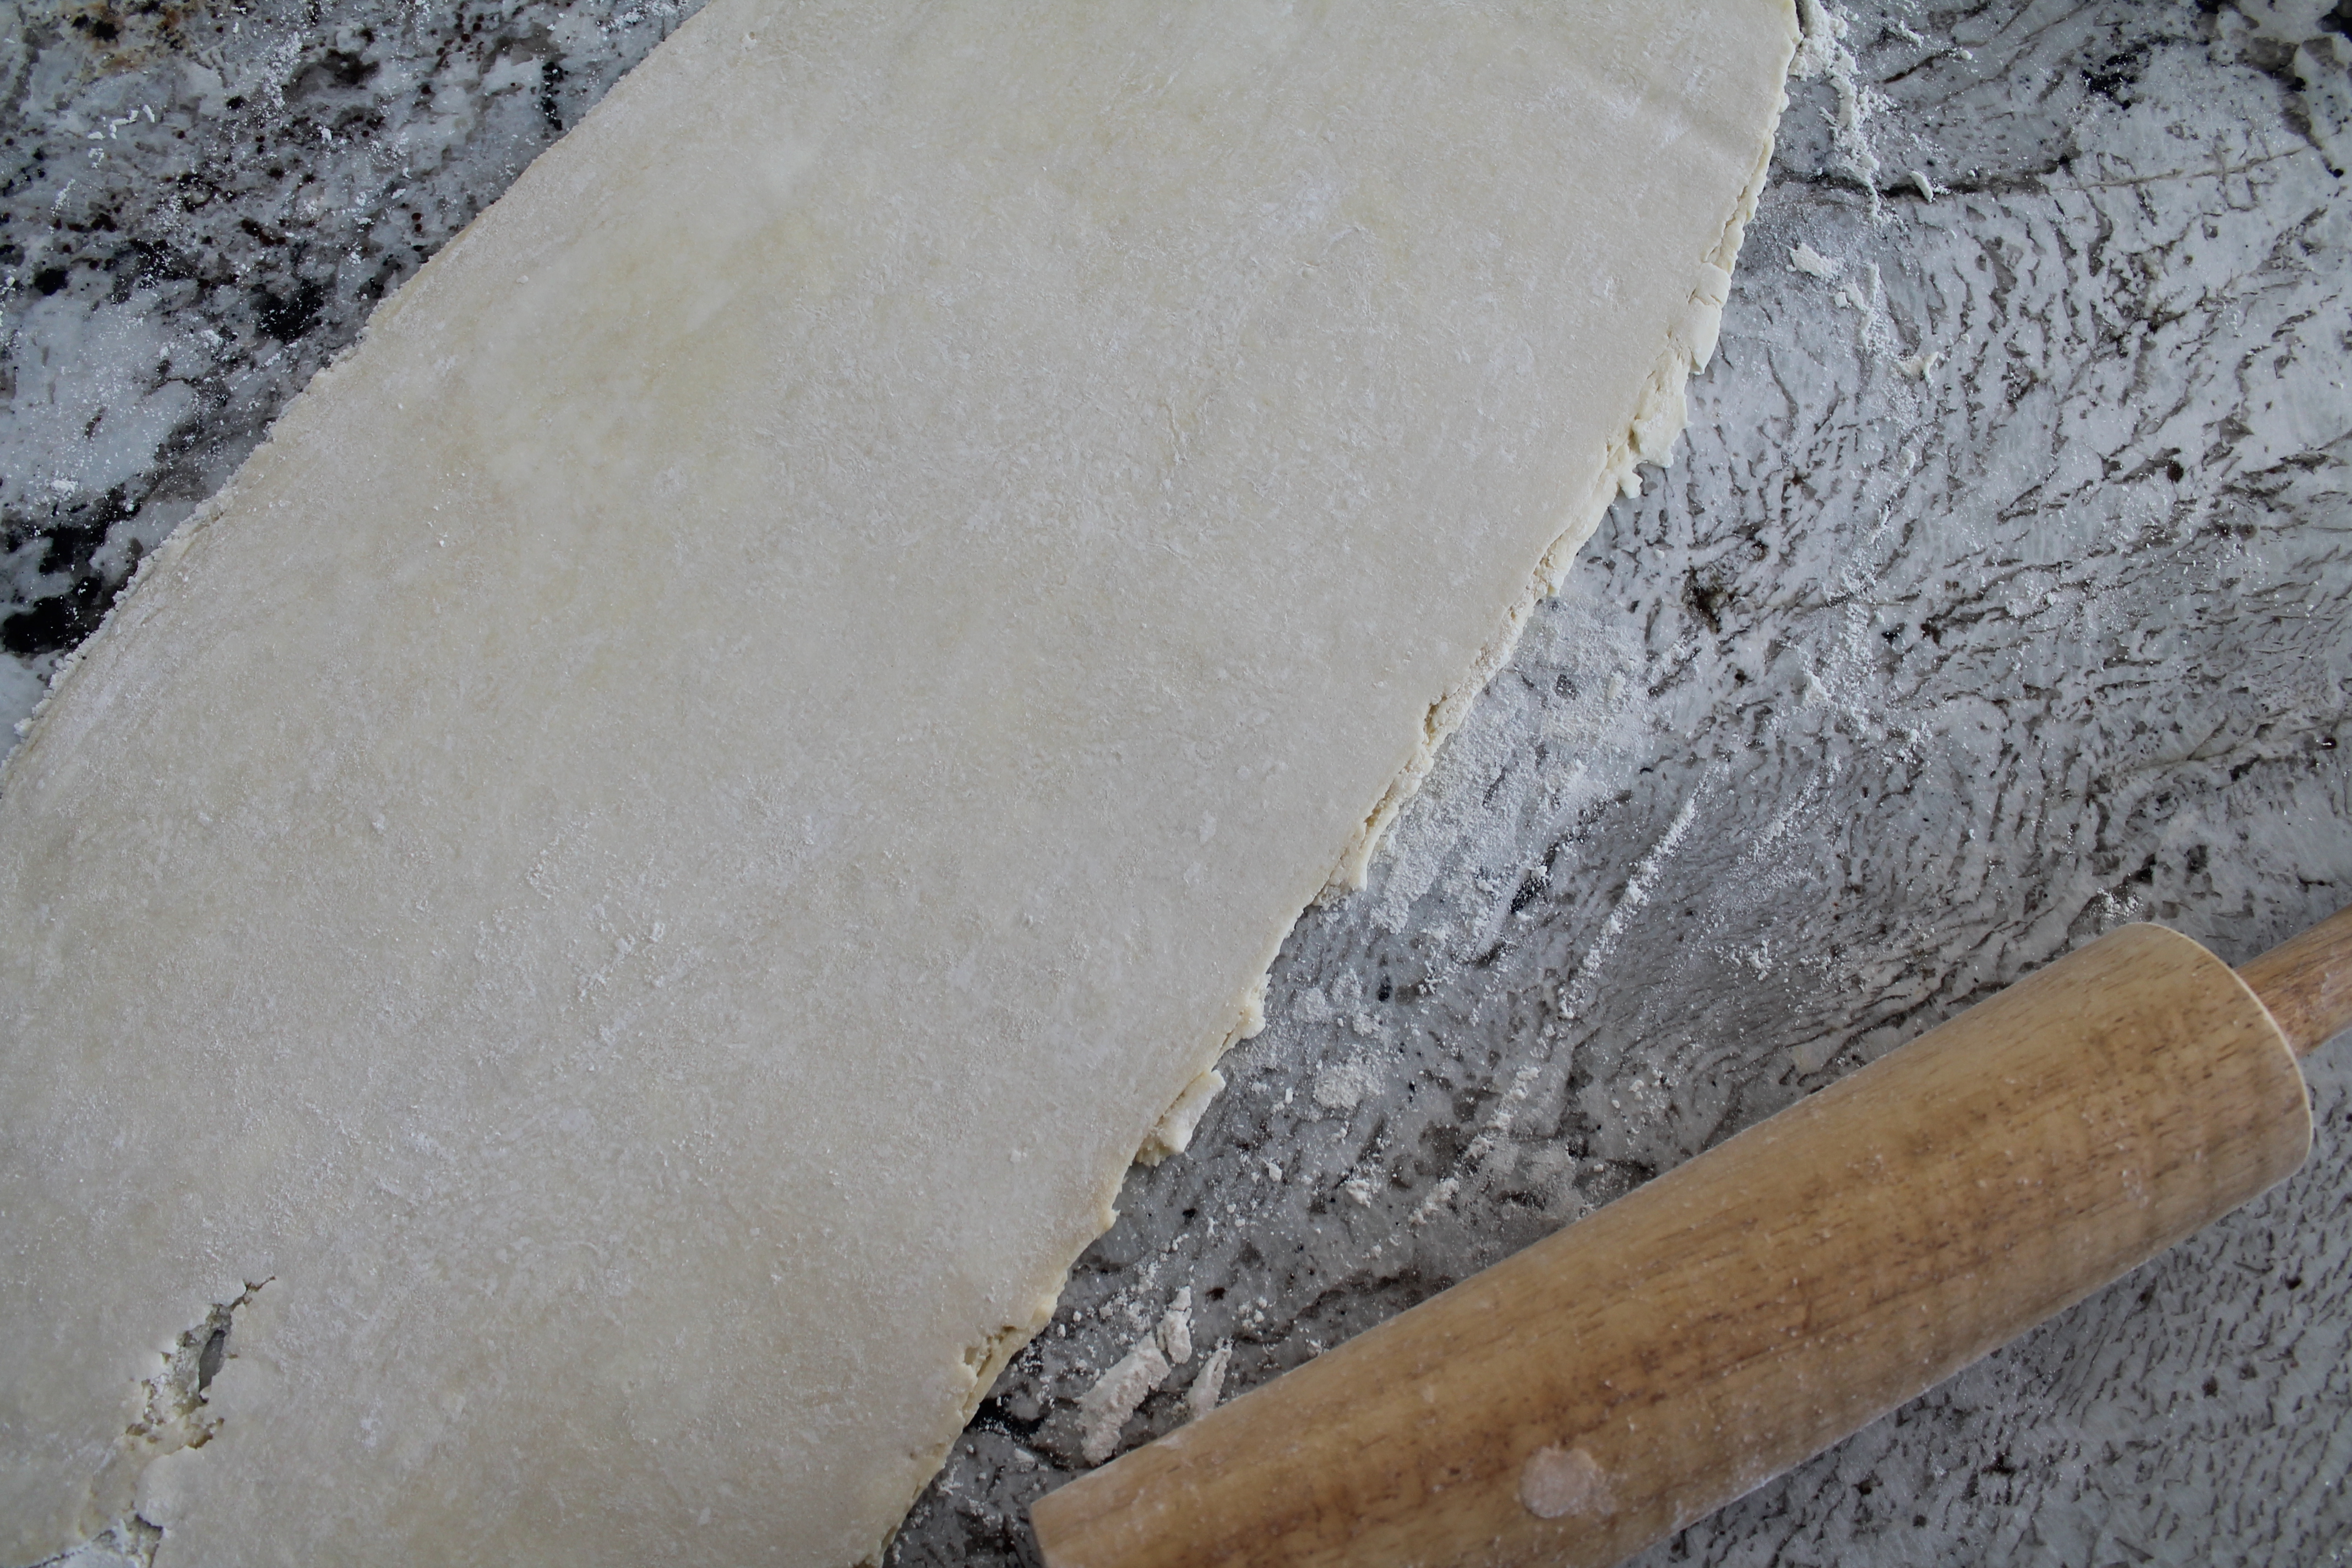
Roll out the pastry to a large, thin rectangle on a lightly floured surface. I got mine to about 11″x25″, juuust barely thinner than ¼″ thick.
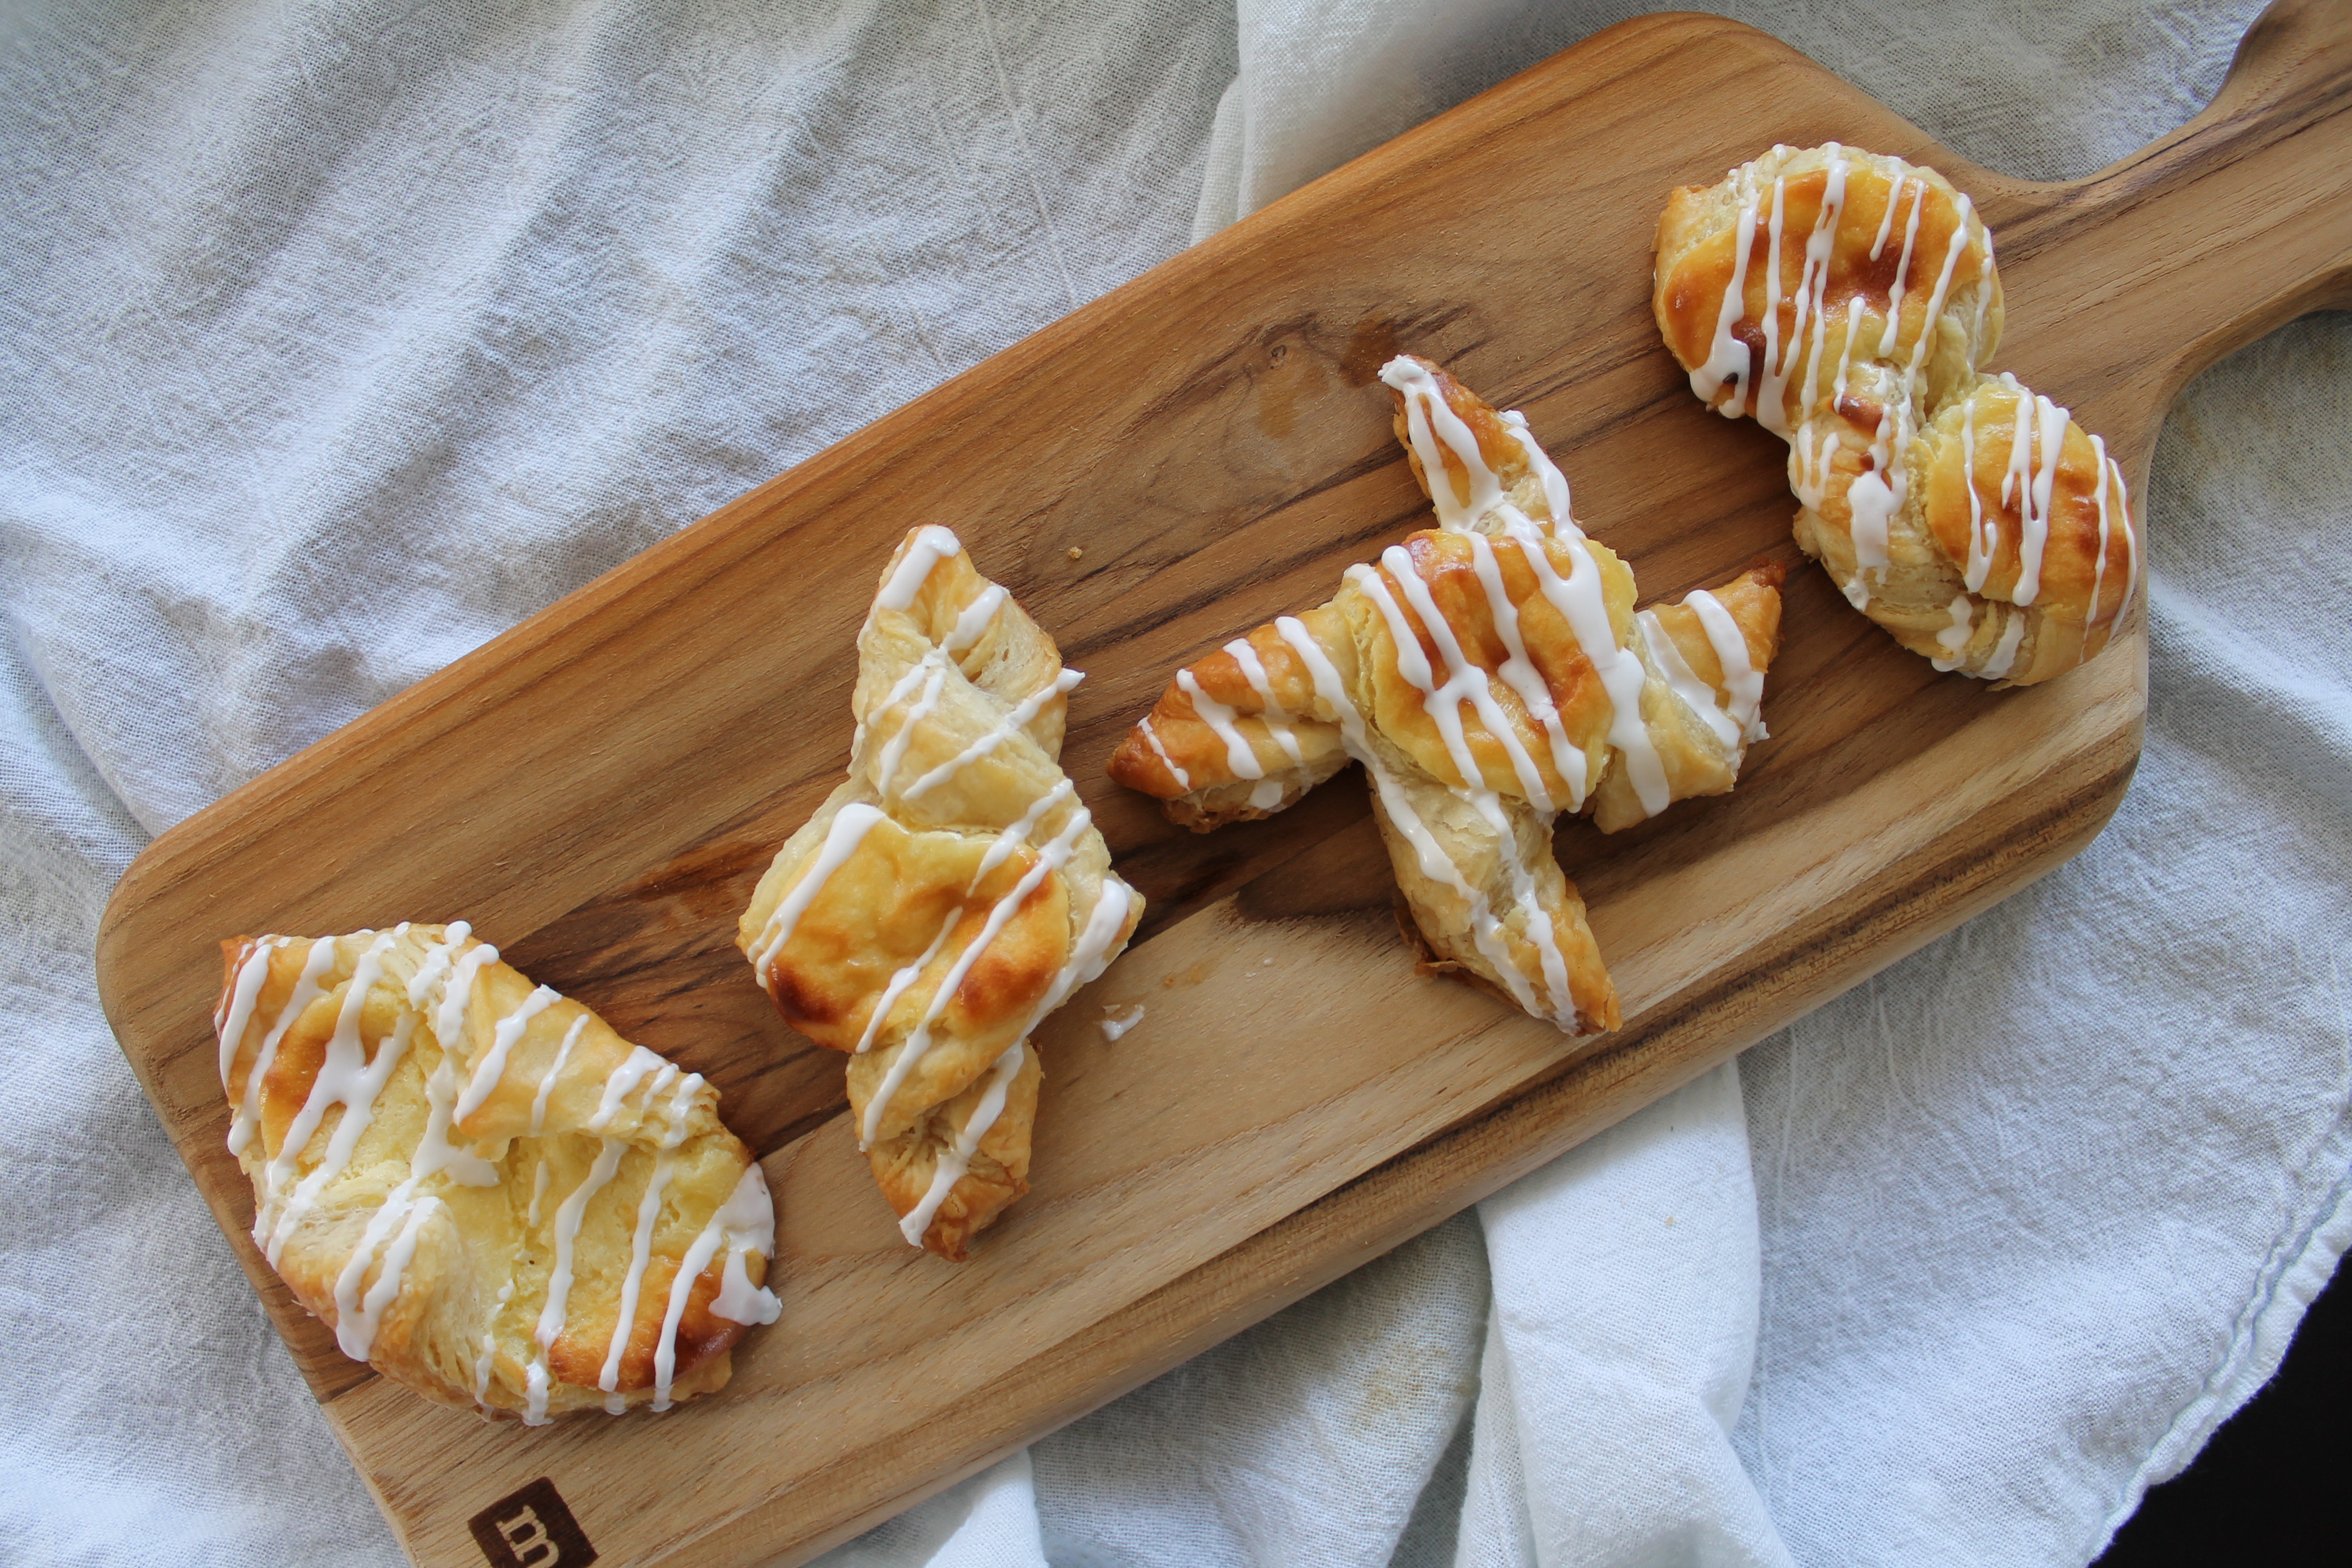
 I really wanted to try out some interesting shapes with my danish. I know, a classic danish shape is basically a circle with thick edges and filling in the center. But I just like to experiment, so I went with figure-8s, vol-au-vents, and pinwheels in addition to the simple cannoli-style folded square Renee recommended.
The first time I made these, I must say, the danish were delicious! But the pastry was underbaked in all of them, regardless of their shape, especially where it had been weighed down by filling. The outsides were beautifully crisp and flaky, but the deeper layers of pastry were still solid and damp-looking. They tasted good, but I knew they could be better. (Side note: after a day, the moisture from the underbaked pastry seeped into the puffed layers a bit, and the texture became a little more even and chewy, and very true to every cheese danish I had ever eaten…but I still wanted to work on getting my pastry baked properly.)
So. Here’s what I recommend for making cheese danish out of puff pastry. It’s unconventional, but hey, so is making danish with puff pastry! Par-bake the pastry. This will allow it to puff up early, creating a better cup for the filling, and then the pastry that ends up buried by a generous dollop of cream cheese will have baked slightly before you filled it. Not only that, but the first time I baked these danish, my cheese filling browned quite a bit…and if you par-bake the pastry, then the cheese spends less time in the oven and it comes out looking beautiful and creamy!
 Let’s talk about the shapes. All of these were very easy to make!
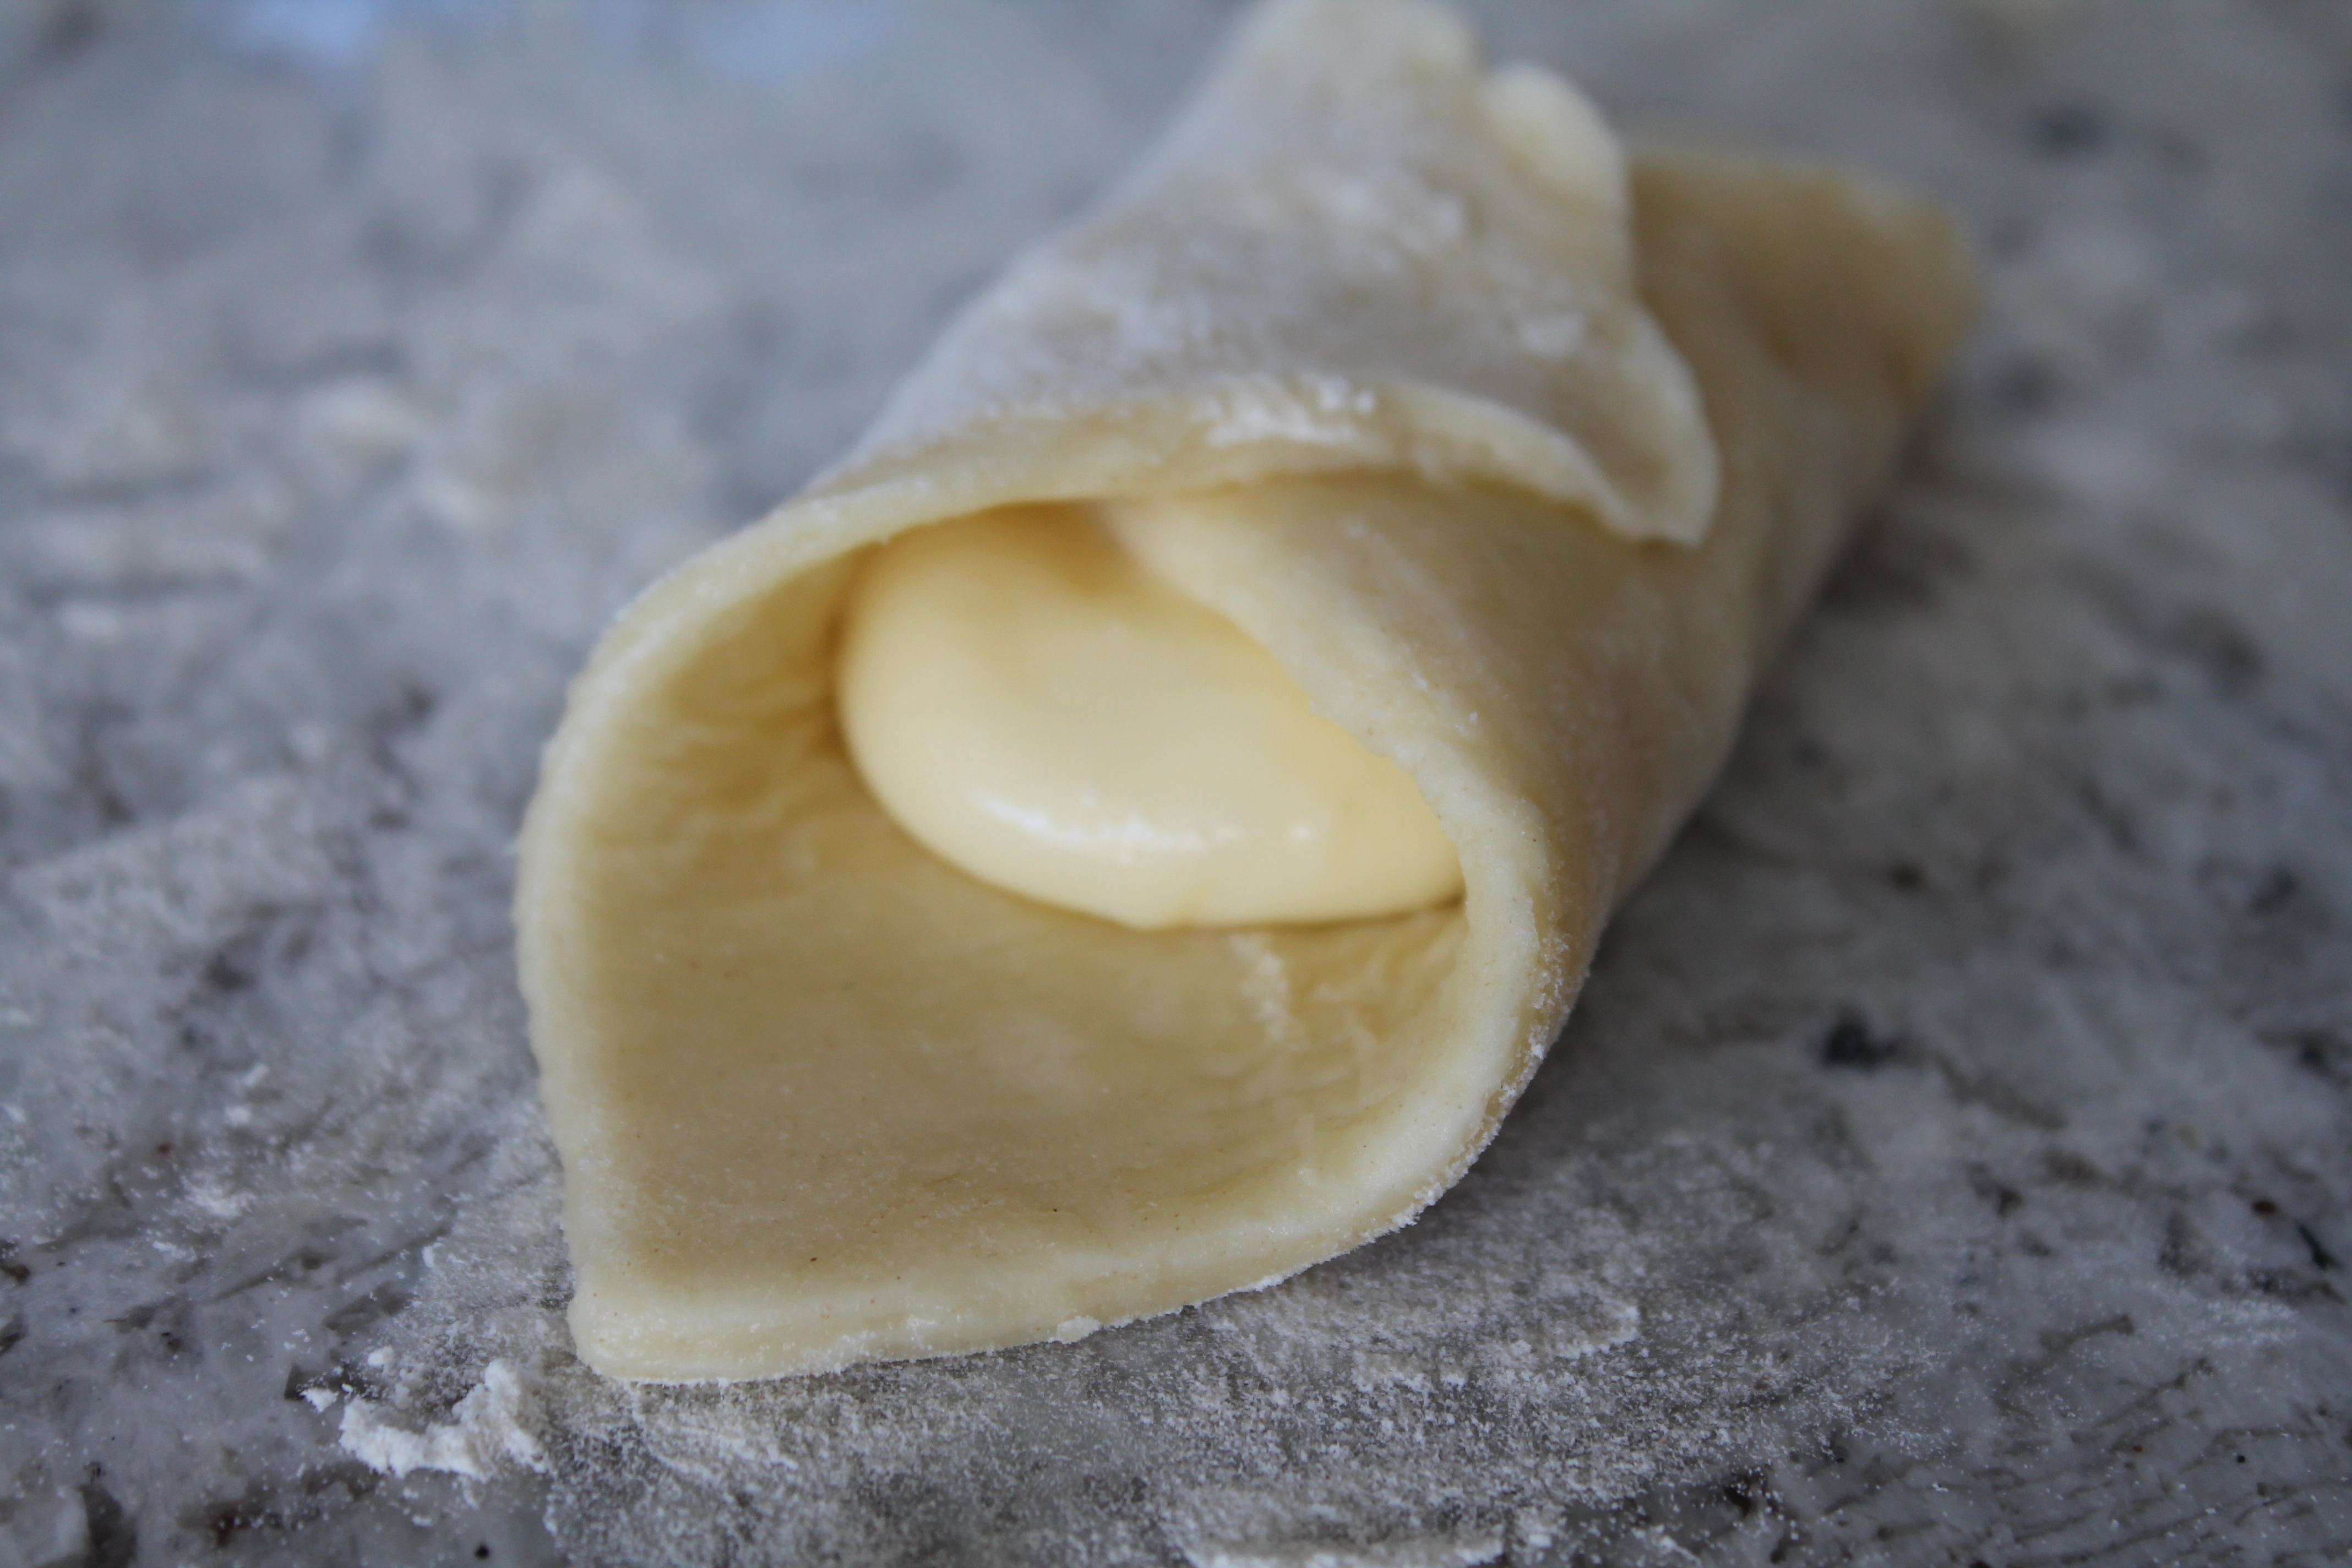
Three of the four I photographed for you started with simple squares. The cannoli-style won’t work with par-baking, because you have to fill it immediately, but if you want to go for it anyway, just drop a generous dollop of filling in the center of a pastry square, then fold the opposite two corners over top and seal with some egg wash. This will likely come apart in the oven as the pastry puffs, but don’t worry!
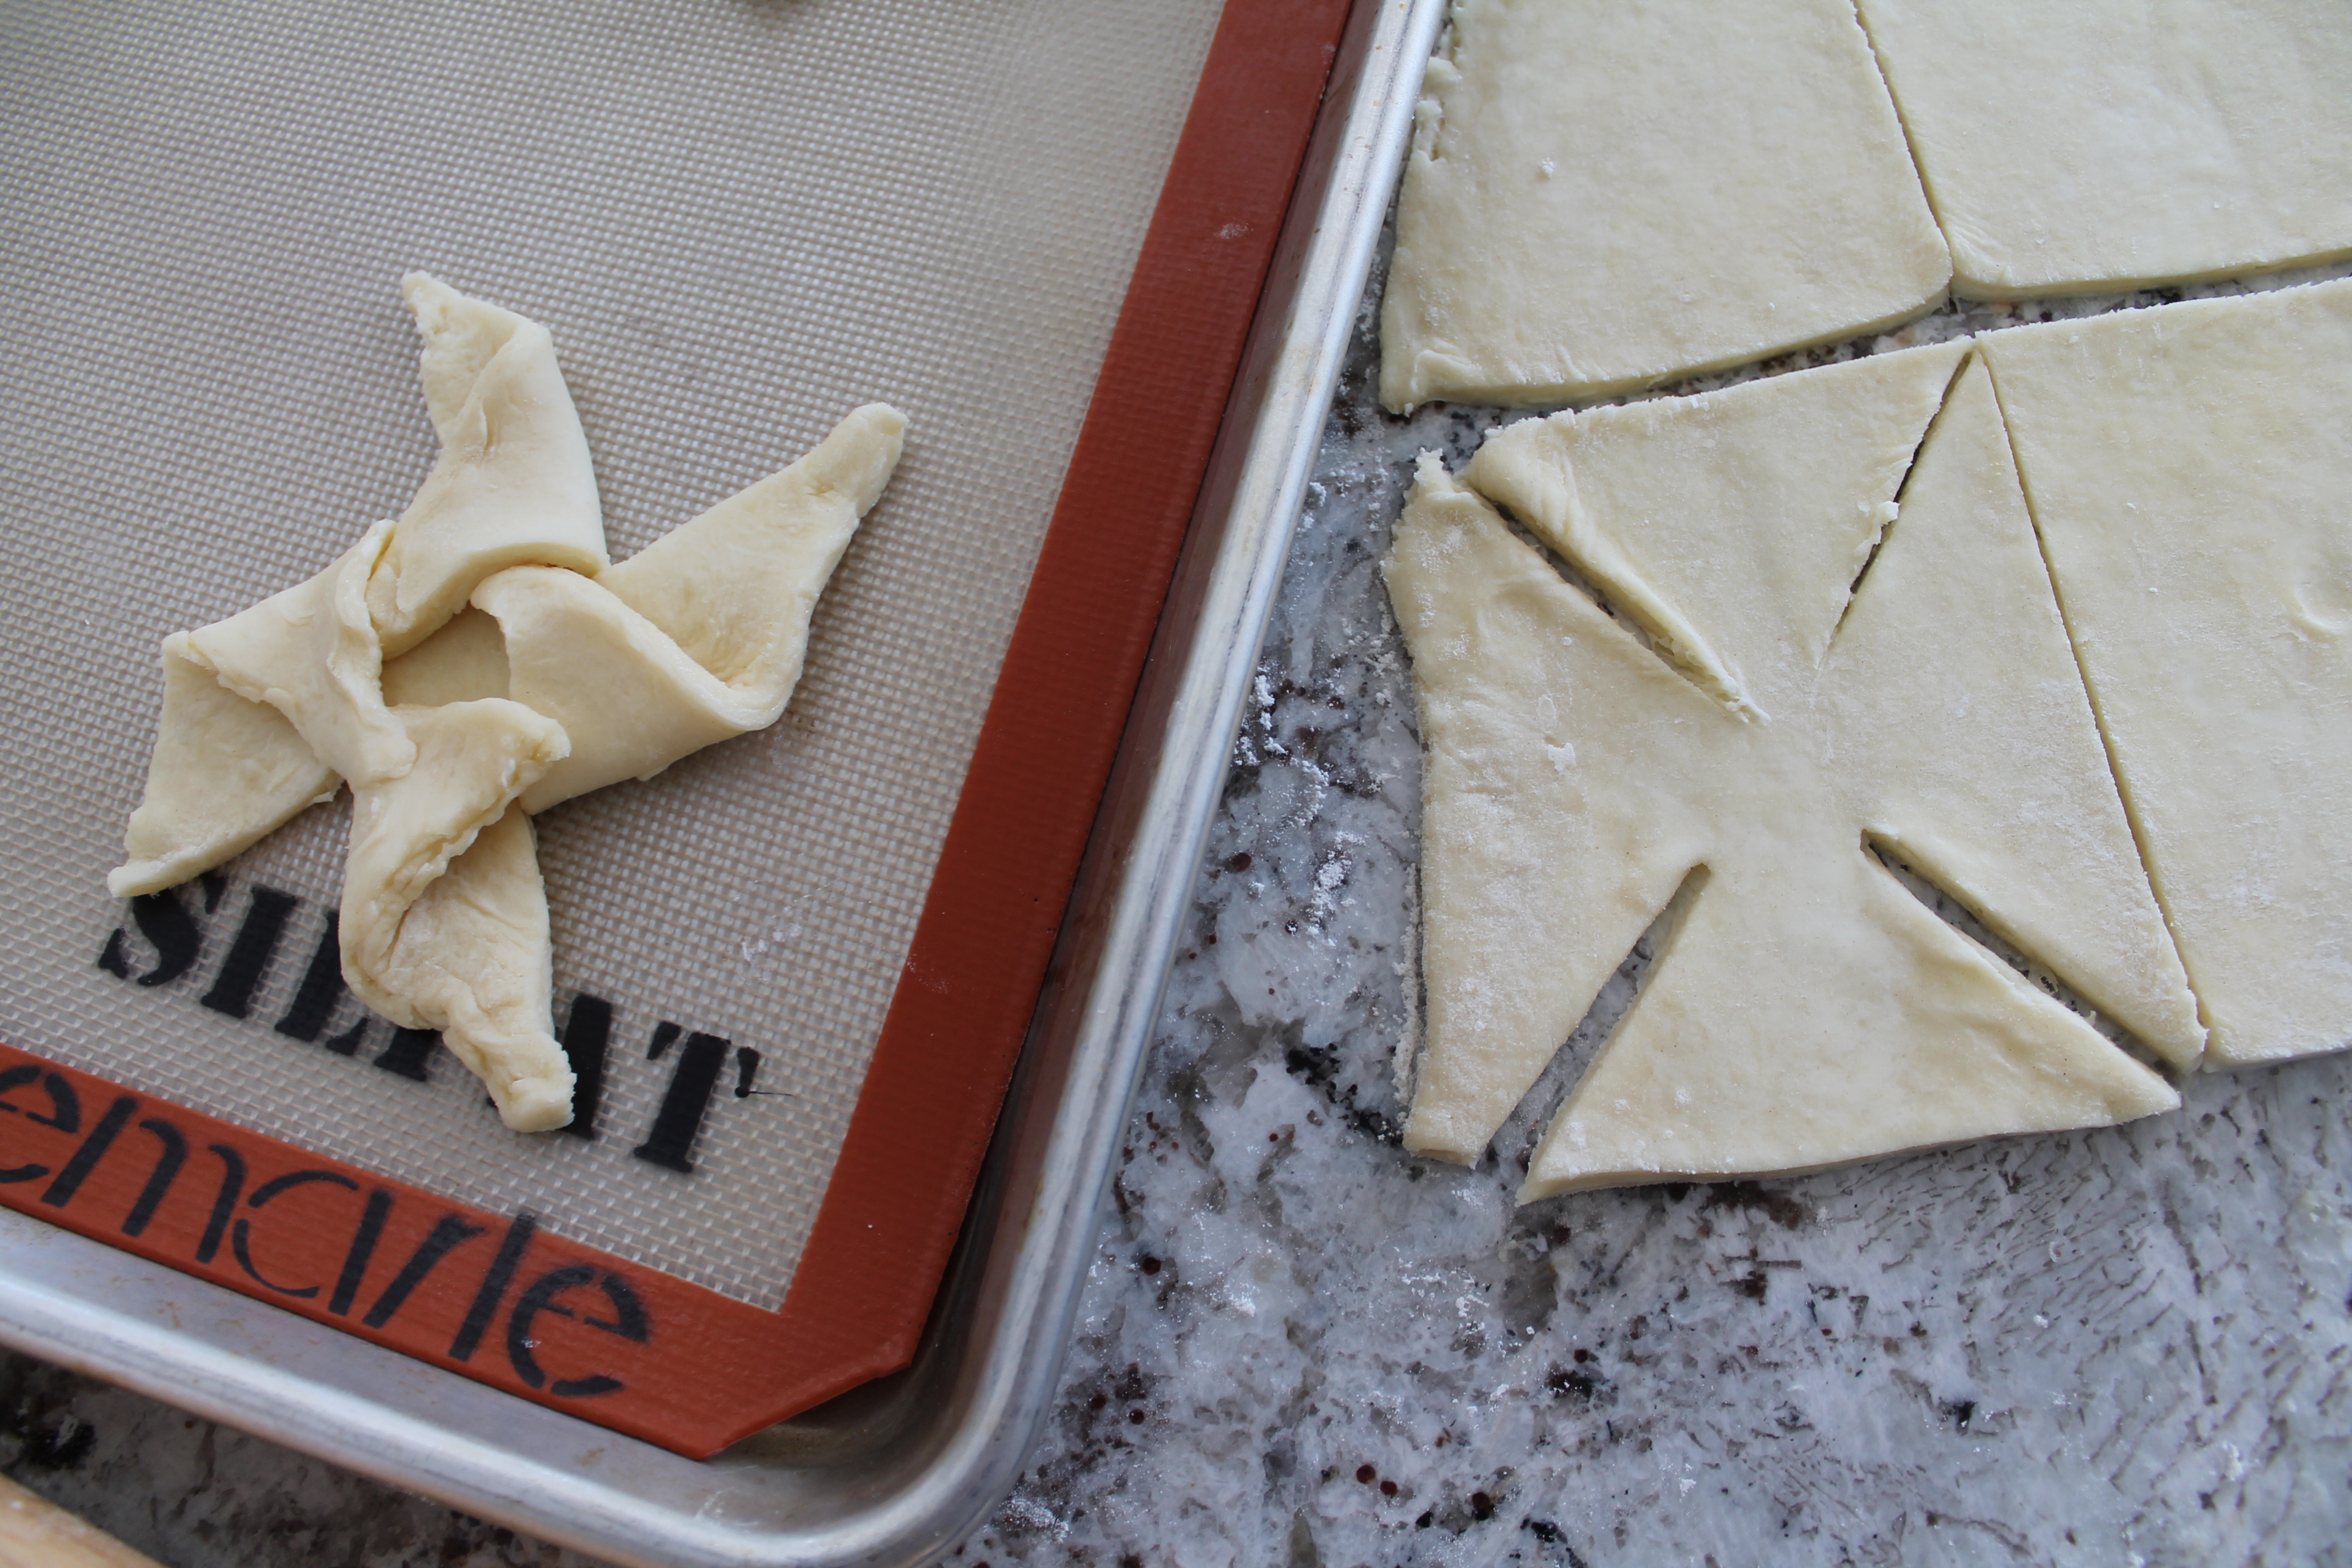 The pinwheels were Jake’s favorite. Simply notch the four corners of your square with a 1″ cut, then fold four of the notched sides in the same direction toward the center.
I felt that the pinwheels didn’t leave enough room for filling, but they did bake reasonably well.
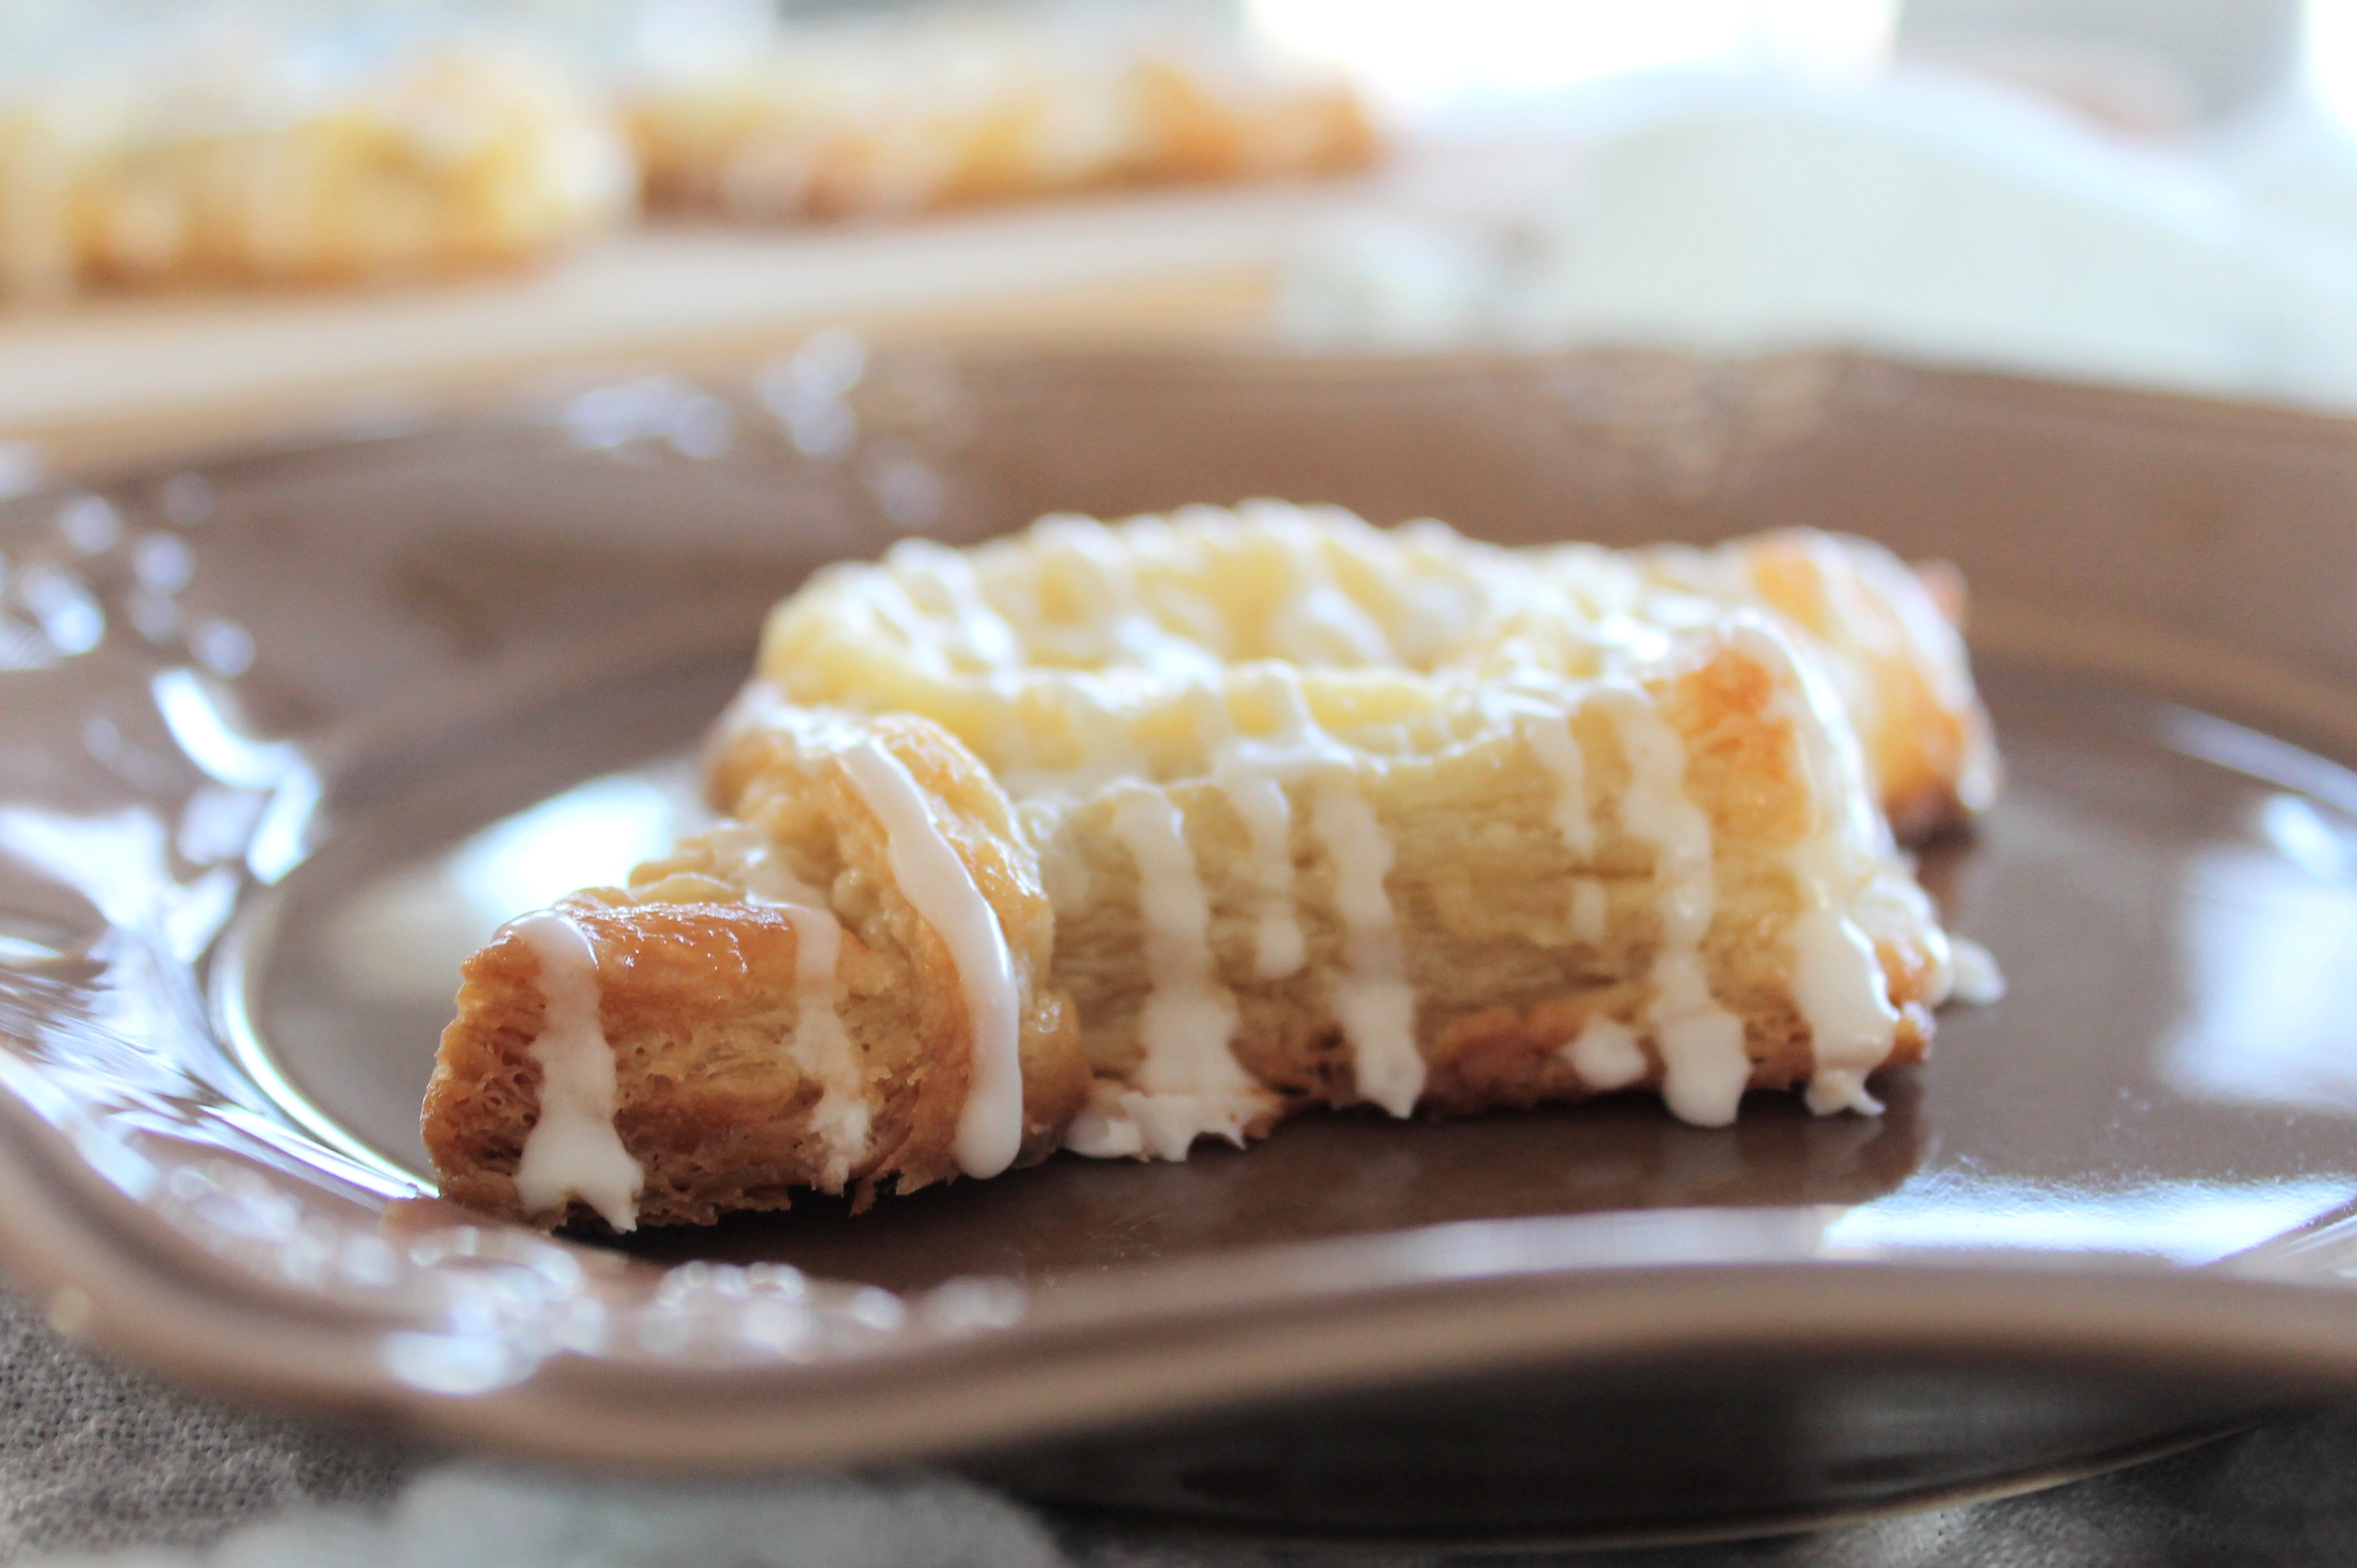
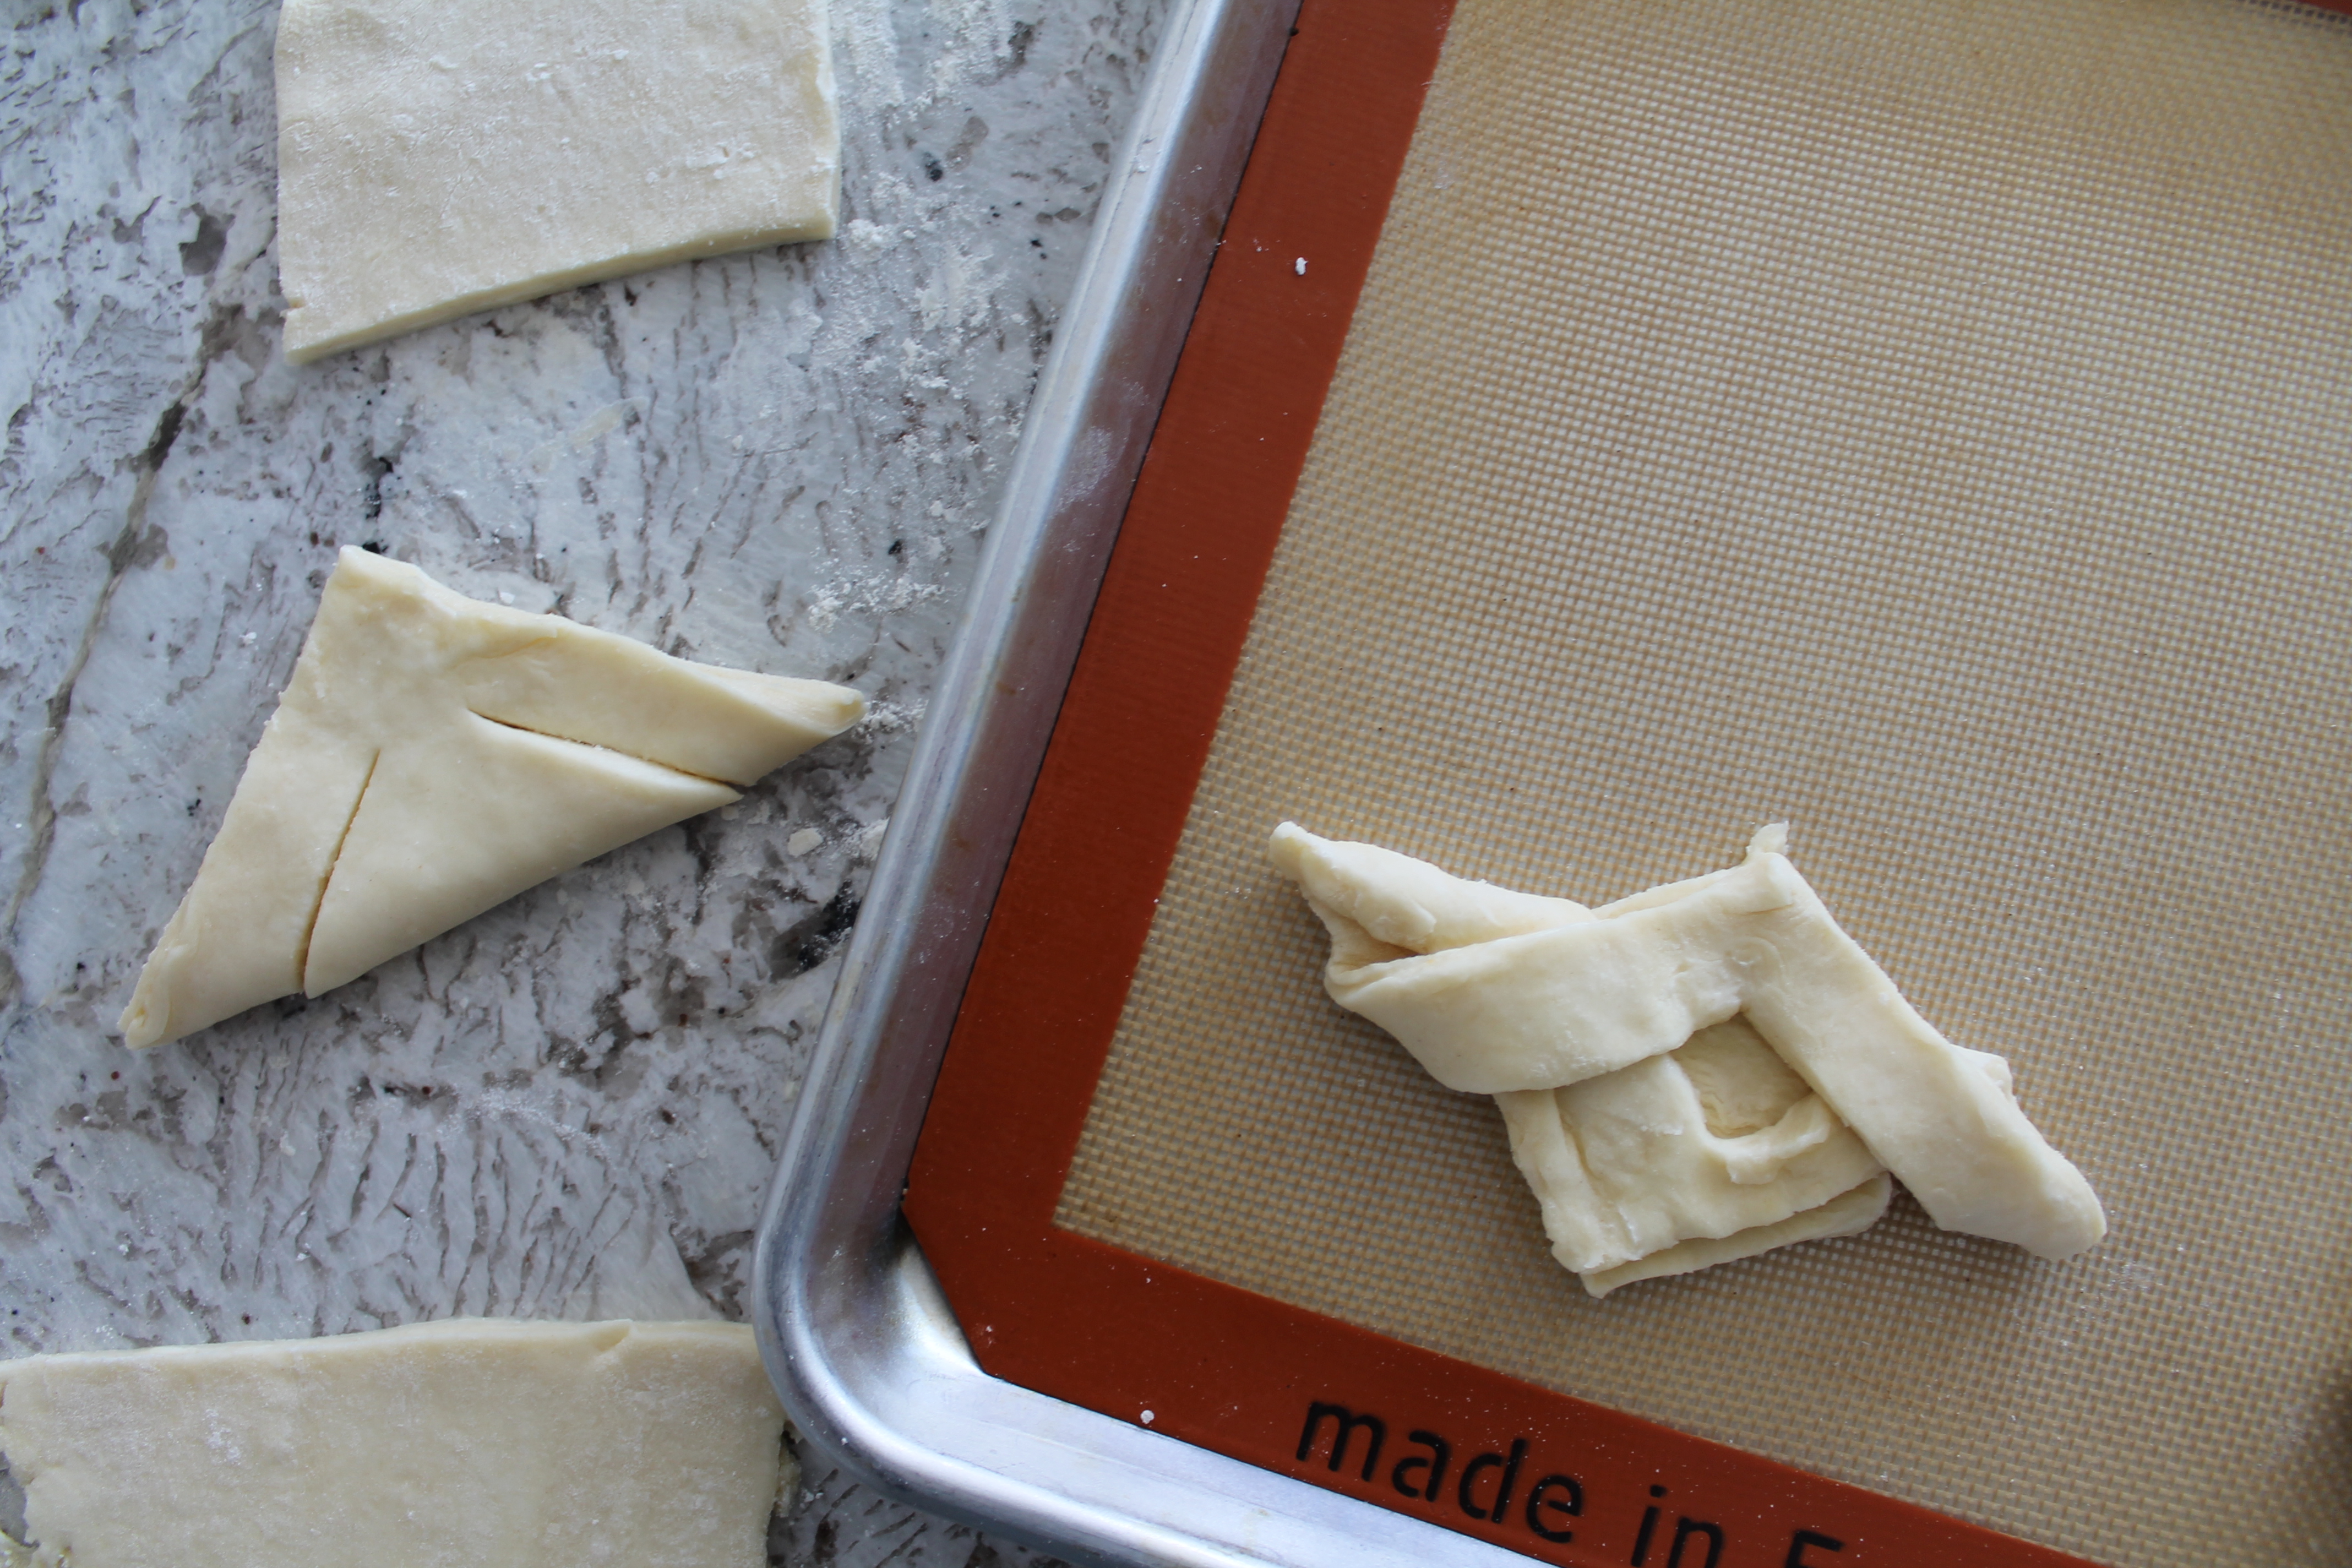 The vol-au-vents, which look a little bit like the twisty outline of a wrapped candy, were my favorite shape because they were quite simple to make, they naturally contained a great pocket for filling, and they baked the most evenly. Simply fold your pastry square into a triangle, then make two cuts running parallel to the outer edge, about ½″ in, running from the folded side up toward the point. Don’t actually completely cut out a smaller triangle, leave the tip of the small triangle uncut. Unfold the pastry and then cross the outer edges over and place them on the inner corners of the pastry.
(Okay. That was really hard to describe. Geometry was not my best subject, people. But trust me and look at the photo: the vol-au-vents were simple to make, and they baked so well!)
Don’t forget you can always go with a traditional style cheese danish, by rolling up the sides of your pastry squares to create a ridge around the outside, into which you will spoon your filling. Or, you could even get really daring and make a pastry braid (but again, the braid won’t work with the par-baking).
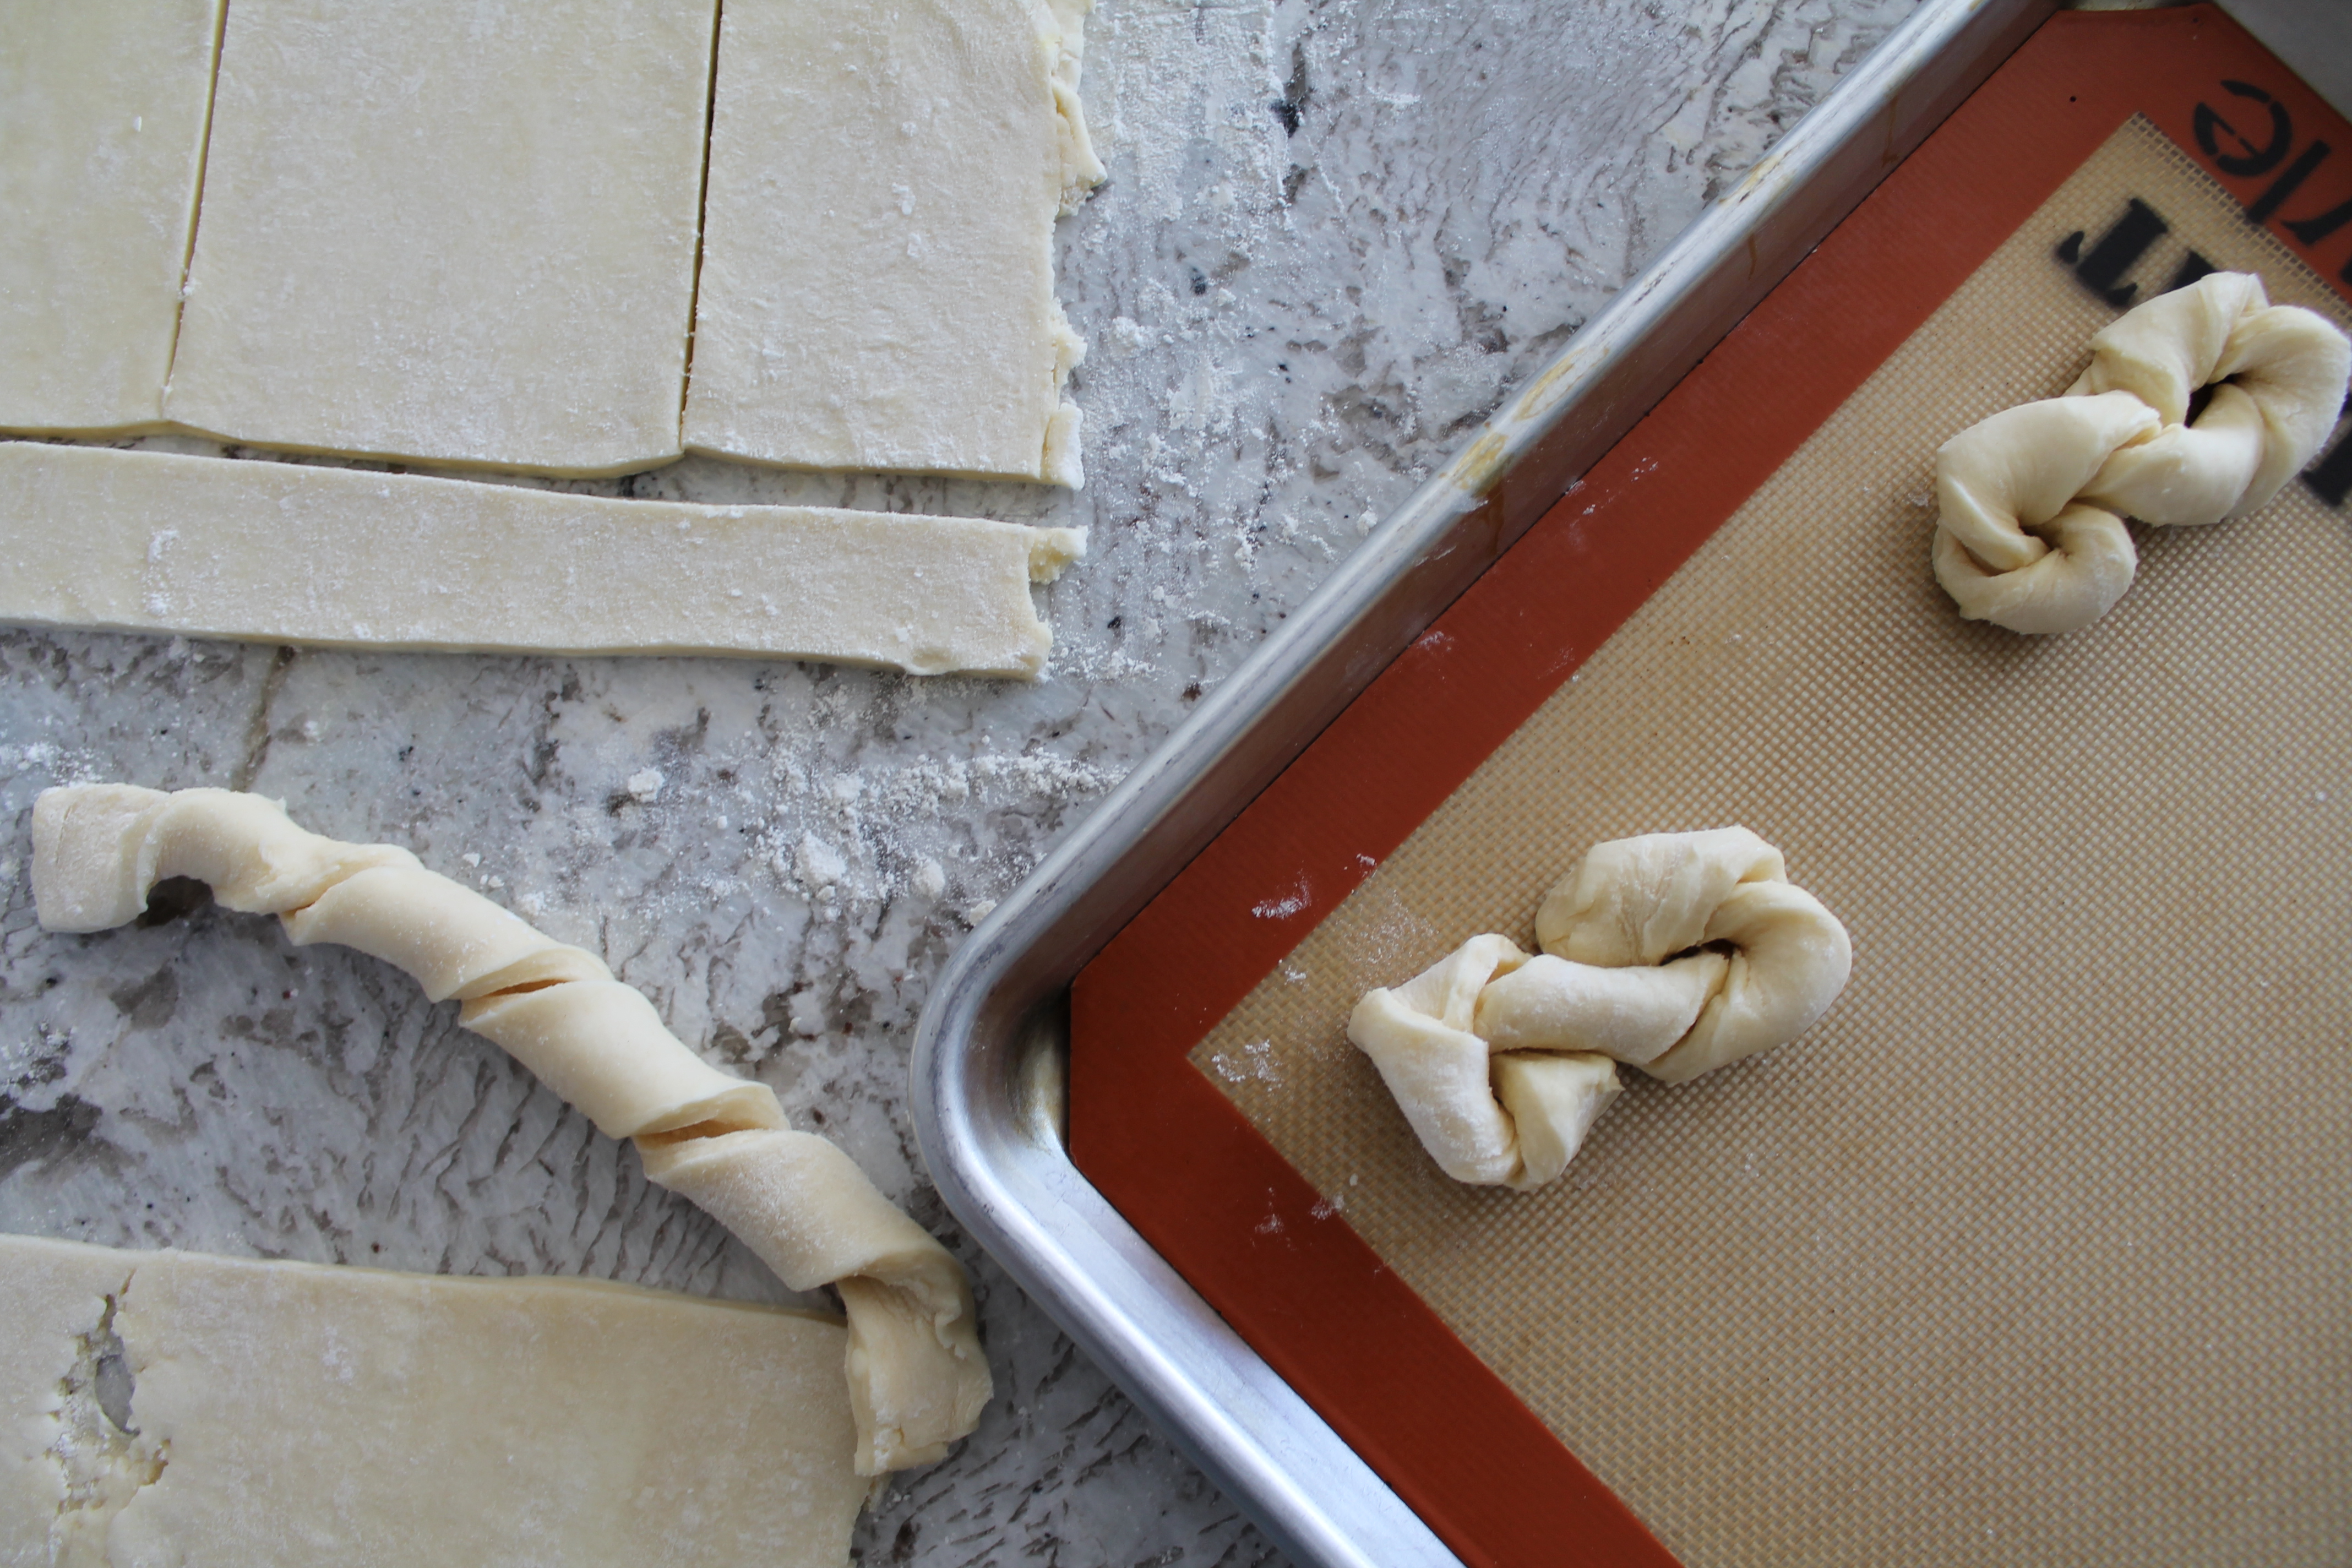 The figure-8s were easy to make, but because they had the densest ratio of pastry, they always were a little underbaked, even with the par-baking. If you want to make a figure-8, start with a long strip of pastry, about 1″ wide, and twist it into a loose coil. Then wrap the coil into the shape of an 8, tucking the loose ends under the pastry.
So. Once you have shaped your pastry, you need to chill it again, somewhere between 15 minutes and half an hour.
 This is a great time to make your cheese filling!
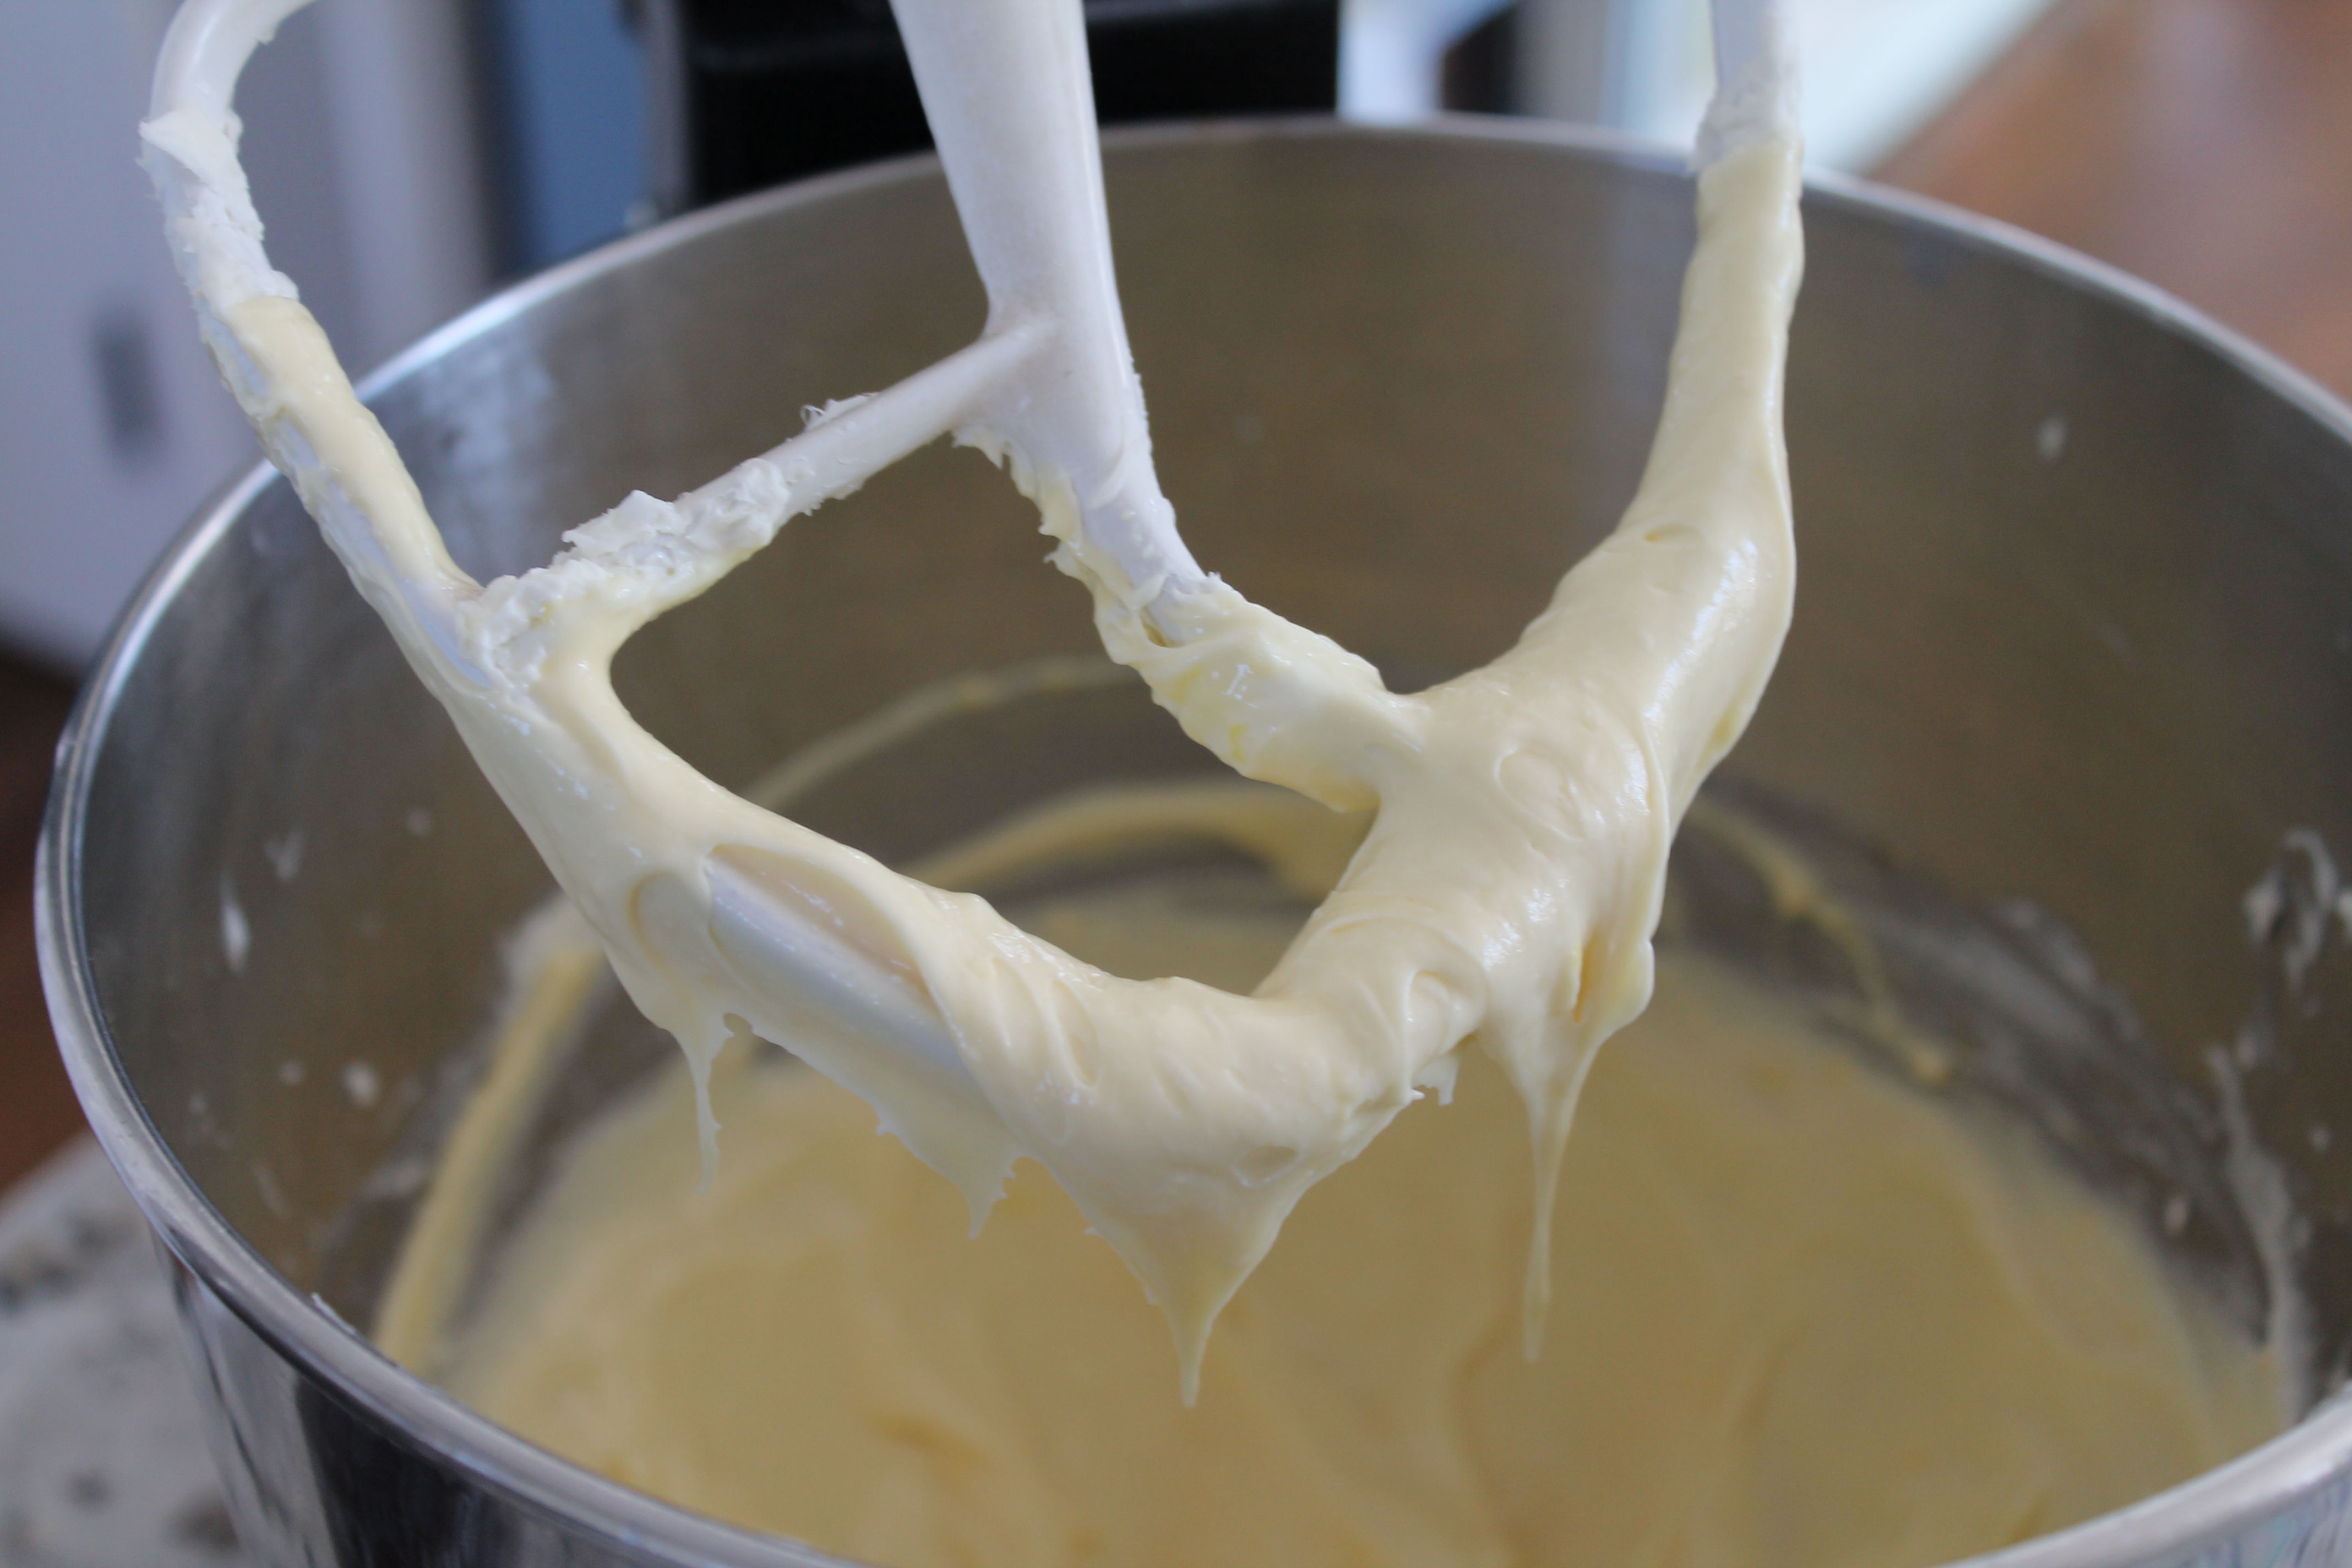
This is super easy, especially if you have a stand mixer. Simply beat the cream cheese until it is soft and silky. Add the sugar and beat again. Then add in everything else: egg yolk, vanilla extract, Greek yogurt or ricotta cheese, a hint of lemon zest, and a big pinch of salt.
I used Greek yogurt to make this danish filling because ricotta is usually a wasteful purchase in my house. I hardly ever use ricotta anymore because I find its slightly gritty texture and totally bland flavor to be less than desirable. I can’t even tell you how many times I’ve bought a small carton of ricotta, used 2 tbsp. in a recipe, and had to throw the rest away months later when I discovered something orange growing in it. Now I use plain Greek yogurt, which I always have on hand.
The amount of lemon zest you use is up to you. I really think less is more here: I am always a little disappointed when my cheese danish tastes more like lemon and less like cheesecake. But, as we all know, I hate fruit. I don’t recommend going over ½ tsp. of zest, but I prefer really just a pinch…maybe up to ¼ tsp.
Set the filling aside until you need it. It’s fine to keep it right on the counter, but you could also chill it if you prefer.
Brush the chilled pastries with an egg wash, focusing heavily on the little pointy, edgy bits, as they will burn quickly without the coating of egg wash to keep them moist.
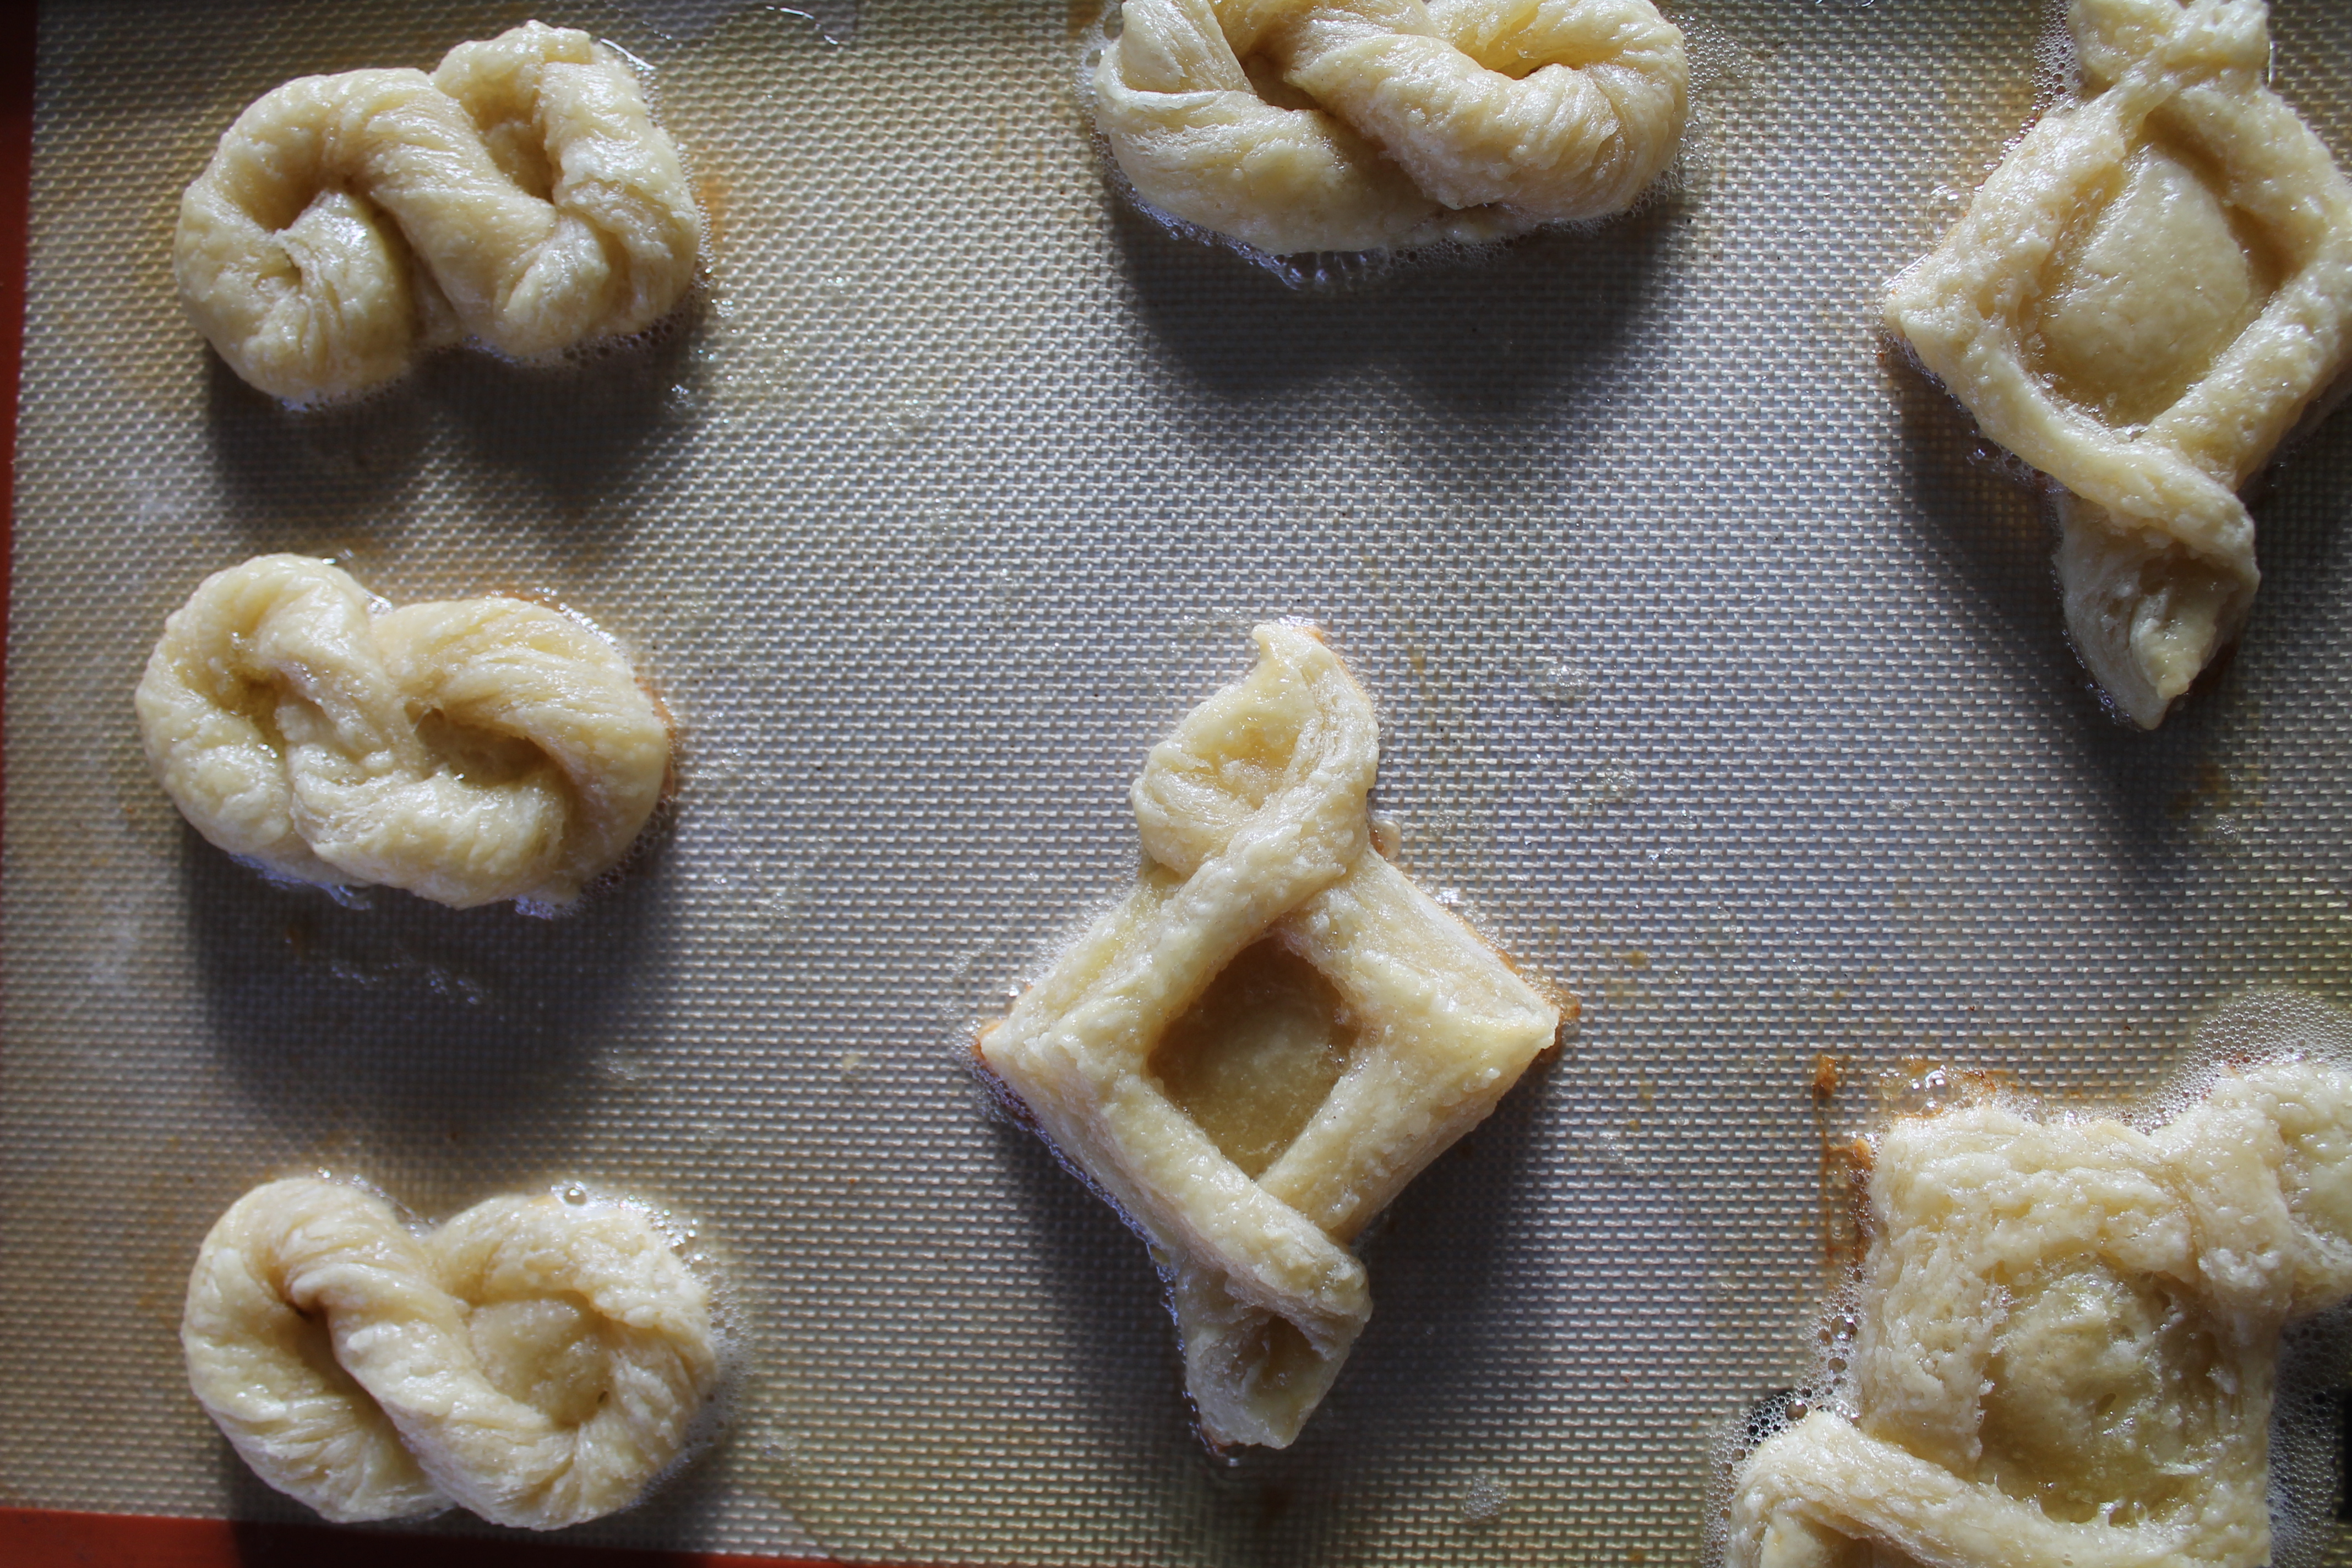 Par-bake the pastries for 10–12 minutes. They will be somewhat puffed but obviously not cooked through. And, if you used super buttery pastry, it will be oozing butter. Mmmm.
Spoon generous dollops of filling into the lightly puffed pastries. Try to work quickly so that the pastry will stay quite hot and will resume baking easily.
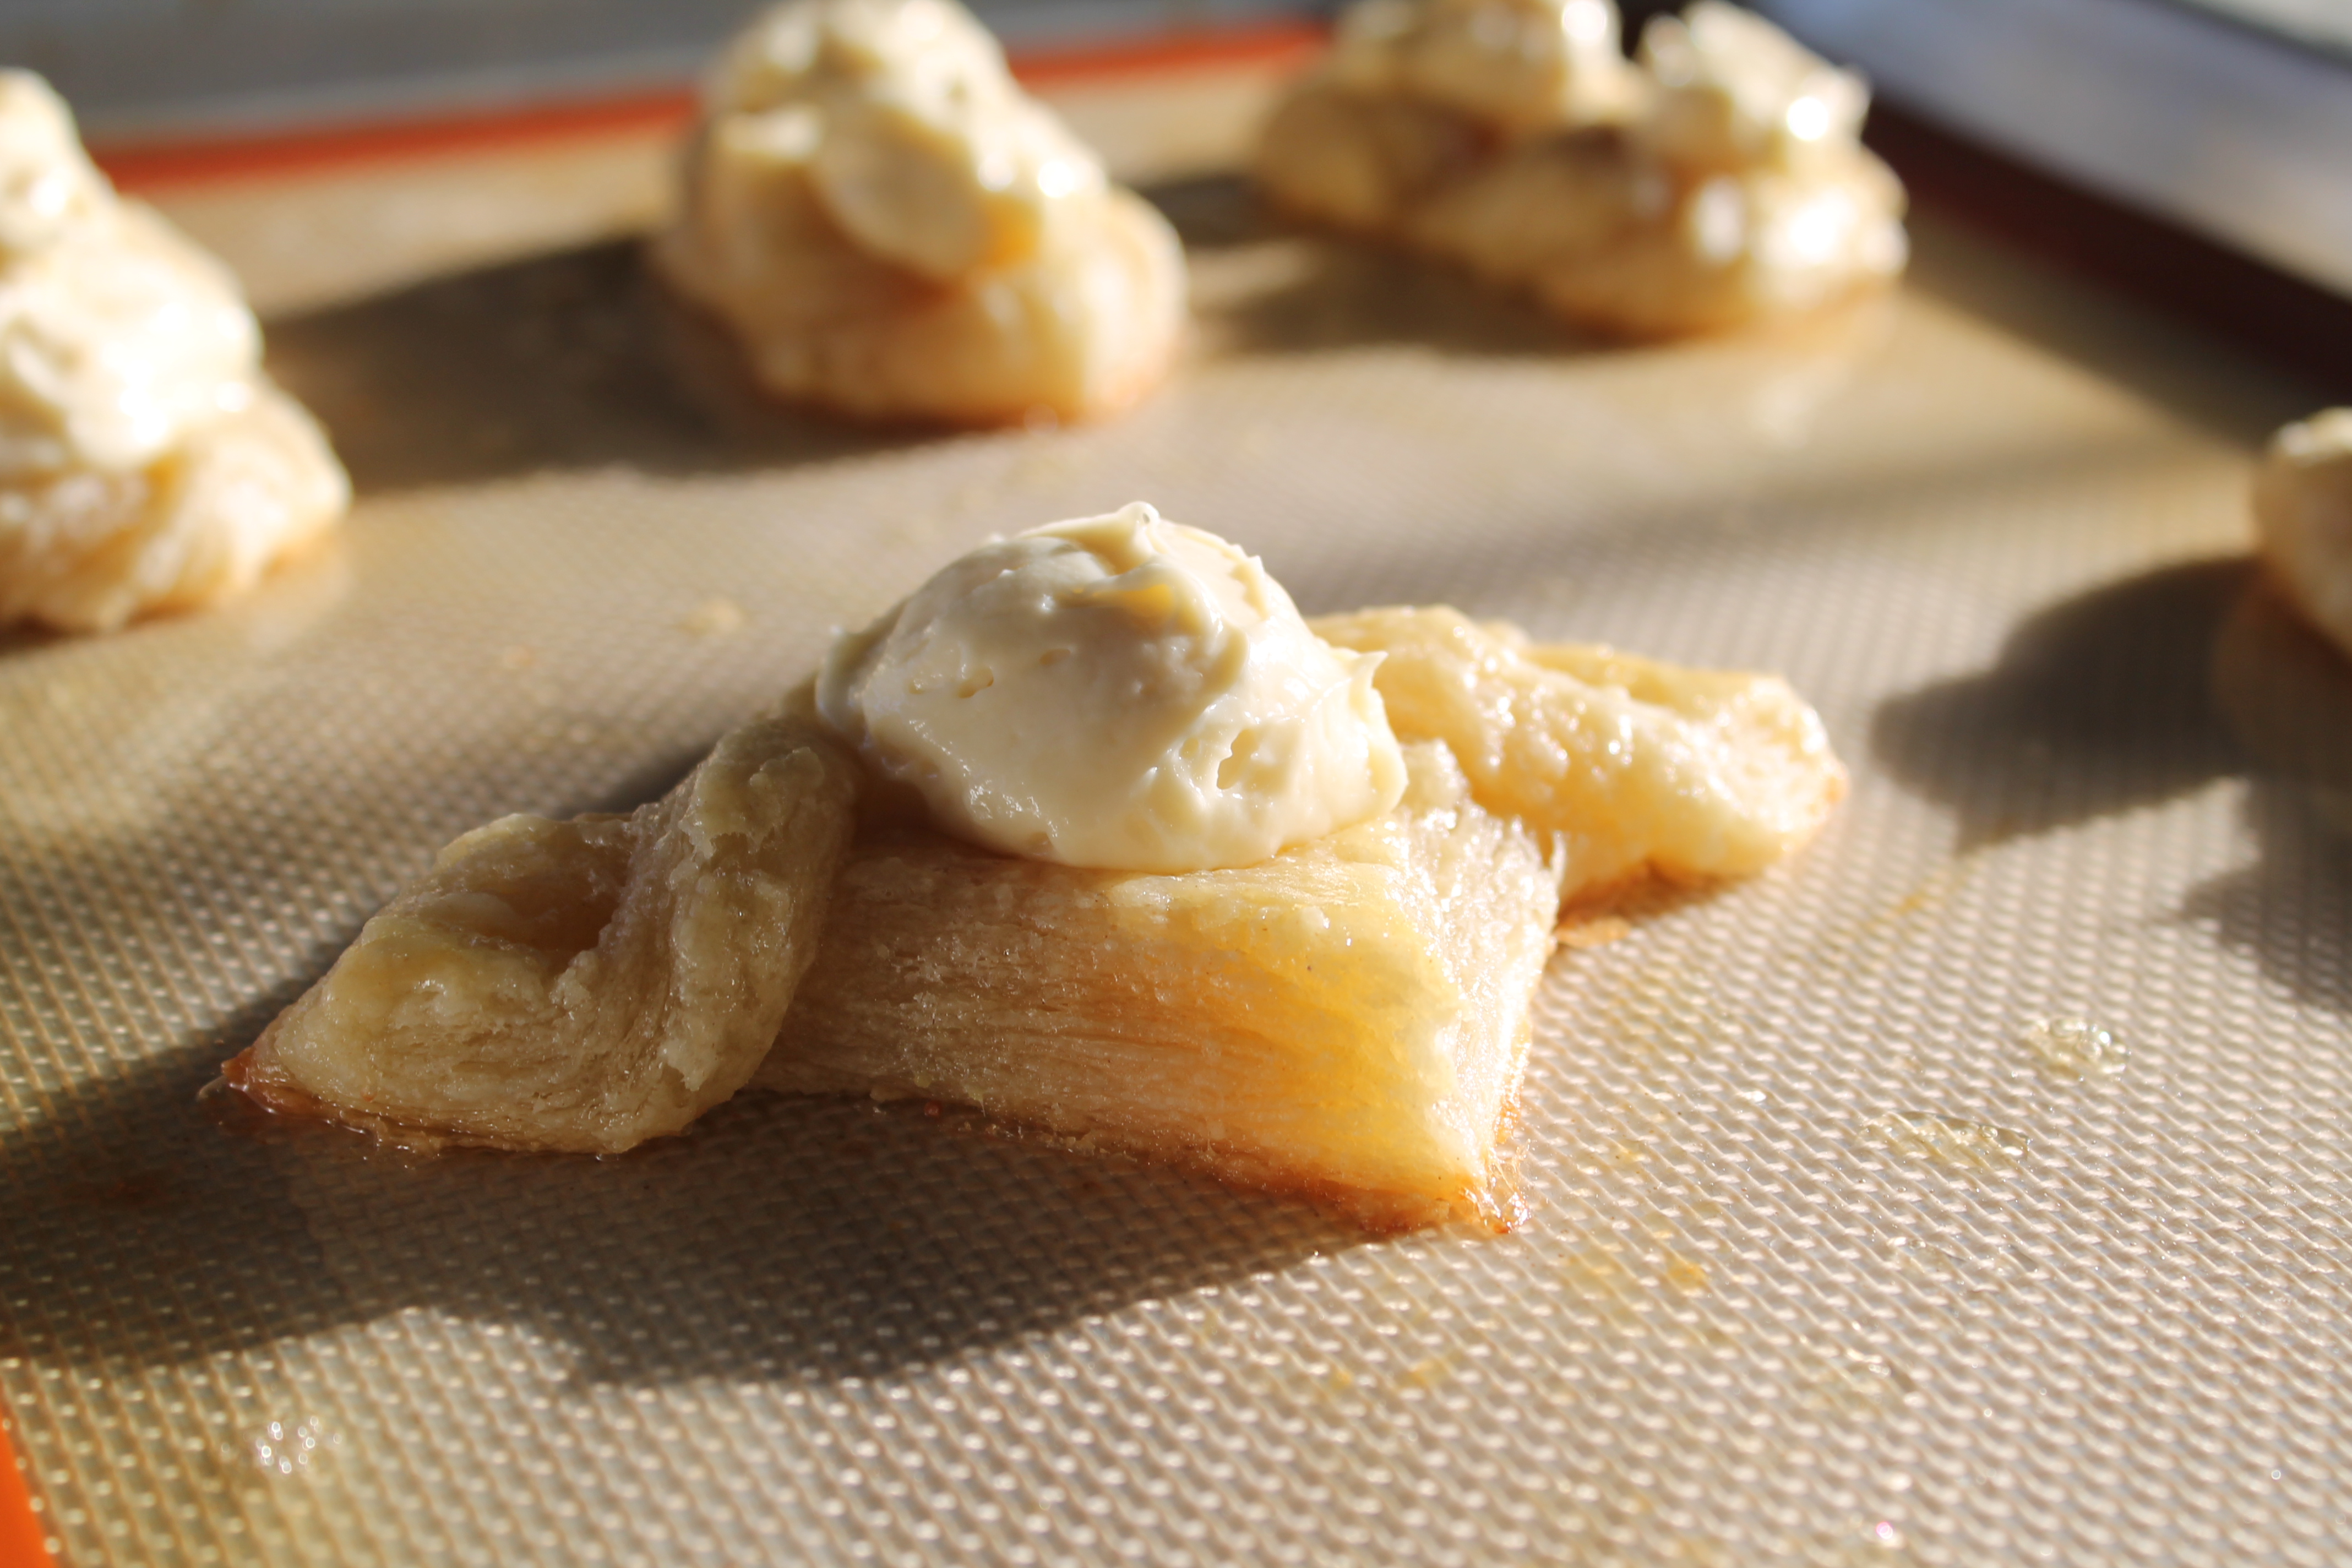 …And maybe the sun comes out from behind a cloud and bathes your pastries in a magical glow. Which should tell you that you are definitely doing something right. After you marvel at the danish basking in the light, you should get those beautiful babies back in the oven quickly.
 Bake another 10 minutes, until the filling is puffed and the pastries are golden.
Meanwhile, whip together a quick royal icing by beating an egg white with confectioner’s sugar until thick and white. Spoon this icing into a plastic piping bag (or! you could use a Ziploc sandwich bag if you don’t have piping bags on hand).
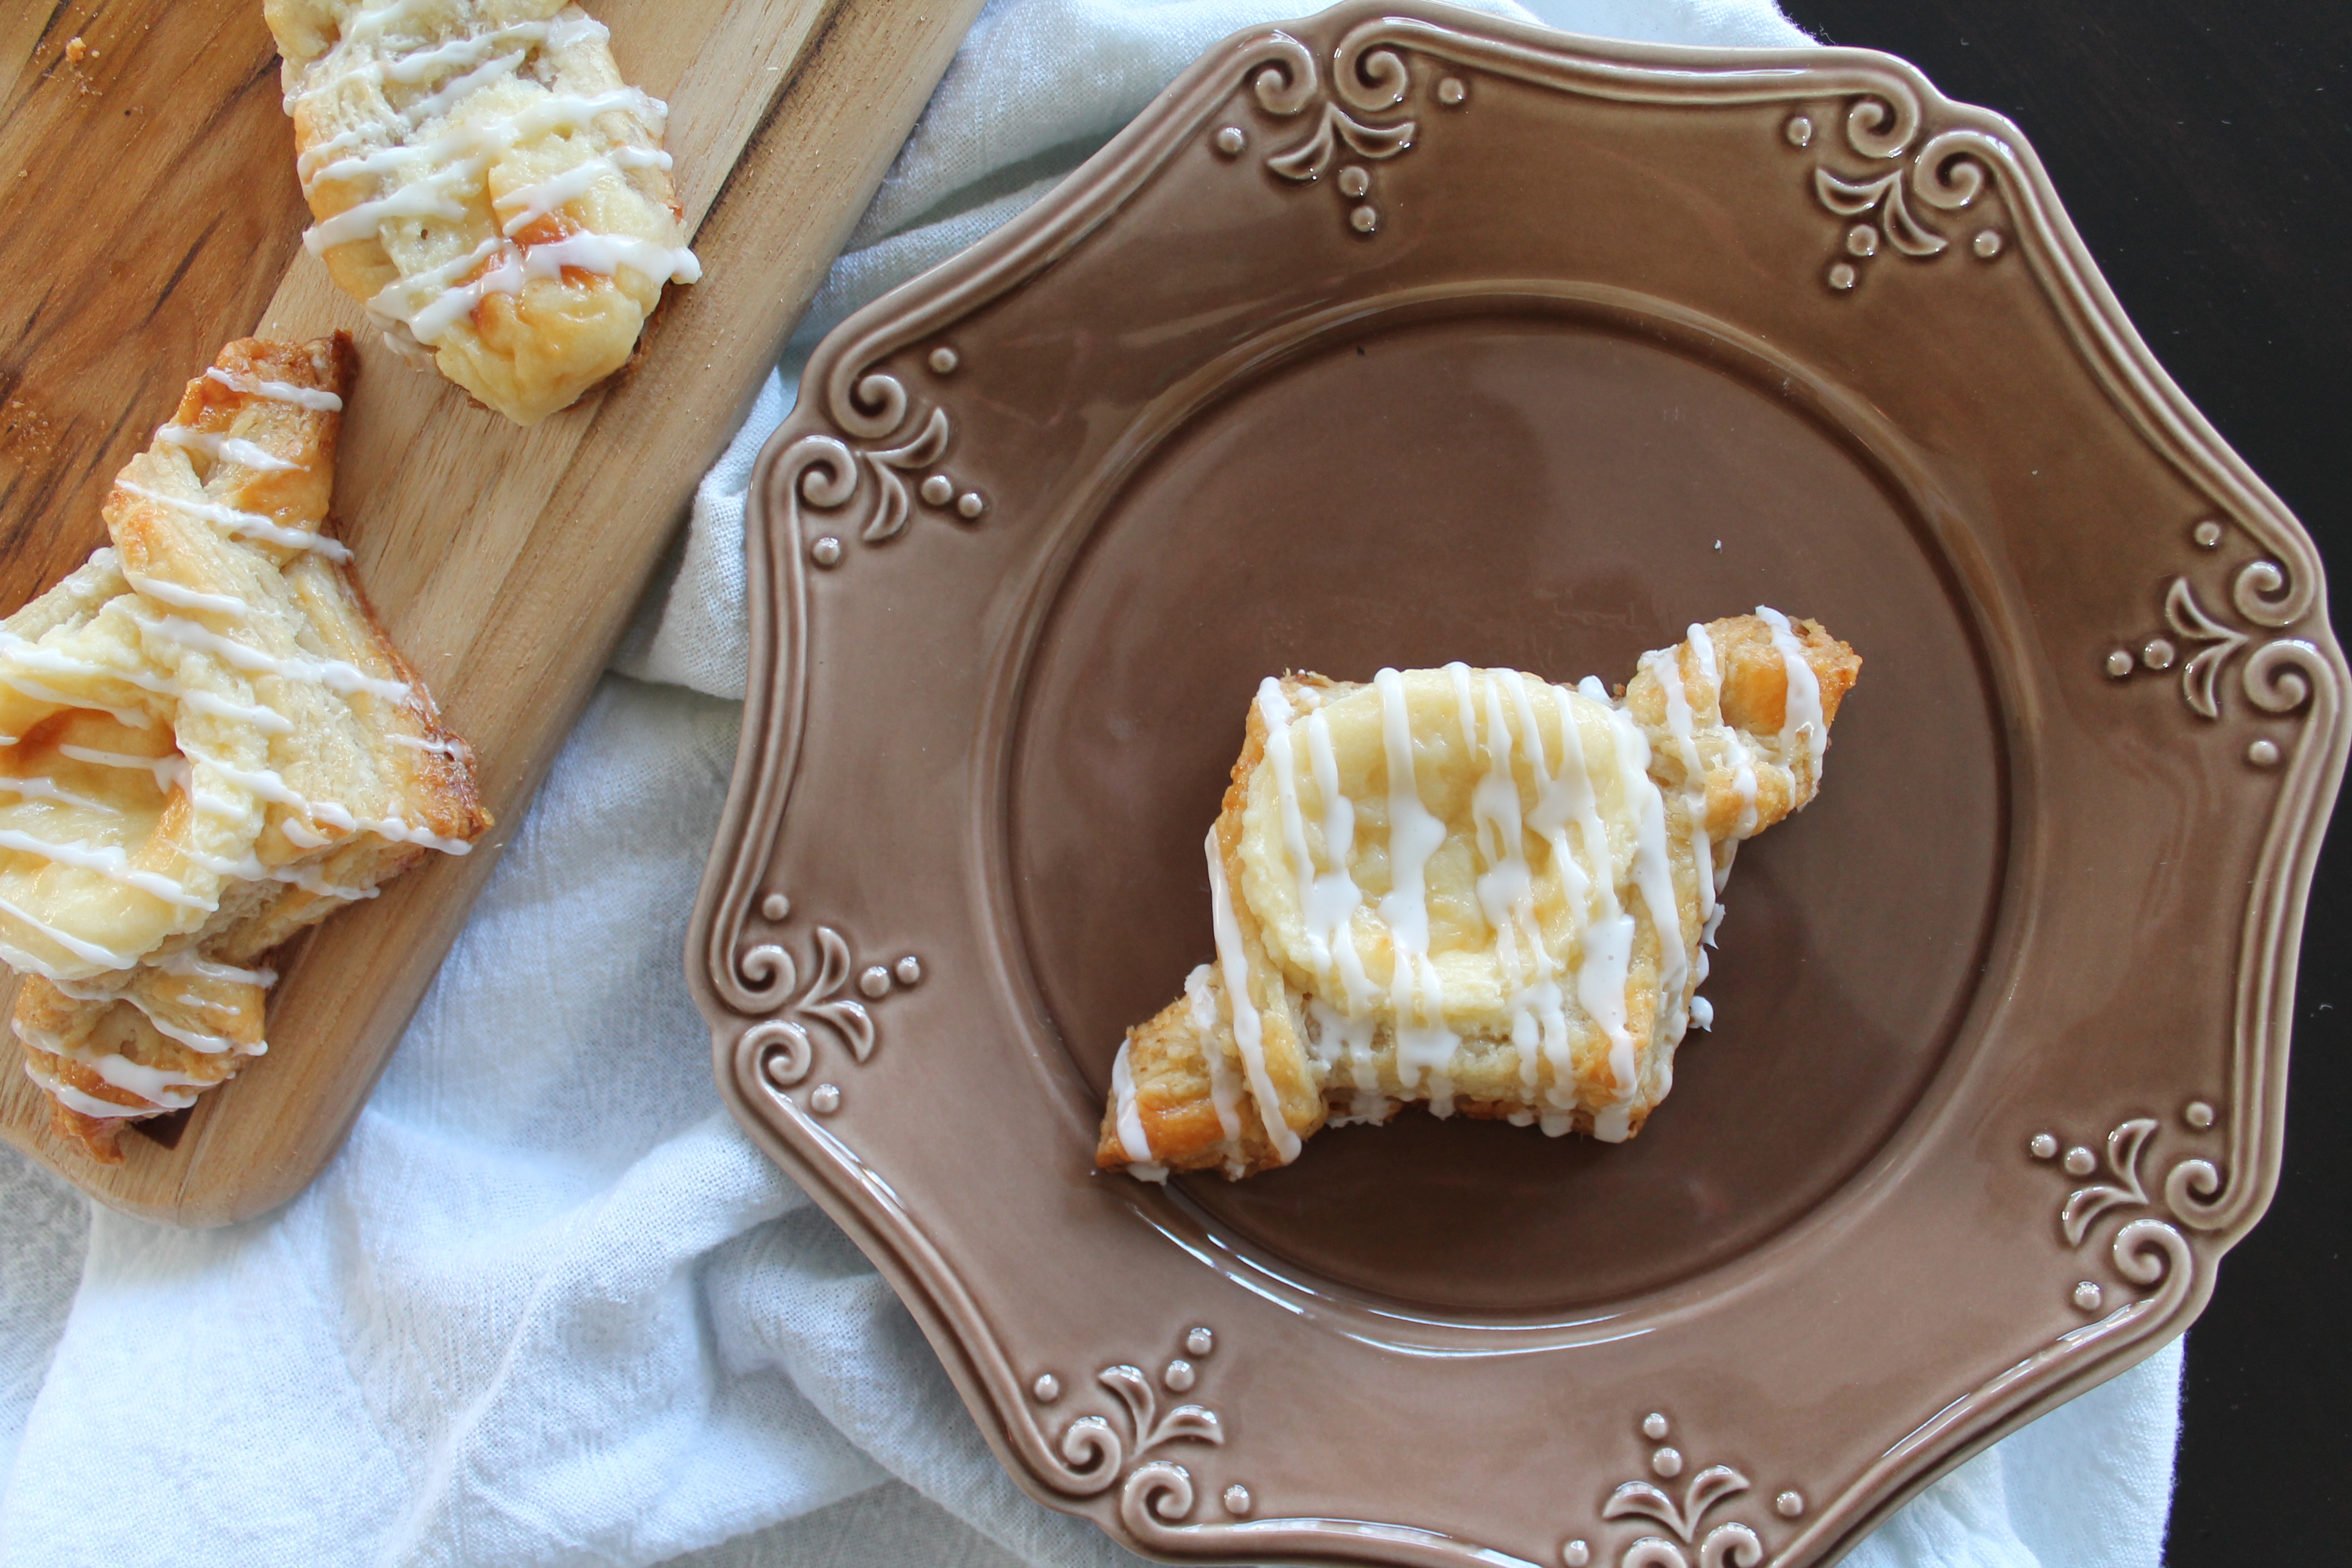
When the danish come out of the oven, drizzle them with the royal icing.
 Enjoy warm for a crisp, buttery, flaky mouth full of heaven. Or, save for the next day and enjoy a moist, sweet pastry that tastes like cheesecake. Either way, go make these immediately.
Easy Cheese Danish
adapted from Renee’s Kitchen Adventures
makes about 12
Ingredients:
1 lb. all-butter puff pastry
8 oz. cream cheese
⅓ cup sugar
1 egg, divided
2 tbsp. Greek yogurt
1 tsp. vanilla extract
pinch of lemon zest, up to ¼ tsp.
pinch of salt
egg wash (1 egg mixed with a splash of water)
1⅓ cups confectioner’s sugar
Directions:
Roll the puff pastry out to about ¼″ thick. Make sure it is an even thickness, with no holes or tears, and as close to rectangular as possible.
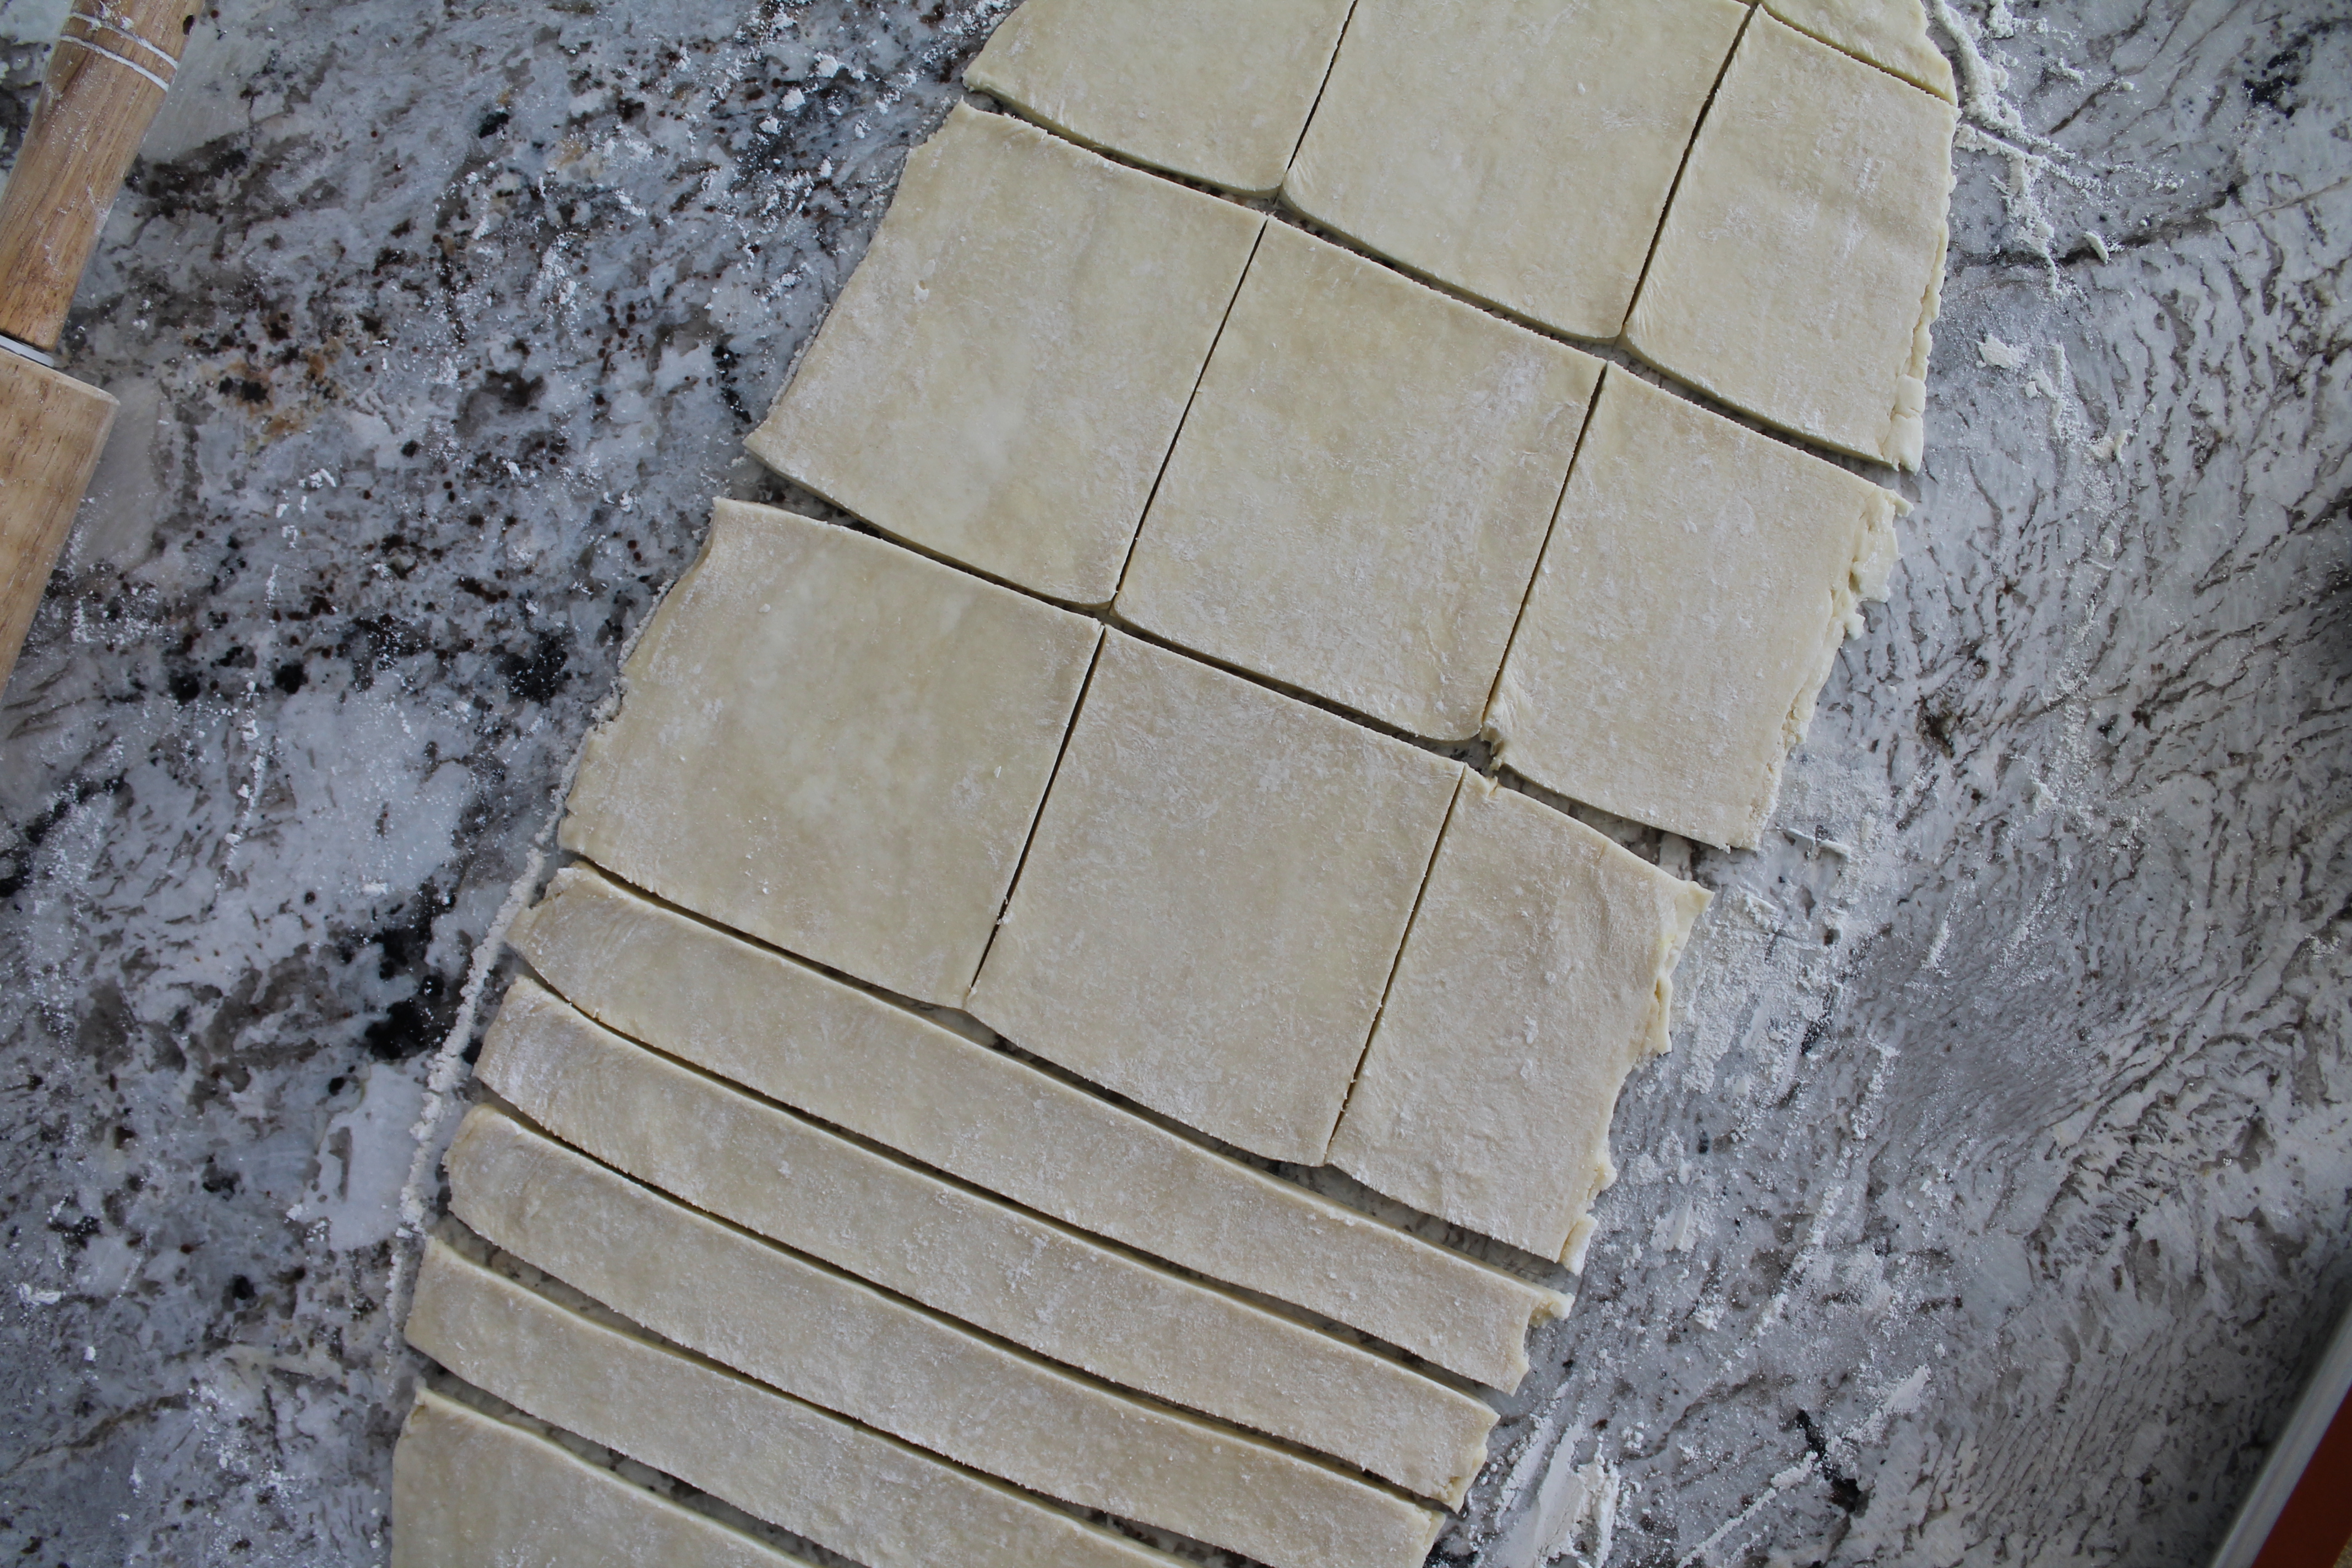
To shape into vol-au-vents, cut into 4″ squares using a roller or a very sharp knife. Transfer the squares to a parchment- or Silpat-lined baking sheet. Fold the squares in half diagonally, to form triangles. With a butter knife, cut slits parallel to the outer edges, about ½″ from the edge, running from the folded side up toward the right-angle corner of the triangle, stopping about ½″ from the tip of the triangle. Make sure to cut completely through both layers of pastry.
Unfold the pastry triangles and pull the outer edges across to the opposite sides of the smaller, inside square. The resulting shape will look a like overlapping or twisted diamonds.
Chill the shaped pastries for 15–30 minutes.
Meanwhile, make the filling! Beat the cream cheese with an electric mixer for 1 minute to soften. Scrape the sides of the bowl. Add the sugar and beat 1 minute more. Scrape the sides of the bowl. Add the egg yolk (reserve the egg white), Greek yogurt, vanilla, lemon zest, and salt. Beat to combine. Cover and chill until needed.
Heat the oven to 400°.
Pull the pastries out of the refrigerator and brush with egg wash all over, concentrating particularly on the tips of the diamonds.
Par-bake for 10–12 minutes, until barely puffed.
Remove the pastries from the oven. Working as quickly as possible scoop the cream cheese filling into the center cavity of the pastries.
Return the danish to the oven and bake another 10 minutes, until the pastry is golden and the filling is slightly puffed.
Meanwhile, make a royal icing by beating the reserved egg white with the confectioner’s sugar until thick and creamy. Scoop the royal icing into a piping bag.
When the pastries come out of the oven, immediately transfer to a cooling rack. Drizzle generously with the icing.
Allow to cool 10 minutes before serving.
Store in an airtight container up to 3 days.
Enjoy!
- One year ago: Vegetarian Shepherd’s Pie
- Two years ago: Coconut Cream Pie
- Three years ago: Peanut Butter Cream Pie
- Four years ago: Black Bottom Cupcakes

9 comments to “Easy Cheese Danish”
Kate - March 14, 2016
Those are the cutest little Danish! You have a lot of patience to get them looking that way, I am sure! Great SRC selection.
Melissa - March 14, 2016
Believe it or not, the shaping went more quickly than the rolling (even with a preschooler helping)! Super easy.
Sarah@WellDined - March 14, 2016
Gorgeous!
Melissa - March 14, 2016
Thanks Sarah!
reneeskitchenadventures - March 14, 2016
I’m so glad you attempted the cheese danish. It really is a super easy recipe and one of my son’s favorite things I make. We do love them with the ricotta for a classic taste, but I’m going to try it your way with Greek yogurt next time for something different.
Melissa - March 14, 2016
Thanks! I have been really obsessed with this Cabot 10% Greek because it is so creamy and mild. Plus, I love the extra protein that Greek yogurt offers when I am eating an otherwise sweet and insubstantial treat!
Corina - March 14, 2016
Well done for doing all that experimenting! I’d never thought to parbake puff pastry before but now I will think about doing that next time I’m trying a similar recipe.
Linda @ 2 Cookin' Mamas - March 14, 2016
I can’t believe all the different shapes you made with your puff pastry – such artistry! Cheese danish has always been one of my favorites and I just might try this recipe using your great hints. They look delicious! Want some company for your morning coffee break? 🙂
chefceaser - March 15, 2016
Reblogged this on Chef Ceaser.