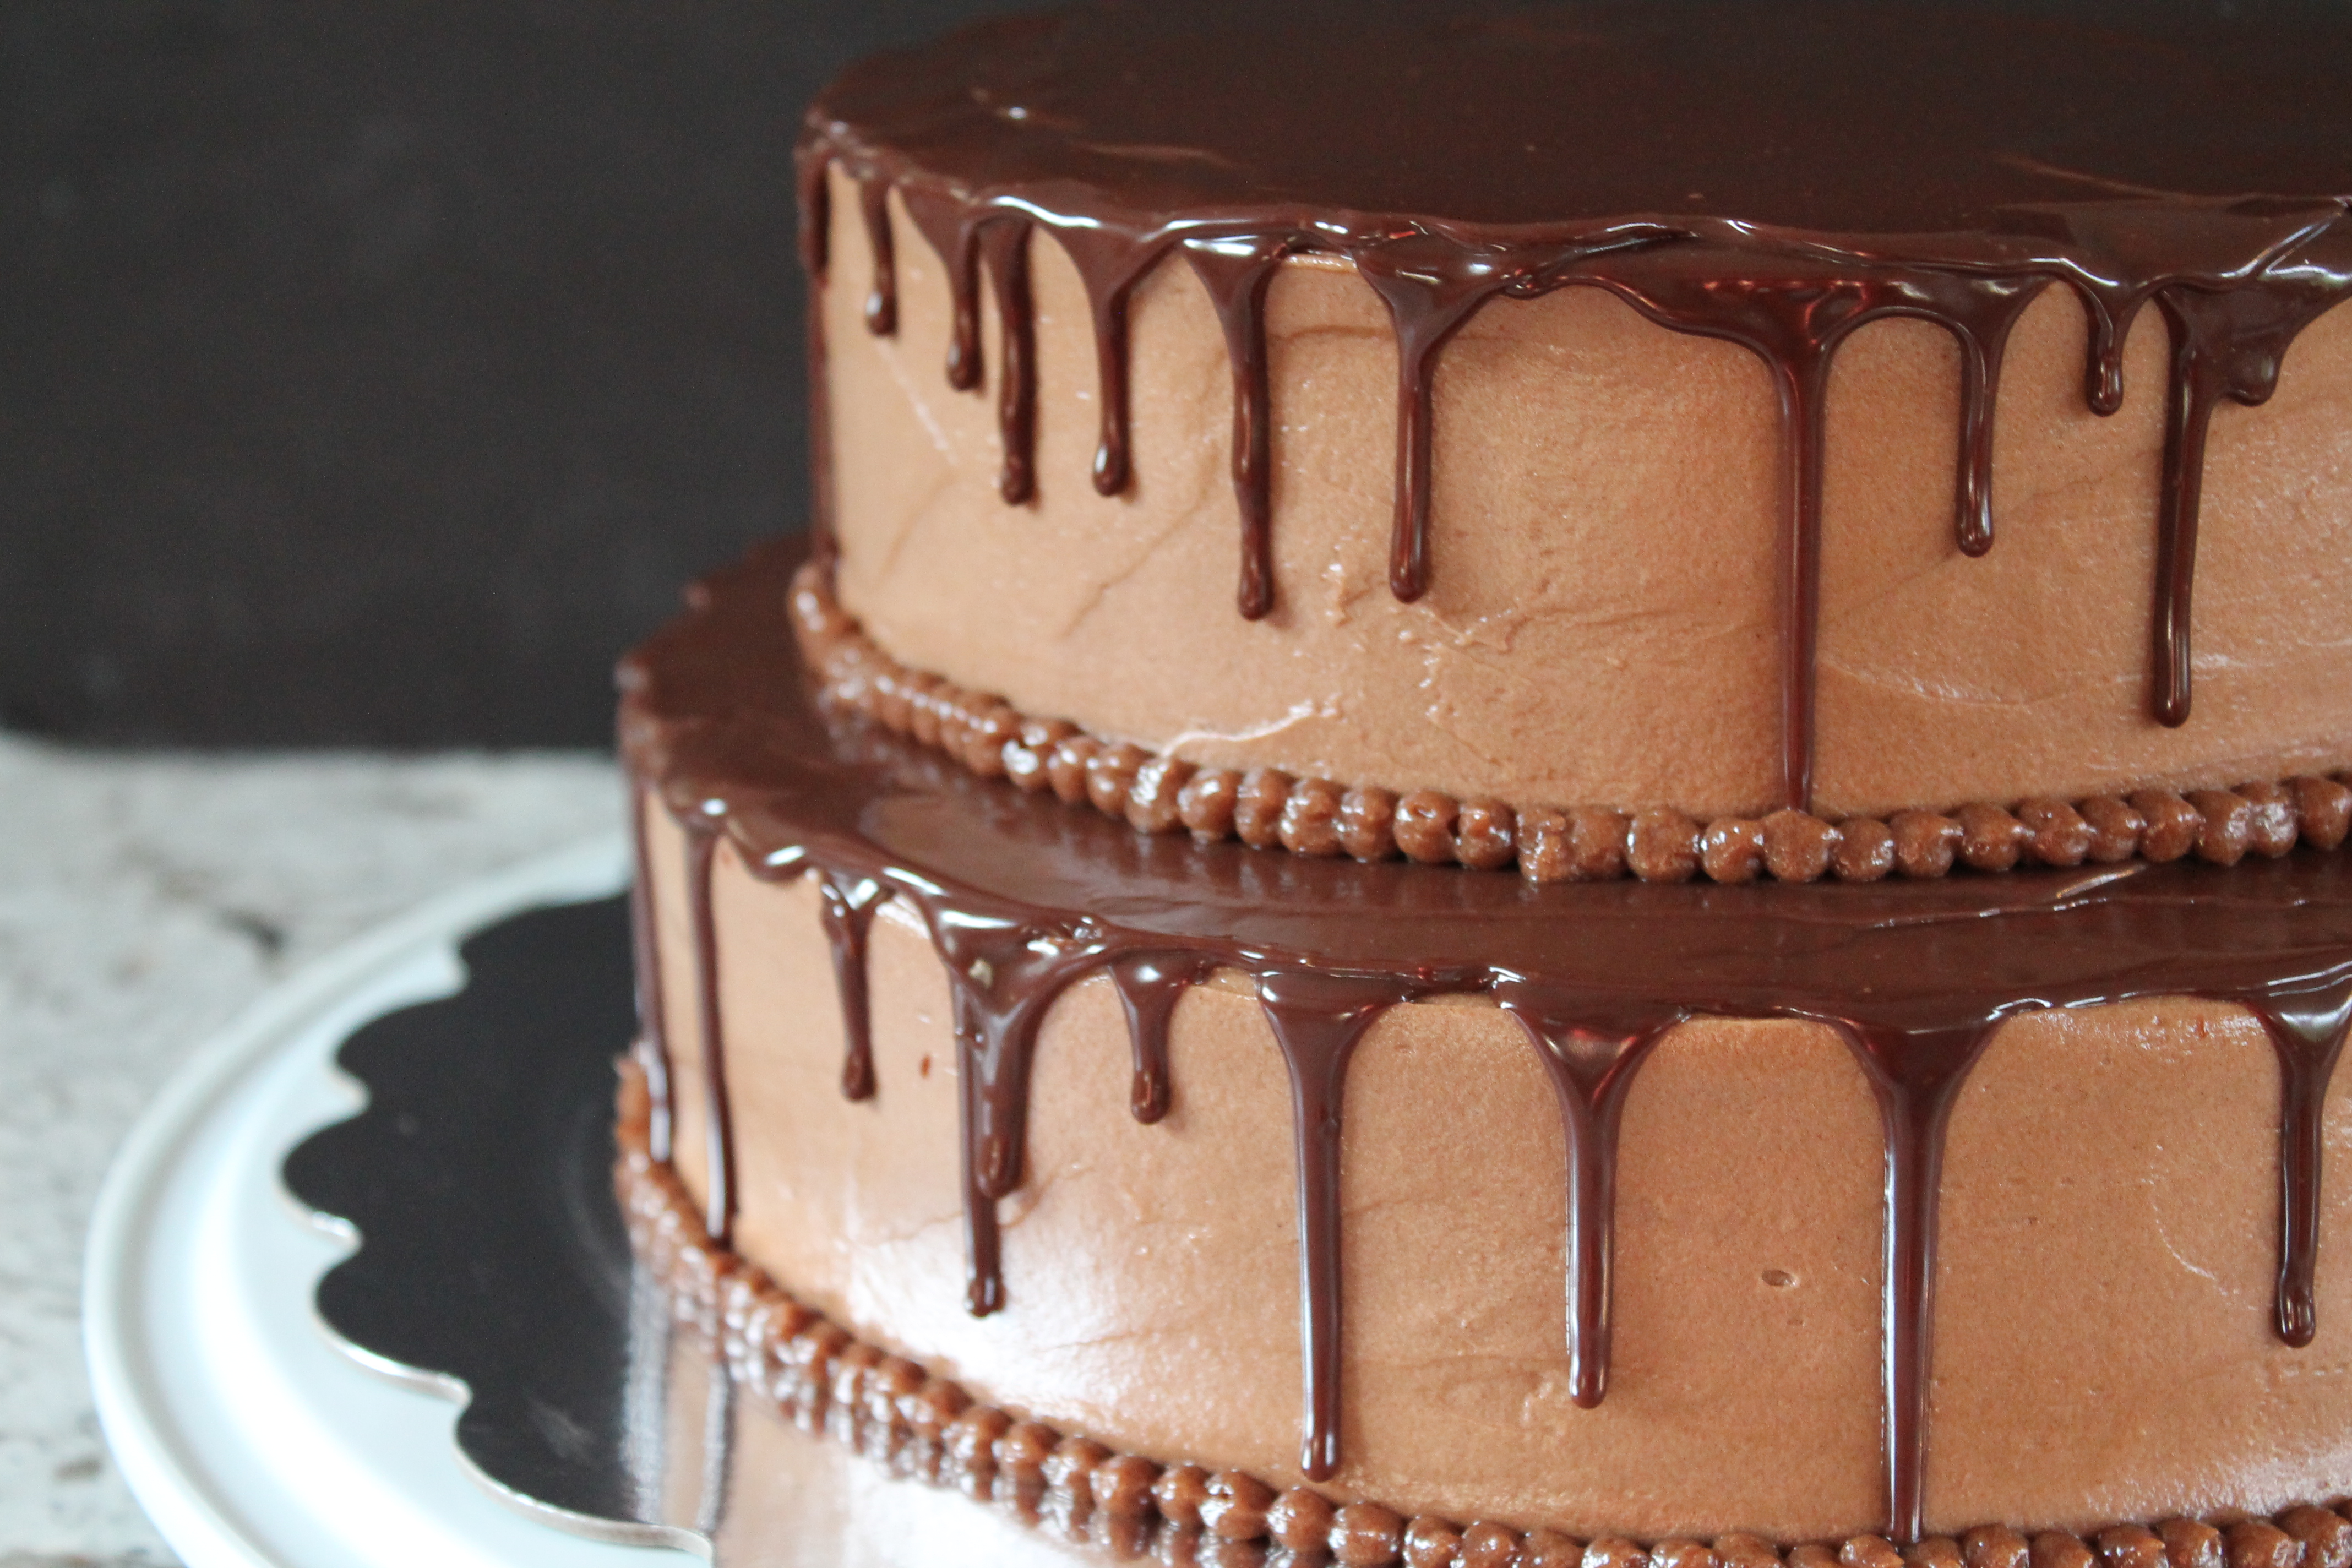
Last summer I made a wedding cake! Or, to be more precise, I made a bridal cake, a groom’s cake, and several sheet cakes for the absolutely gorgeous wedding of some friends of mine! The bride used to babysit my children, and her mother is one of my dearest friends and mentors.
It was such a labor of love. Delicious, chocolatey labor.
And today I am sharing part two of my series about my wedding baking adventure!
Last time I shared with you the ups and downs of my planning stages, including the timing of making all this happen. Today I want to share with you the recipes for the groom’s cake: a two-tiered vanilla cake with chocolate ganache filling, chocolate mousse frosting, and a shiny chocolate drizzle, topped with a chocolate fish to honor the groom’s favorite pasttime.
Yellow cake with chocolate frosting has long been dear to my heart. It’s one of my all-time favorites, and I have very high expectations. The cake must be moist and richly vanilla, with a tender but not spongey crumb. The frosting must be rich and silky and so, so chocolatey.
But I will admit it: when the groom decided on yellow cake with chocolate frosting for his cake, I was a little nervous. I knew I had a killer chocolate frosting recipe, one that I turn to again and again, but a favorite yellow cake recipe was a different story. Yellow cake can dry out easily and bake unevenly. I’ve tried so many yellow cake recipes from so many amazing bakers, from Rose Levy Berenbaum to to Christina Tosi to Deb Perelman.
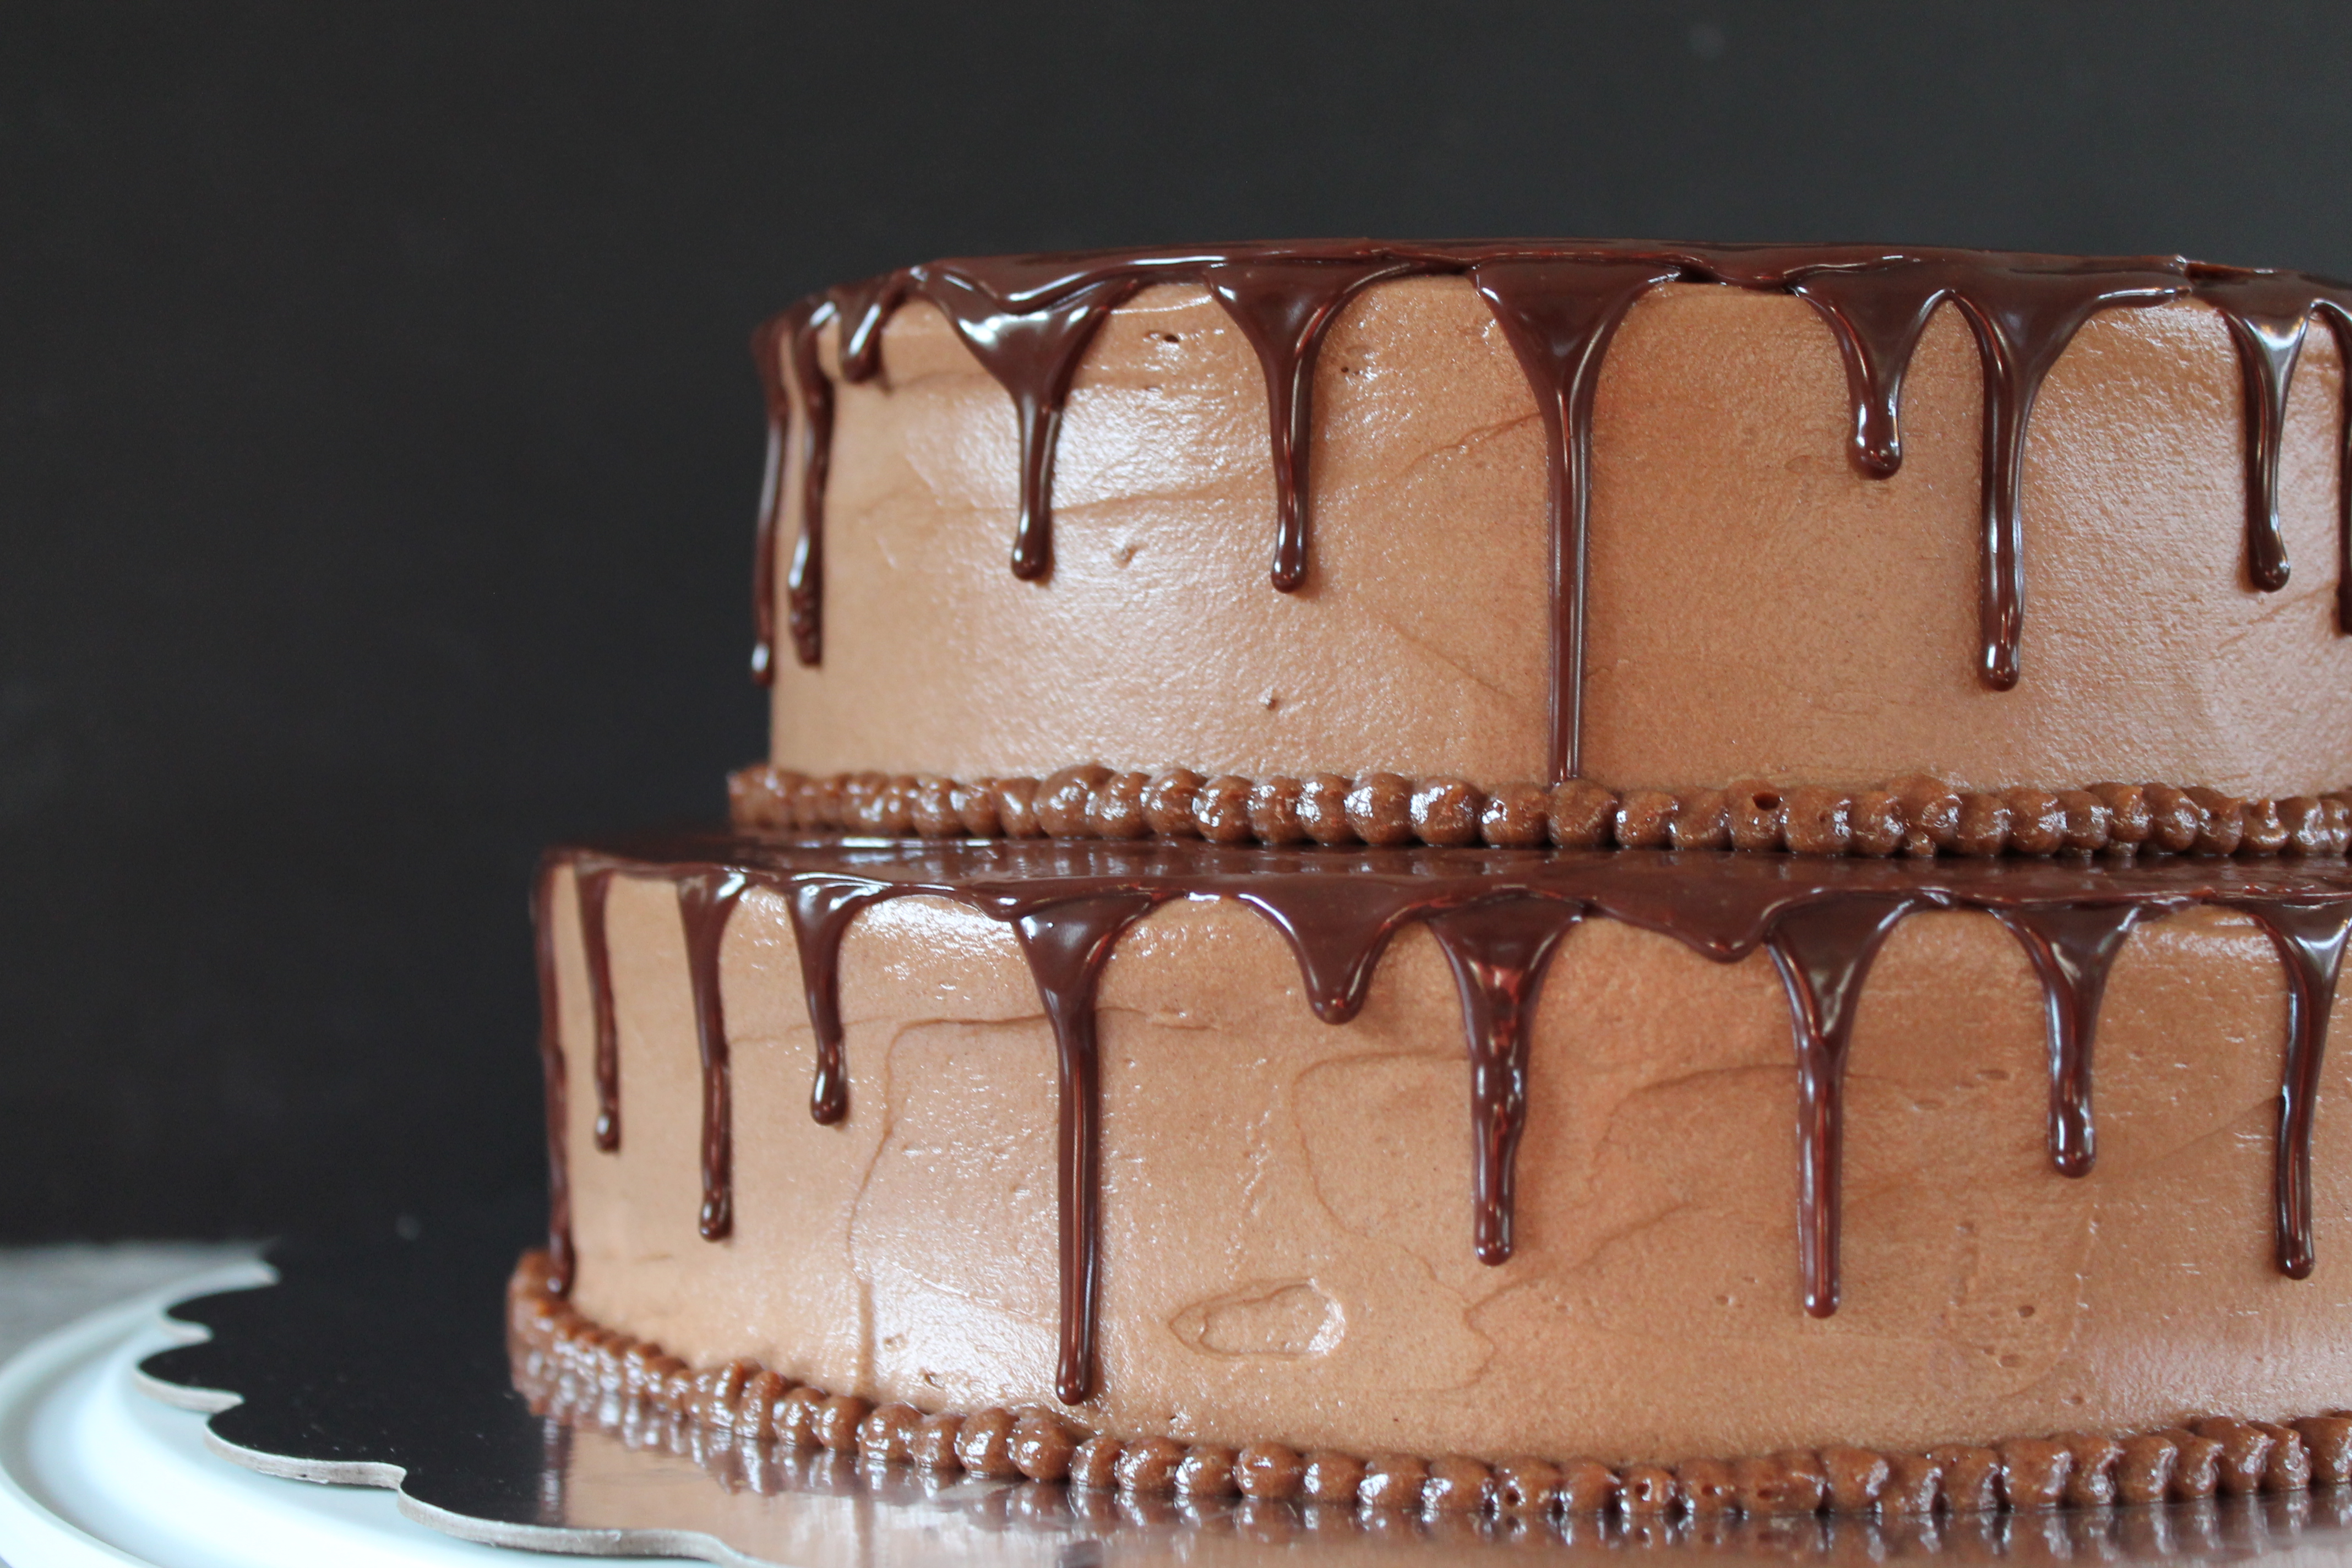 I wanted to bake something that would make my eyes roll back in my head, it was that delicious. And thanks to Shirley Corriher’s baking bible, BakeWise, I finally found a vanilla cake recipe that is tender and light, so sweet and so moist.
This cake is a two-stage method cake, as opposed to a creaming method cake. With the creaming method, which is probably the best-known cake baking method, you beat butter and sugar together, then add eggs, and then alternate beating in flour and liquid until you have a smooth batter. Fat + sugar first = creaming method.
But with the two stage method, you start by blending together all the dry ingredients (flour, sugar, leaveners, and salt), then you add all the fats and mix, to grease the flour proteins a little, which results in a very tender cake because it inhibits the glutens from forming! After you have a rather thick dough of flour+butter, you add a splash of liquid, followed by eggs, followed by the reamining liquid.
Except, in this amazing yellow cake recipe, some of the liquid is whipped cream. Seriously, I will die from delight.
I whipped together double batches of Corriher’s recipe to make the process much less time consuming. I needed three double batches, one for the groom’s cake and two for the layered sheet cakes. Below I am posting the double version of the cake recipe. Each (double) batch will make enough cake for either a thick, two-layered sheet cake, or a small, tiered cake comprised of 10″x2″ and 8″x2″ rounds.
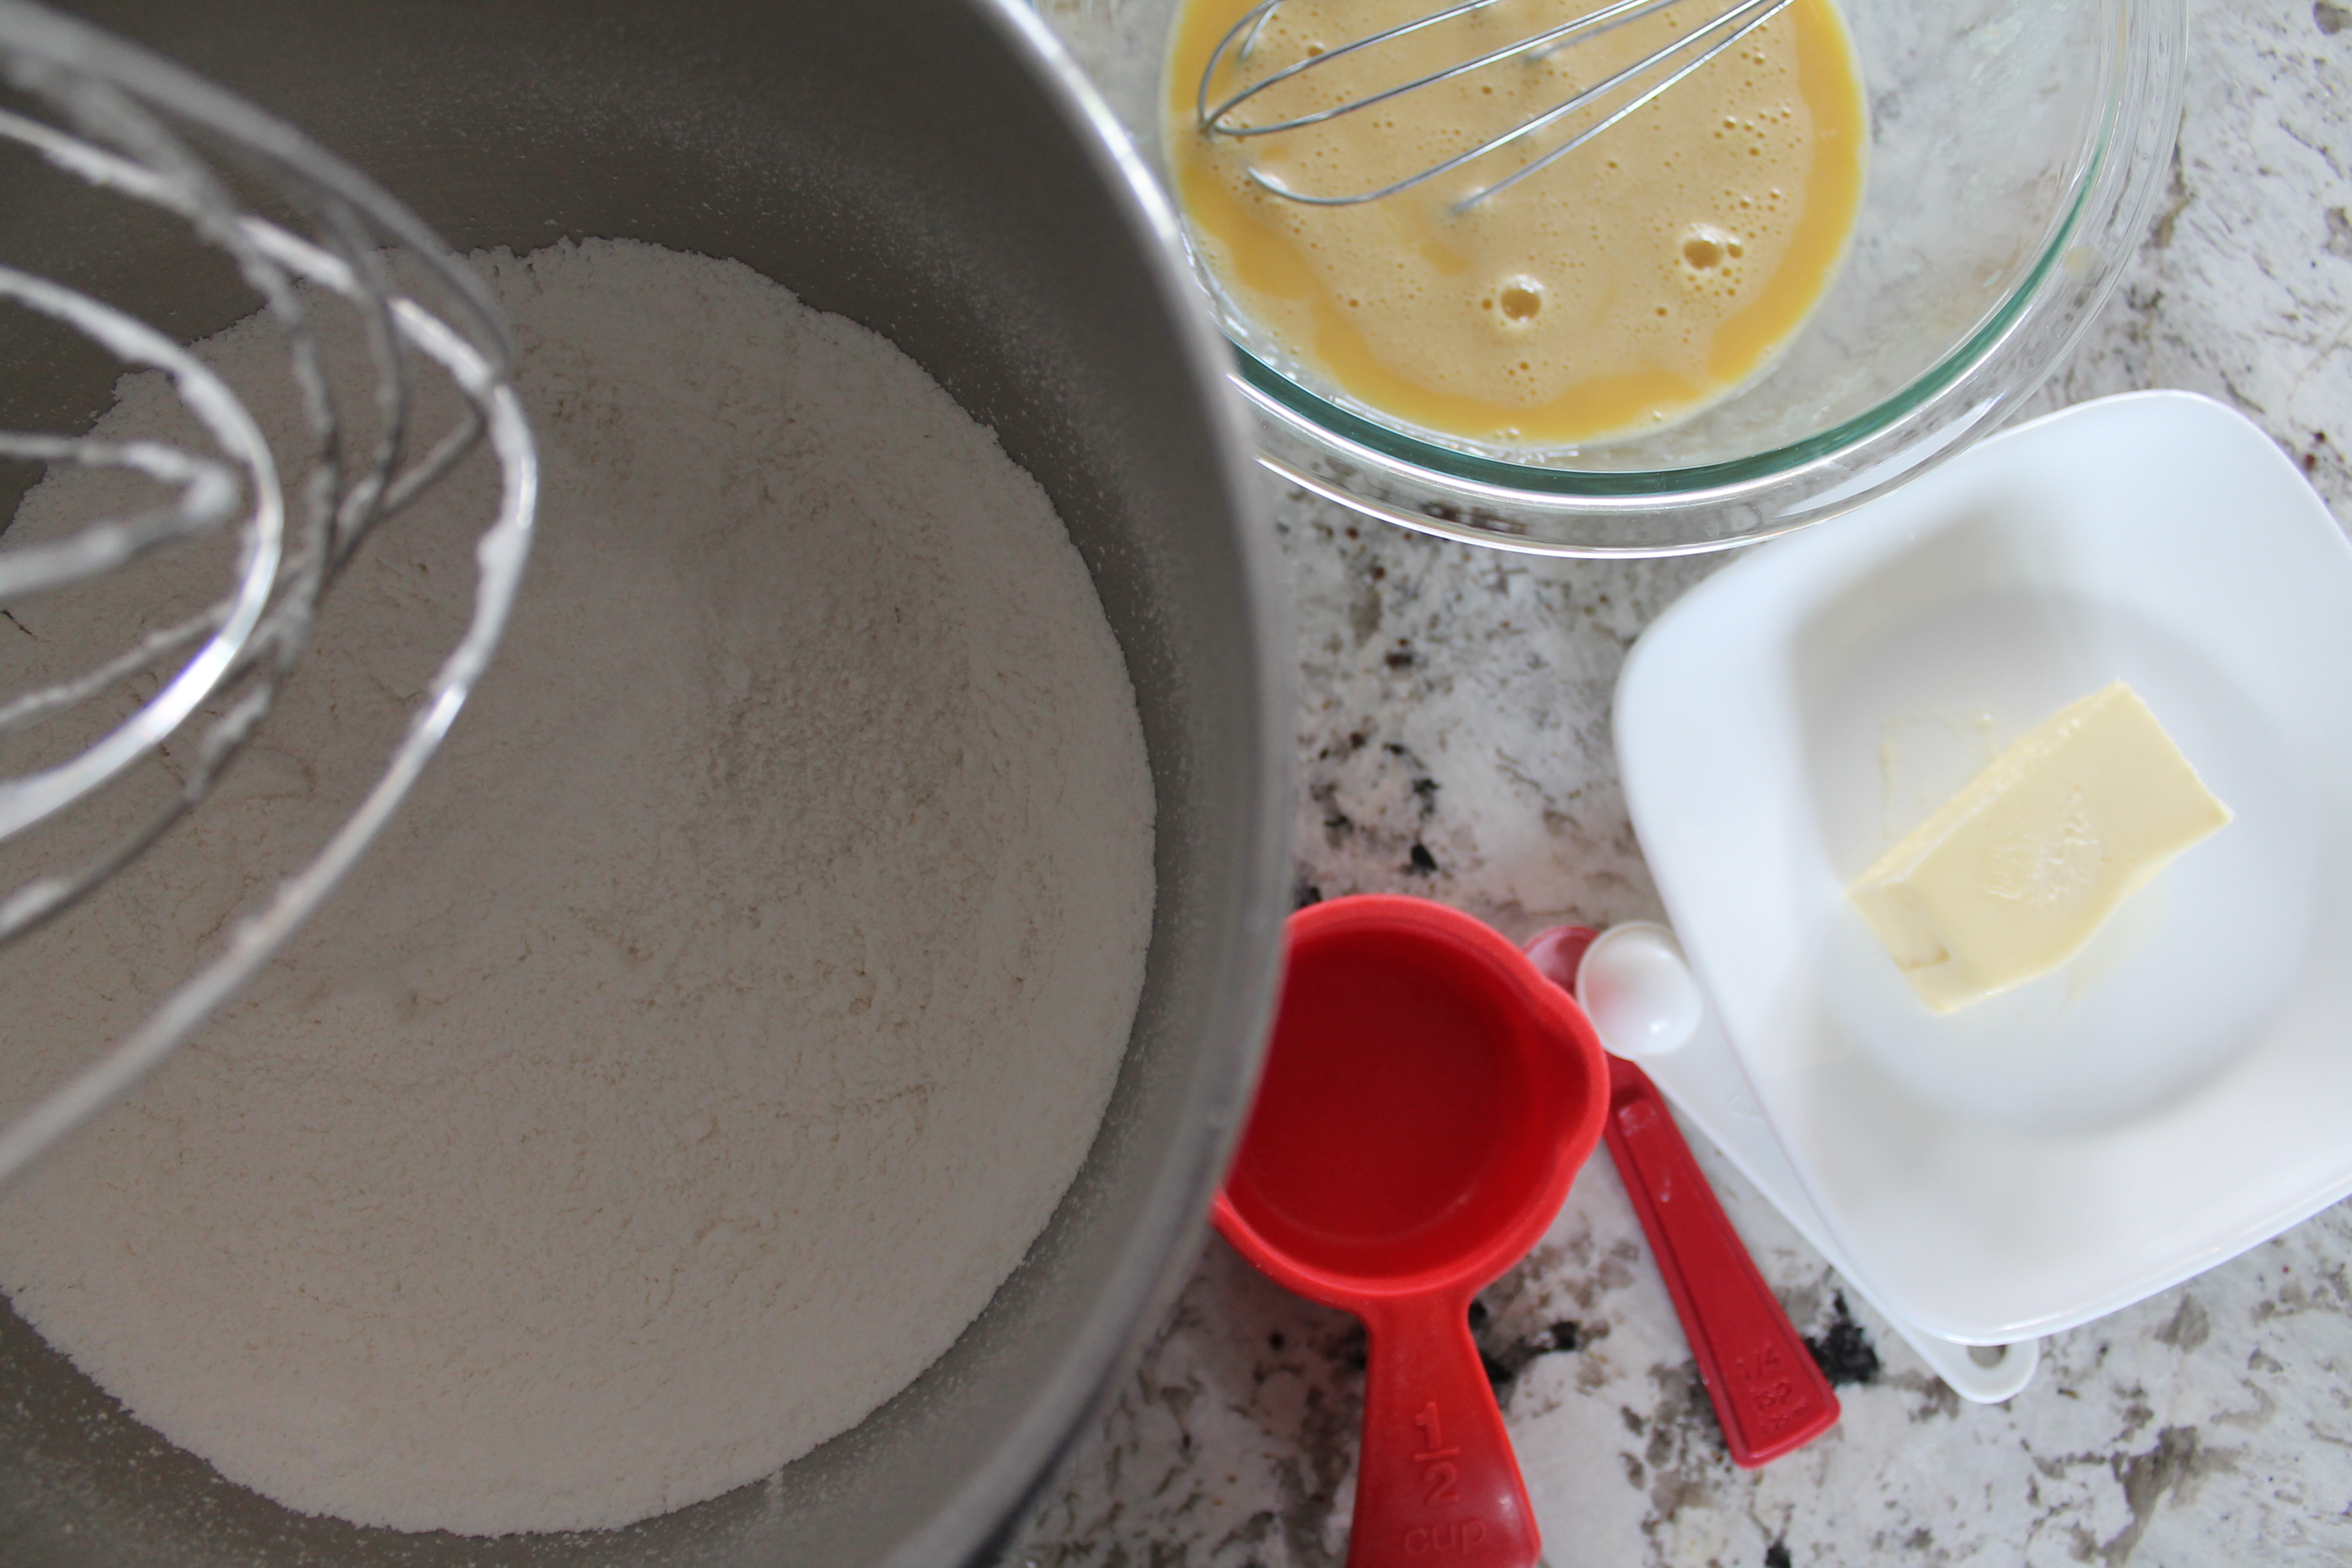
Start by whisking together the cake flour, sugar, baking powder, and salt. I do not recommend you use regular, all-purpose flour here, because it will make the cake tough, and it will affect the rising. I like Pillsbury Softasilk and Swans Down cake flours, but it is imperative you not use a pre-blended cake flour, which will include starches and leaveners that you do not want! If you absolutely cannot find cake flour, you may use a smaller amount of all-purpose: subtract 2 tbsp. from each cup of all-purpose flour in order to achieve a comparable protein count to cake flour.
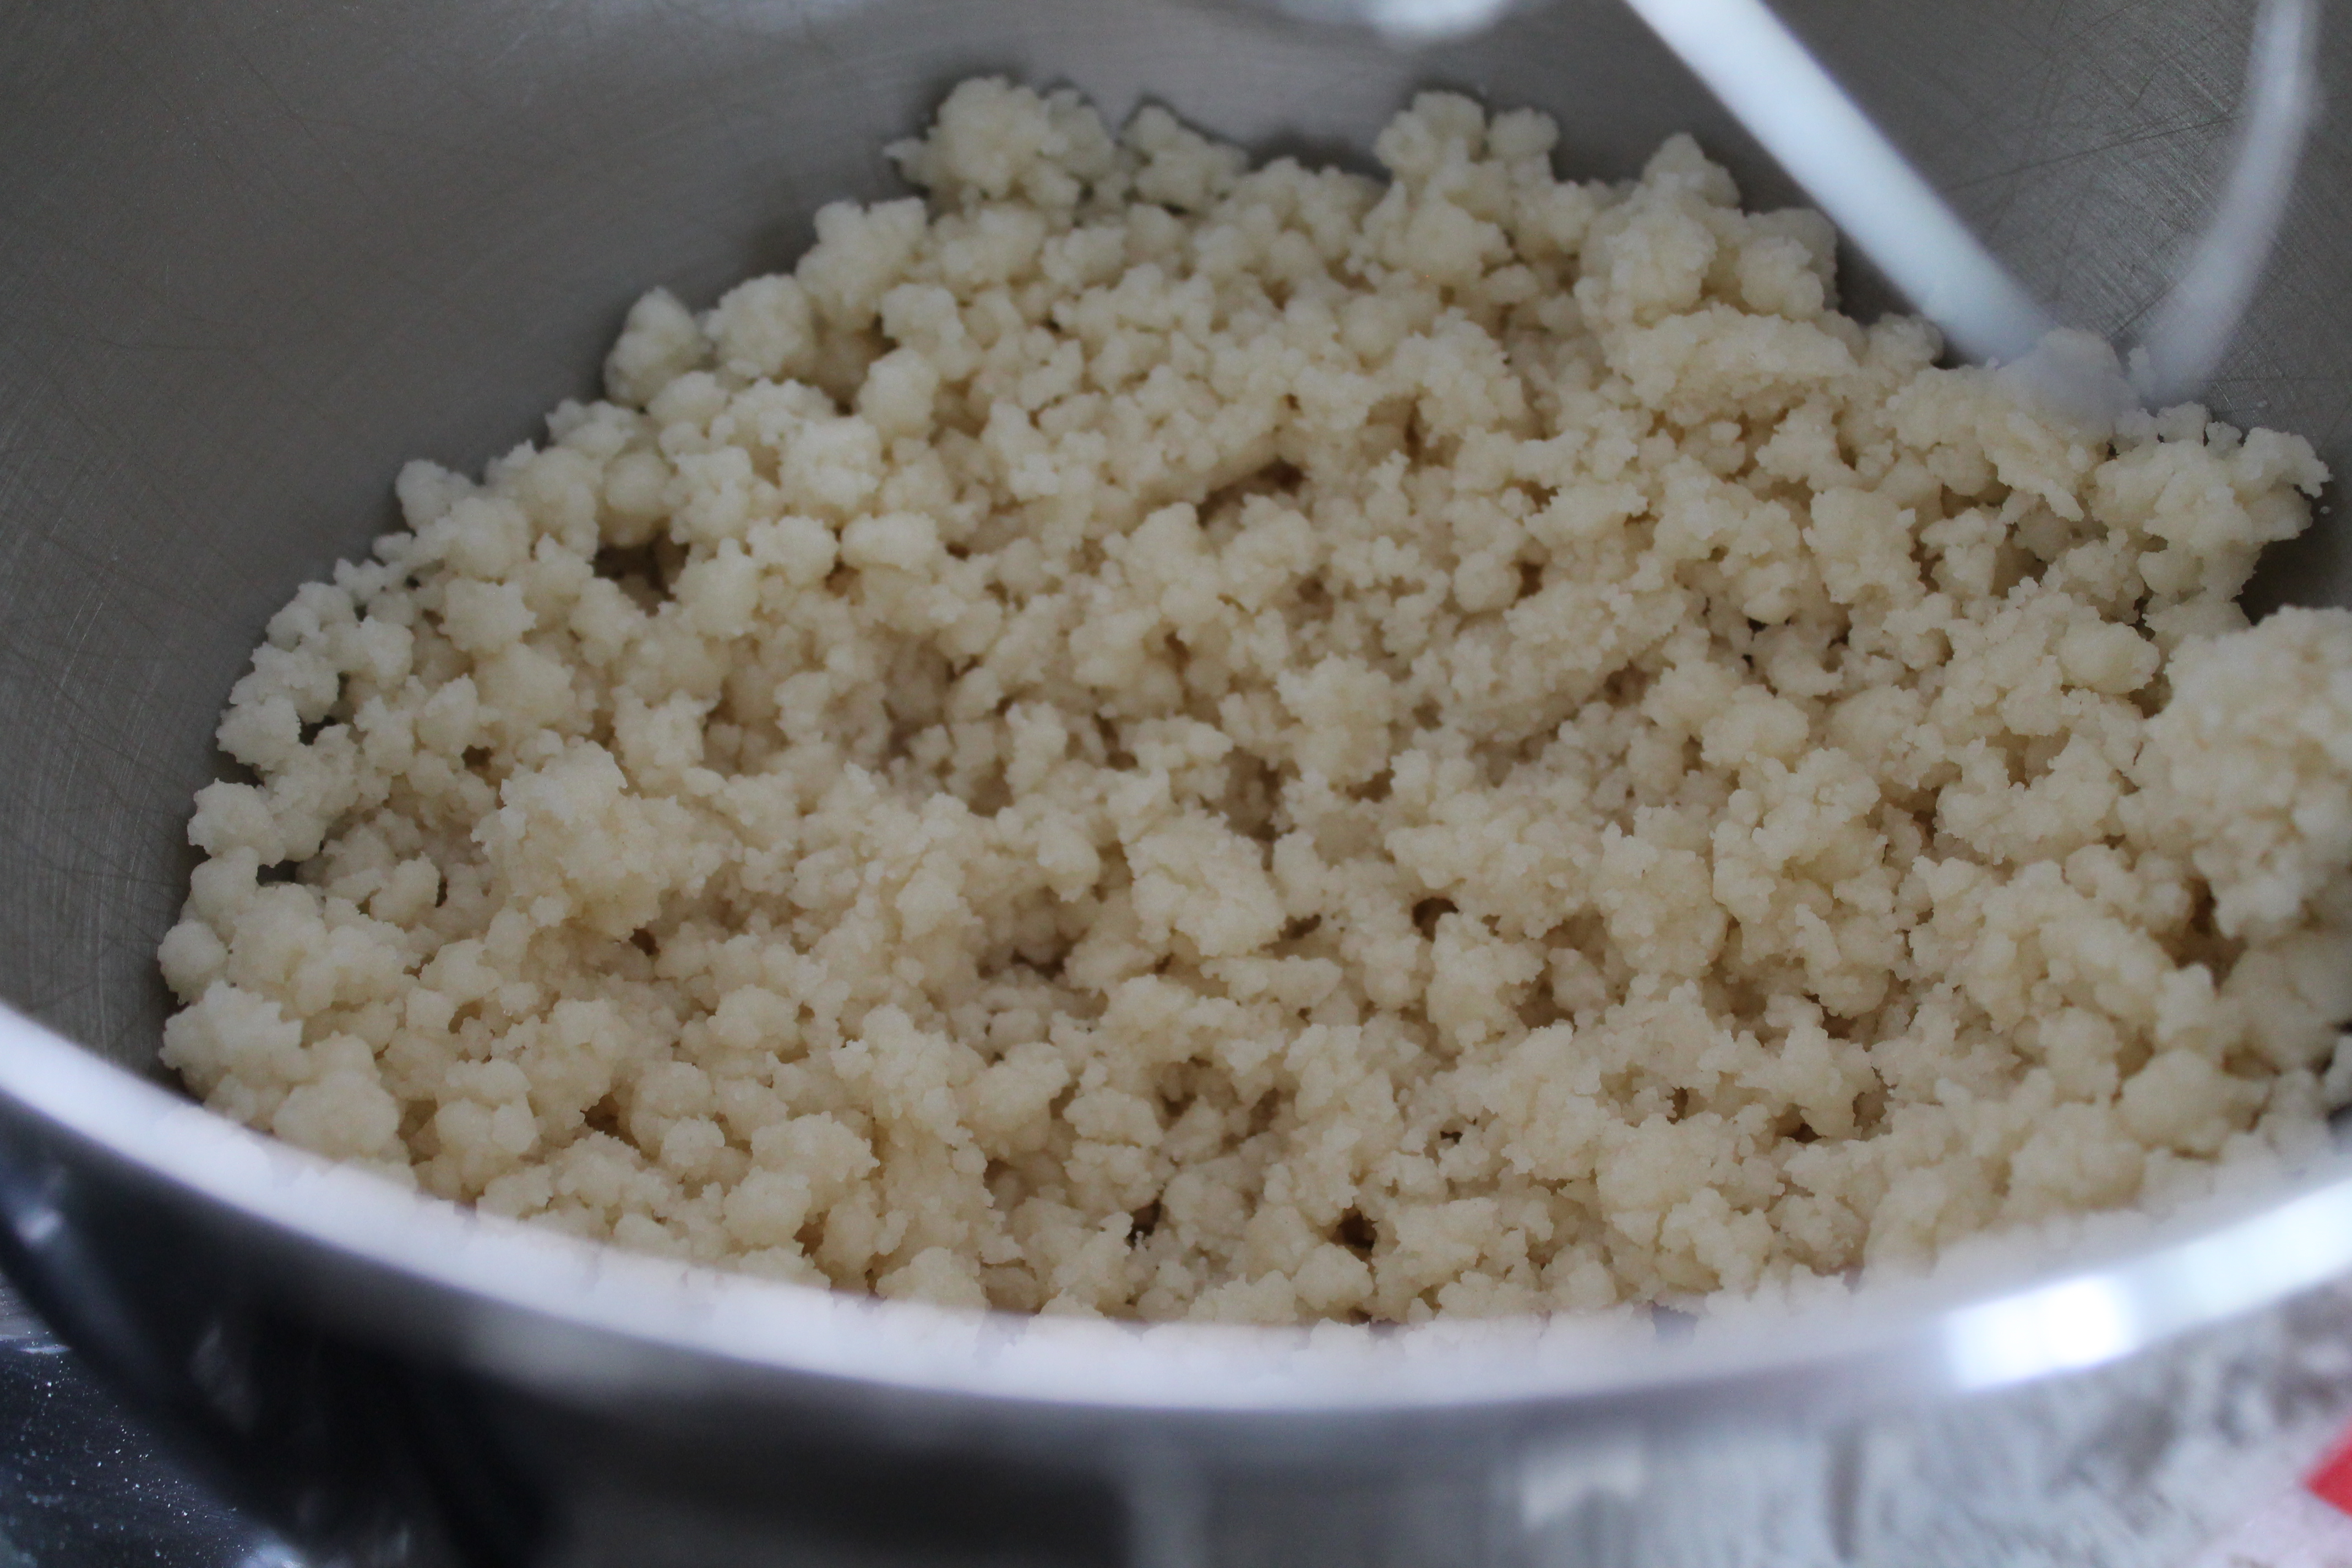
Add all the room temperature butter and the oil (there is less than you’d expect, isn’t there?), along with 2 tbsp. buttermilk, and mix on slow speed until the flour looks slightly sandy. Beat for 90 seconds, until the mixture resembles a coarse pile of pebbles.
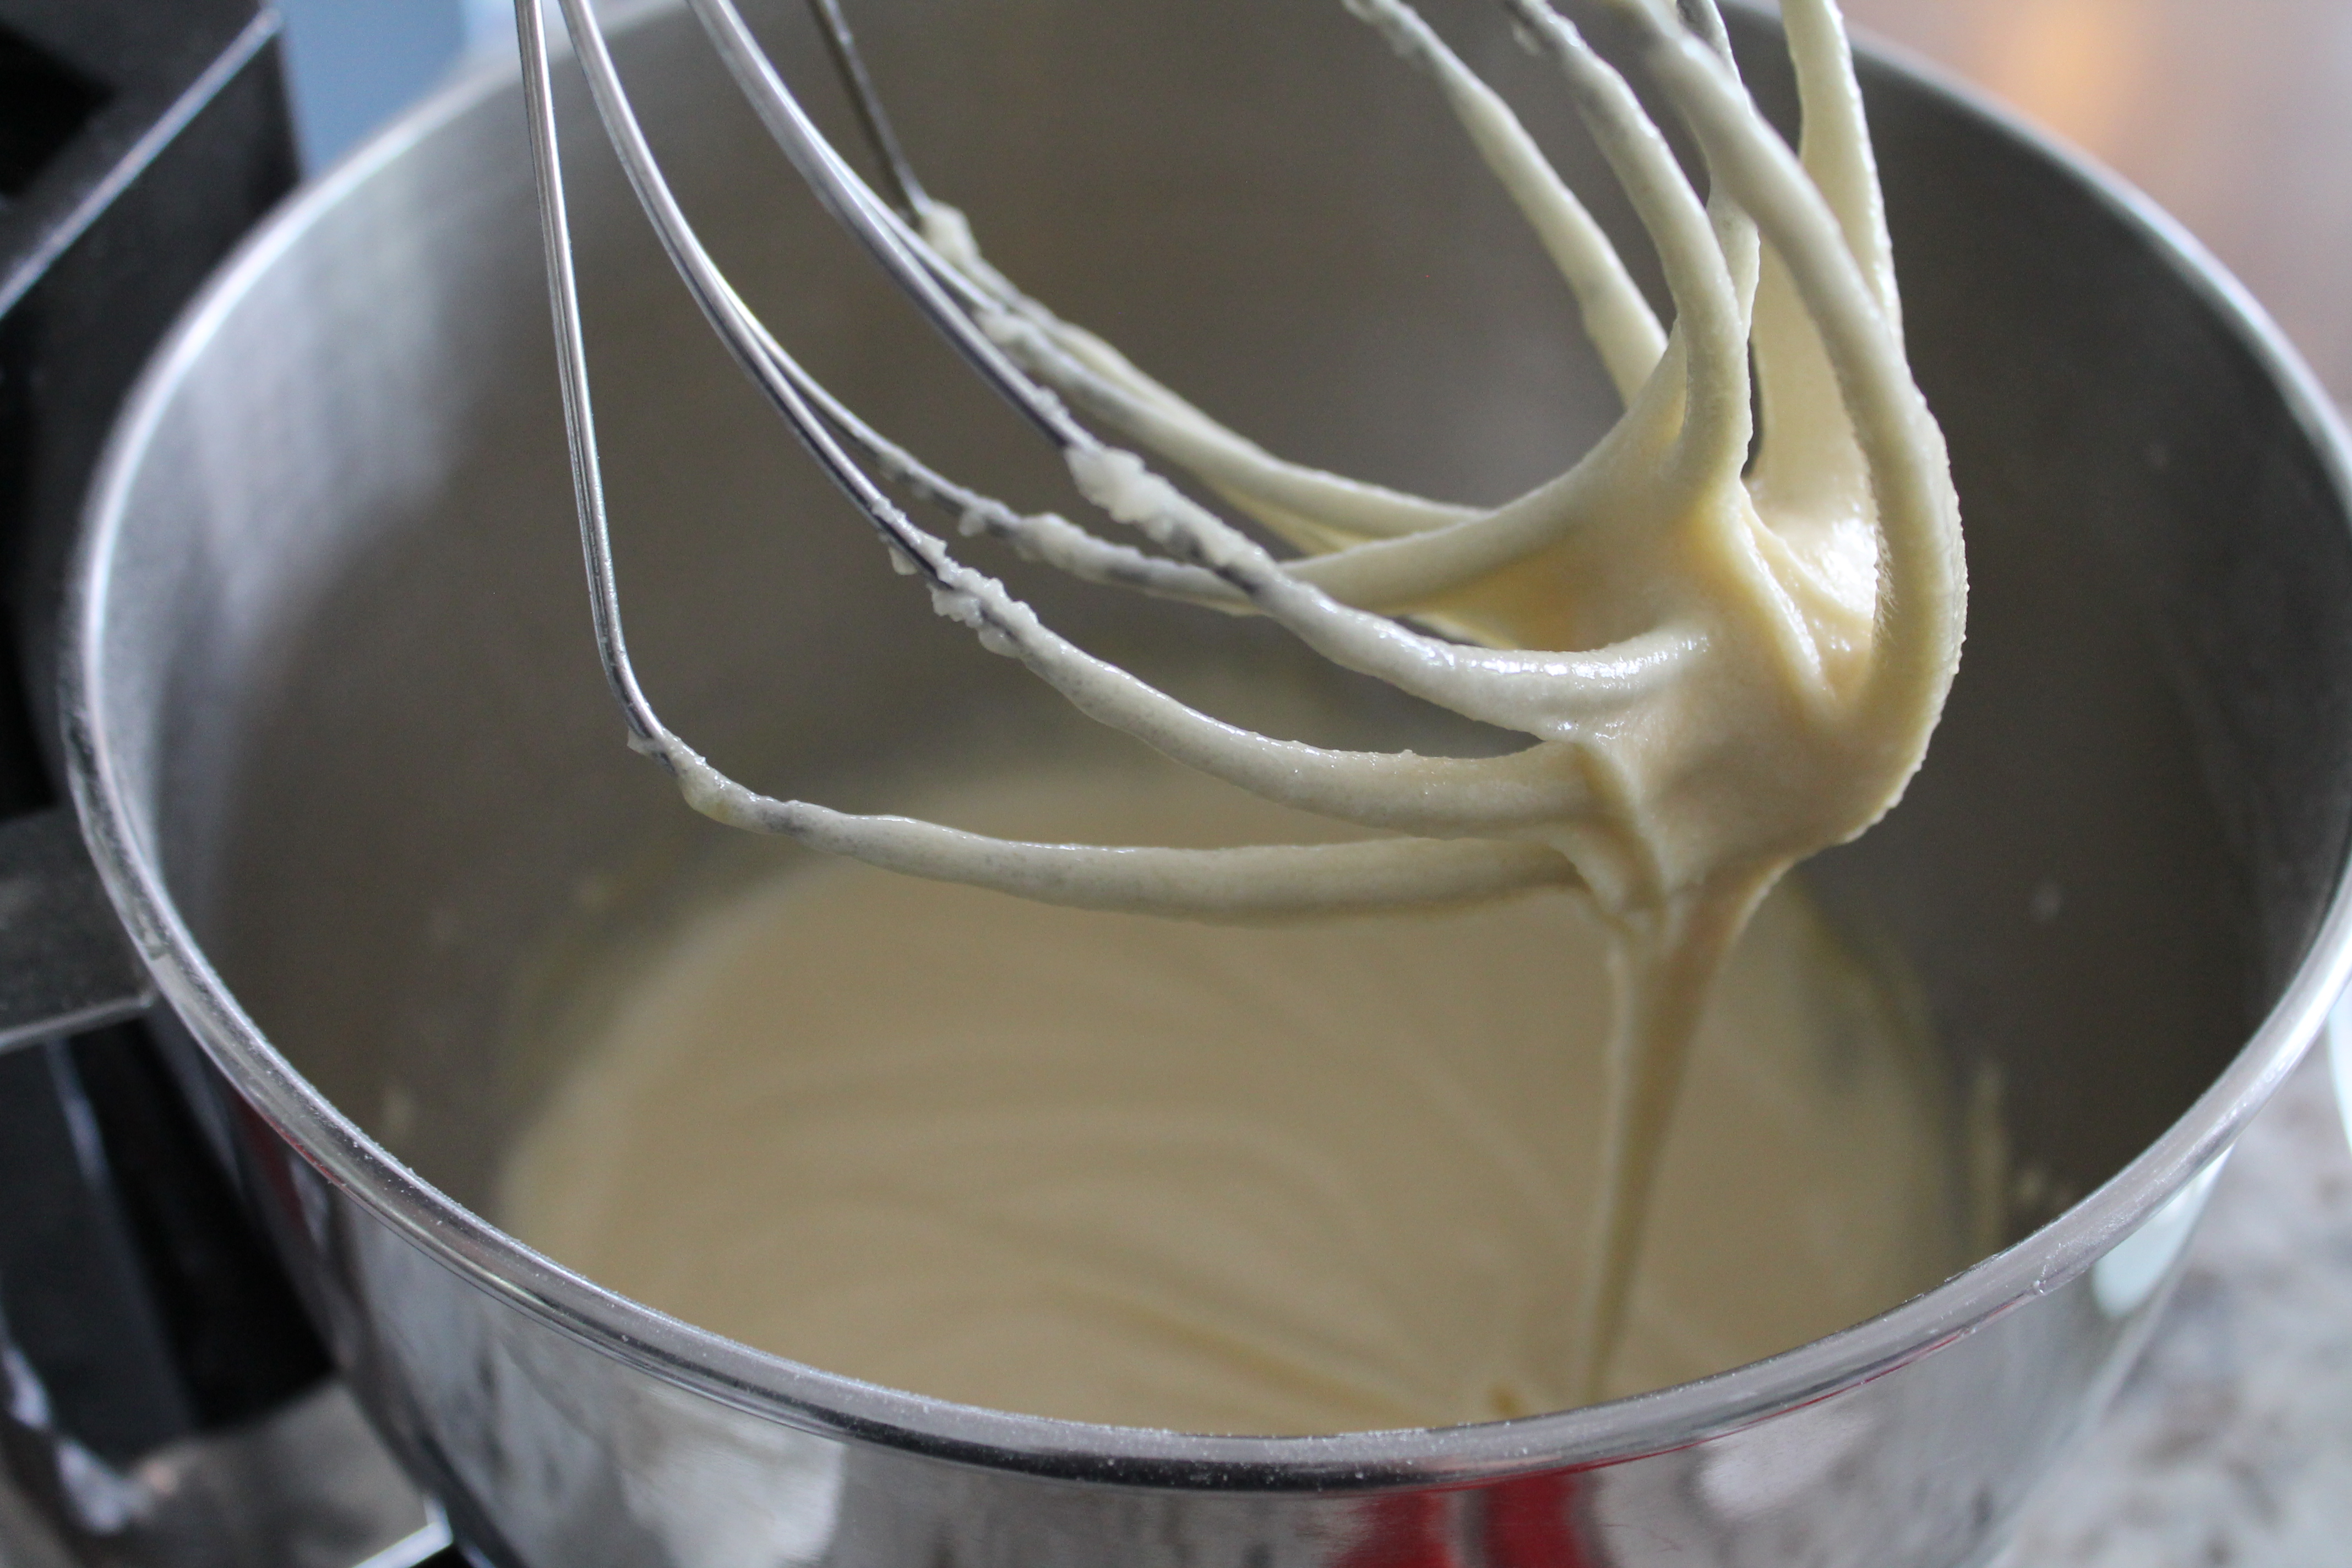
Now, in a separate container, blend whole eggs, egg yolks (which make the cake yellow!), 6 tbsp. buttermilk, and vanilla.
Ad the egg mixture in three batches, beating for 20 seconds between each addition and scraping the sides of the bowl to make sure no stiff dough is lingering there.
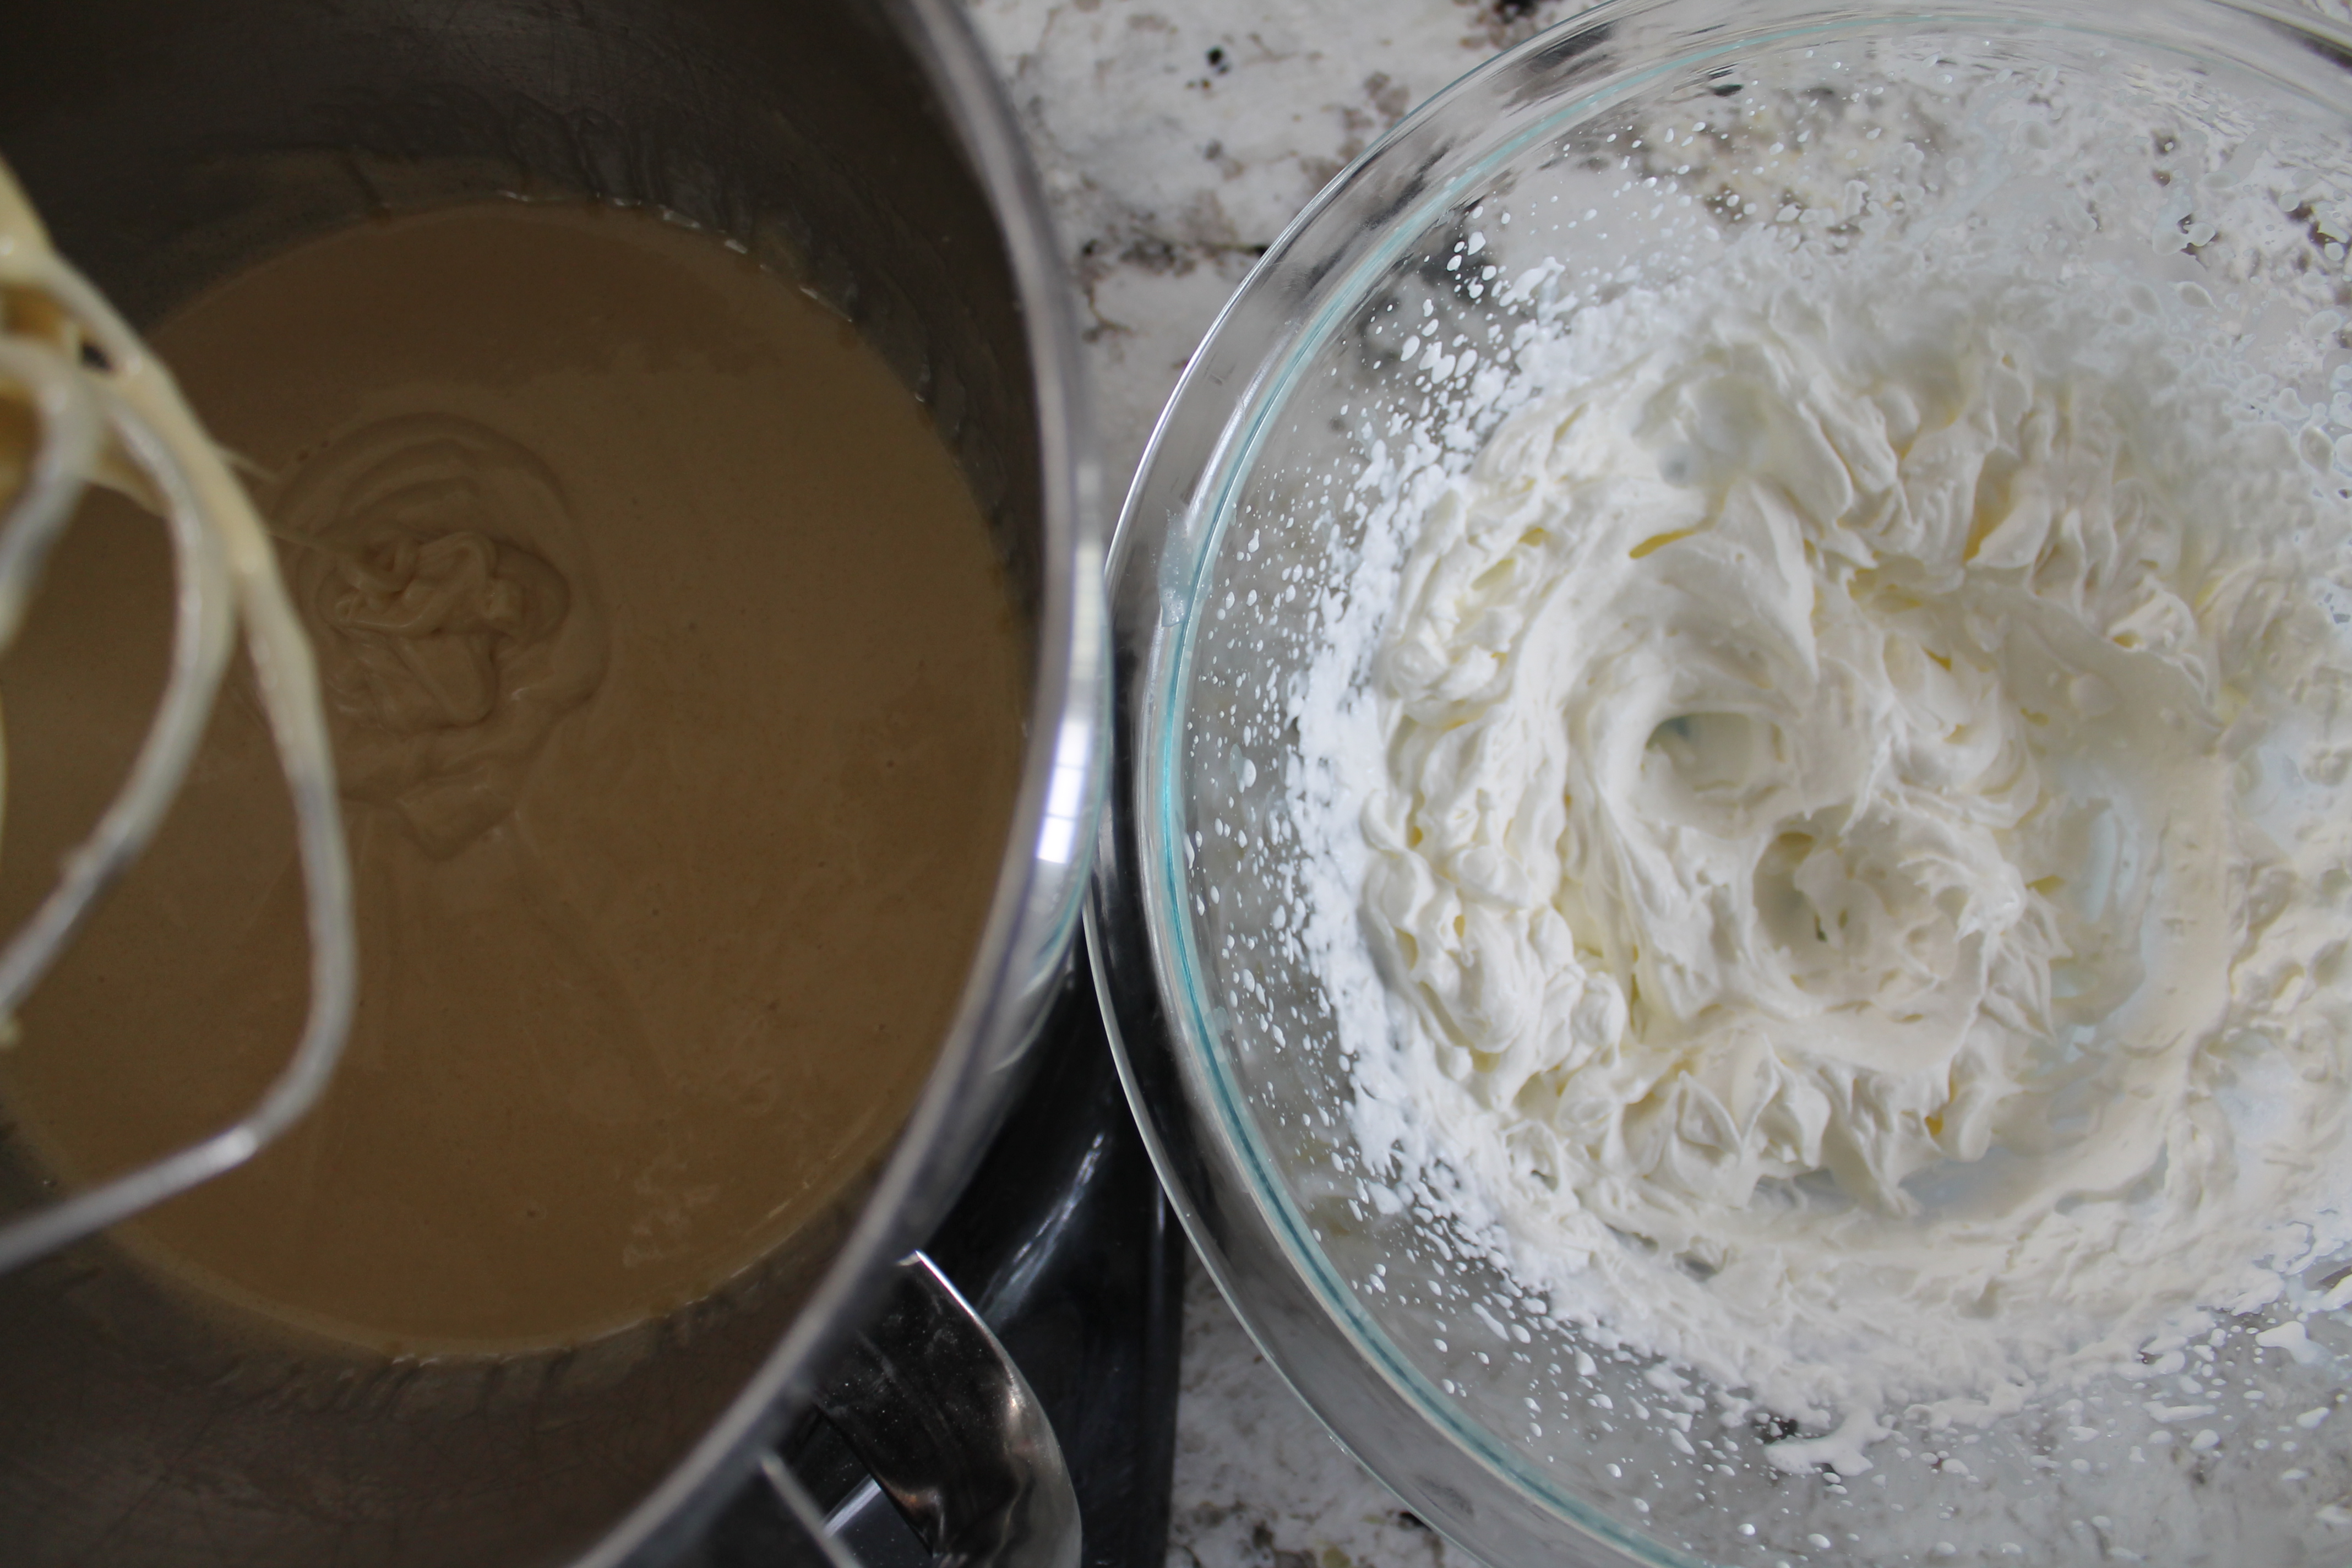
Finally, in a separate bowl, beat the cream until soft peaks form, then beat another 10 seconds. Don’t go all the way to stiff peaks: we want the cream to be aerated, but not so stiff that it will leave little clumps of cream when we fold it into the dough.
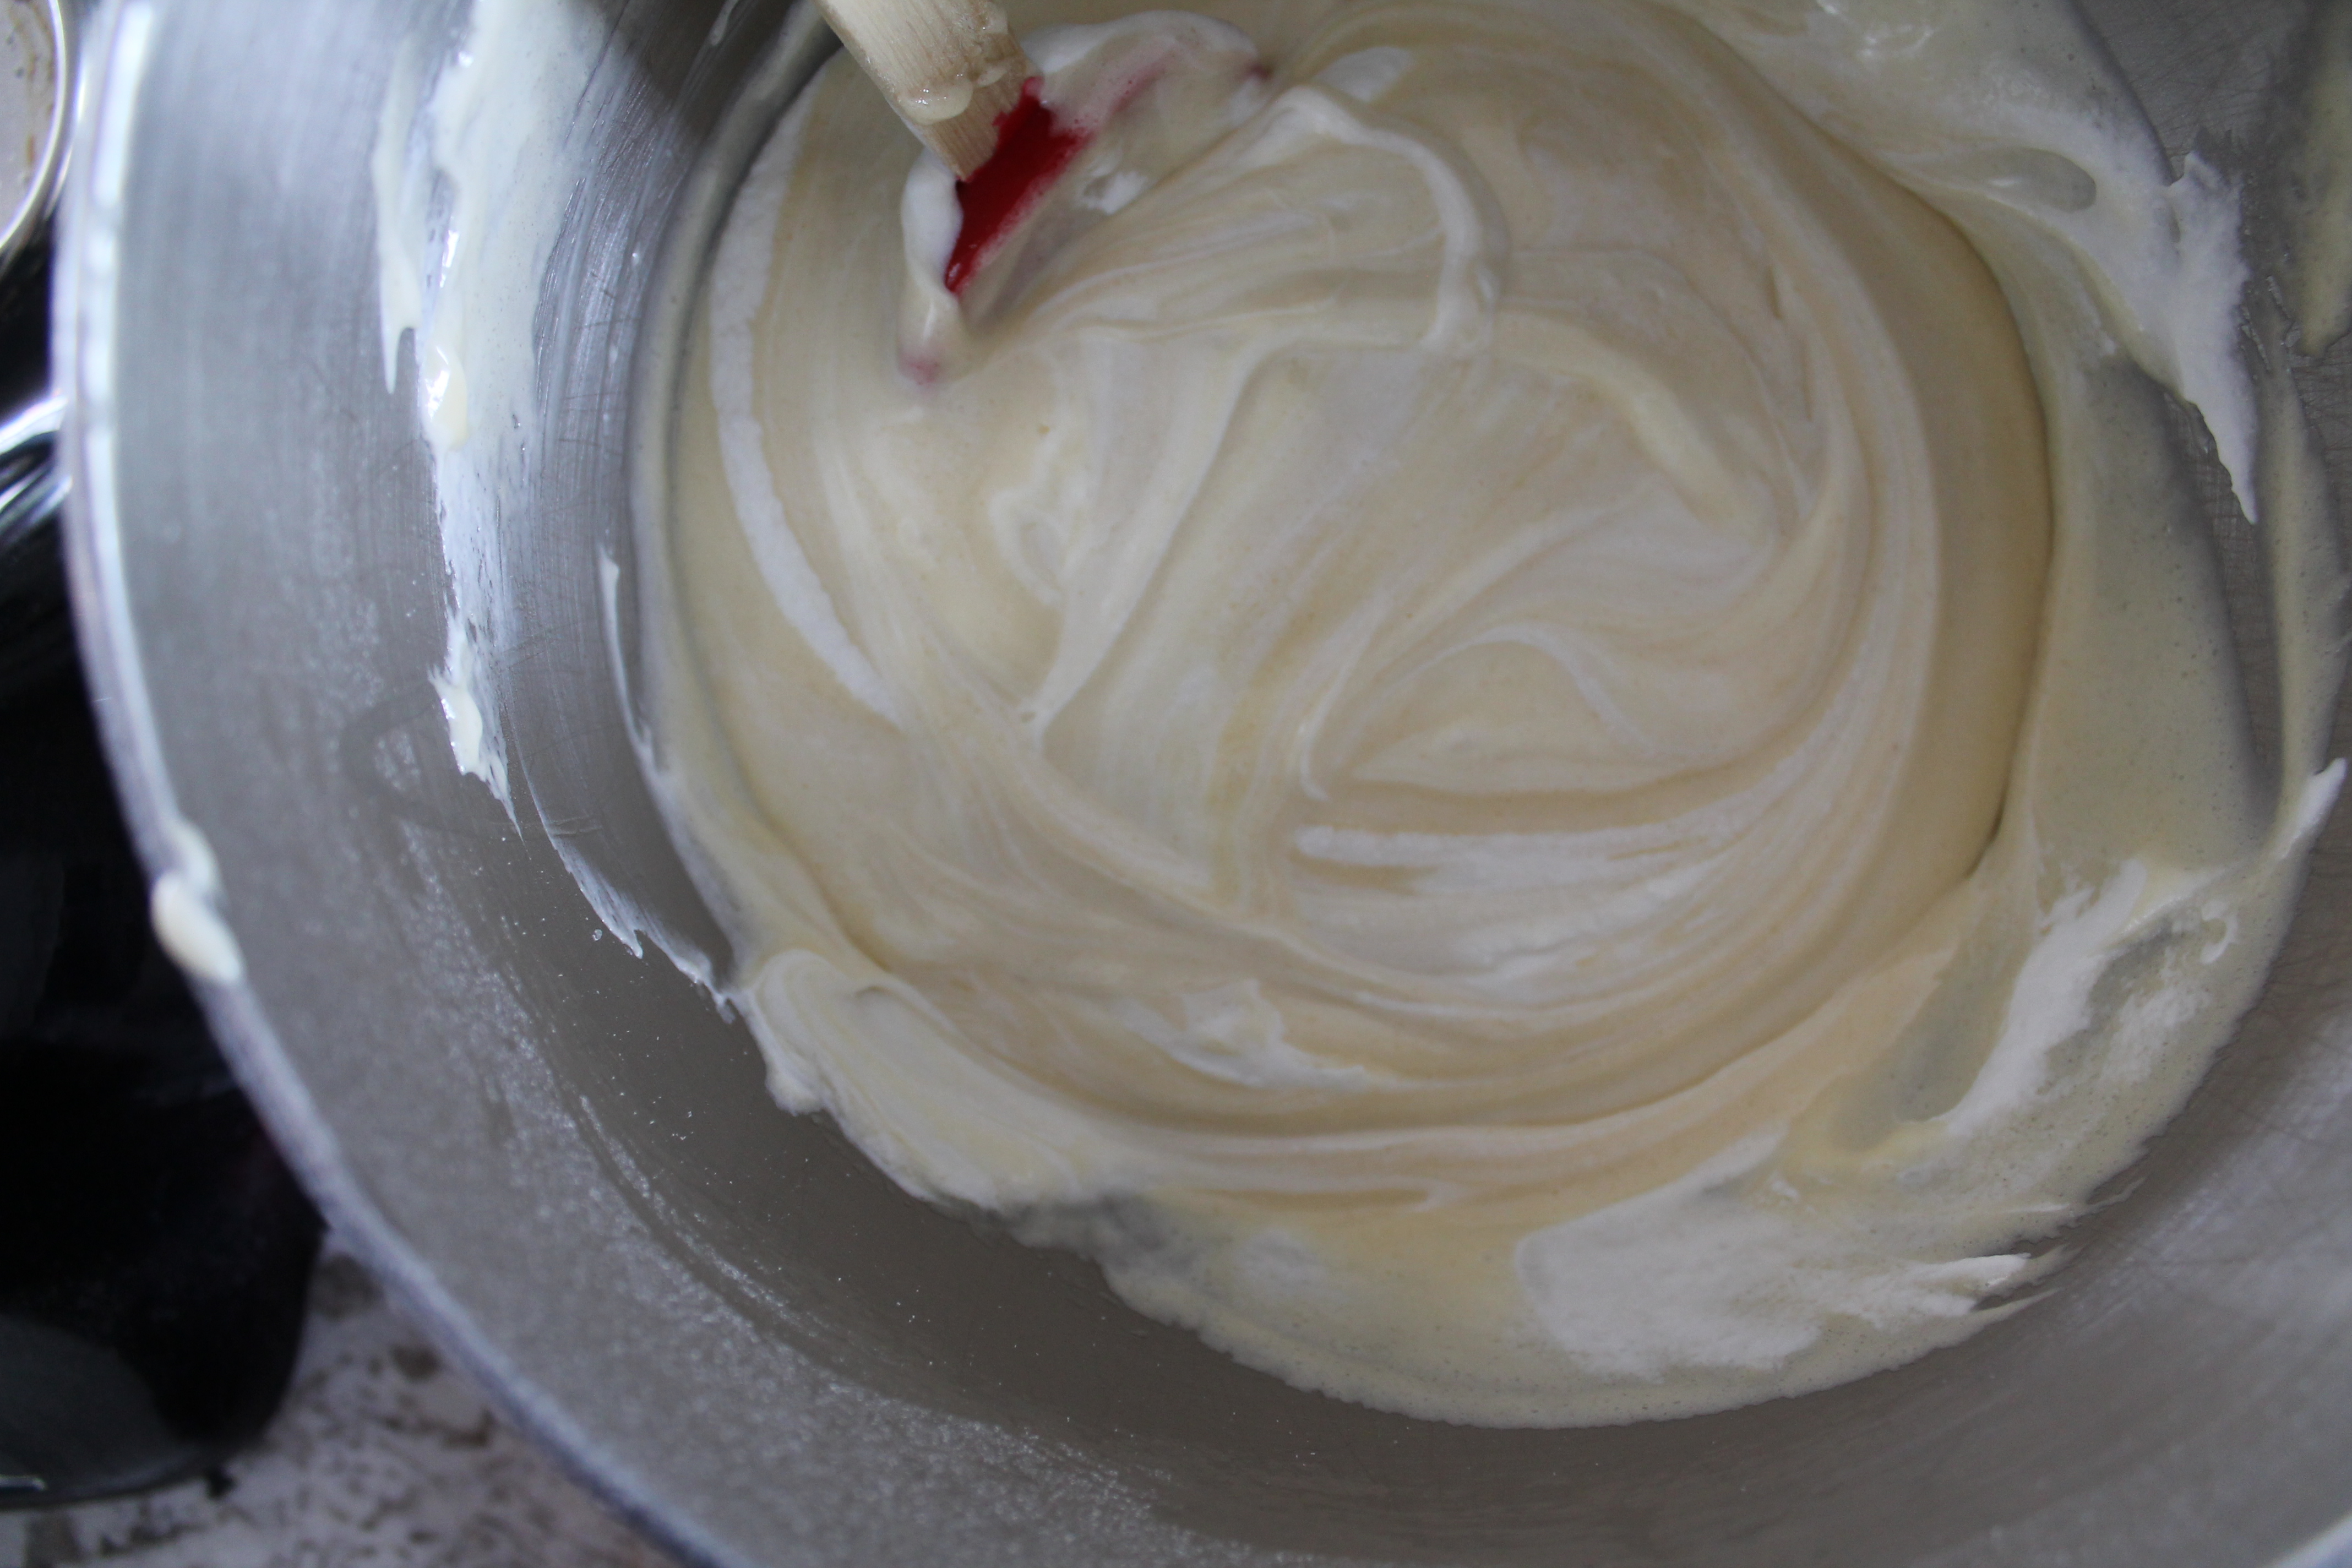
Fold the whipped cream into the dough, starting with a small amount and then adding the rest after that has been incorporated.
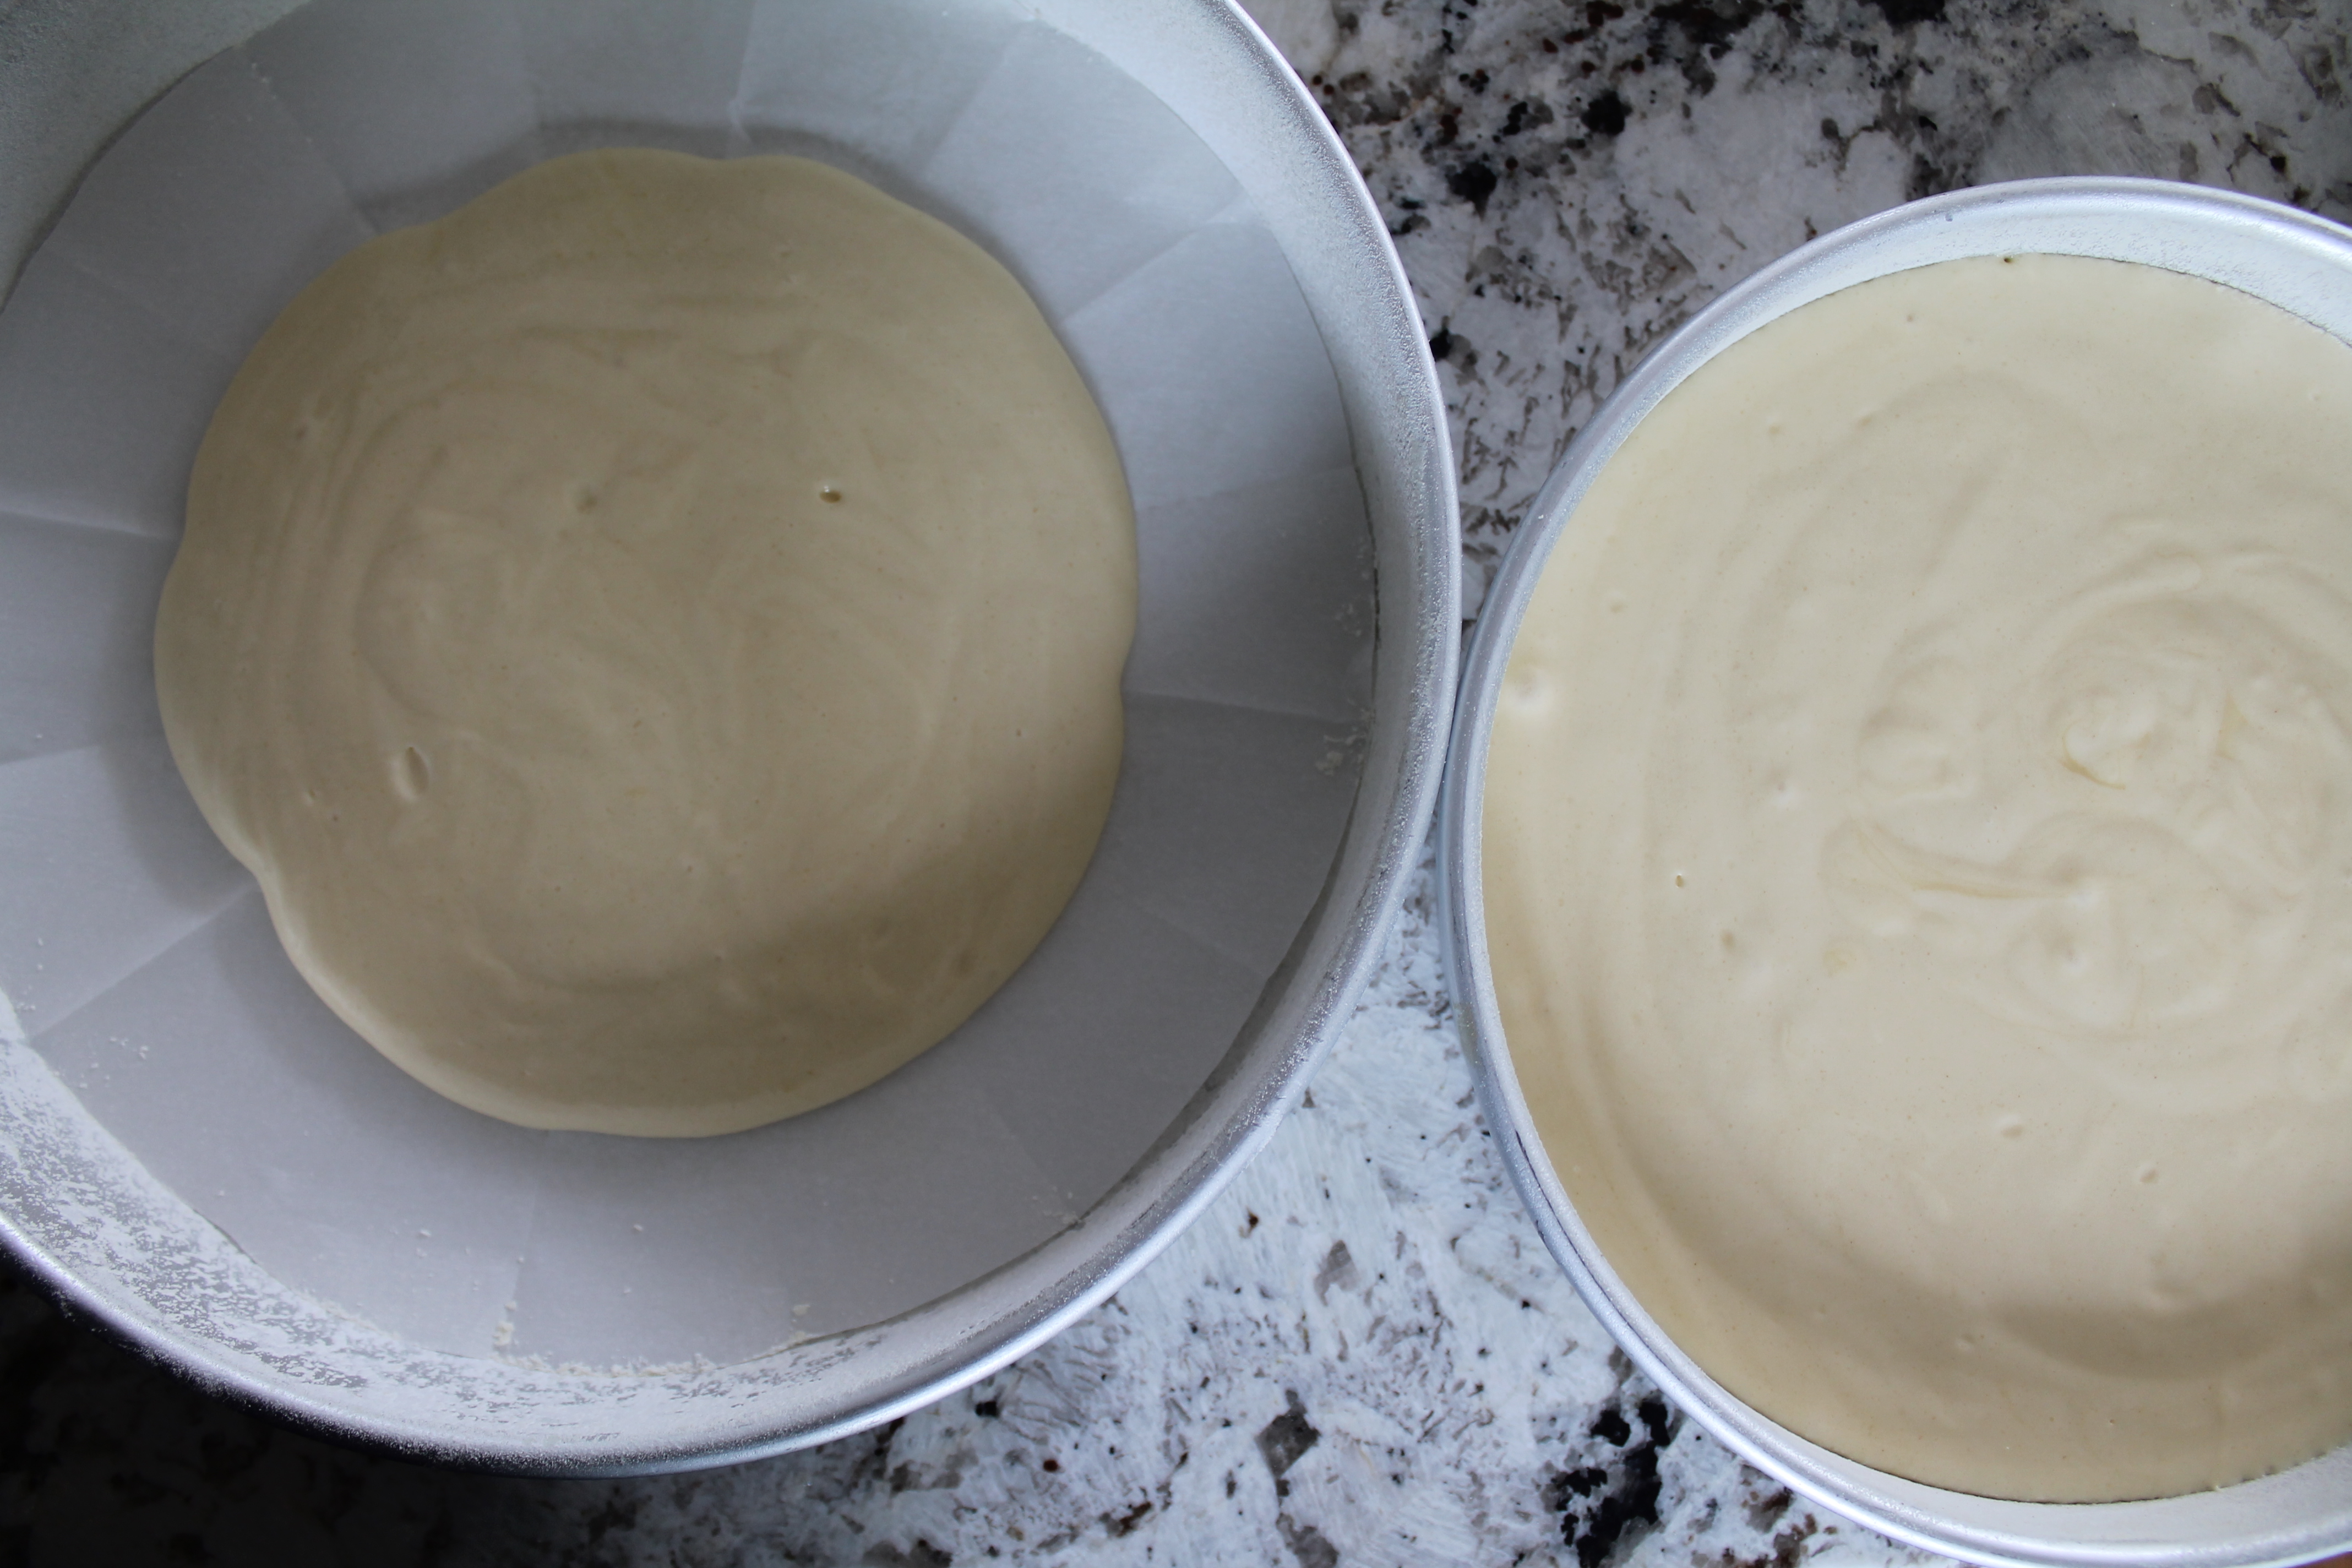
Scoop the dough out into greased and floured cake pans. I always line the bottom of my cake pans with parchment, which you can see above in the partially filled pan, so the cakes will come out easily after baking. This recipe can make a tiered cake if you overfill two round cake pans, 8″ and 10″ (using about 40% of the batter in the 8″ pan and 60% in the 10″). Or, you can fill two 9″x13″ cake pans about halfway each, and stack them to make a very tall layer cake. If you make just half of the recipe posted below (which represents the original recipe amounts), you can make a 9″ two-layer cake.
Bake the cakes at 350° until the tops are deeply golden and the center of each cake springs back when you gently press it with your thumb.
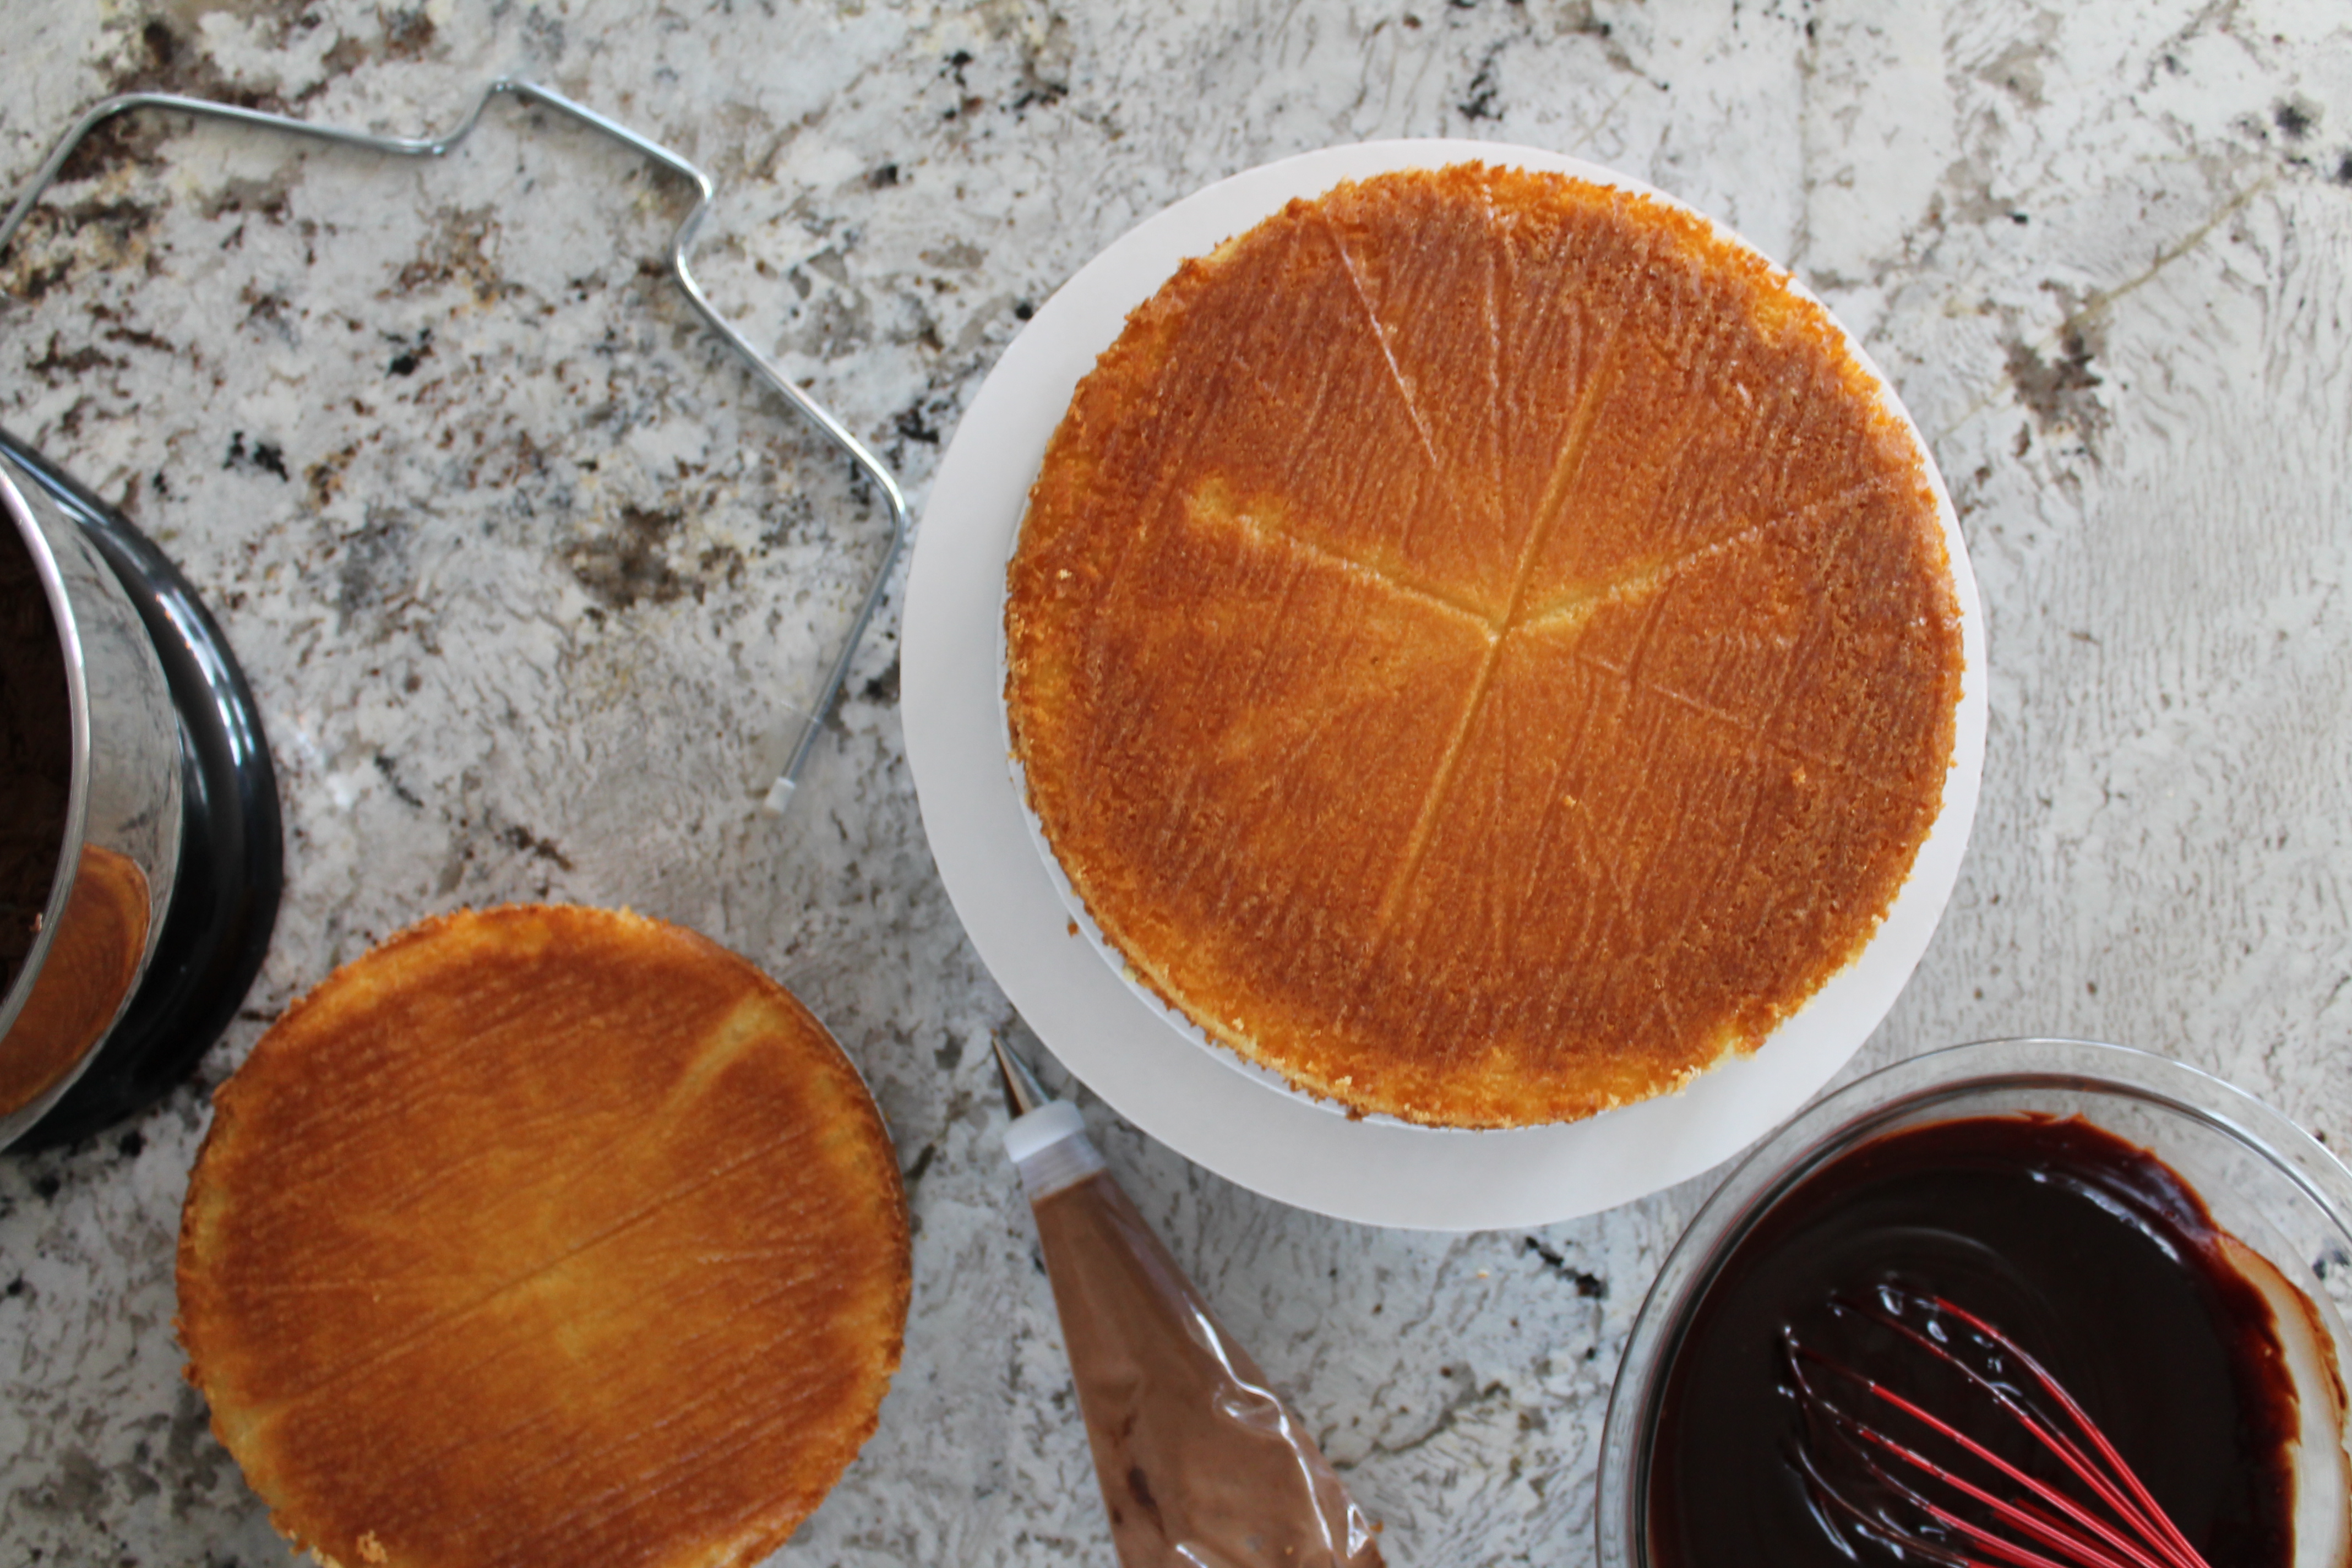 Allow the cakes to cool for 10 minutes before you run a knife around the edges of the pan and turn it out onto a cooling rack. Don’t let the cakes sit longer in the pan or the edges will start to dry out due to the residual heat of the baking pans. Cool completely and wrap tightly in plastic wrap until ready to fill and frost.
The filling for the groom’s cake and accompanying sheet cakes was very simple, just a combination of cream, semisweet chocolate, and vanilla. Yum. This ganache is so simple, and you don’t even need a double boiler; you can just pour very hot cream over the chocolate, wait a minute, and whisk to combine!
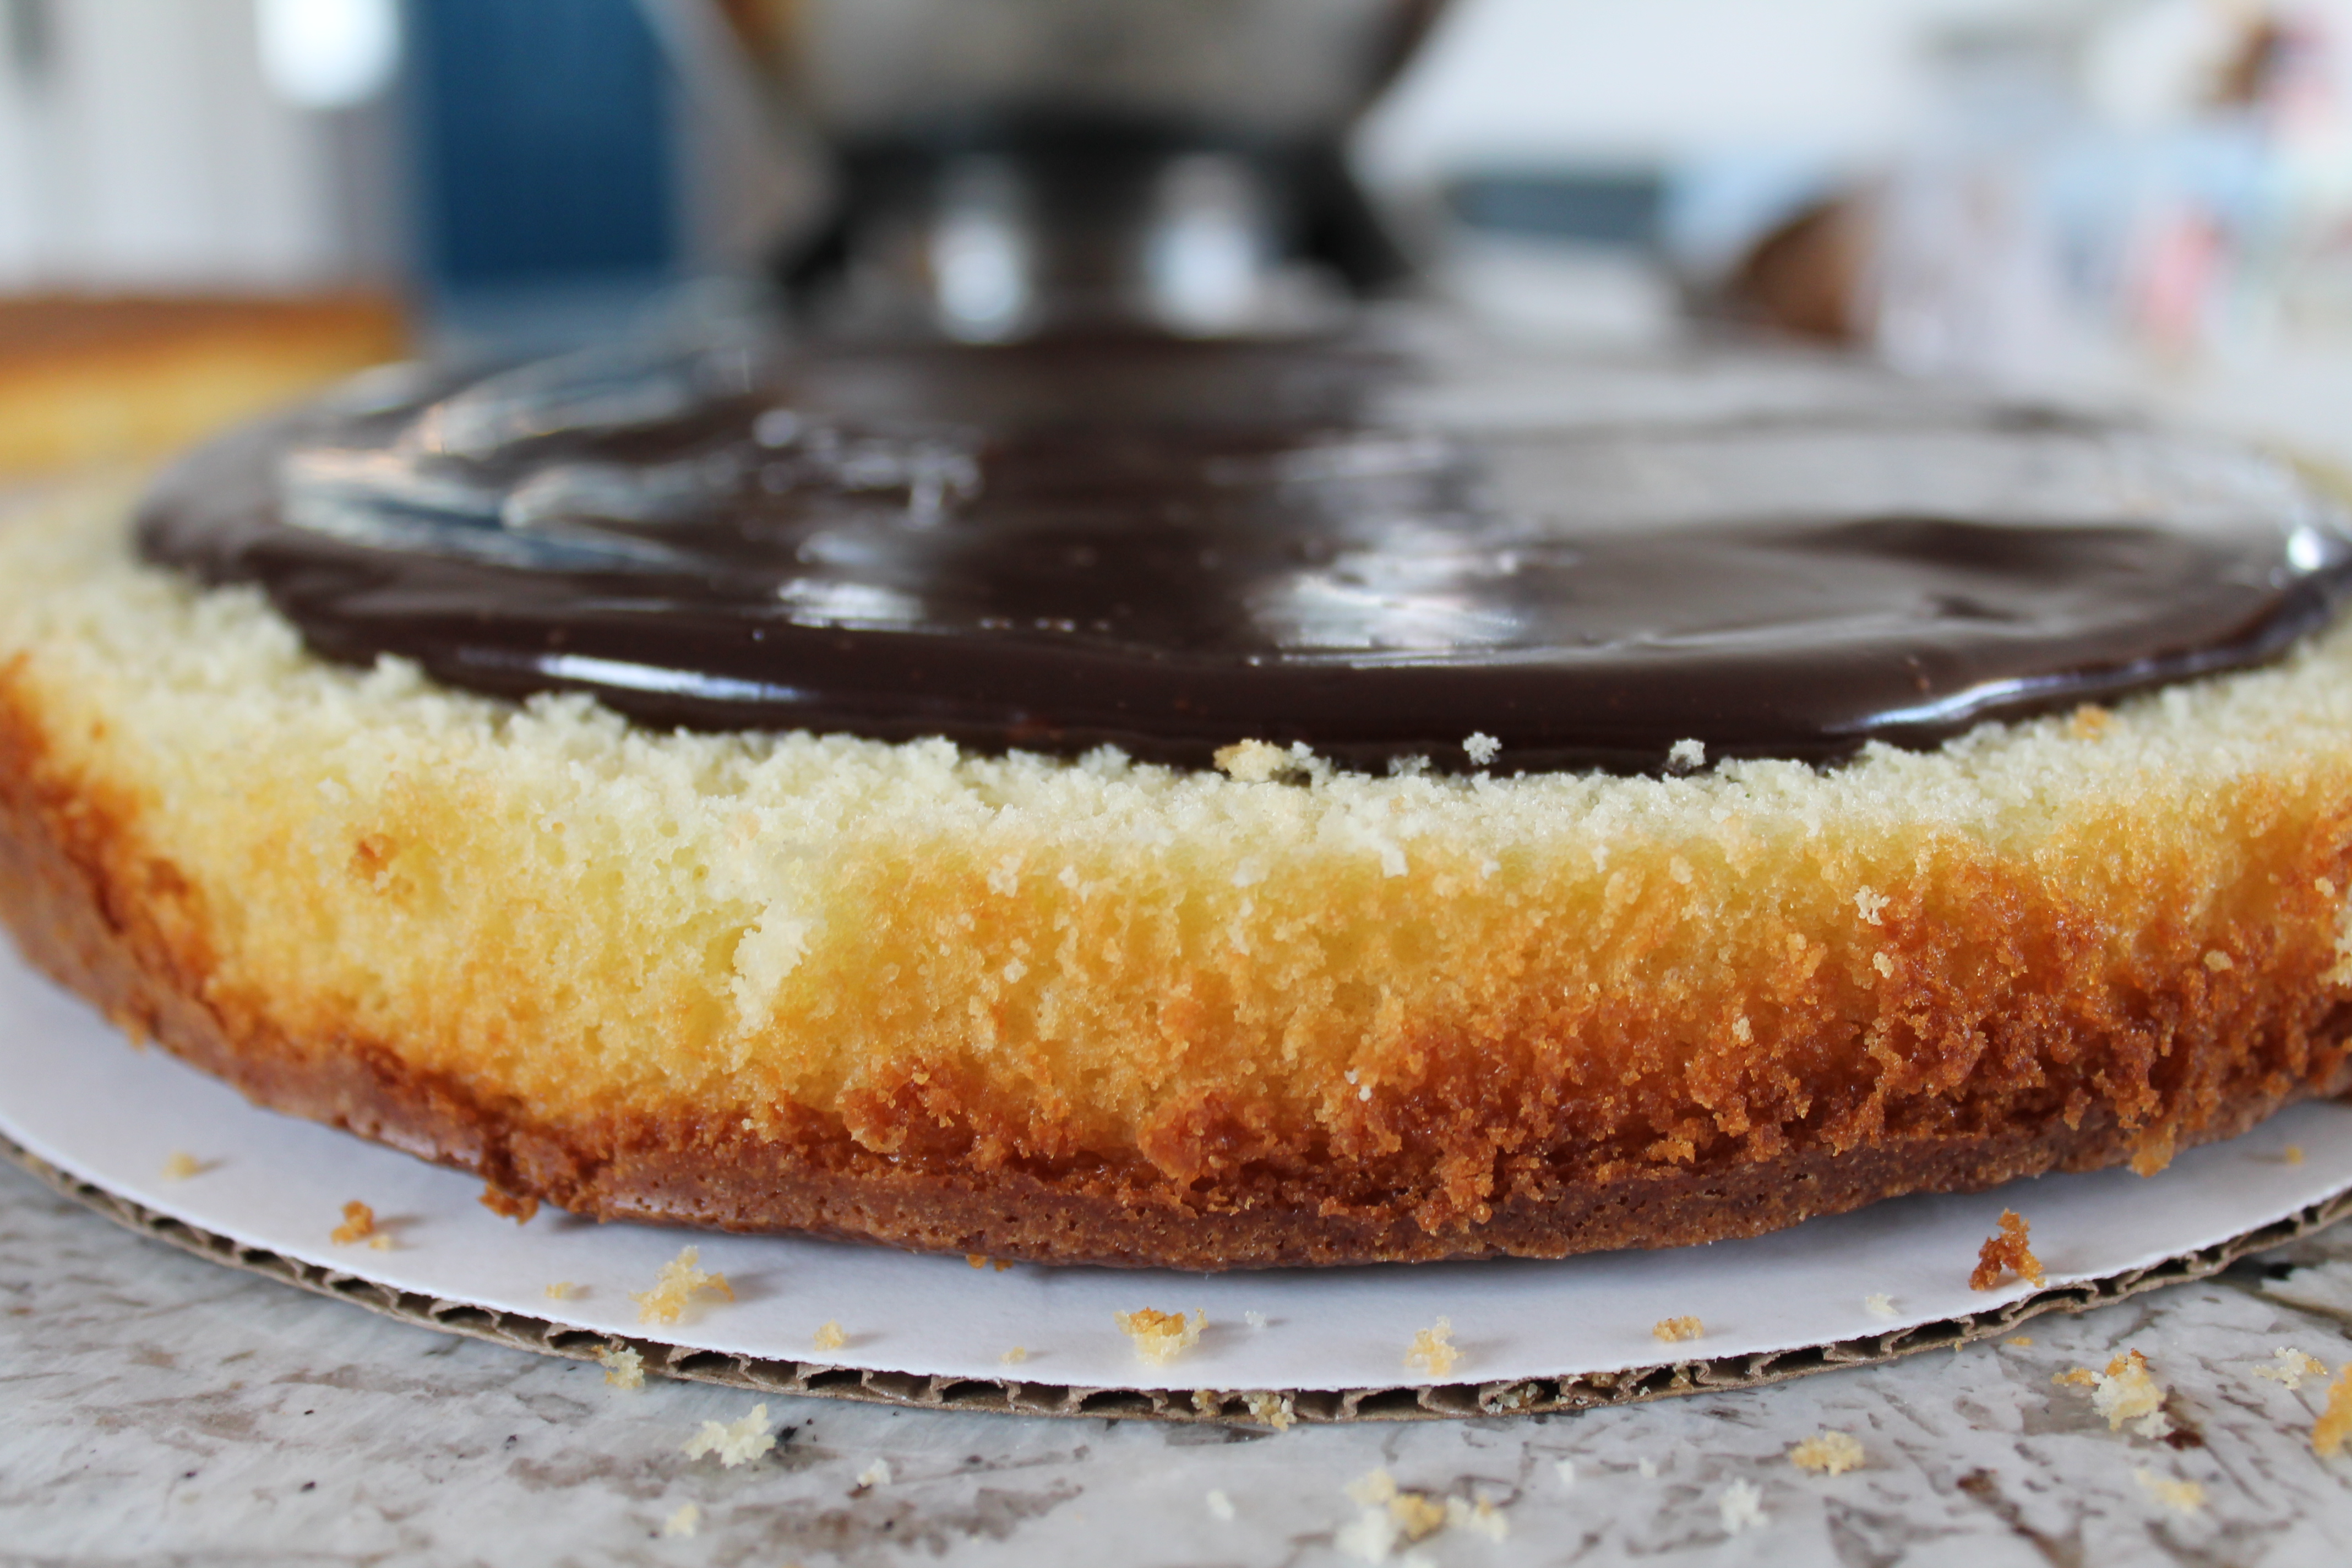
Allow the ganache to cool for 5 minutes. Meanwhile carefully level the cooled layers of yellow cake, and then slice them in half. (Do not slice the sheet cakes in half.) When the ganache is warm but not molten, spreading over the bottom layer of cake. Chill in the freezer for 10 minutes before topping with the second layer of cake.
Next, we need to crumb coat the cakes, and then frost them.
This is my most favorite chocolate frosting recipe all time. It is so rich and creamy, so soft and perfect. It’s amazing. Plus, it doesn’t hurt (ahem…when you are making cake for 100) that each batch makes about 6 cups of frosting!
So sorry, but I forgot to take pictures whilst making this frosting! For a funny blast from the past, and if you need to see how the frosting comes together, you can check out the link above to see some terrible, very yellow photography from nearly six years ago.
Get a small pan of water simmering. Meanwhile, combine whole eggs, sugar, and cocoa powder in a stand mixer bowl. When I’ve made this recipe before, I typically used Dutch process cocoa, which does certainly make delicious frosting, but for this cake, I wanted something more homey—and more easily accessible—so I went with Hershey’s natural cocoa powder, which is less alkaline than Dutch process cocoa. Since frosting is not as strongly reliant on chemical reactions as something which is baked, this did not negatively affect the texture or flavor of the frosting.
Whisk the egg and sugar mixture for 5–6 minutes over the double boiler, until it is thick and very hot. The sugar should have melted completely.
When the mixture is thick and somewhere between 120° and 140°, remove it from the double boiler and fit it into the stand mixer. Using the whisk attachment, beat for 10 minutes, until the meringue has come to room temperature and has nearly tripled in size.
Beat in vanilla and salt.
Next, grab 6 sticks of unsalted butter. Unwrap them and lay them between two large sheets of plastic wrap. Using a rolling pin, pound the butter several times to soften it. I love this method of softening butter while it is still cold! Cut each stick of butter into four or five pieces.
Keep the mixer running and add the butter, one chunk at a time, allowing each piece to be worked in for 15 seconds or so before adding another one. Don’t worry if the frosting starts to look curdled or chunky. Just keep beating! It will all come together into a silky, buttery perfection, I promise.
When all of the butter has been incorporated and the frosting looks completely thick and smooth, and just a little shiny, it’s time to add even more chocolate.
Melt 8 oz. semisweet chocolate (I typically use Nestle chocolate chips) over a double boiler. Don’t do this in the microwave, because it can cause the chocolate to seize or overheat in certain places, and this would wreck the frosting. Scrape the melted chocolate into the bowl with the rest of the frosting and beat to combine. Continue beating until the frosting is completely even and glossy. Yum.
Place a small amount of frosting in a separate bowl to use for the crumb coat. (You know how to crumb coat, right? You aren’t mad that I also didn’t take pictures of this? Blame it on the high-pressure situation, and the weird hours I was working during wedding week.)
I like to crumb coat round cakes on a rotating cake tray, such as this one from Wilton, because it allows me to smoothly coat the sides without scooting the cake or myself around.
Spread a very thin layer of frosting over the whole cake. This layer will glue the crumbs that might want to excape from the cake down, so that the outer layer of frosting will end up looking clean and smooth rather than lumpy.
Chill the crumb-coated cake. I typically just stick my crumb coats in the freezer for 10-15 minutes. This step helps the crumb coat to become firm and stable, so that the crumbs will truly be captured within it rather than swimming through the pristine frosting and messing up the whole look! It also makes the cake easier to frost, because you are starting with a firm layer underneath.
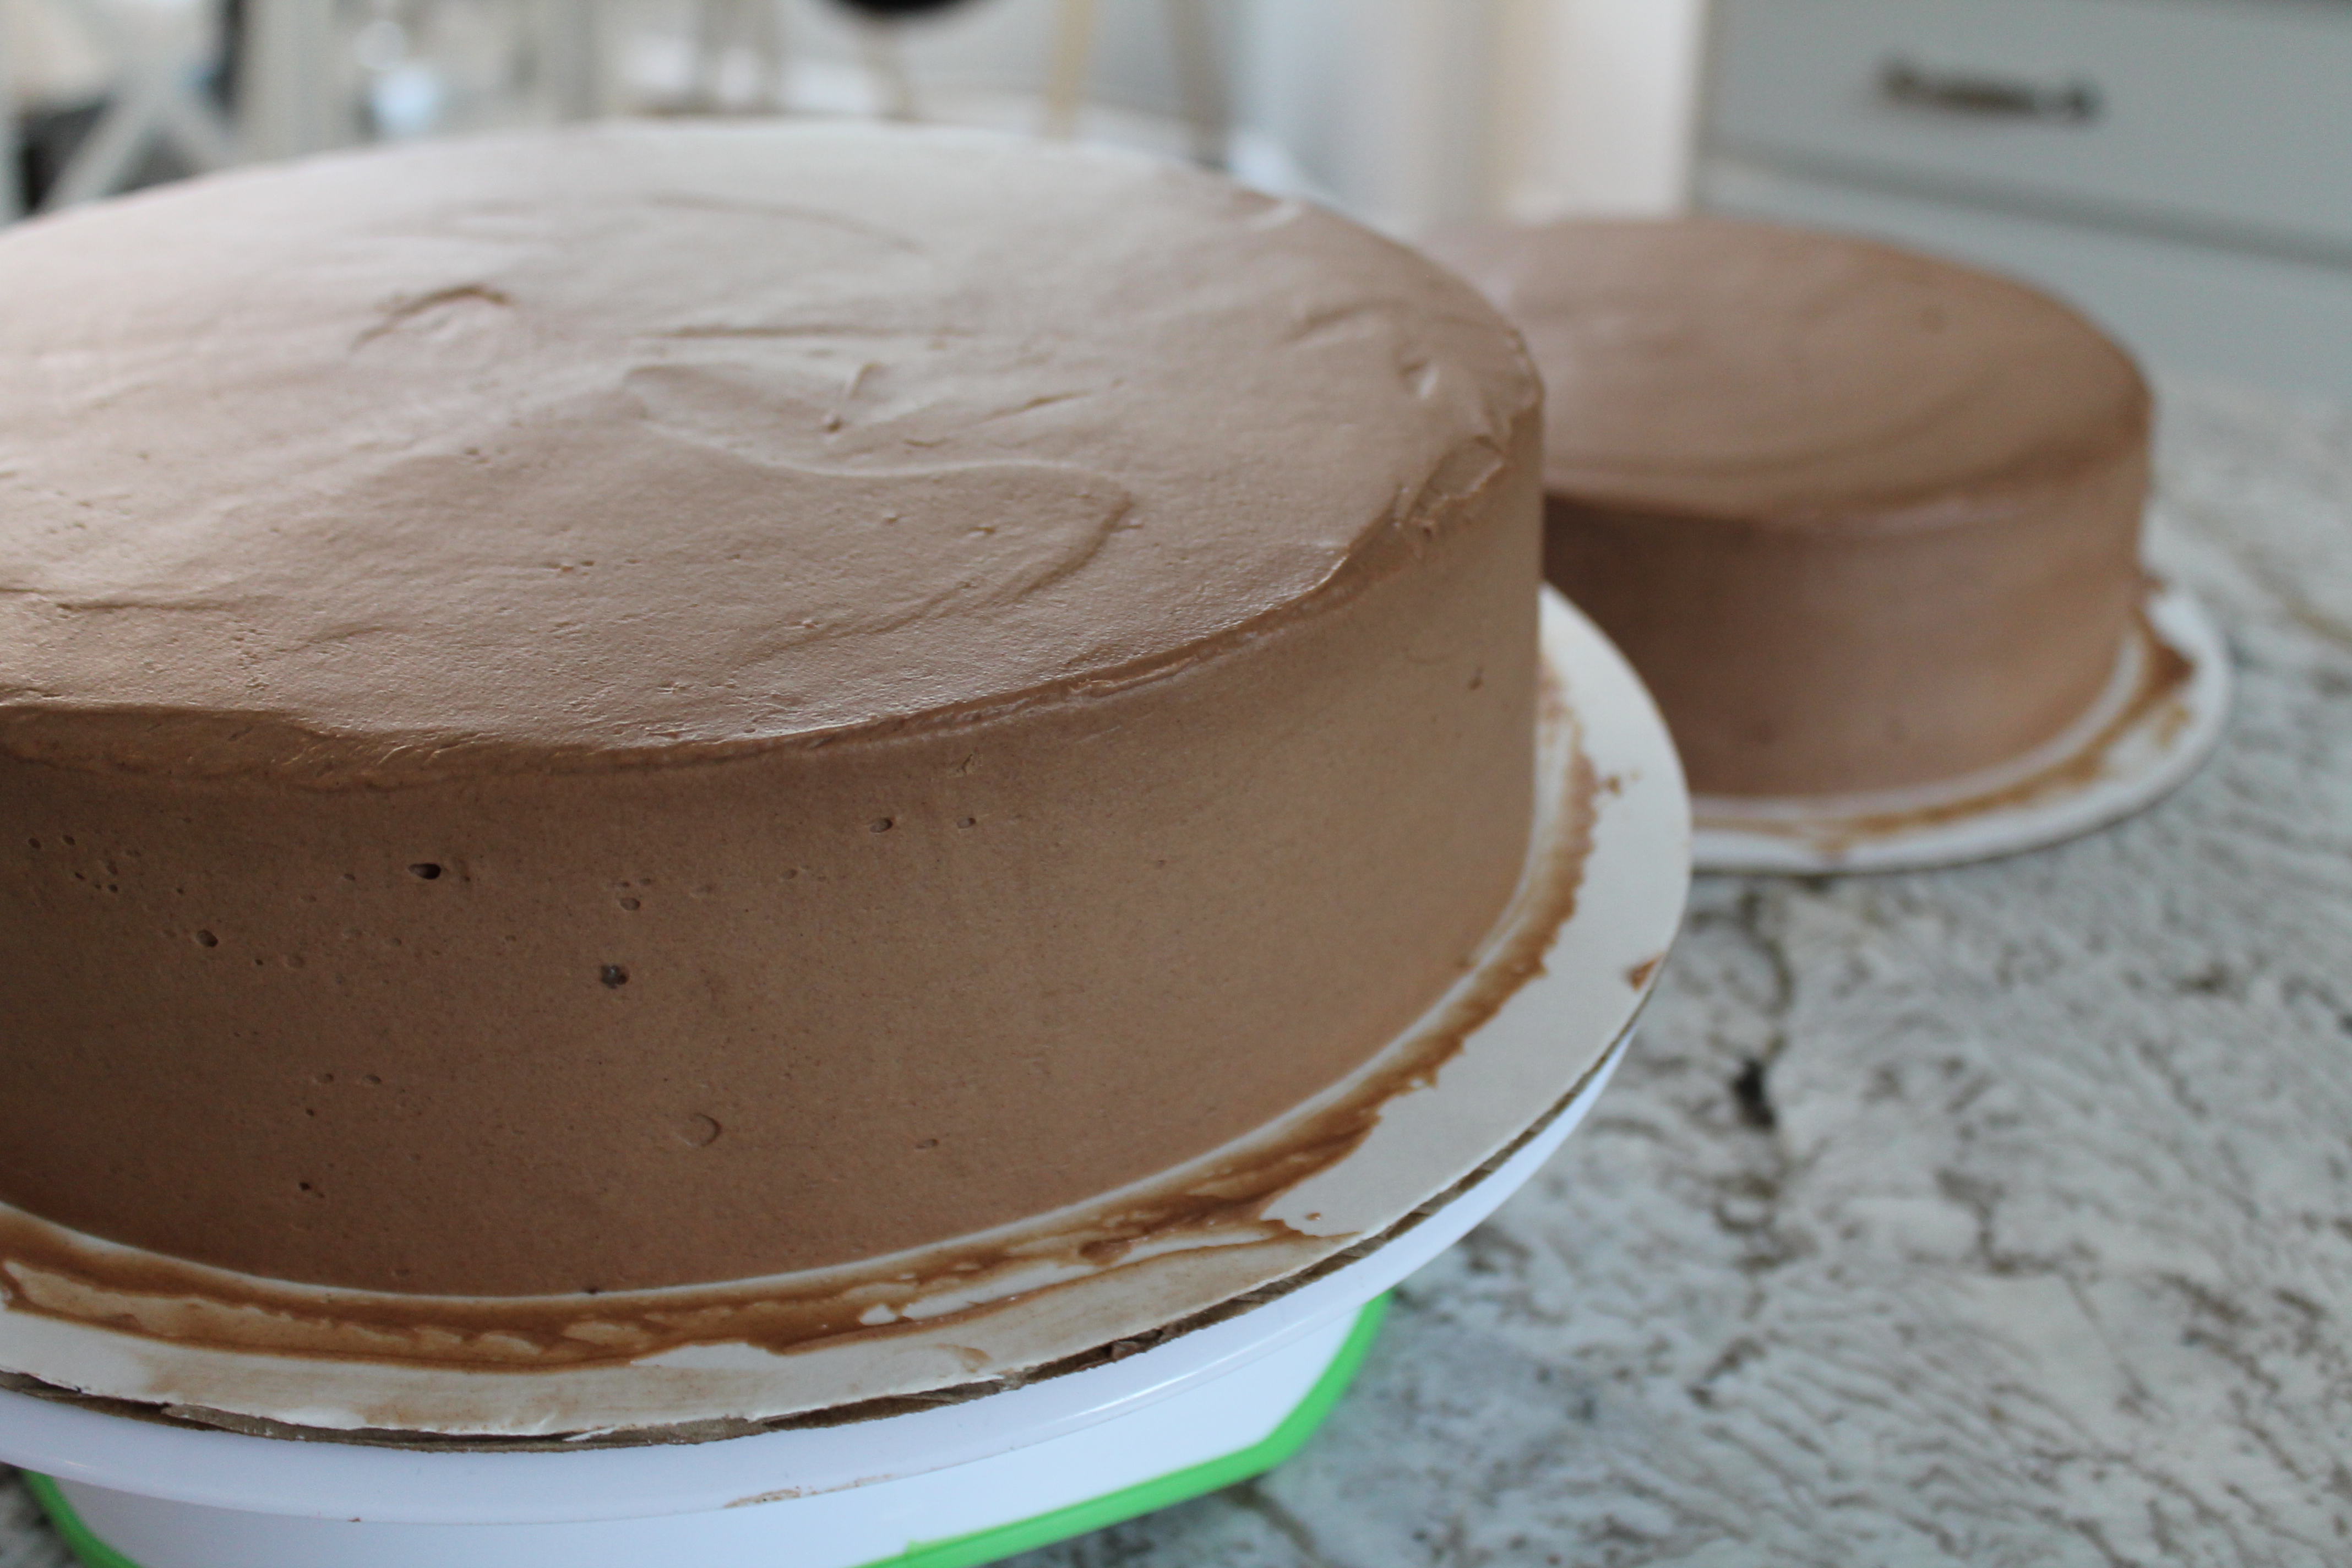
When the crumb coat is firm to the touch and does not transfer any frosting to your finger, it’s time to frost the cake! I rely heavily on a large, angled metal icing spatula and a metal scraper tool to achieve smooth edges. I really prefer metal tools over plastic for smooth frosting.
When each layer of cake is completely frosted (about ½″ thick frosting) and smooth, transfer to a safe container, such as an airtight cake keeper or a cardboard cake box, and chill. I chilled the groom’s cake for 24 hours before adding the shiny ganache drizzle. The layer cakes did not get a drizzle, as they were not on display.
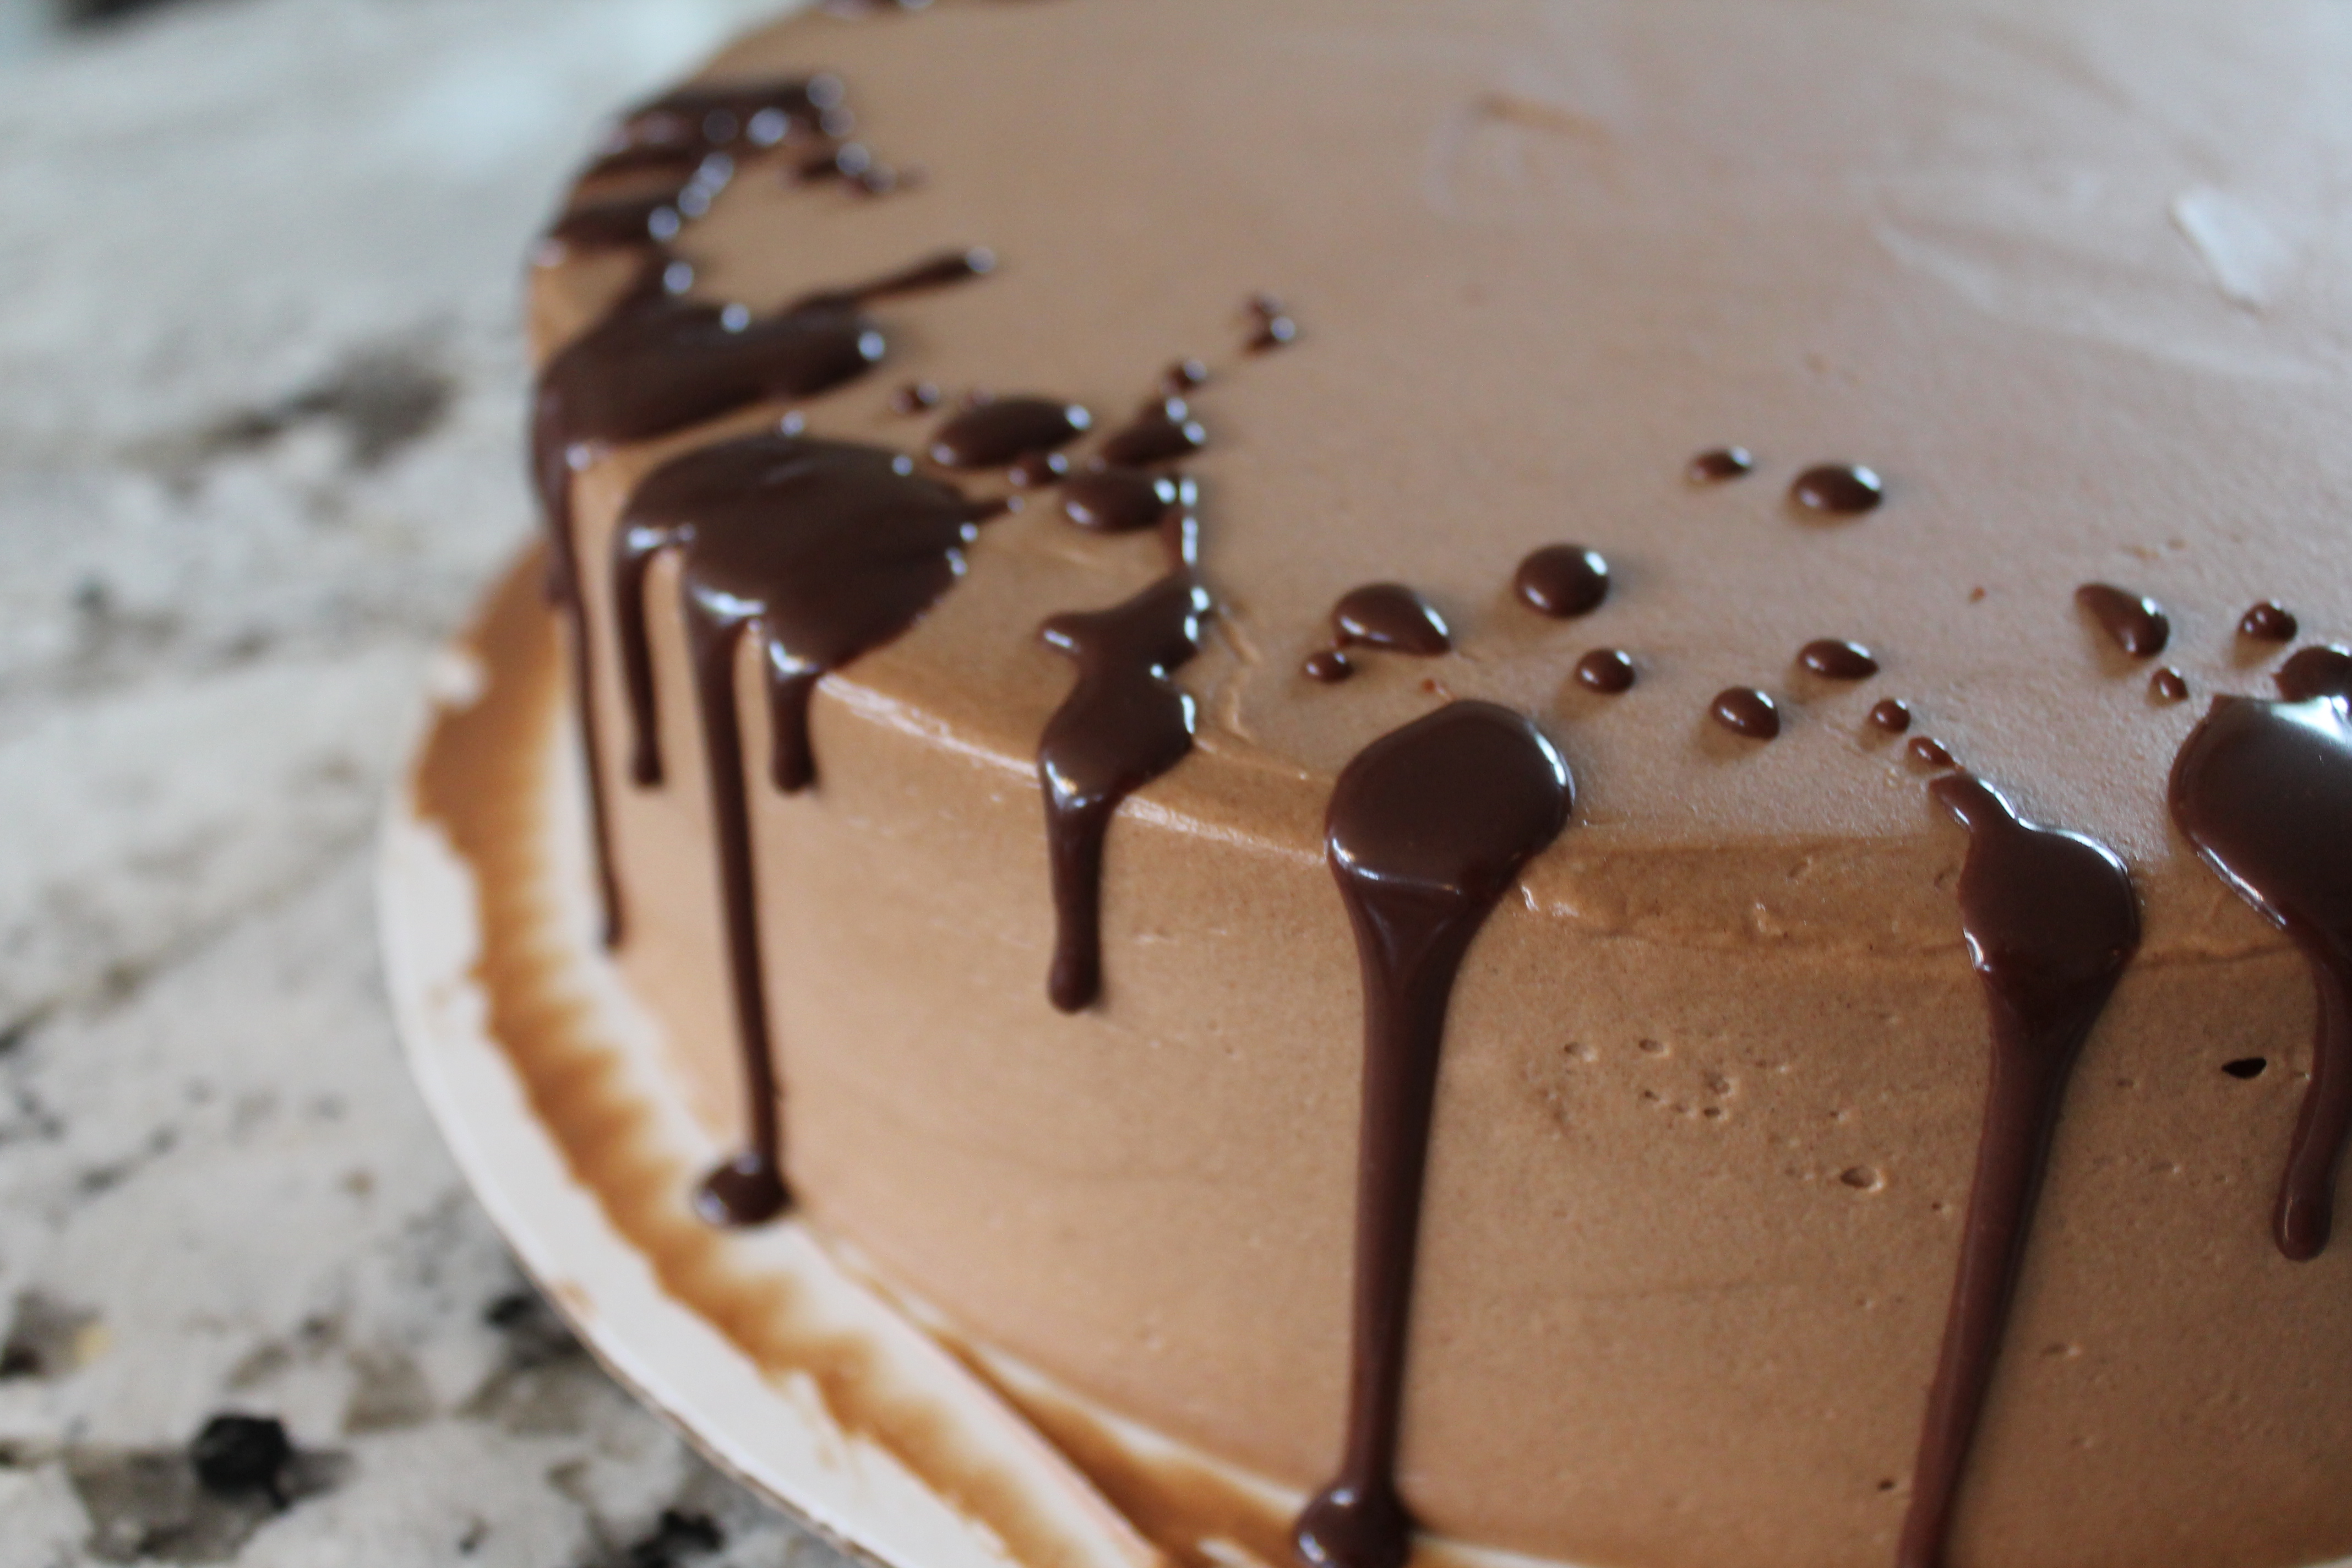
The ganache drizzle was a lot easier than I expected, but I’m very glad I practiced doing this before I was doing the real thing! For me, the challenge was not in getting lovely drips down the side, but in achieving a smooth, glassy top layer.
To make a ganache for drizzling, you must use the double boiler. Combine equal parts cream and semisweet chocolate and stir until completely melted. Let the ganache cool for 10 minutes.
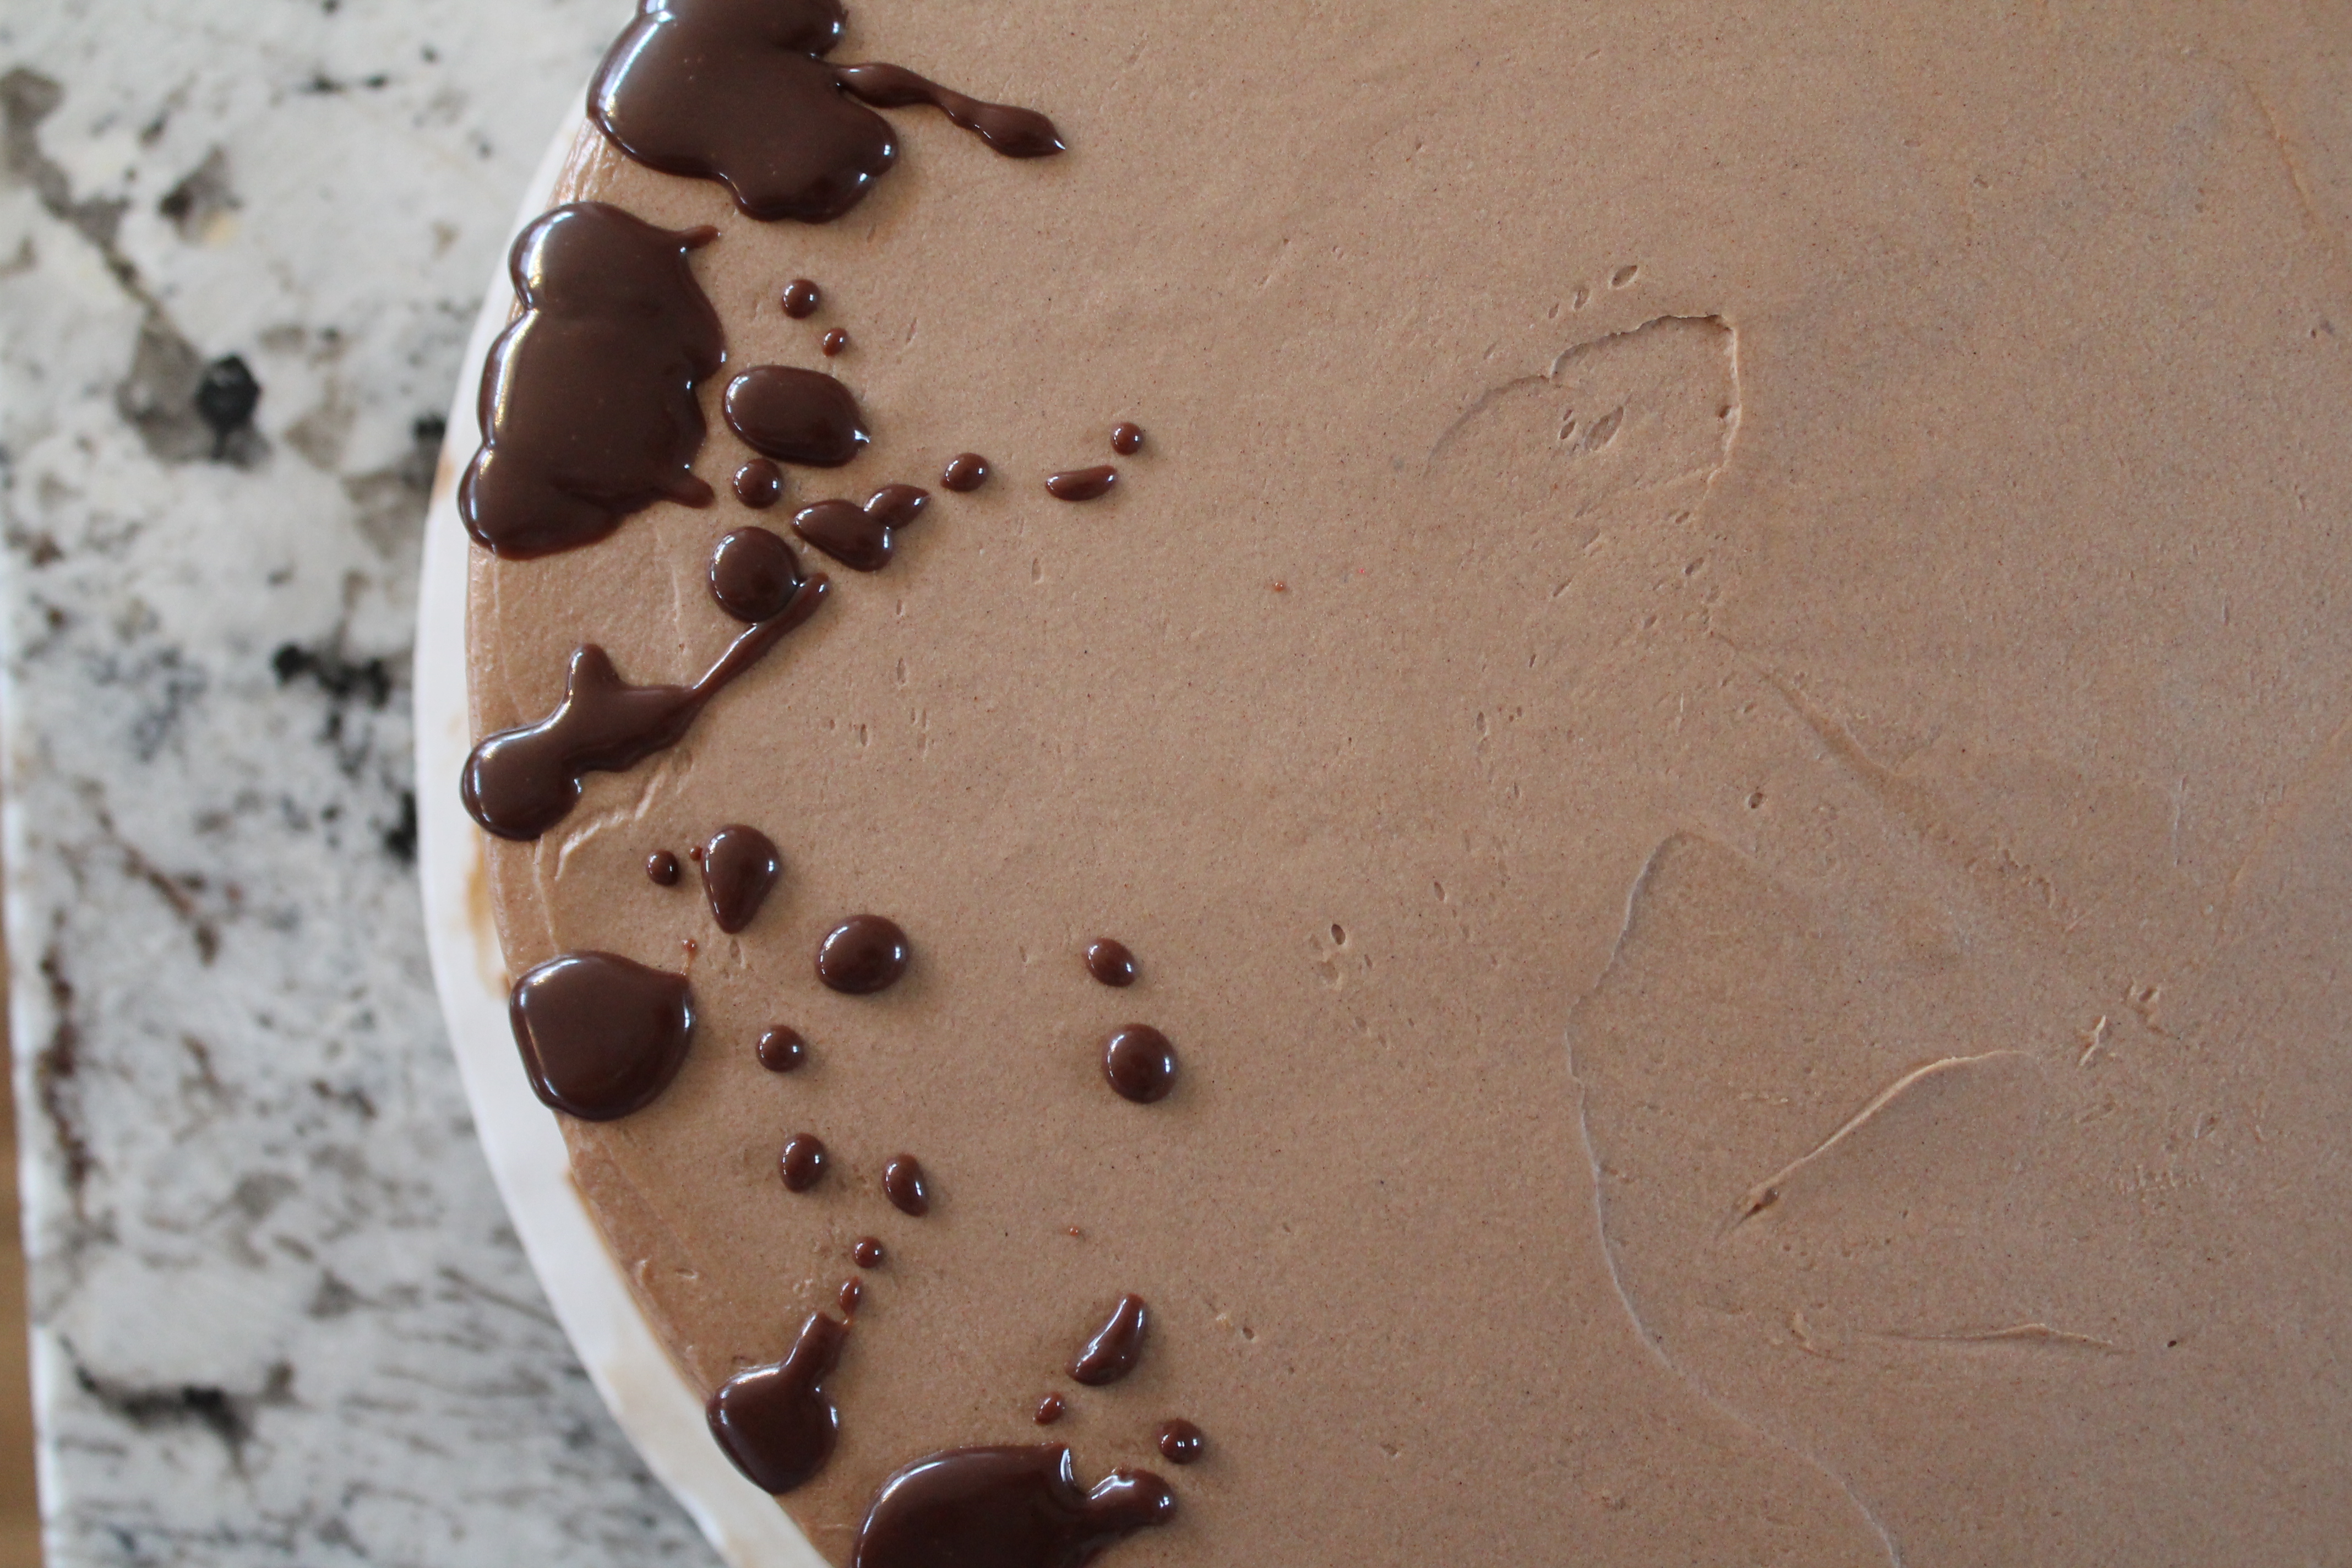
Using a spoon, Drop small drops of chocolate all around the edges of the cake, allowing them to flow over the edge of the cake and drip down the sides. With practice it will be easier to control the length of the drips, and you will figure out how wide apart you like them to be spaced!
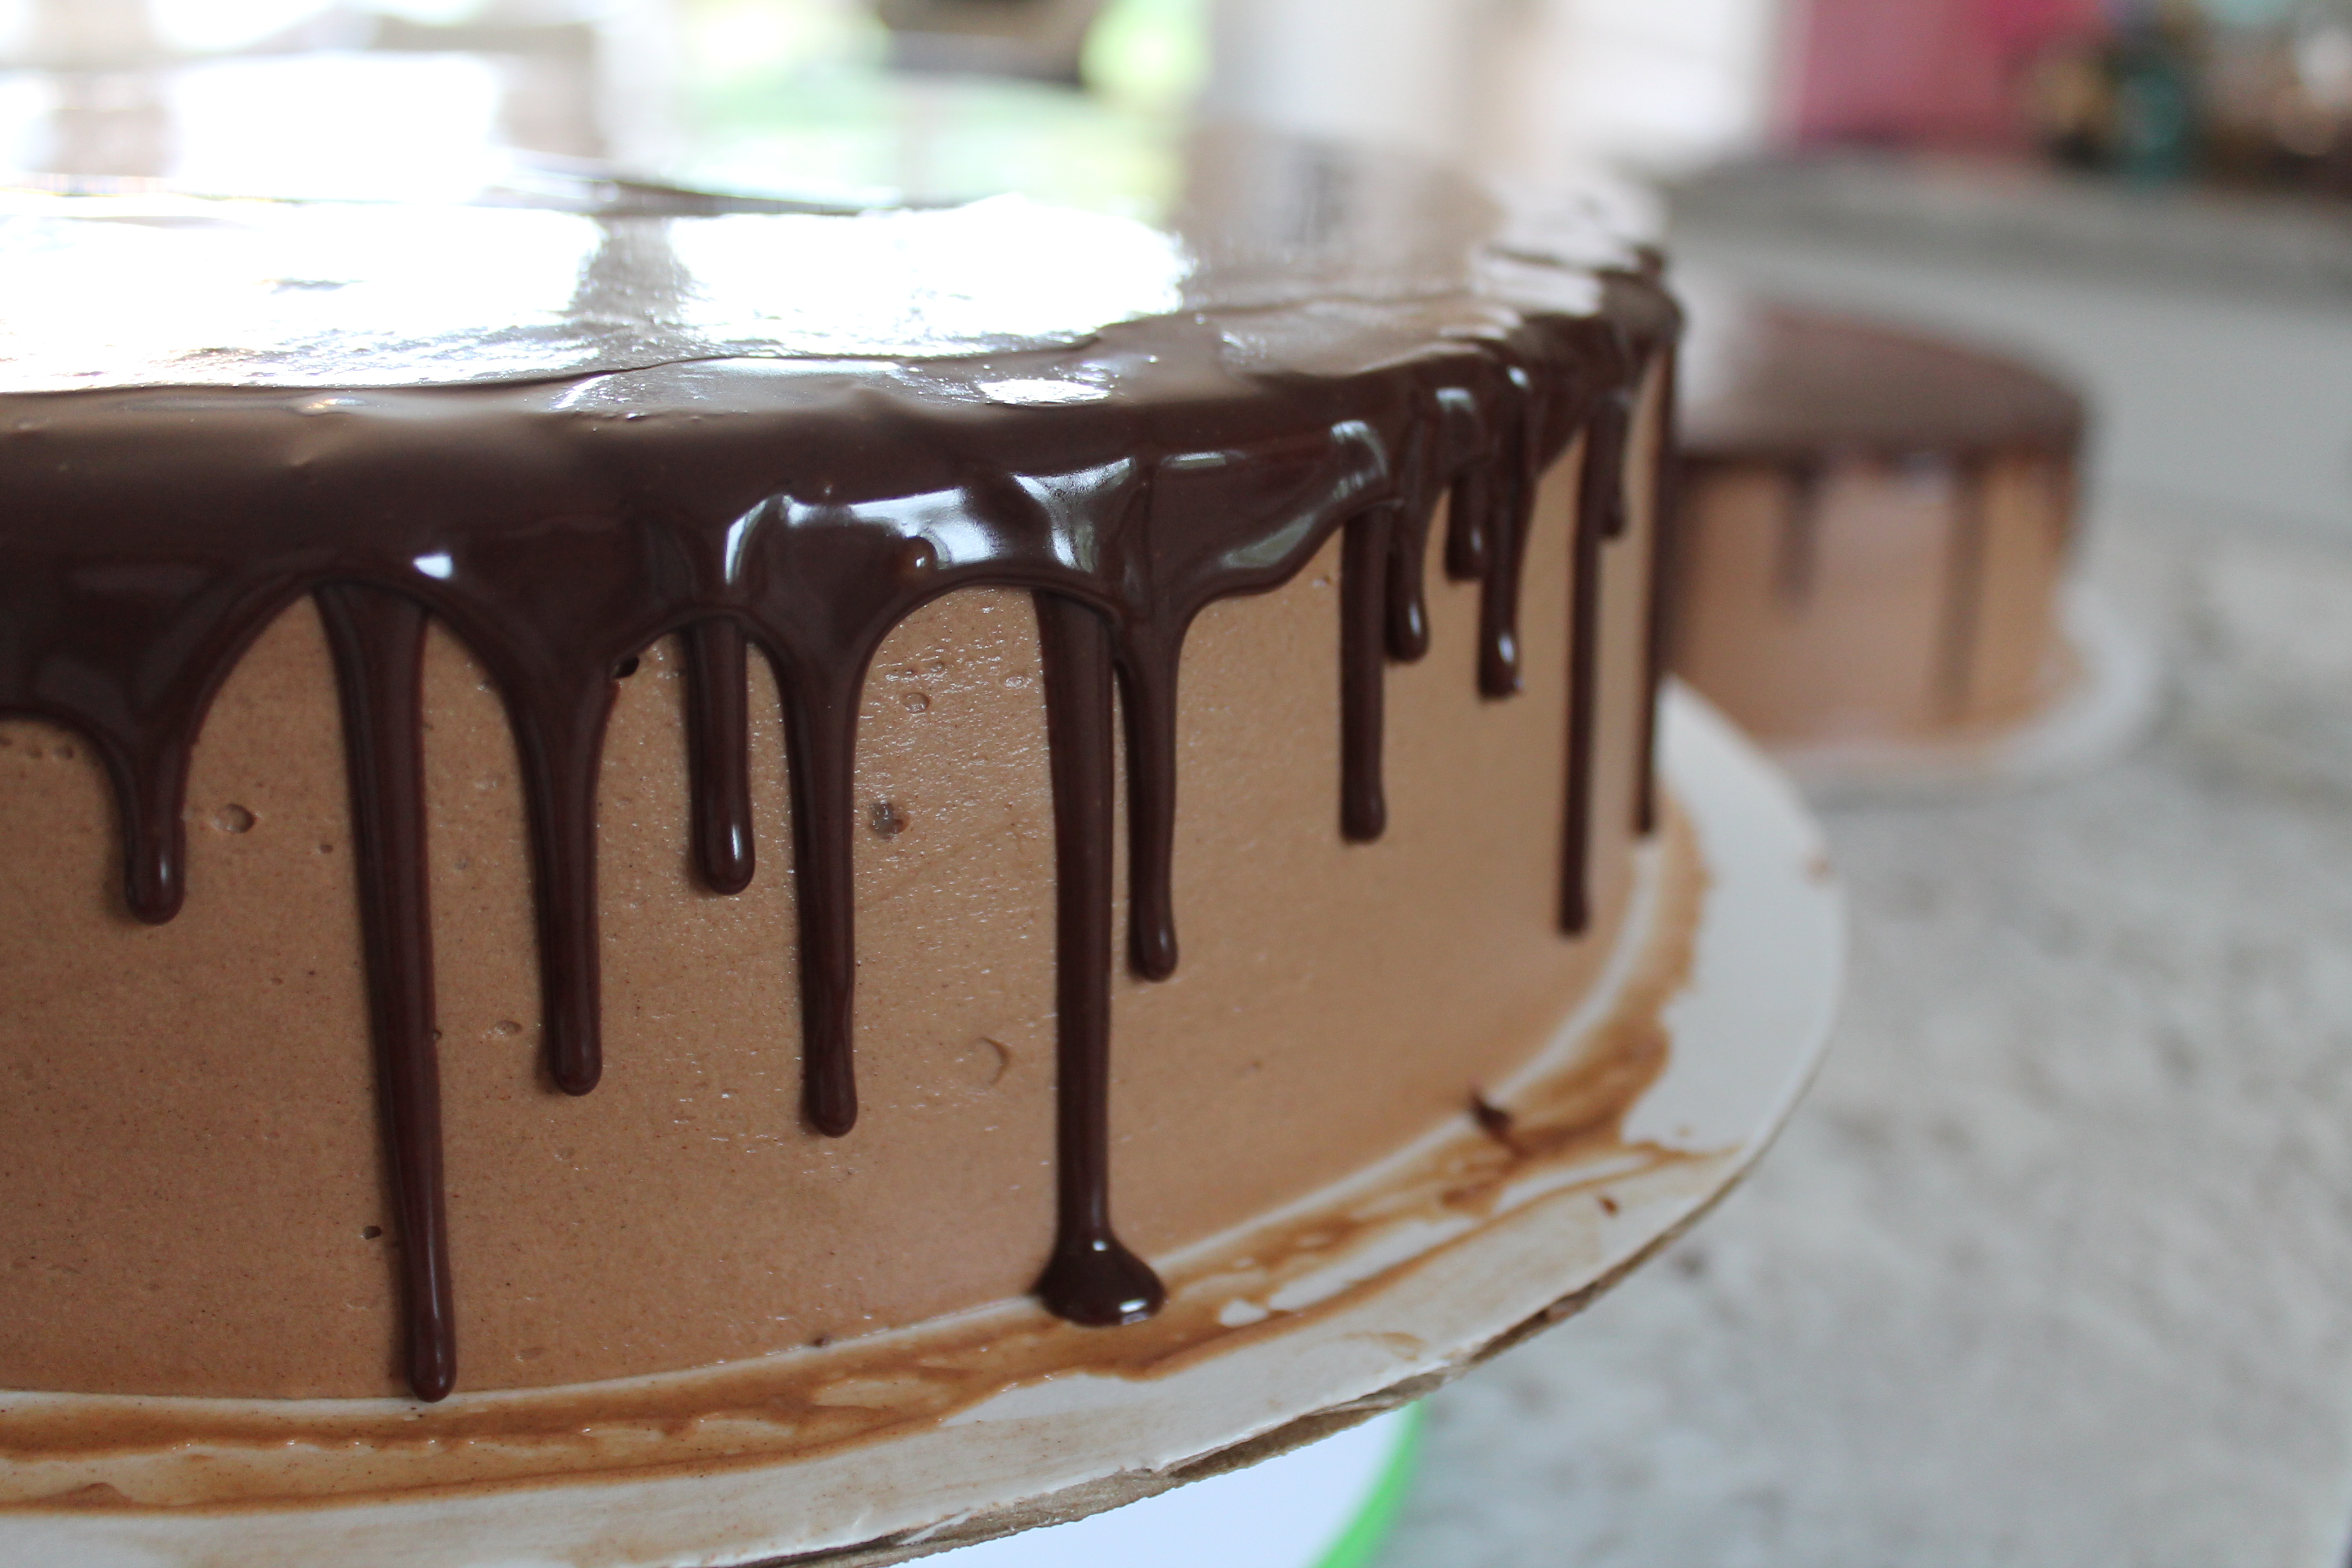 When the side drips are done, spread a fairly thin layer of ganache over the top, working from the outer edges in to the center so that the edge will end up looking smoother. As soon as the ganache starts to set, you should not touch or spread it again, or the glassy look will be lost.
Allow the ganache to set completely, about 10 minutes. Then, if you are making a tiered cake, it will be time to stack!
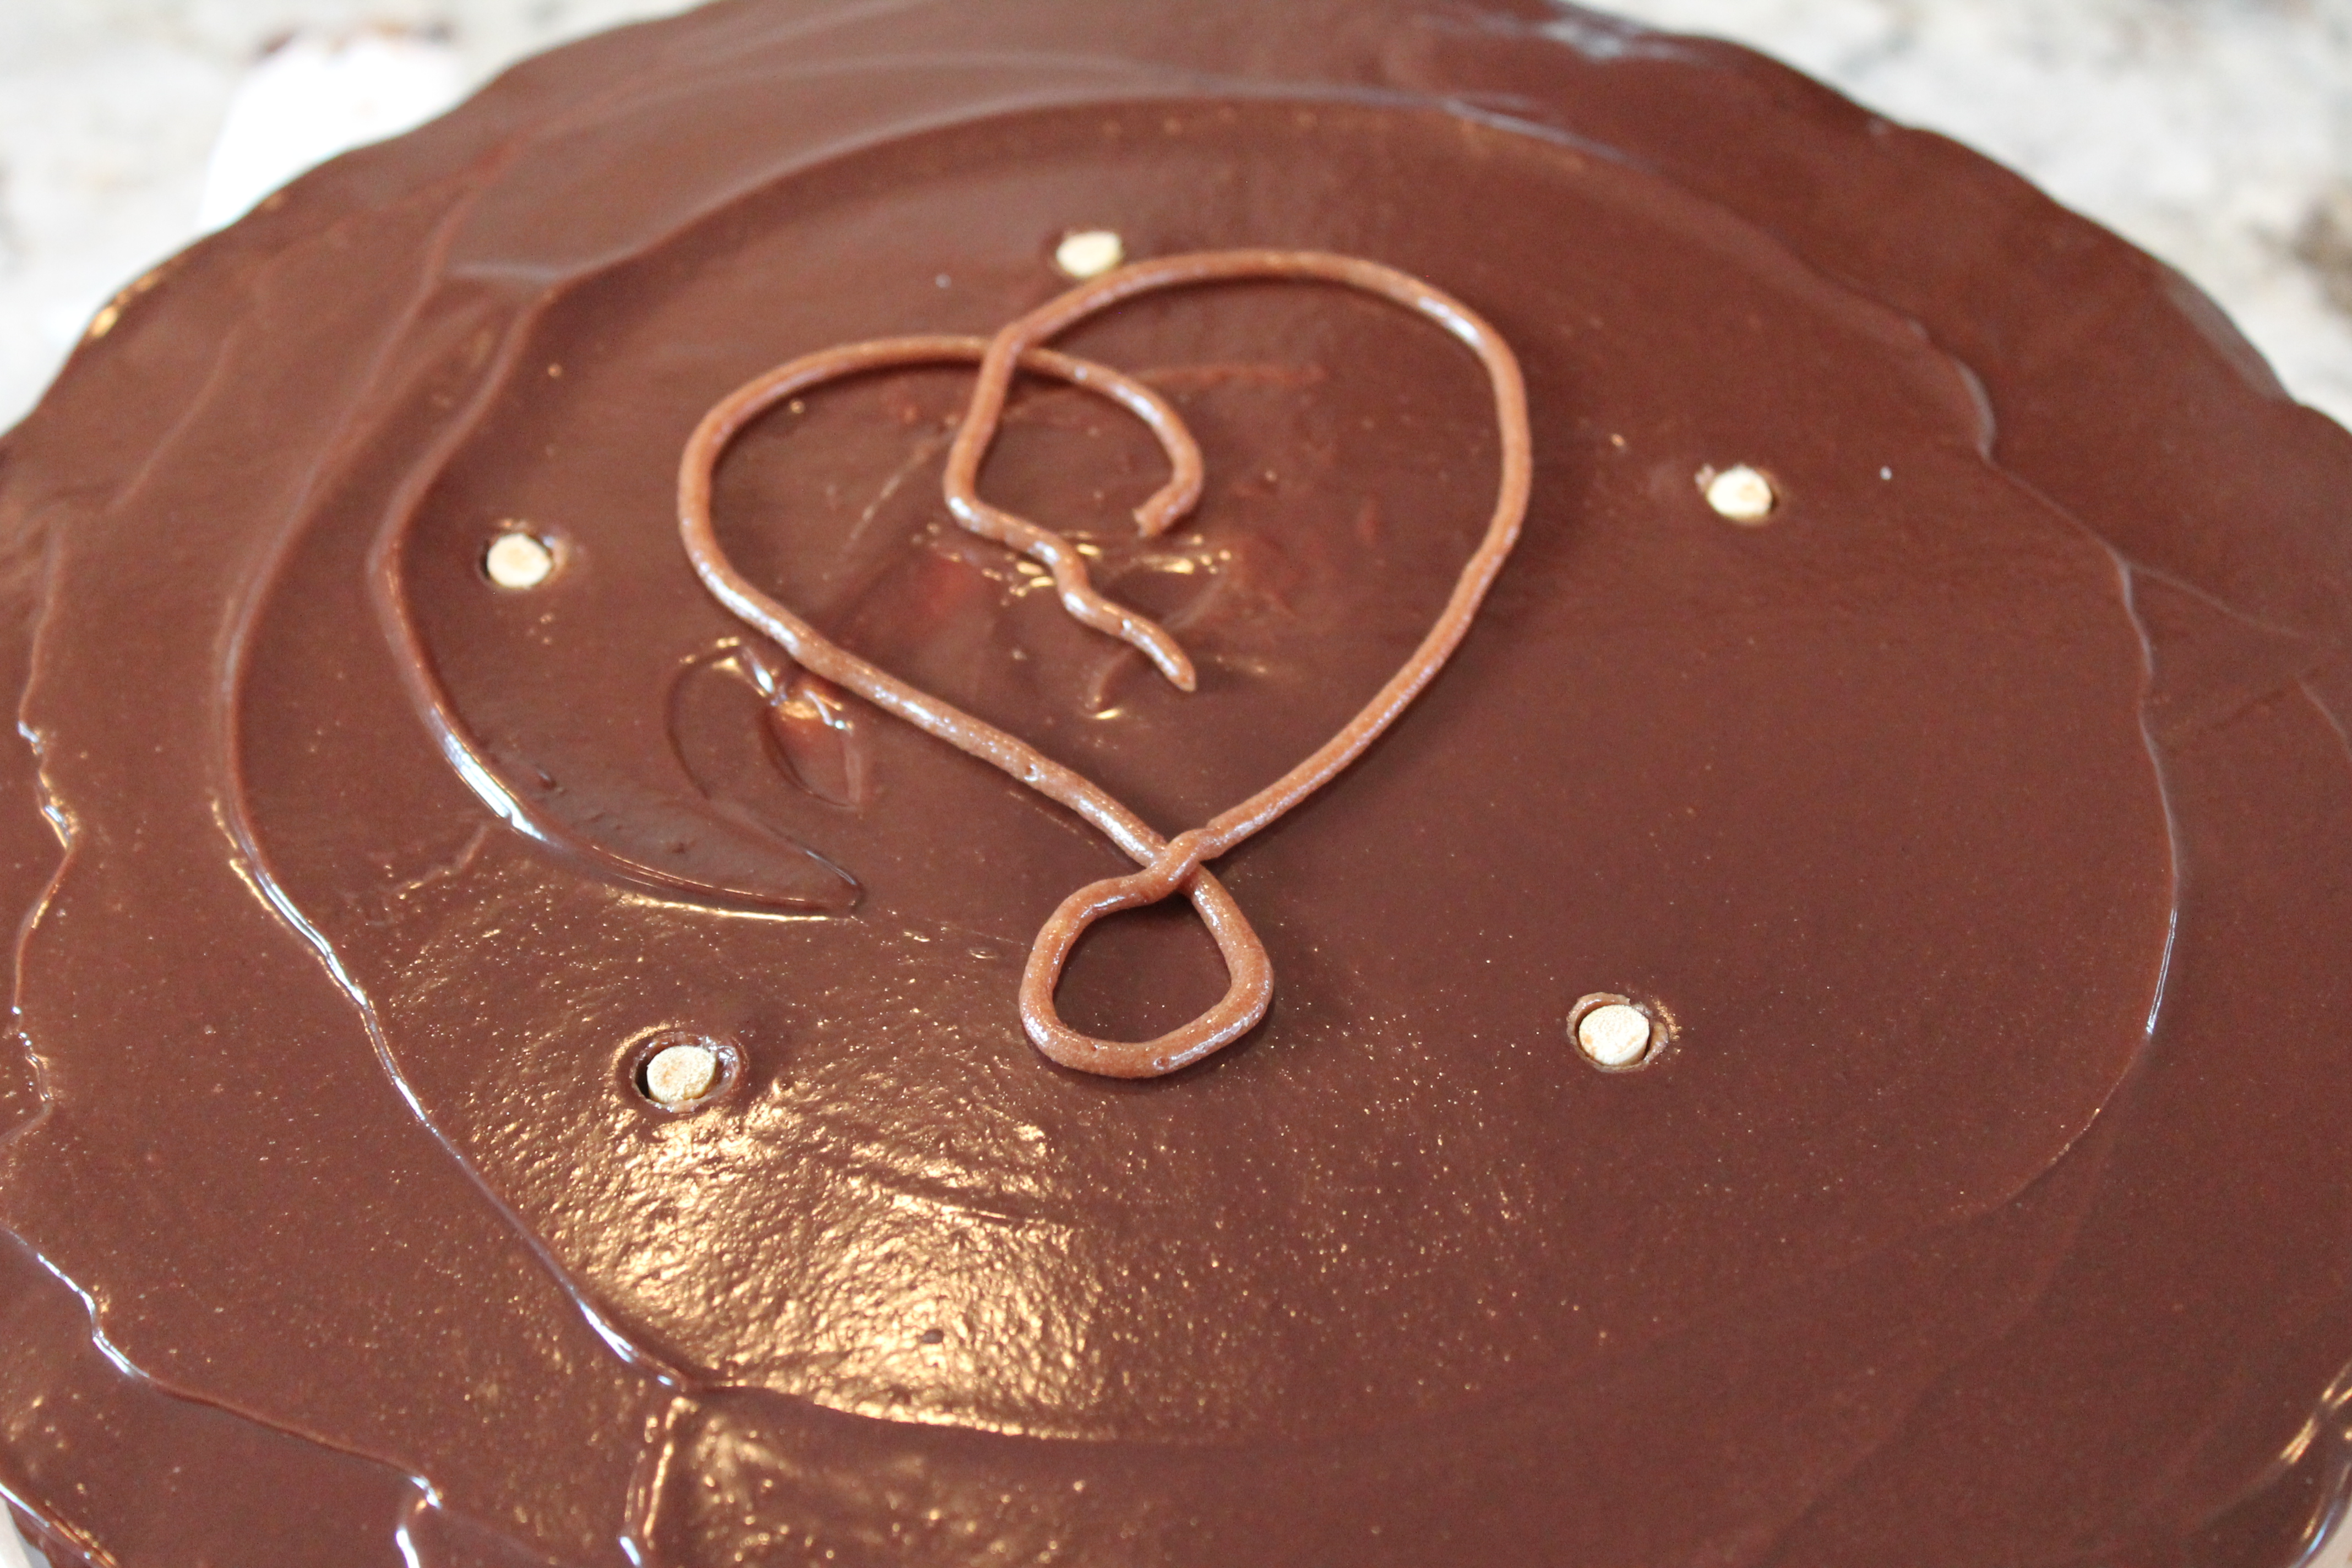
I wrote a comprehensive how-to on stacking a tiered cake a few years ago when I made my first wedding cake, and you can find those instructions here.
When you have stacked and doweled the center of the cake (don’t forget to add a swirl of frosting in between the layers before you stack them!), add a final, small dab of ganache on the top to cover the hole made by the center dowel. This dowel is so important for transporting the cake, especially on a cake topped by slick ganache, so I don’t recommend skipping it. If you are not topping your tiered cake with a decorative topper, then you will want to apply a whole new layer of shiny ganache after doweling the top of the cake, so that the top will be glossy and smooth.
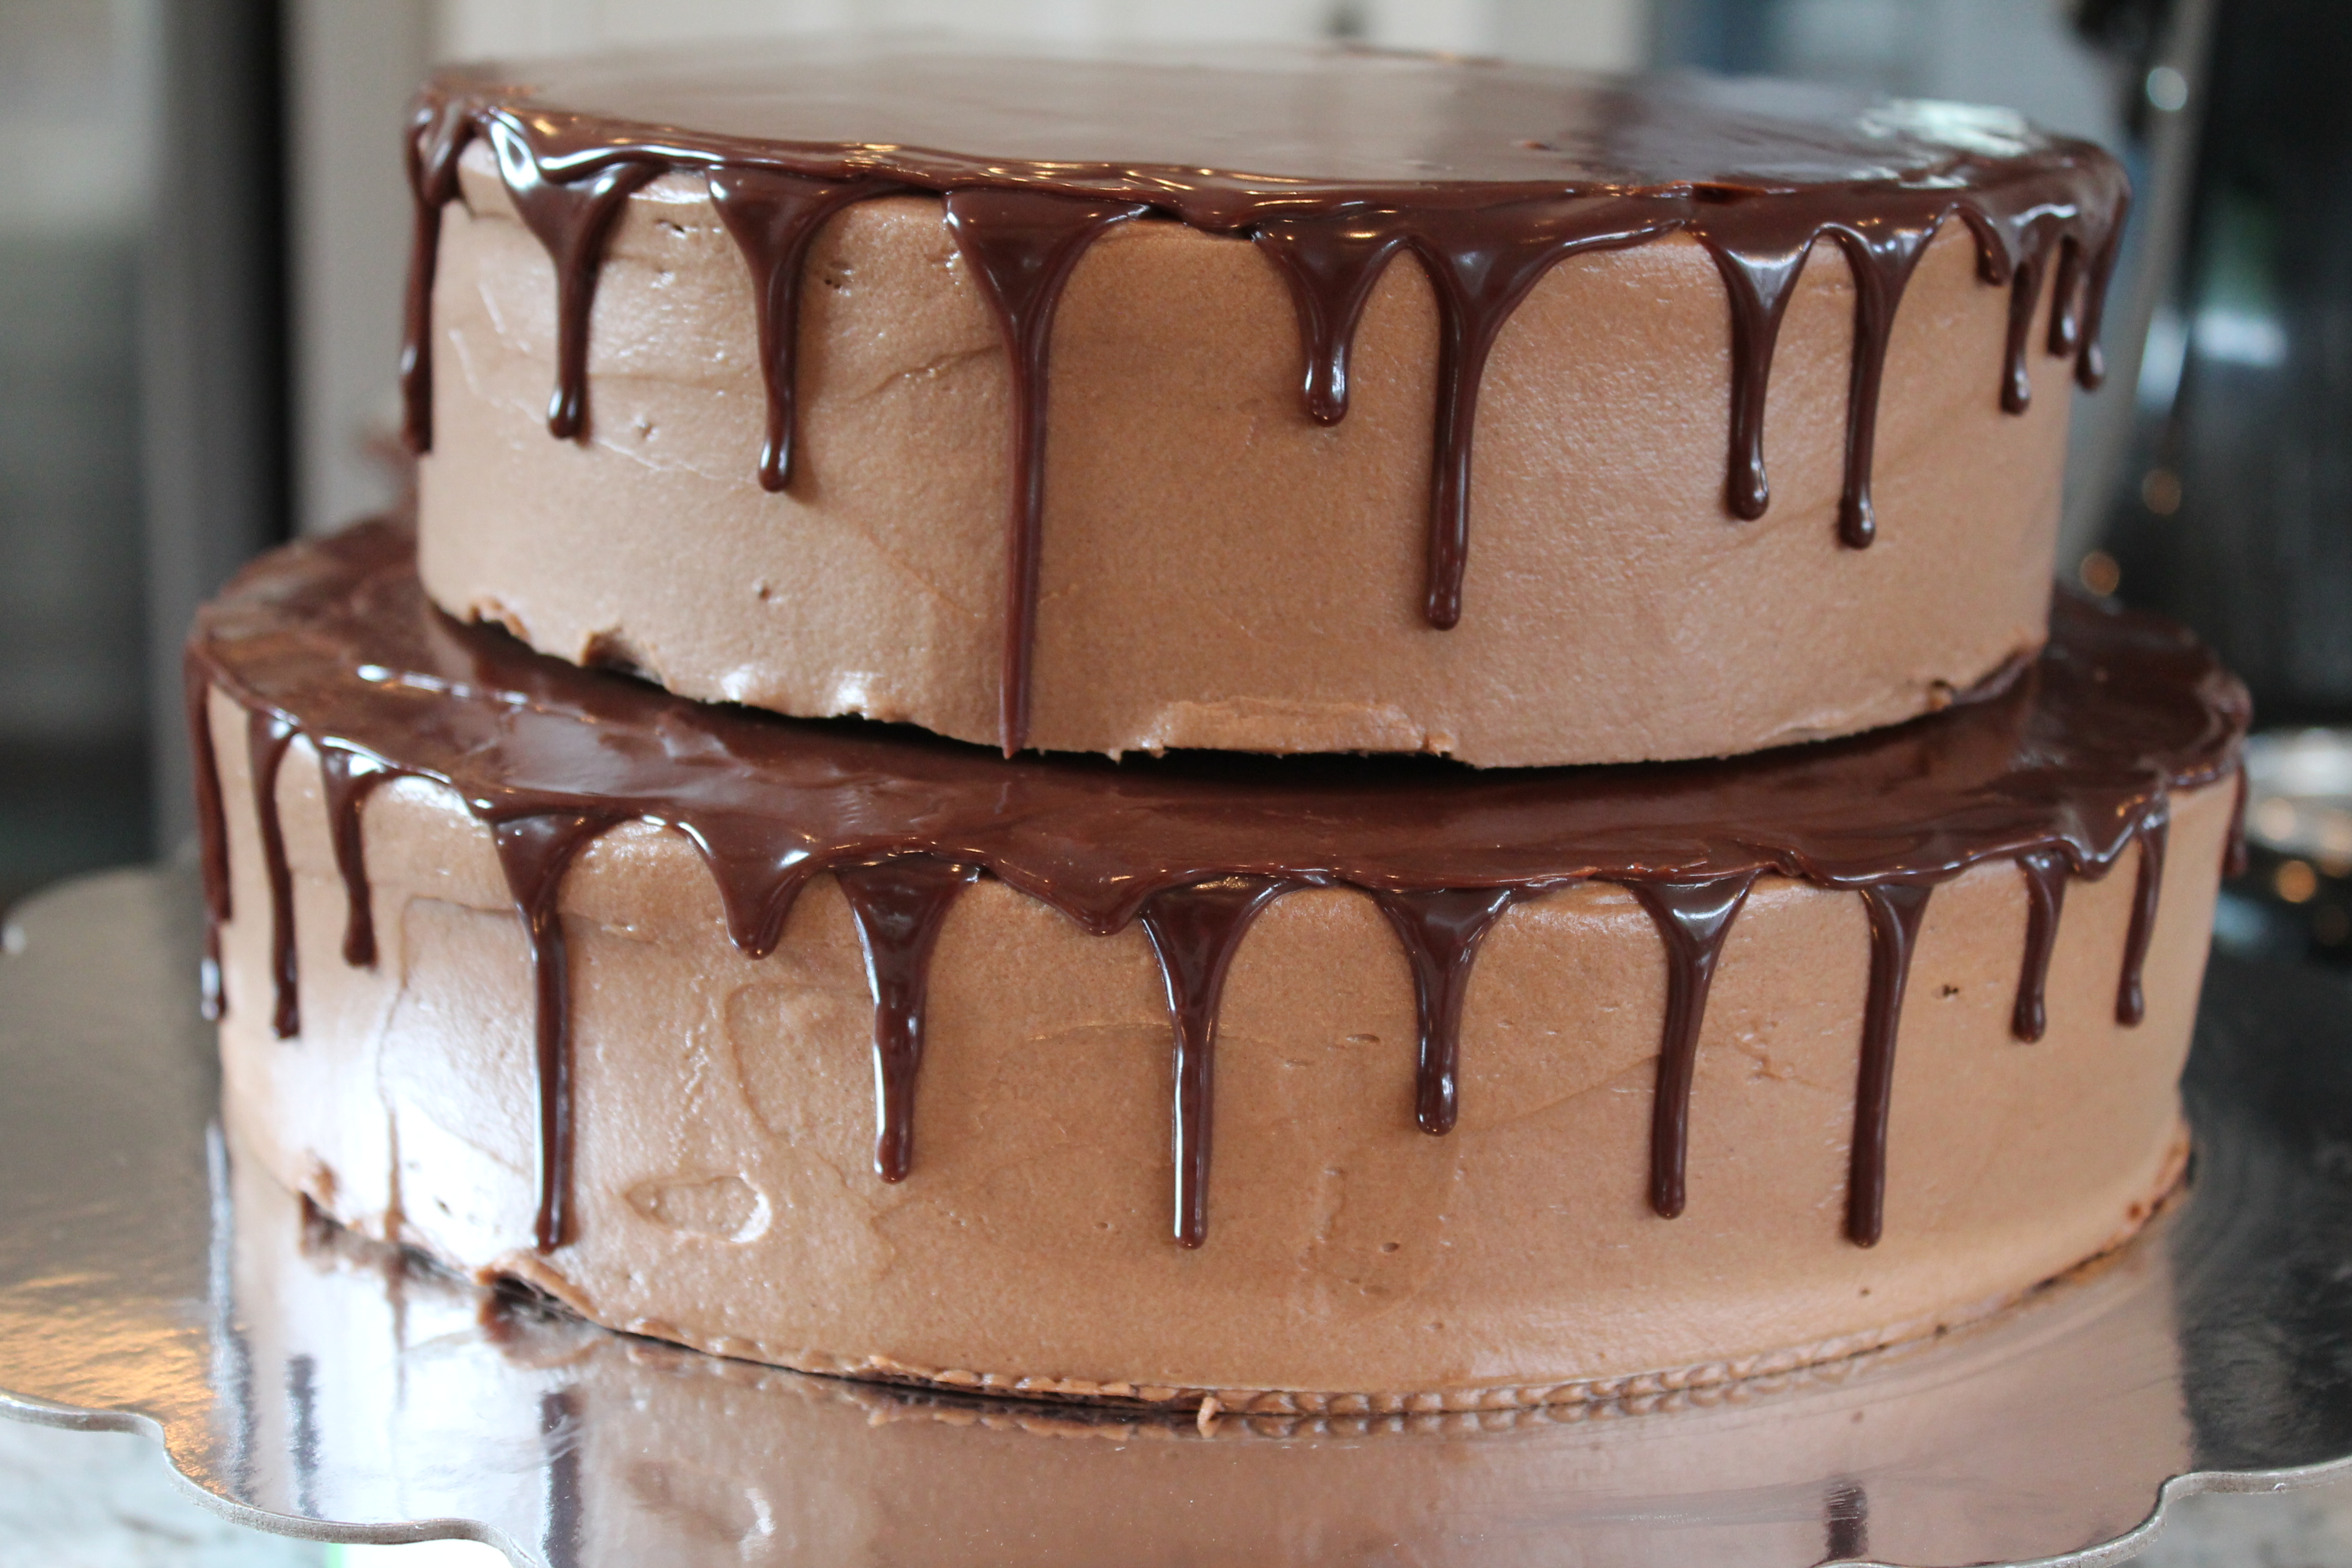
Don’t forget to use some of your reserved frosting to pipe little frosting dots around the seams of the cake. These dots finish the whole look (and they cover tiny fingermarks, too!).
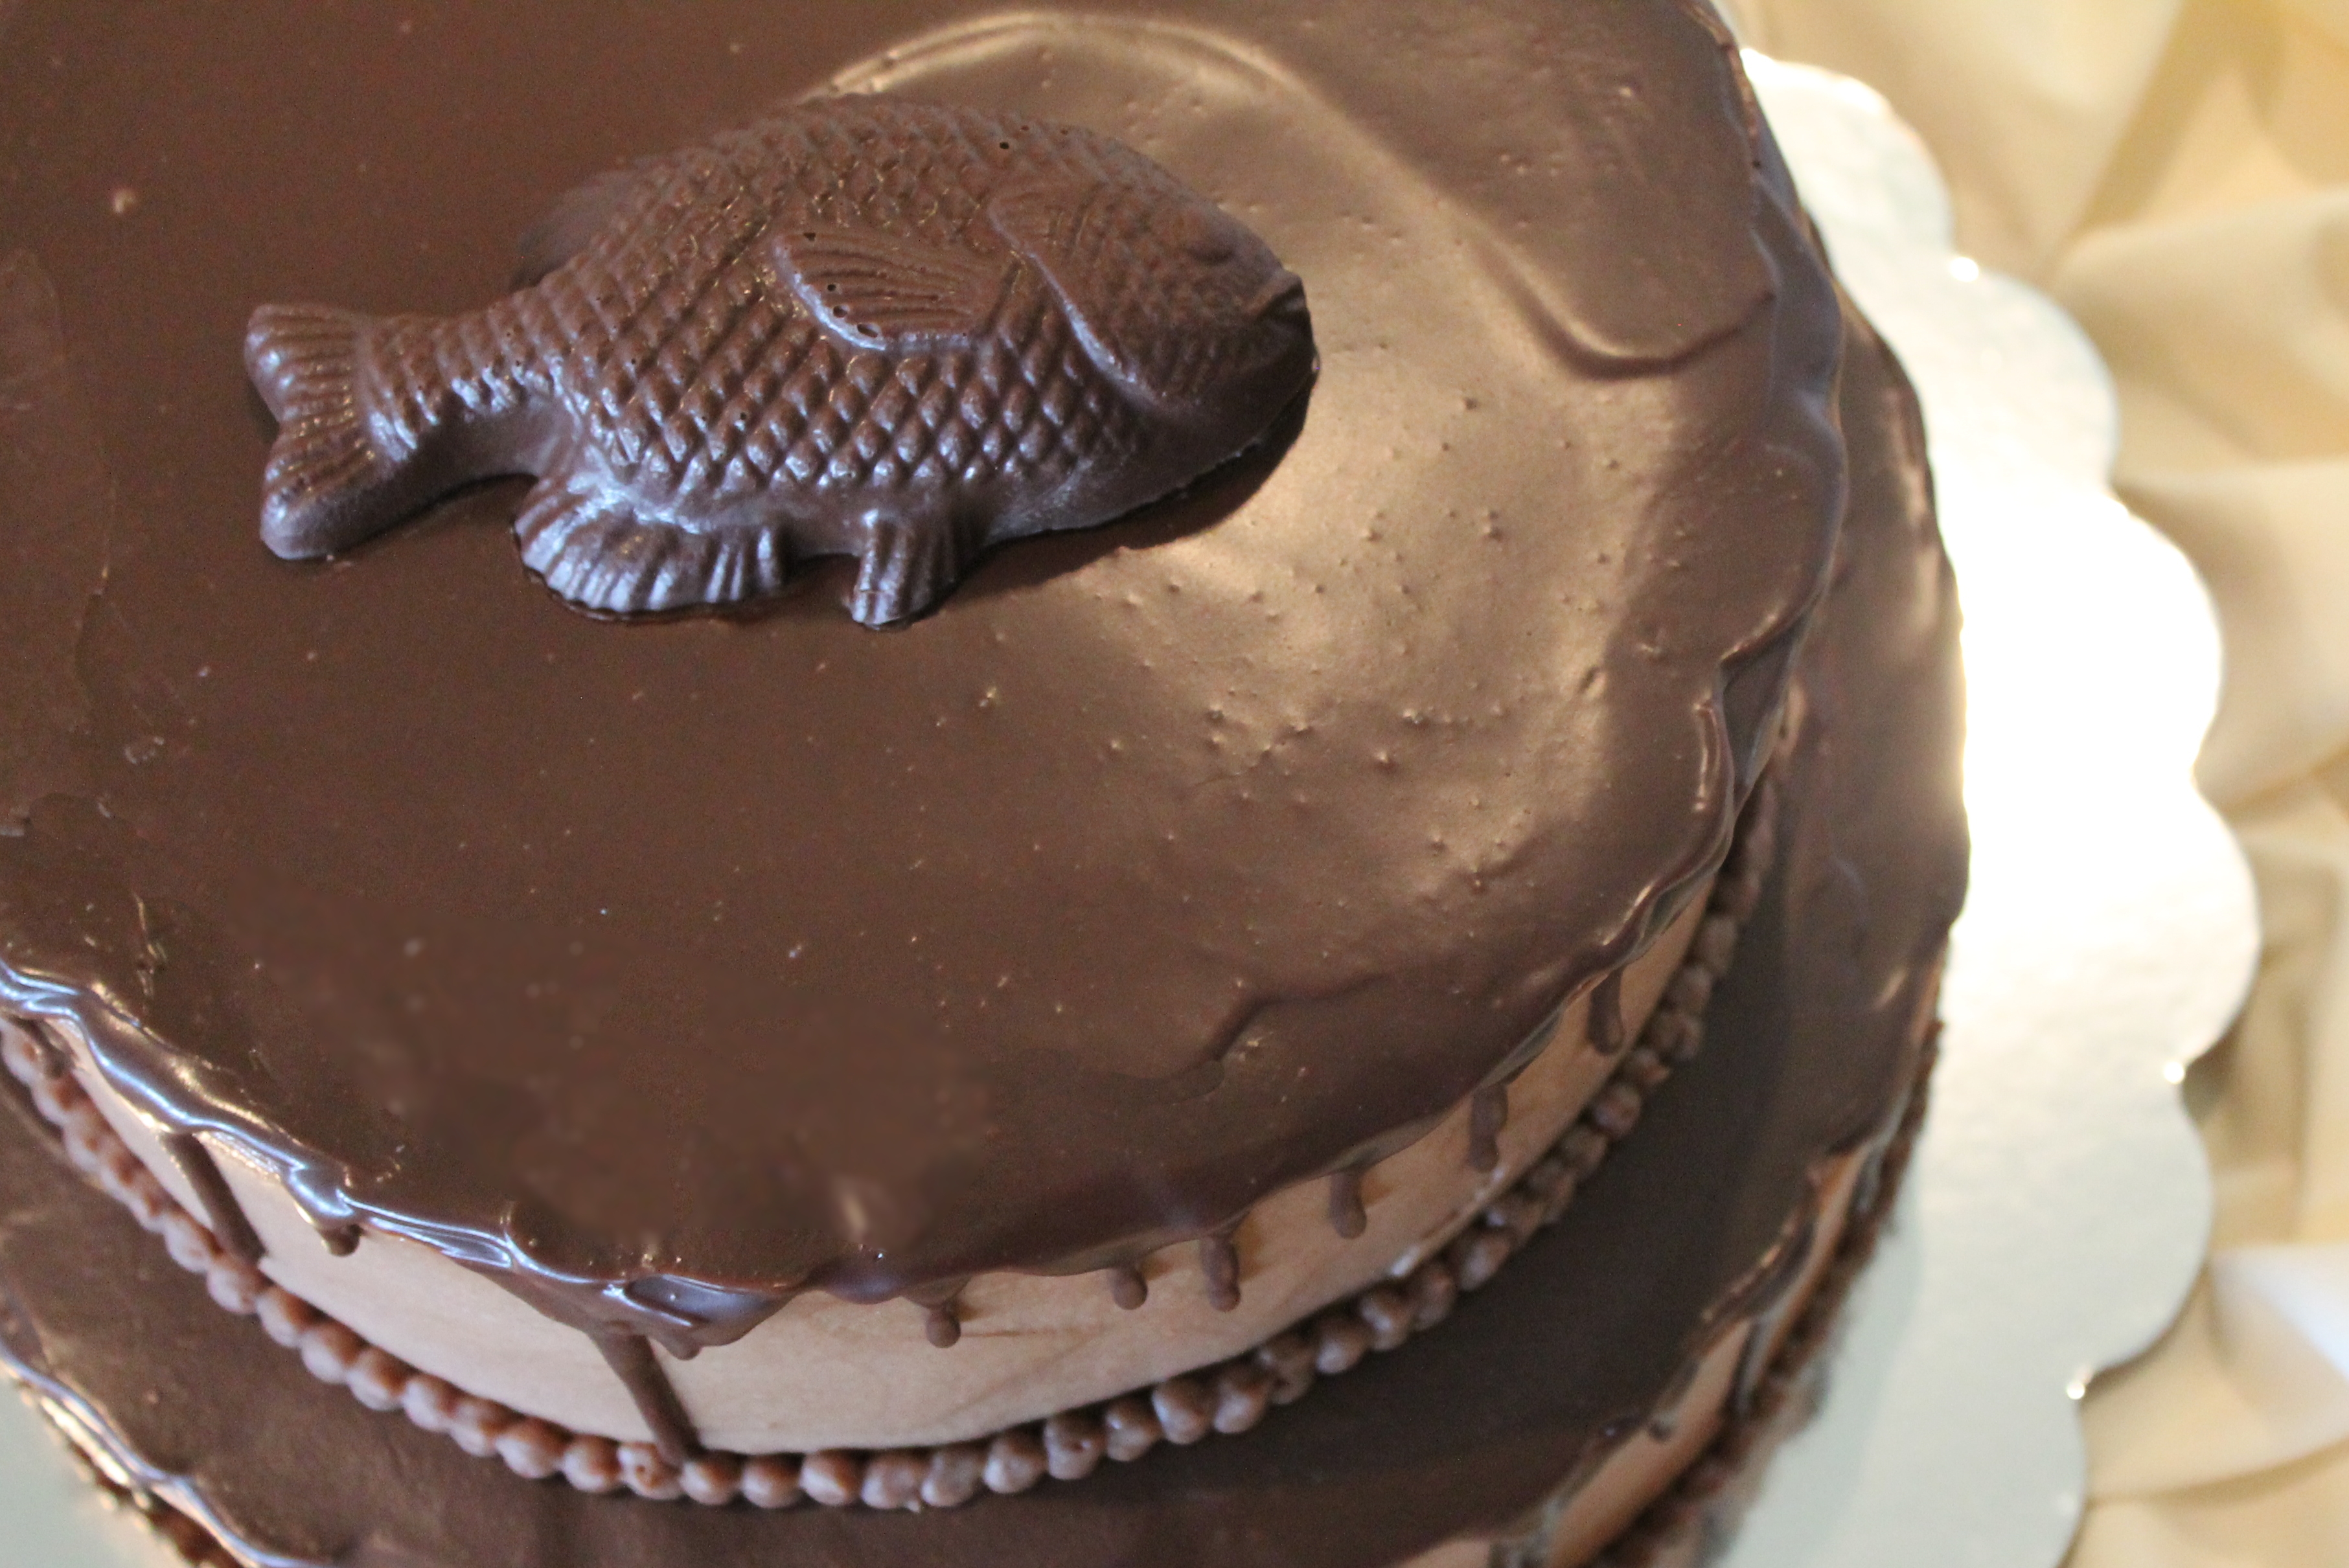
The bride and groom joked with me several times about putting a fish on the groom’s cake. At first, when I said I woud do anything they wanted me to, they backed down and said that wasn’t necessary…but I did it anyway! I found a large chocolate mold in the shape of a fish and filled it with melted milk chocolate. After it was chilled, I simply popped it out of the plastic mold and placed it on the center of the cake, covering up the spot I had driven the structural dowel.
Everyone at the wedding who saw the fish chuckled and said it fit the groom perfectly, so I was very glad I went for it!
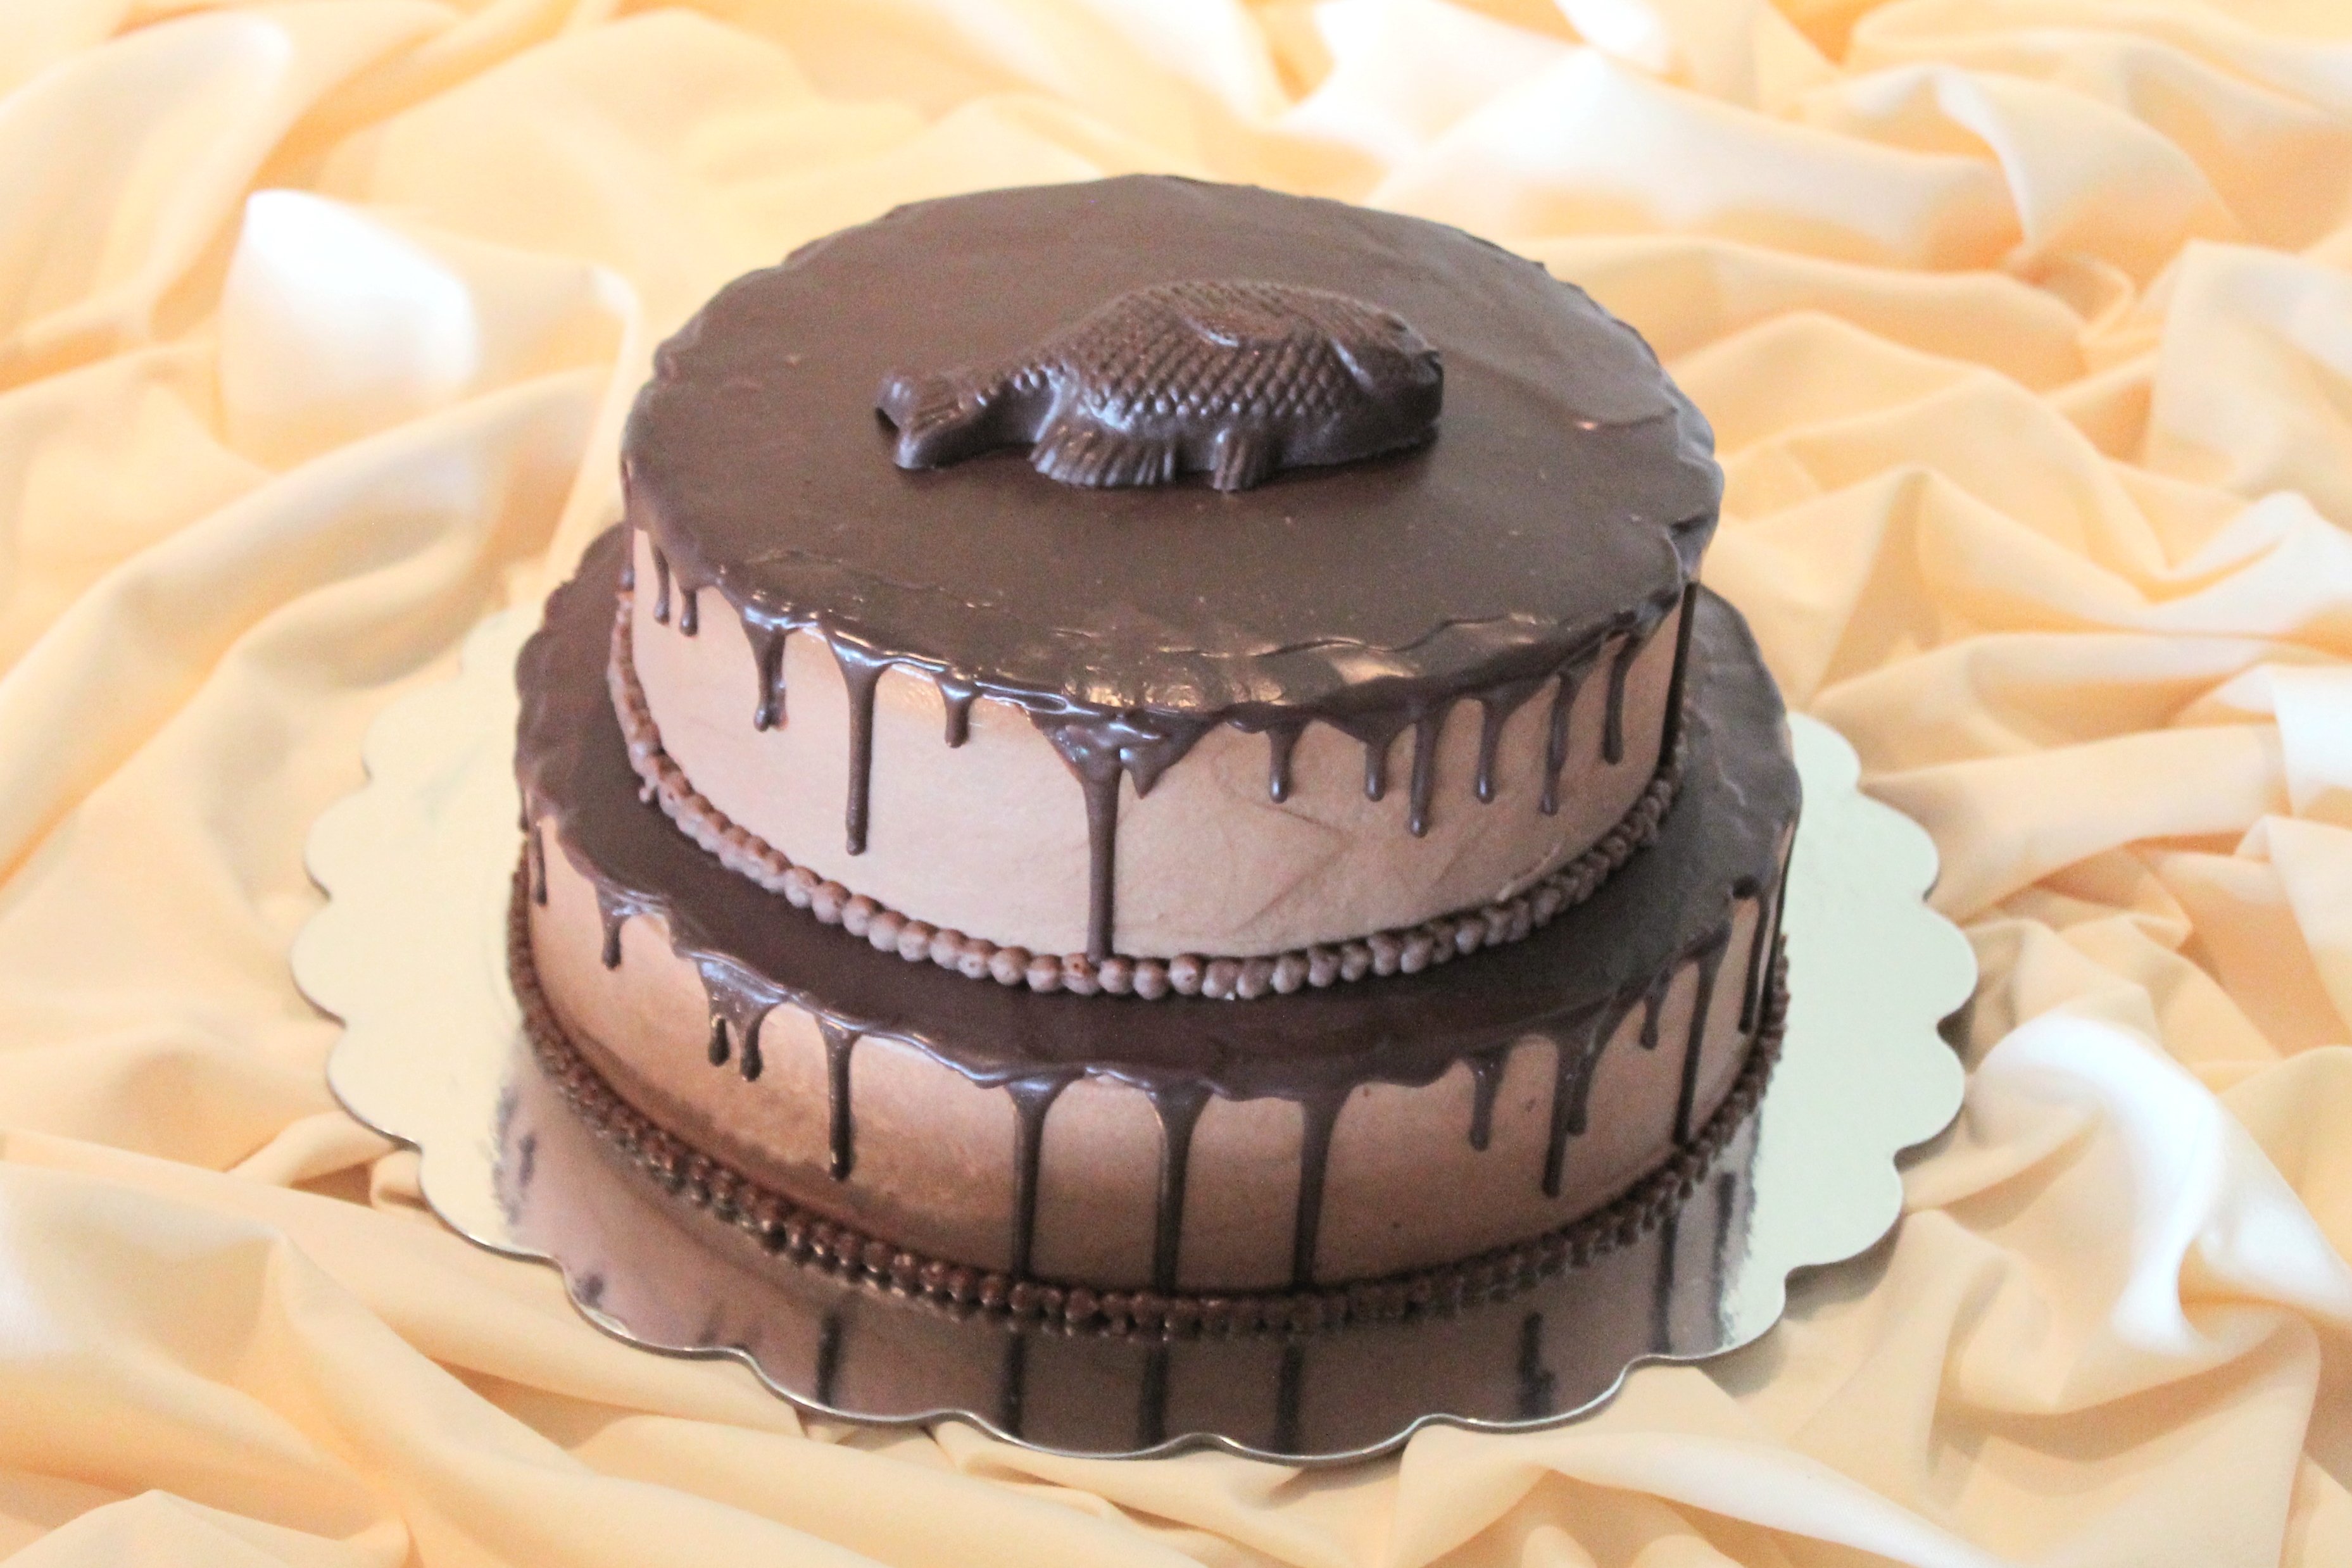 This yellow cake with all the chocolate was so delicious. Even though I baked the cake two days before the wedding, it retained its moisture, and balanced perfectly with the dark, sweet chocolate filling and frosting.
Happy anniversary to a sweet couple! May God continue to bless you and grow you closer together.
Magnificent Moist Yellow Cake with Chocolate Ganache and Chocolate Mousse Buttercream
cake barely adapted from BakeWise
frosting from Sticky, Chewy, Messy, and Gooey
makes a small, tiered cake (8″ and 10″ tiers) or a 9″x13″ layer cake
Cake Ingredients:
3½ cups cake flour
3 cups sugar
1 tbsp. plus ½ tsp. baking powder
1 tsp. salt
4 eggs
6 egg yolks
⅔ cup cultured buttermilk, divided
4 tsp. vanilla extract
½ cup unsalted butter, slightly softened, cut into 1 tbsp. pieces
⅔ cup canola oil
1 cup heavy cream
Cake Directions:
Preheat oven to 350°. Place a baking stone on the lowest rack of the oven, and position the upper rack directly in the center of the oven.
Grease and flour an 8″ round cake pan and a 10″ round cake pan. Line the bottoms with parchment circles and set aside.
In a stand mixer bowl fitted with a whisk attachment, whisk together the dry ingredients (flour, sugar, baking powder, and salt), about 30 seconds.
Add the soft butter, oil, and ¼ cup buttermilk to the flour mixture and mix on low speed to moisten the flour. Increase the mixer speed to medium and beat for 1½ minutes. Scrape down the sides and across the bottom of the bowl.
In a separate bowl, combine the eggs, yolks, the remaining buttermilk (about 6 tbsp.), and the vanilla. Whisk until the eggs are broken down and blended into the liquid.
Add the egg mixture, one third at a time, into the mixer bowl with the flour and butter, beating for 20 seconds after each addition and scraping the sides of the bowl.
In a large, cold bowl with cold beaters, whip the cream until soft peaks form when the beaters are lifted. Beat another 10 seconds. Stir about one-quarter of the whipped cream into the batter to lighten it. Fold in the rest of the whipped cream using a spatula.
Pour the batter into the prepared pans, aiming for about 60% of the batter in the 10″ round cake pan and 40% in the 8″. Test the depth of batter in each cake pan with two toothpicks and compare: they should be the same, such that each cake will end up the same height. Drop the pans from a height of about 4 inches onto the counter to knock loose any large air bubbles.
Bake the cakes in the center of the preheated oven: the 8″ cake will be done after 42–45 minutes, and the 10″ cake will take 50–53 minutes (in both cases, I baked for the longer time). The tops should be golden and spring back when pressed lightly in the center. If pressing the cake creates a dent, then return the cake to the oven for 2–3 minutes and test again. (A 9″x13″ sheet cake will take about 50 minutes; start testing at 48 minutes.)
Cool the cakes for 10 minutes in the pan, then run a knife around the edges and turn the cakes out onto a cooling rack to finish cooling. Remove the parchment when the cakes are cool.
Before filling and frosting the cakes, level the tops and slice each tier in half (do not slice the sheet cakes).
Ganache Filling Ingredients:
1 cup heavy cream
6 oz. (1 cup) semisweet chocolate chips
½ tsp. vanilla extract
pinch of salt
Filling Directions:
Heat the cream on the stove or in the microwave until simmering.
Pour the hot cream over the chocolate chips and let stand for 1 minute. Whisk until smooth. Add vanilla and salt and whisk again th combine.
Let the ganache cool for 10 minutes.
Spread a little less than half of the ganache over the bottom of the 8″ cake round, and spread the remaining ganache over the bottom of the 10″ round. Chill the rounds in the freezer for 10 minutes to help the ganache to set before topping each round with its other half.
Mousse Buttercream Ingredients:
6 eggs
1½ cups sugar
2 tbsp. cocoa powder
1 tsp. vanilla extract
pinch of salt
1½ lbs. (6 sticks) cold unsalted butter
8 oz. (1⅓ cups) semisweet chocolate chips , melted and cooled
Buttercream Directions:
Whisk together the eggs, sugar, and cocoa powder in the metal bowl of a stand mixer.
Fill a small sauté pan with water and bring to a simmer over medium-high heat. Place the mixing bowl in the simmering water and whisk the egg mixture constantly until the sugar is completely dissolved and the mixture is thick and fluffy and very hot, 5–6 minutes. Use an instant-read thermometer to check the temperature of the mixture; it should be anywhere between 120° and 140°.
Remove the bowl from the simmering water and, using the stand mixer whisk attachment, beat the eggs at medium-high speed until they are tripled in volume and form soft peaks, about 10 minuntes. The bottom of the bowl should be completely cool to the touch. Beat in the vanilla and salt.
While the eggs are mixing, unwrap the individual sticks of butter and cover them loosely in plastic wrap (top and bottom). Pound the butter several times with a rolling pin, until the butter is soft and malleable but still cool.
With the mixer on medium-high speed, add the butter to the meringue, approximately 2 tbsp. at a time, beating in each addition until it is incorporated. Don’t panic if the buttercream seems too liquidy or looks curdled; it will emulsify into a smooth, creamy frosting before you run out of butter.
When the buttercream is smooth and glossy, turn off the mixture and carefully fold in the melted chocolate with a rubber spatula.
Scoop about 1 cup frosting into a piping bag and set aside. Do not refrigerate.
Next, scoop a small amount of frosting out into a separate bowl. Apply a crumb coat to the filled cake tiers from this small amount of frosting, adding more as needed but not dipping the spreading tool into the main frosting (so no stray crumbs get mixed into the frosting). Chill the crumb coated cake tiers in the freezer for 10 minutes.
Frost the outsides of the cakes fully with the remaining buttercream, smoothing with an icing scraper.
Chill the cakes for at least 1 hour before drizzling with ganache.
Ganache Glaze Ingredients:
¾ cup heavy cream
6 oz. semisweet chocolate chips (about 1 cup)
Glaze Directions:
Make the ganache as described above (pour hot cream over chocolate and whisk until smooth). Let the smooth ganache stand for 10 minutes to cool.
Using a spoon, drip small amounts of ganache over the outer edges of each cake tier, allowing small drips to run over the sides. For a natural look, vary the distance between each drip and the length of the drips. The glaze will naturally set as it drizzles over the cold cake.
When the drips are complete, quickly spread the remaining frosting over the tops of the cake tiers, smoothing as much as possible while it is still warm. Once the glaze sets on top of the cake, it will lose its glassy look with continued spreading or smoothing.
When the cake tiers are fully frosted and decorated, stack the tiers, following the instructions given here. After the cake is assembled, pipe small frosting dots around the base of each tier.
Store in an air-tight container in the refrigerator until ready to display and serve!
Next time…
I will share with you how I made the bridal cake—and later, how to safely transport tiered cakes to a reception or party.
