Woo-hoo, it’s time to frost a wedding cake!
You guys, this step is totally daunting. I’m not going to lie to you. The frosting is the part everyone sees! Everyone is going to judge your delicious wedding cake by its cover. So we had better make sure it’s a beautiful one!
What you see on this wedding cake is purely frosting. No fondant here! (I was very pleased that the bride asked me not to use fondant, because I think buttercreams and cream cheese frostings are way tastier than fondant…but I must admit that fondant is easier to smooth than frosting, so I had to bring my A-game.)
And let me tell you, this cream cheese frosting infused with a splash of Baileys Irish cream was divine!
Let’s start off by making a double batch of frosting. We can worry about the assembly and frosting each layer in due time! Baby steps.
 Making cream cheese frosting is really, really simple. Hooray! You absolutely must start with room temperature cream cheese and butter, though, or you will end up with lumpy frosting. Lumpy frosting will never make a smoothly frosted cake!
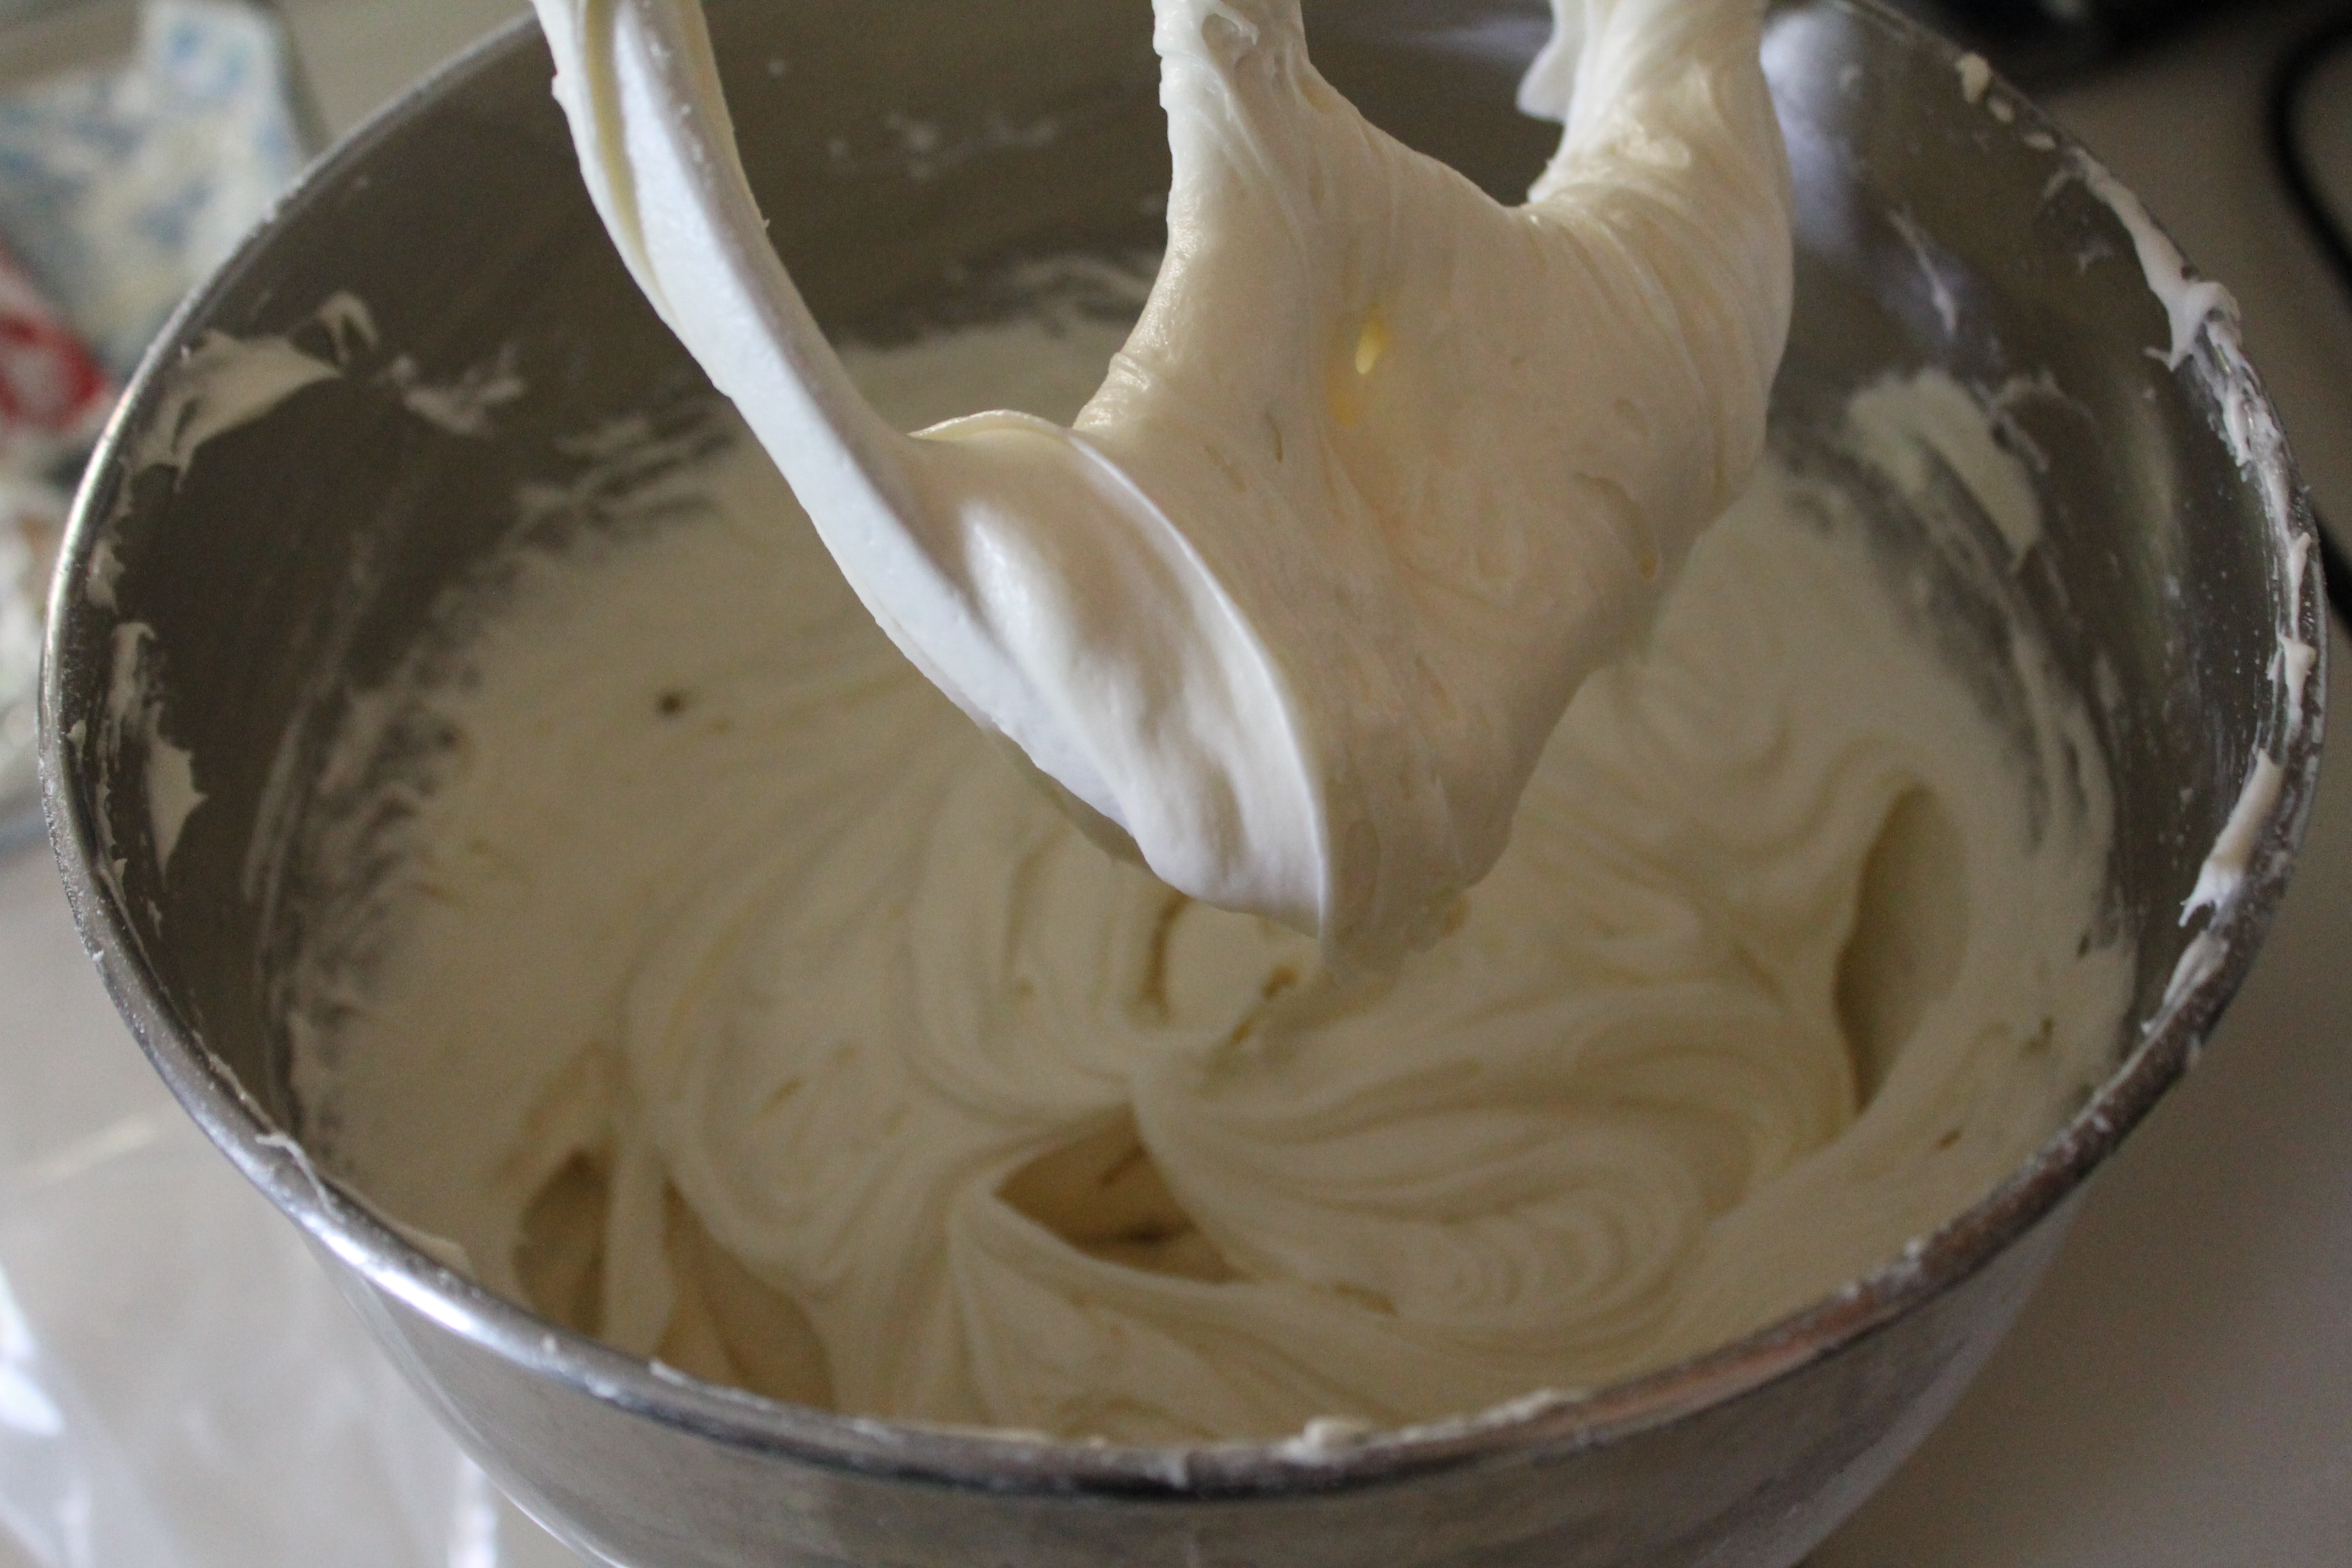
Beat the cream cheese and unsalted butter until it is light and airy. This took me about 5 minutes, scraping the sides of the bowl several times to make sure all of the cream cheese and butter got beaten together.
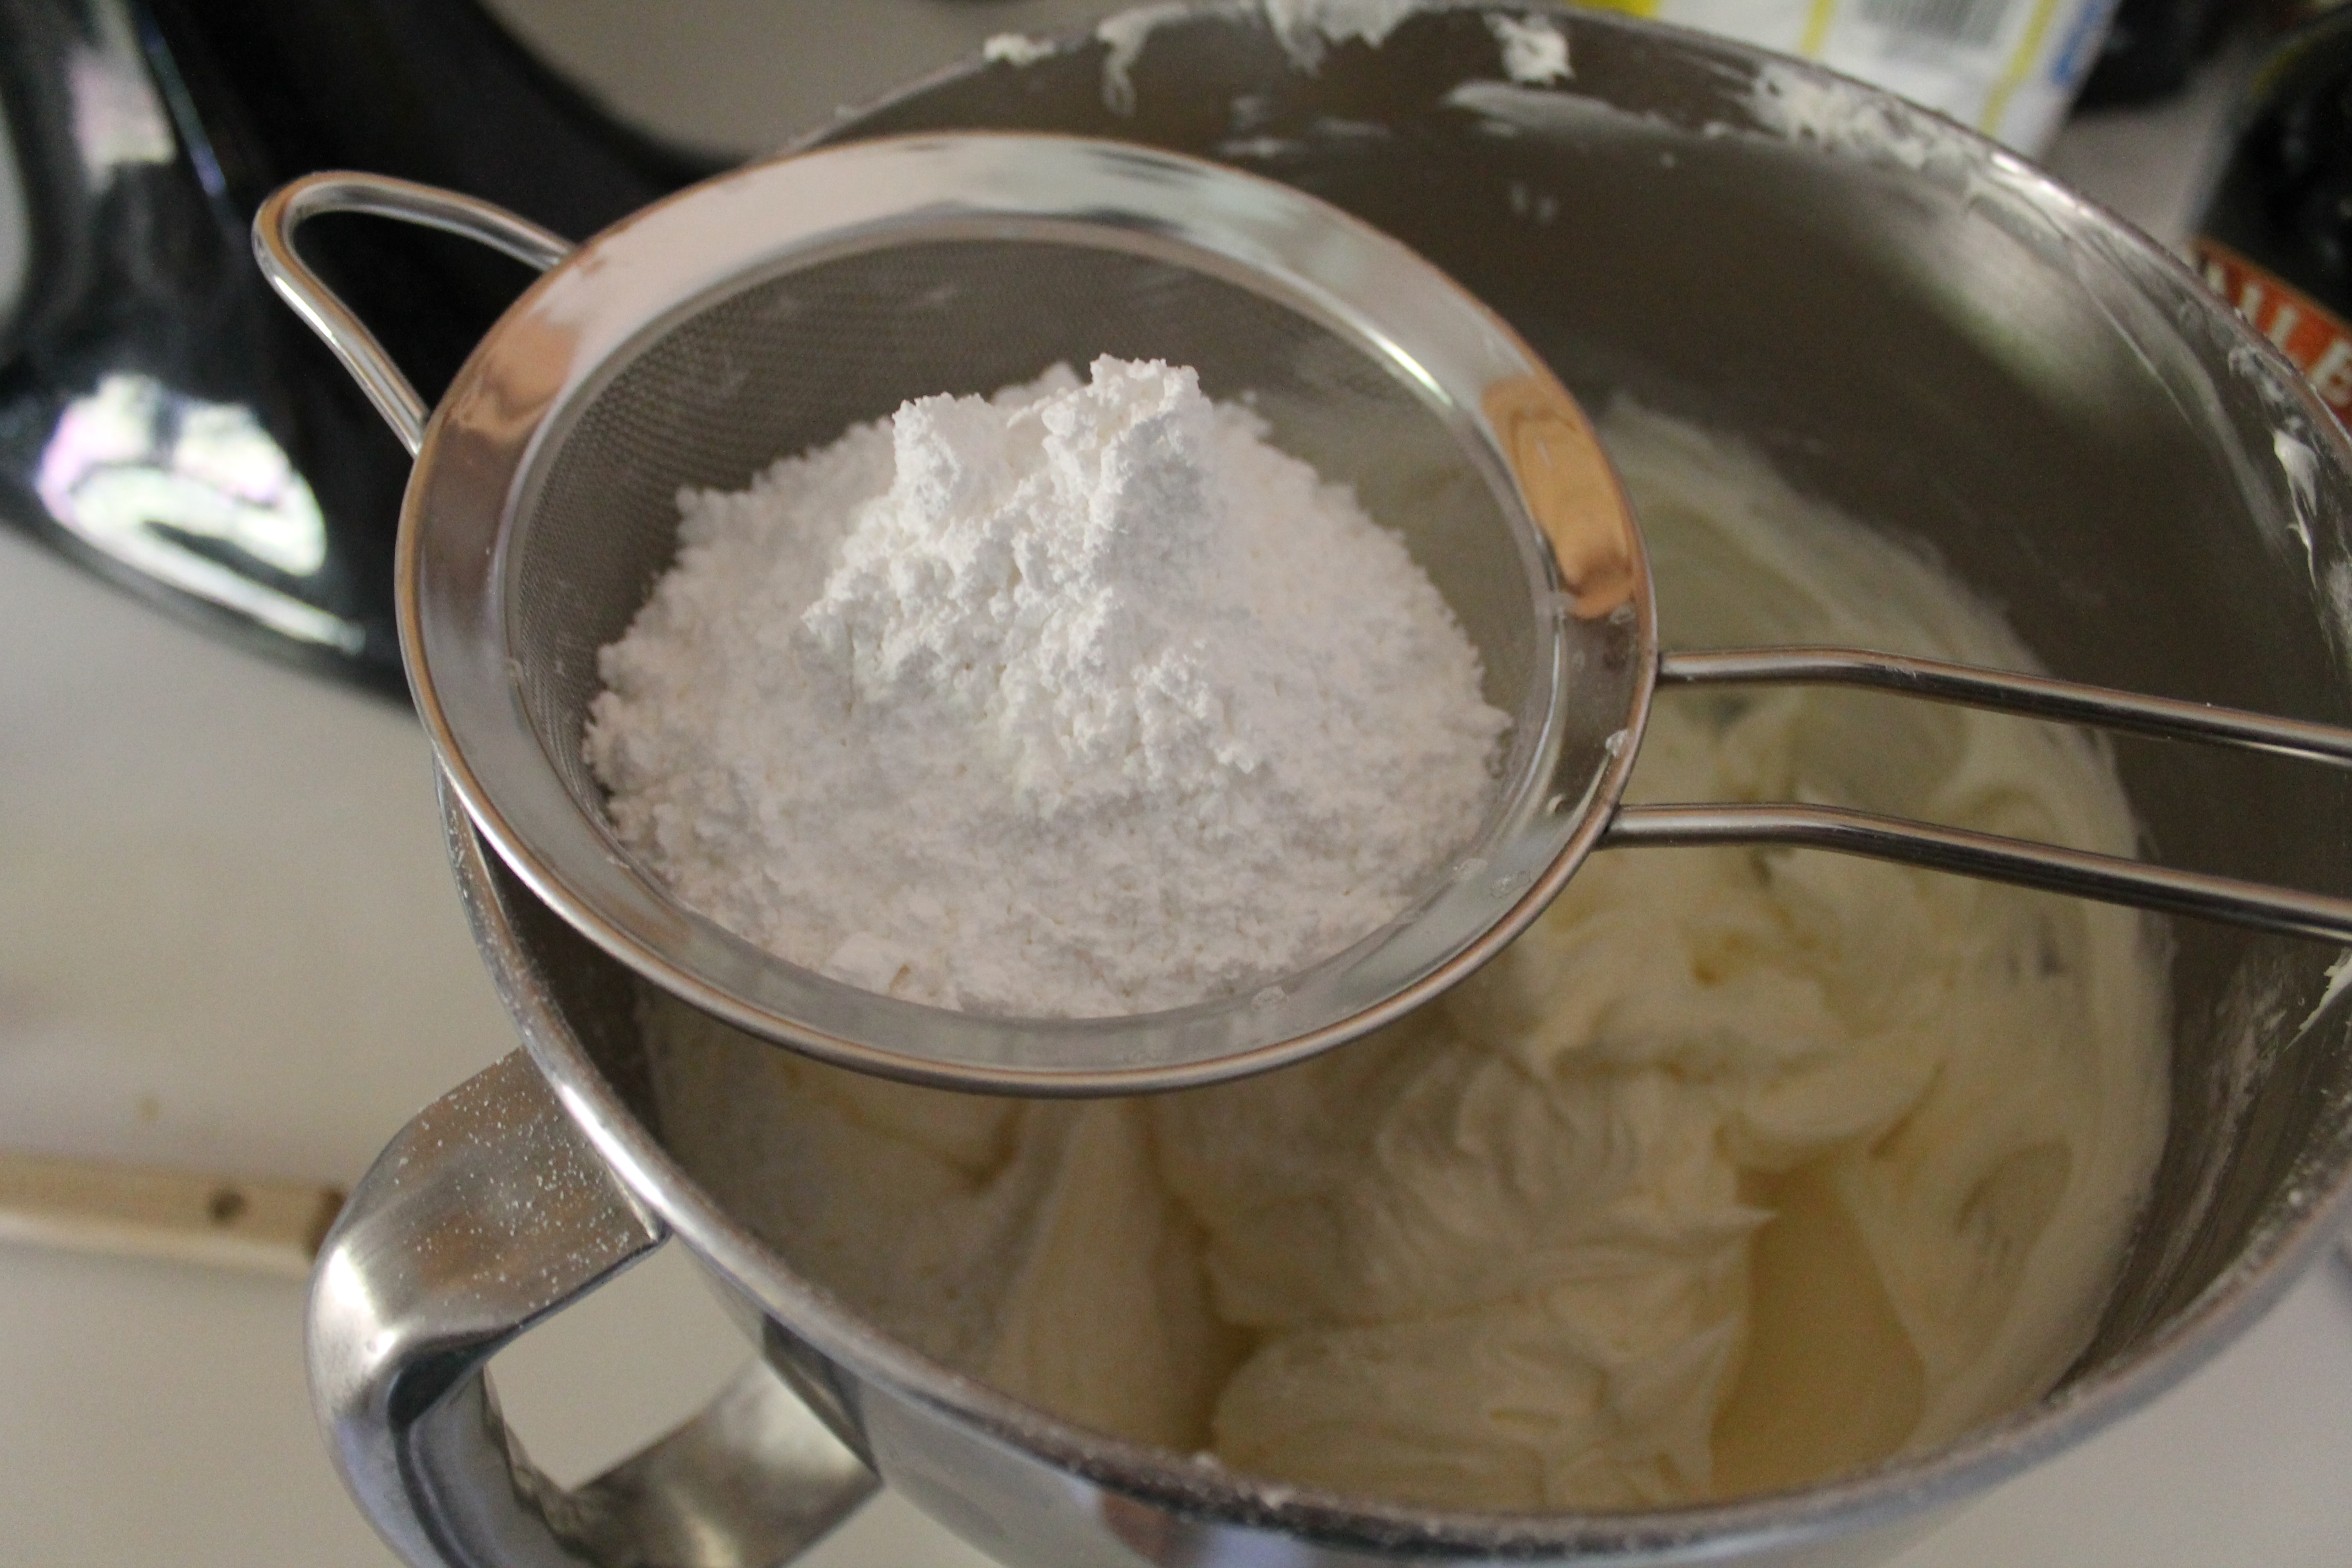 Now slowly start adding the sugar. I added my sugar about a cup at a time, sifting it straight into the bowl. I definitely recommend sifting, again to ensure a smooth texture. Don’t forget to scrape the sides of the bowl after mixing in each addition! It wouldn’t do to have any unsweetened cream cheese lurking at the edges of the bowl.
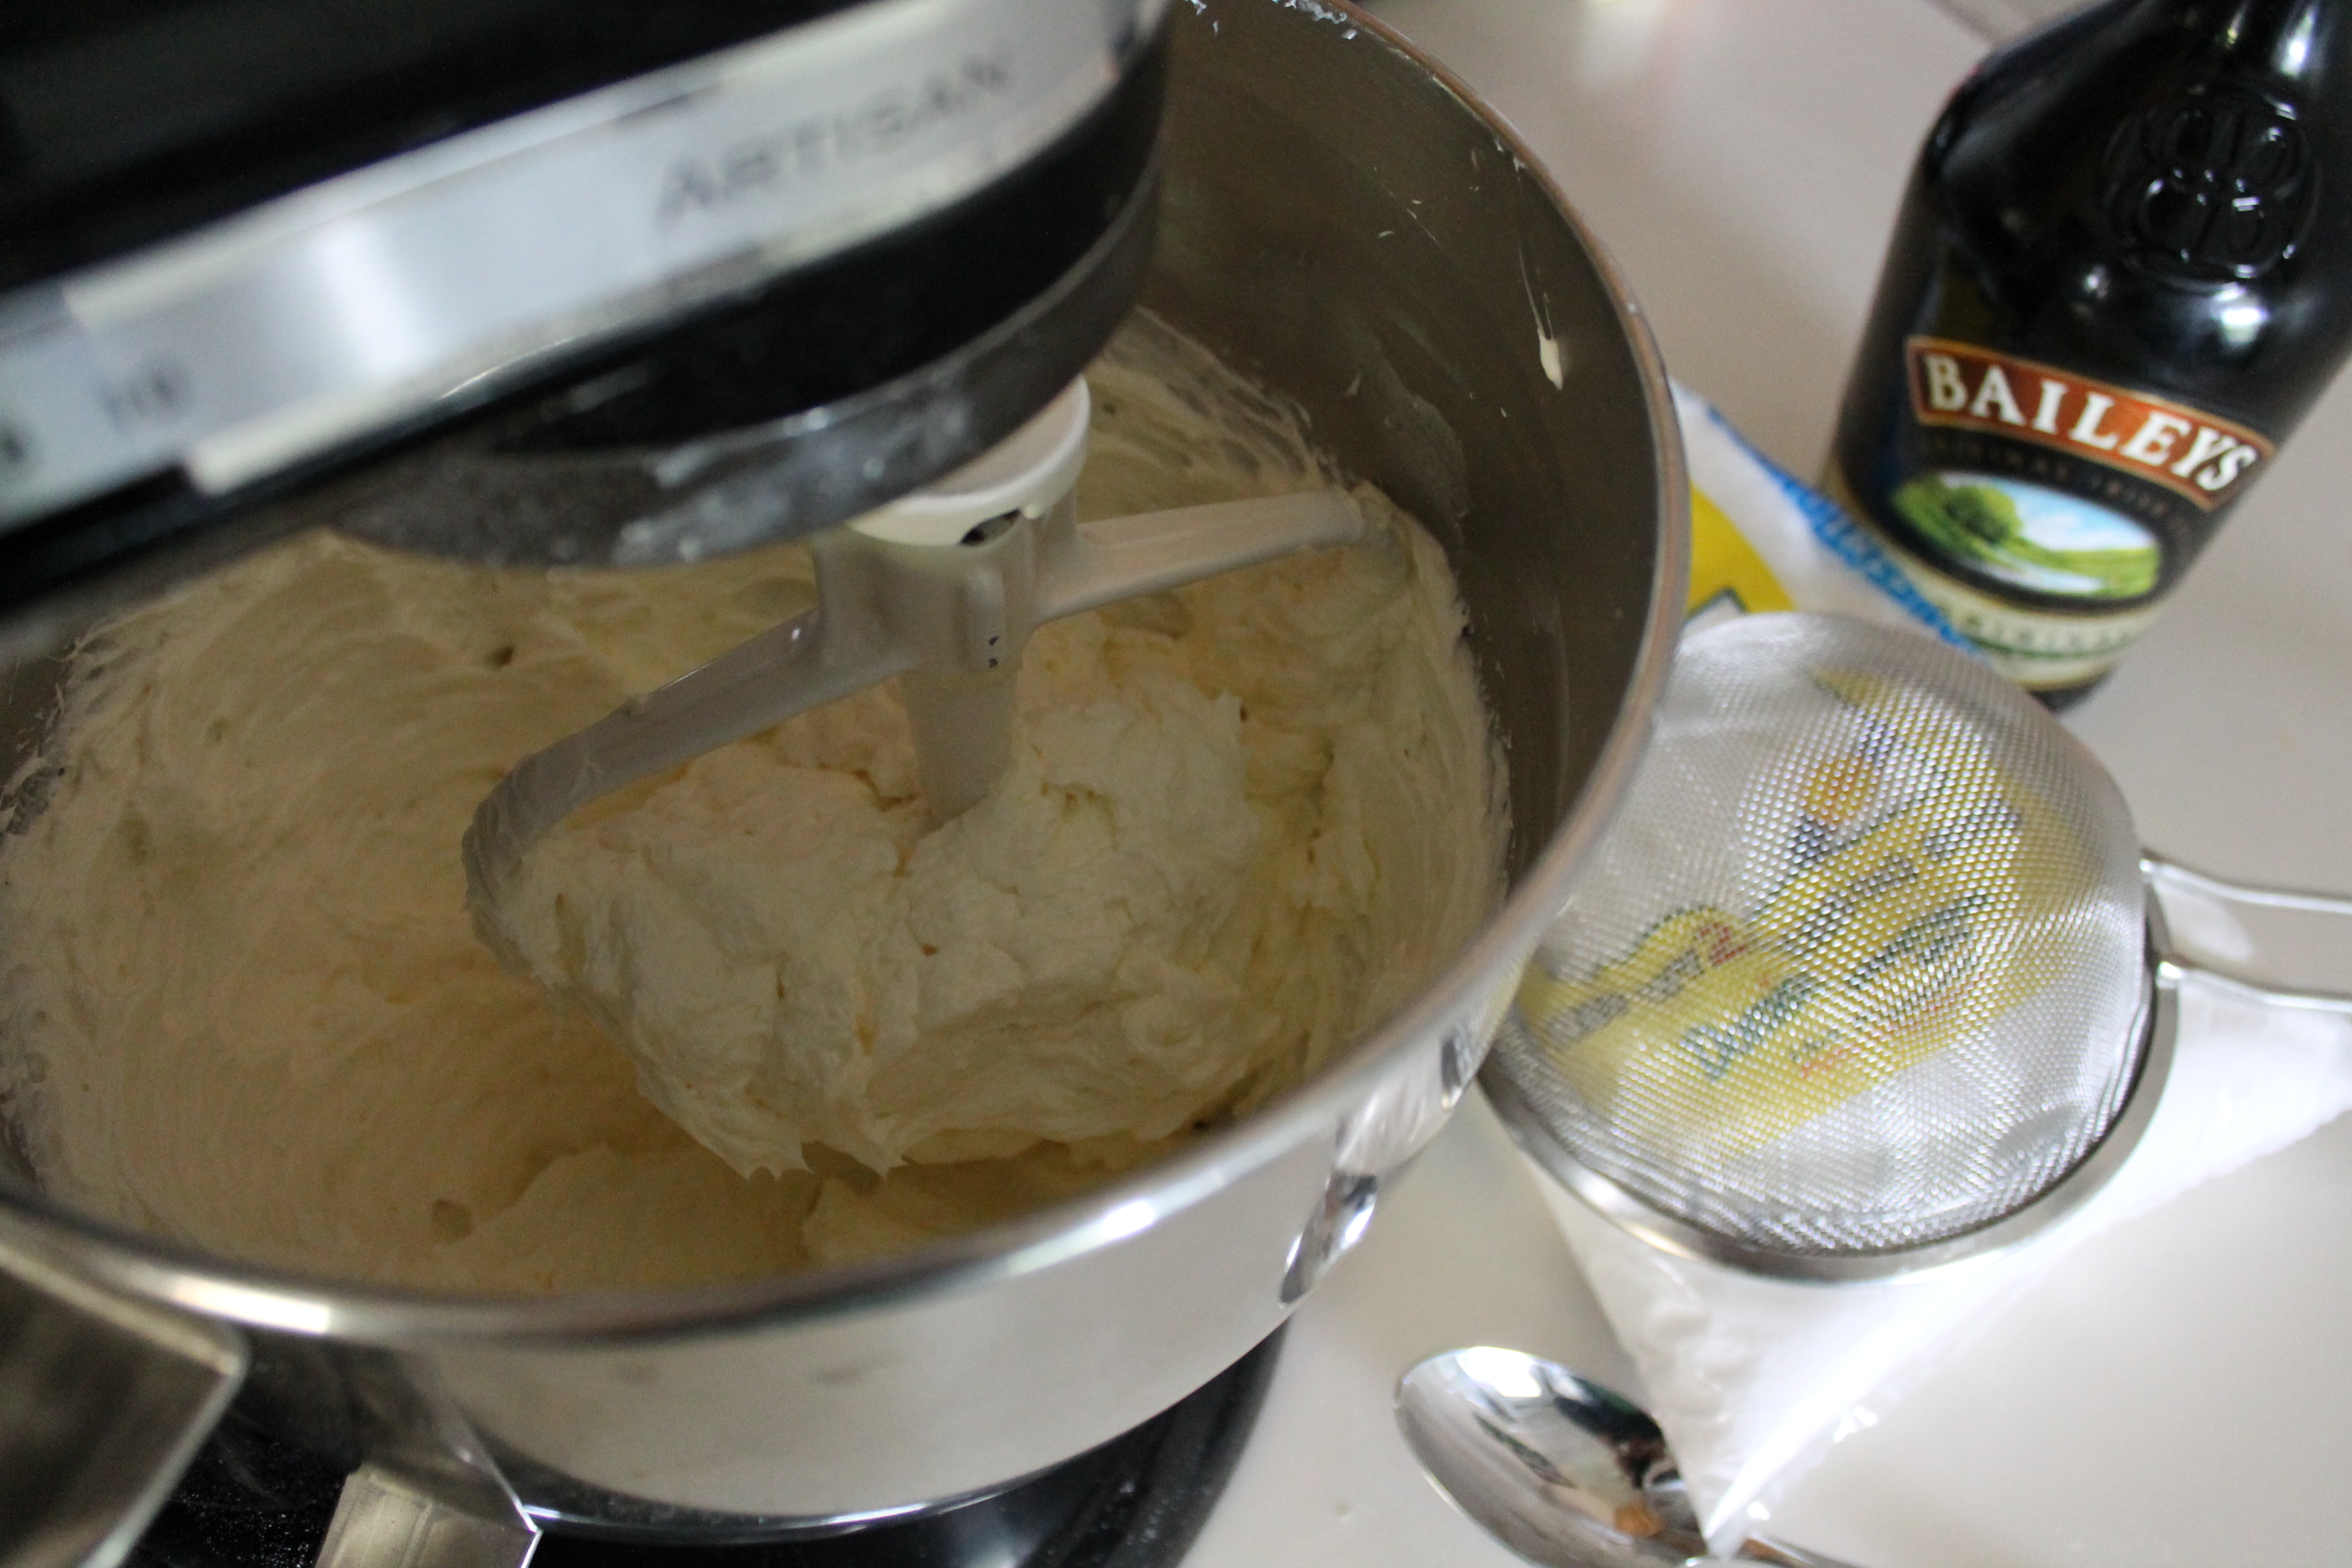
 Whip in a splash of Baileys. I really wanted to maintain the delicious tang of cream cheese, so I went fairly light on the Baileys. It just added a hint of flavor—a little tease. But you could even double it without seriously compromising the stiffness of the frosting. It’s good to have a frosting that can hold its structure together very well when you are frosting a wedding cake, otherwise the tiers may slide around and generally cause mayhem.
I like to just keep whipping the frosting. I watched it and waited until it started to look smooth and sleek rather than slightly textured. Smooth is good for a wedding cake! It took about 6 or 7 minutes of extra whipping after all the sugar and Baileys were in before the frosting seemed ready.
Now…set aside the frosting for a bit. We have other work to do!
If you are going to make an elegant wedding cake without using fondant, you will need a few crucial tools to help you.
First off, you need a cake leveler to help you trim the domes off the top of the cake rounds as well as cut them in half for filling. (I used the cheapest one around…I think it cost me under $5 at Michaels, and it worked absolutely great!) You will also need a long, angled frosting spatula; a plain-edge smoothing tool; and a turntable or lazy Susan designed for bakers. I also used a nifty decorating comb to get the textured look on this cake, which the bride and groom loved.
And don’t forget cardboard cake circles—cut to the exact size of each cake layer—and a piping bag fitted with a small, round tip!
Whew. Let’s get down to business.
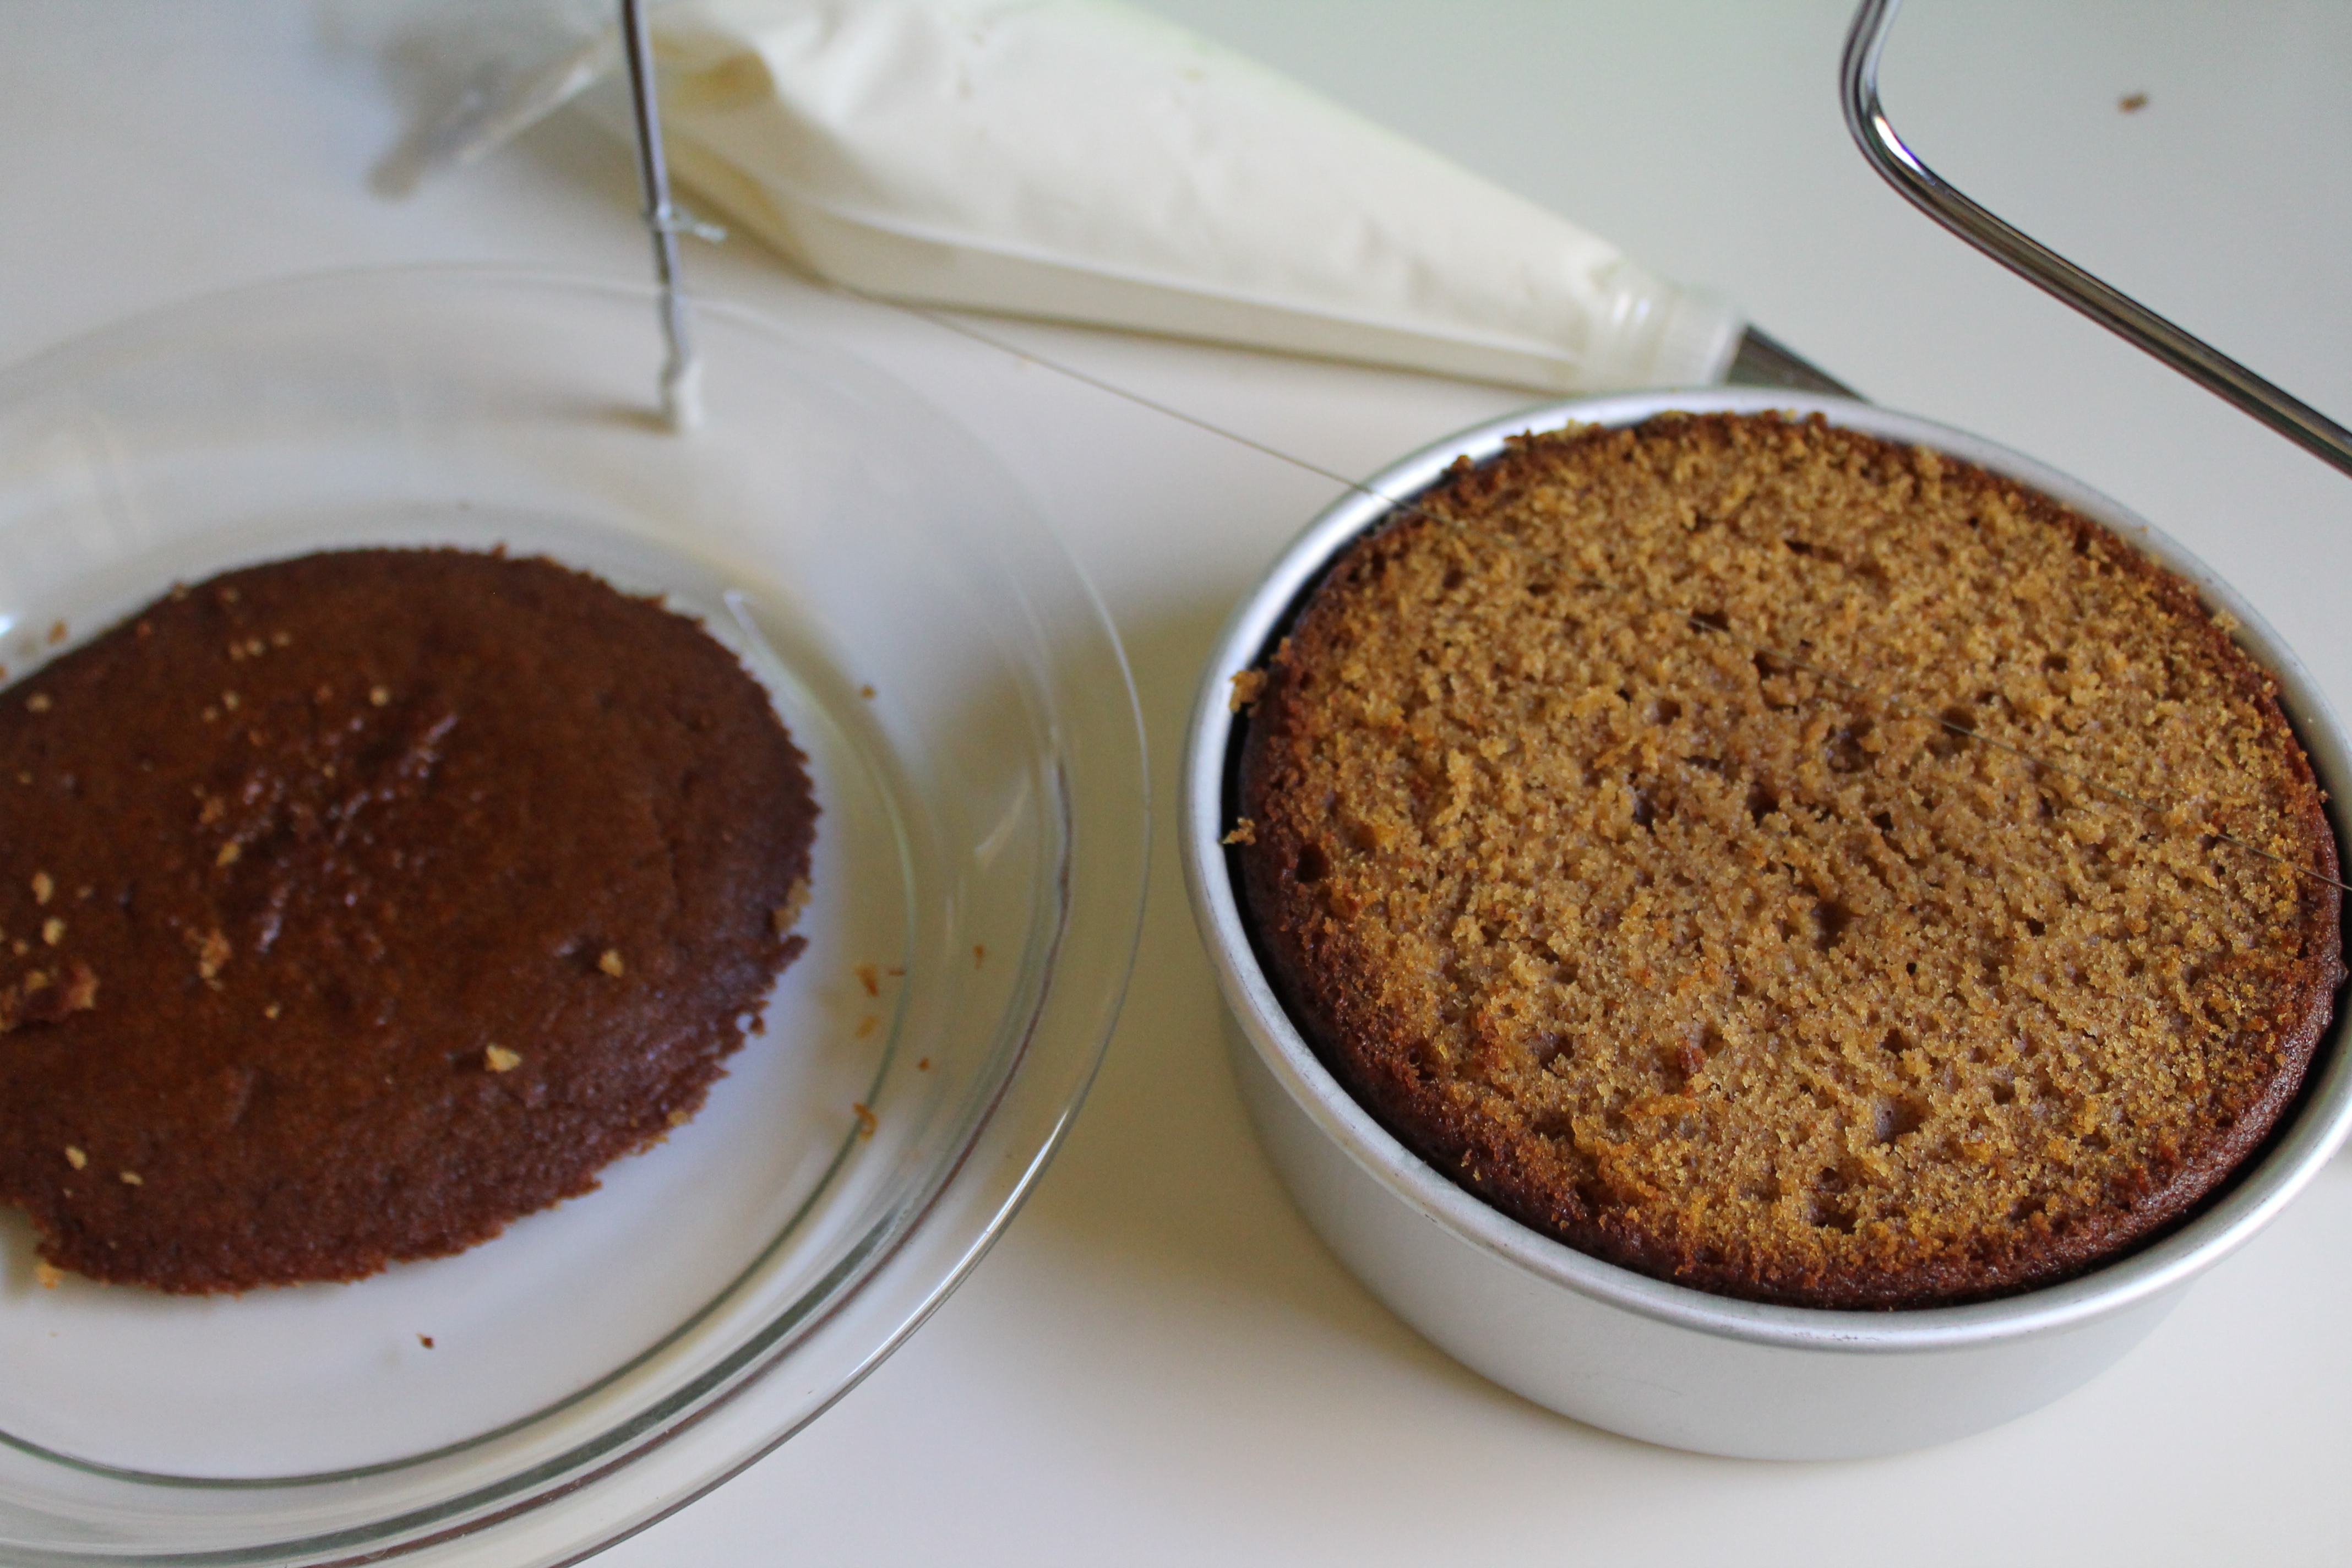 Grab those cake layers you have resting on the counter or in the fridge. I prefer to cut the domes off while they are still in the pans. Here’s why: it prevents accidentally setting the wire on the cake leveler too low, and therefore making shorter layers than necessary; and it also helps prevent the cake from tearing as the wire cuts through the slightly tougher outer “skin” of the top of the cake. Both of which mean there is more cake to work with in the end!
I recommend revolving the cakes while trimming (that is, sweeping the cake leveler through the cake in a circular motion, rather than sawing straight through) because it is much neater and requires less pressure.
Once you have leveled the tops of the cakes, you are ready to deposit them on the cake circles. We want to make sure the cakes will be secured to the cake circles properly, so we need to glue them down with a thin layer of frosting.
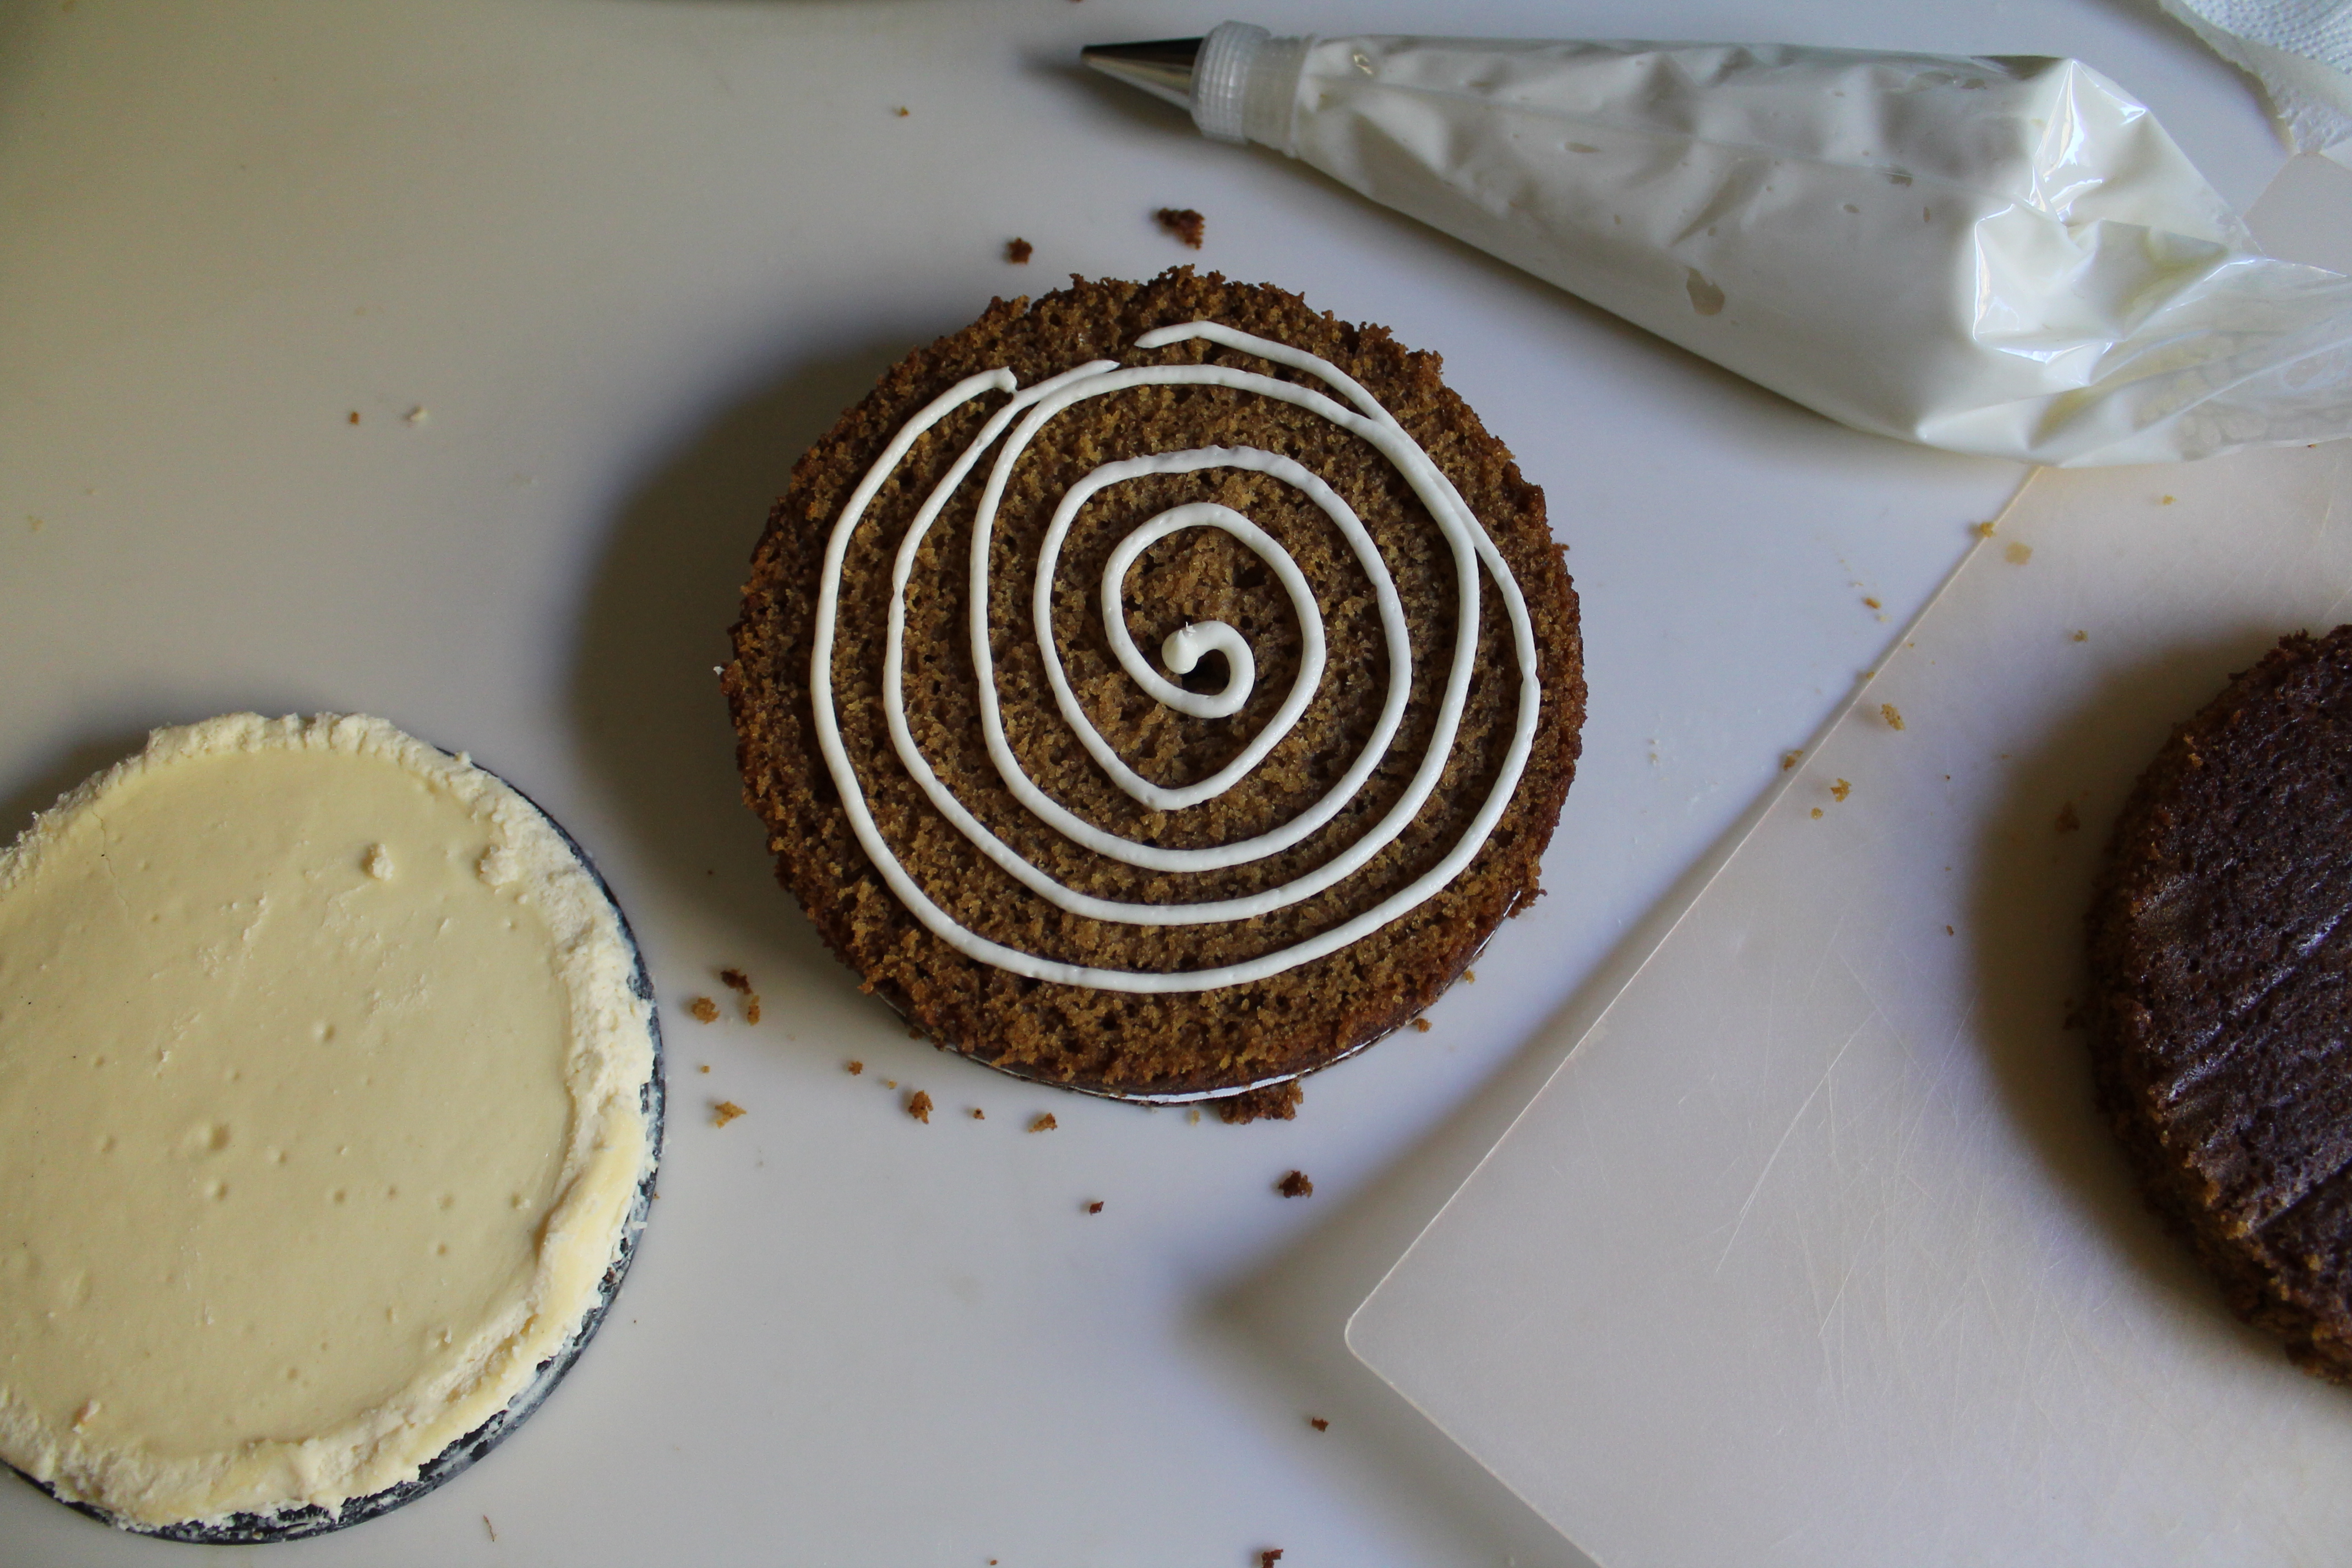
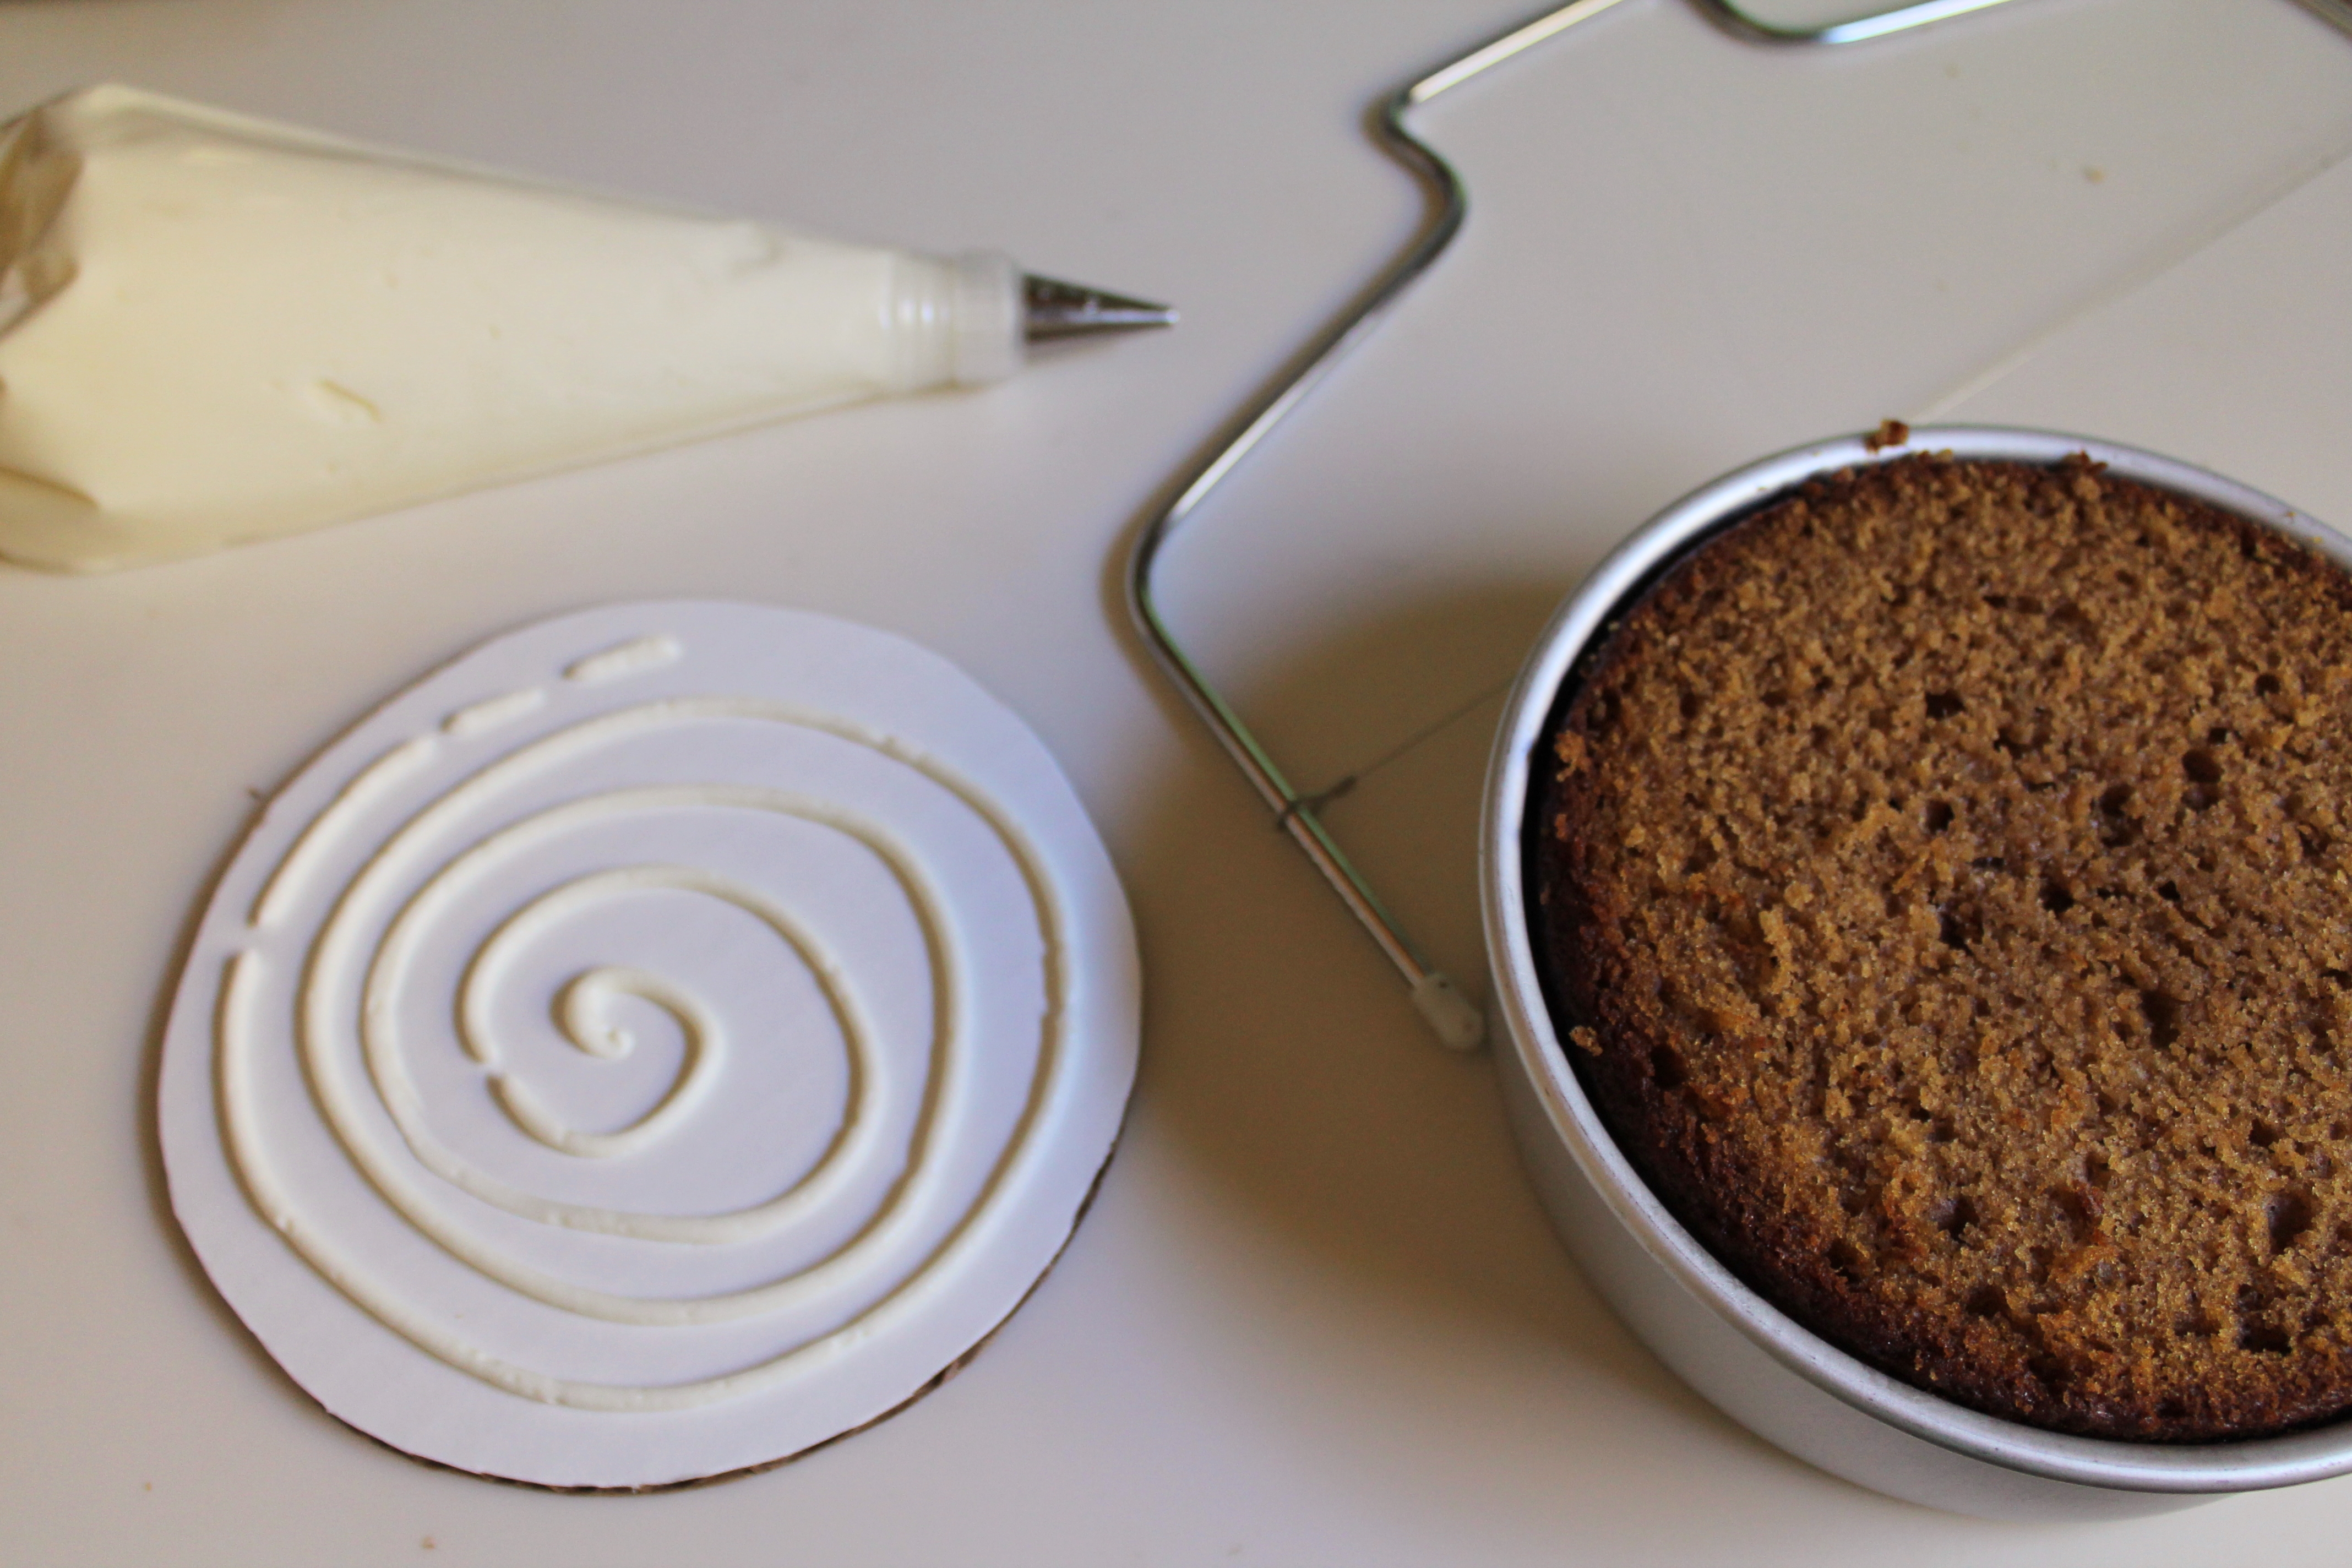 Grab the piping bag fitted with a small, round tip and fill it with about a cup of the frosting. Pipe a dense swirl onto the white side of each cake circle.
Turn the cake circles over and set them on top of the trimmed cakes in the pan (thus adhering the cake circles to the cakes with the frosting), making sure they are perfectly centered. Flip the cake pans and gently pull them off of the cakes. The layers should now be sitting pretty on their cake circles!
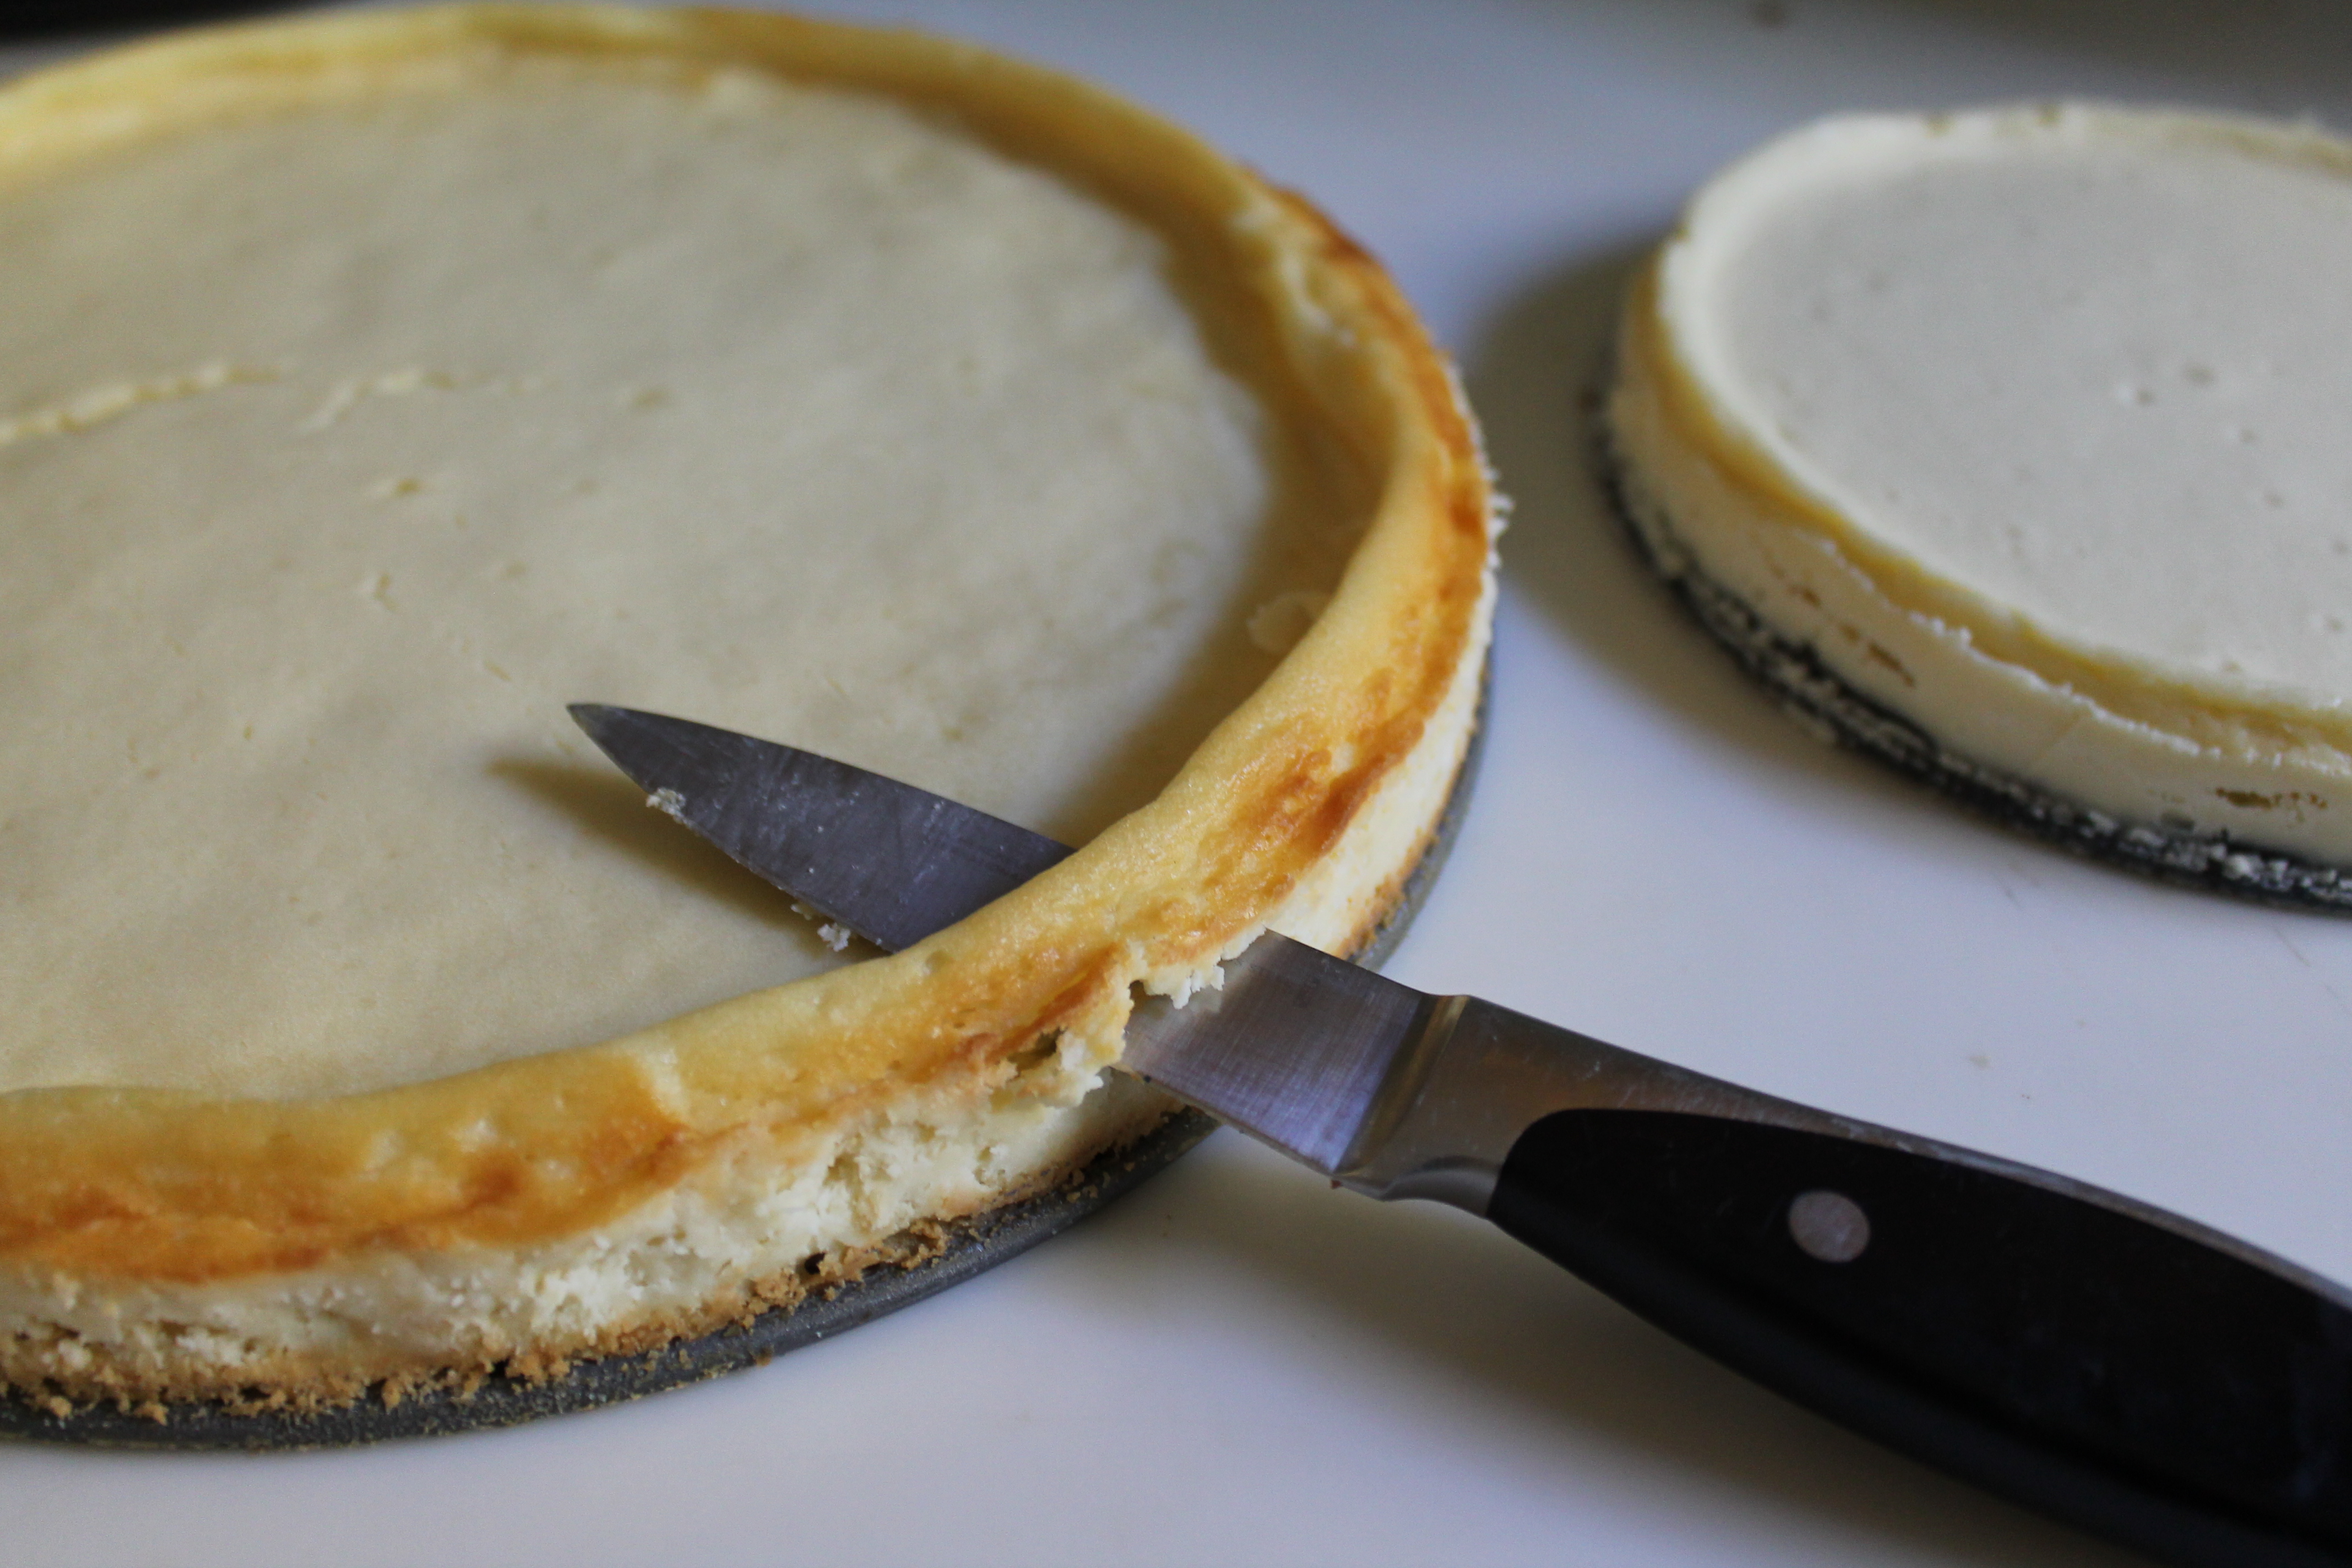 Okay. Time to prep the cheesecake filling layers. Pull the three cheesecakes out of the freezer. Run a knife around the outer edges of the springform pans (I just used a sharp knife, but you could also warm the blade if you are having trouble separating the frozen cheesecake from the pan). Release the sides of the pan and remove them.
My cheesecakes had a little ridge around the outer edge. We definitely want them to be flat and level before we insert them between two layers of cake! Sturdiness is key for a tiered cake. With a sharp knife, trim the ridge off the cheesecakes. I found this to be incredibly easy. The cold cheesecakes didn’t tear or crumble at all (this is why we froze them), and I could rest the tip of the blade against the lower center of the cheesecake while I was slicing around the rim. I was able to pull the ridges off in whole circles!
 Now, don’t forget that the middle cheesecake is actually the wrong size currently (unless you actually had an 8″ springform; I did not, so my middle cheesecake layer started out at 9″). You can skip trimming the ridge off the middle layer and instead use an 8″ cake circle (or the baking pan) to trim this layer down to the right size. I found that when I trimmed my cheesecake, the 8″ circle actually fit perfectly inside the raised ridge, so instead of leveling the cheesecake, I just cut the raised edge off entirely.
Carefully slice around the bottom of the cheesecakes to release them from the bottoms of the pans. Cheesecake prep accomplished! I stuck mine back in the freezer, because they were getting a little soft.
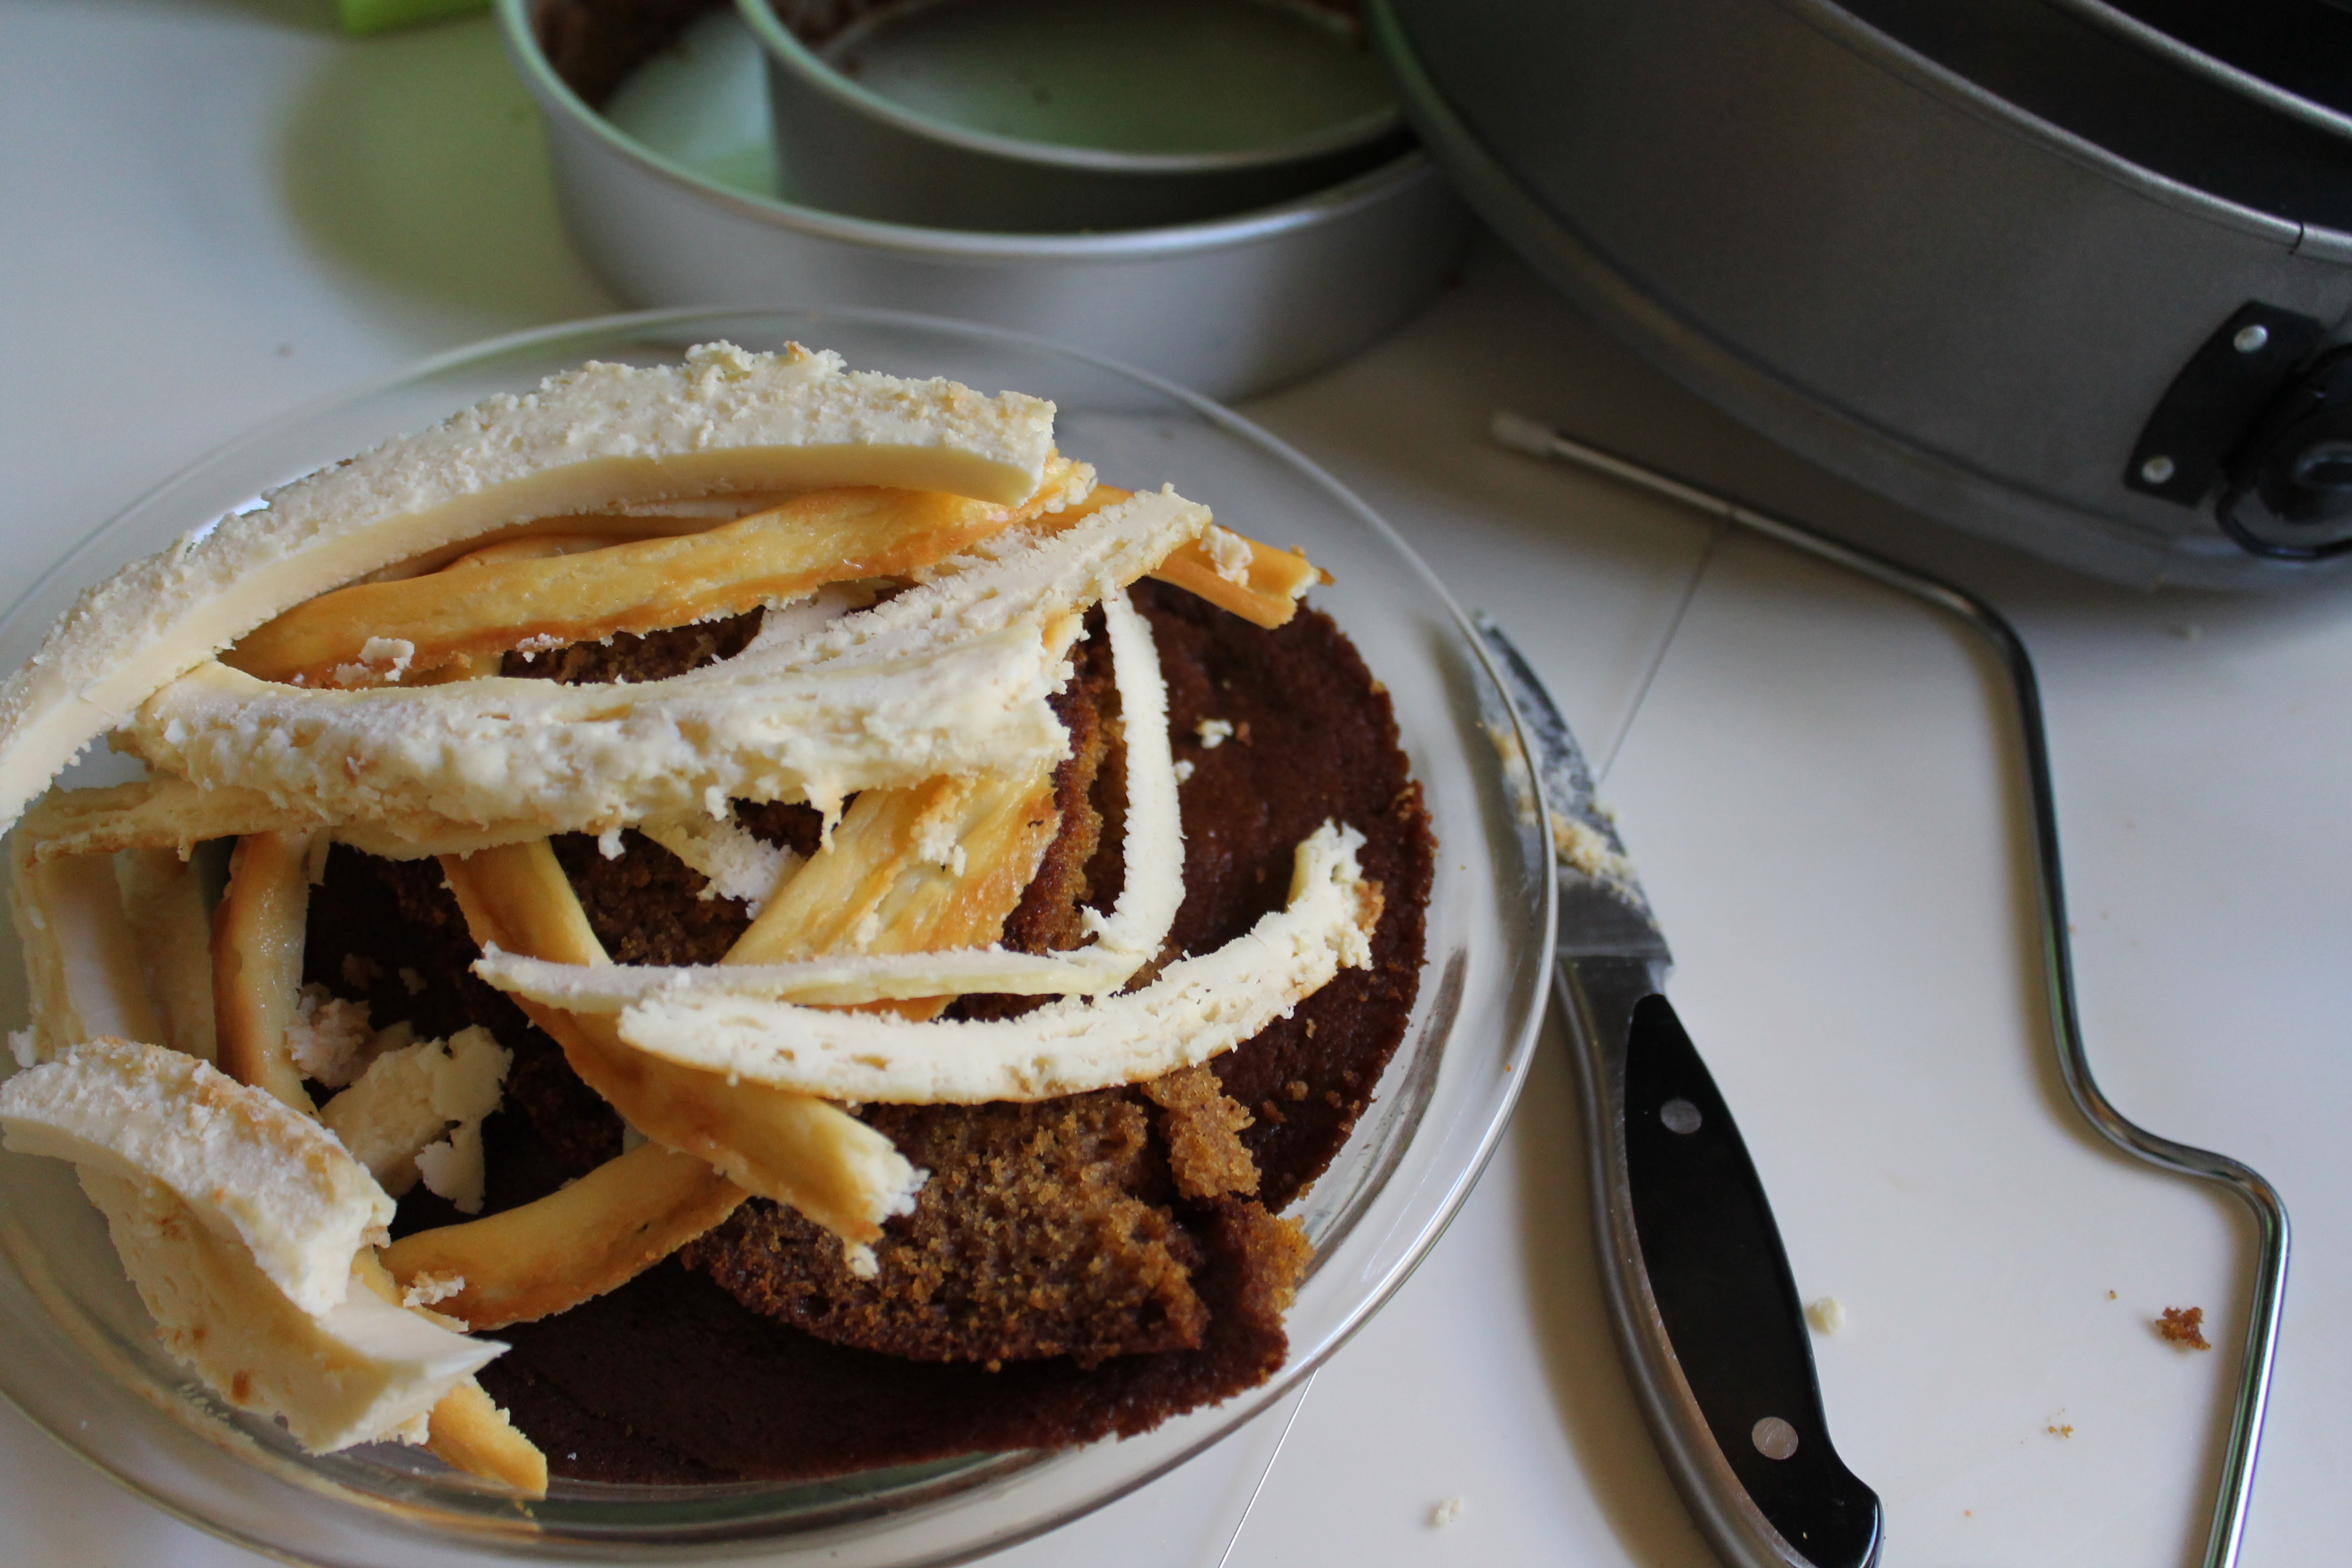 (P.S., all those little bits we have been trimming off the cakes and cheesecakes are still delicious…)
 Now we need to slice the pumpkin cake layers in half so we can insert the cheesecakes in the middle. Starting with the biggest layer (I like to get the hardest one out of the way first!), line the leveling tool up next to the cake and adjust the wire so that it is about half as high as the whole layer. Using the same revolving motion as before, slide the leveler through the cake, cutting it in half.
Slide a thin, plastic cutting board between the sliced layers (or a sheet of parchment would also work if you have very steady hands). This will give the top layer some stability when you lift it off, so that it doesn’t break in half or crumble. It will also help you keep the two halves in the same original orientation, though in theory this shouldn’t matter too much. Lift the top of the cake layer off and set it aside.
 Pipe a swirl of frosting onto the bottom half of the cake. Gently slide the cheesecake filling layer onto the bottom half of the pumpkin cake. Make sure it is lined up exactly, otherwise the tier might end up crooked.
Pipe a second swirl of frosting on top of the cheesecake layer. Now carefully line up the edge of the top layer with the cheesecake underneath and push it off the cutting board onto the lower half of the cake. Using two hands, shift it as needed to make sure it is on center with the bottom half of the cake.
Yay!! The first (and hardest) layer is now filled and ready to be crumb coated!
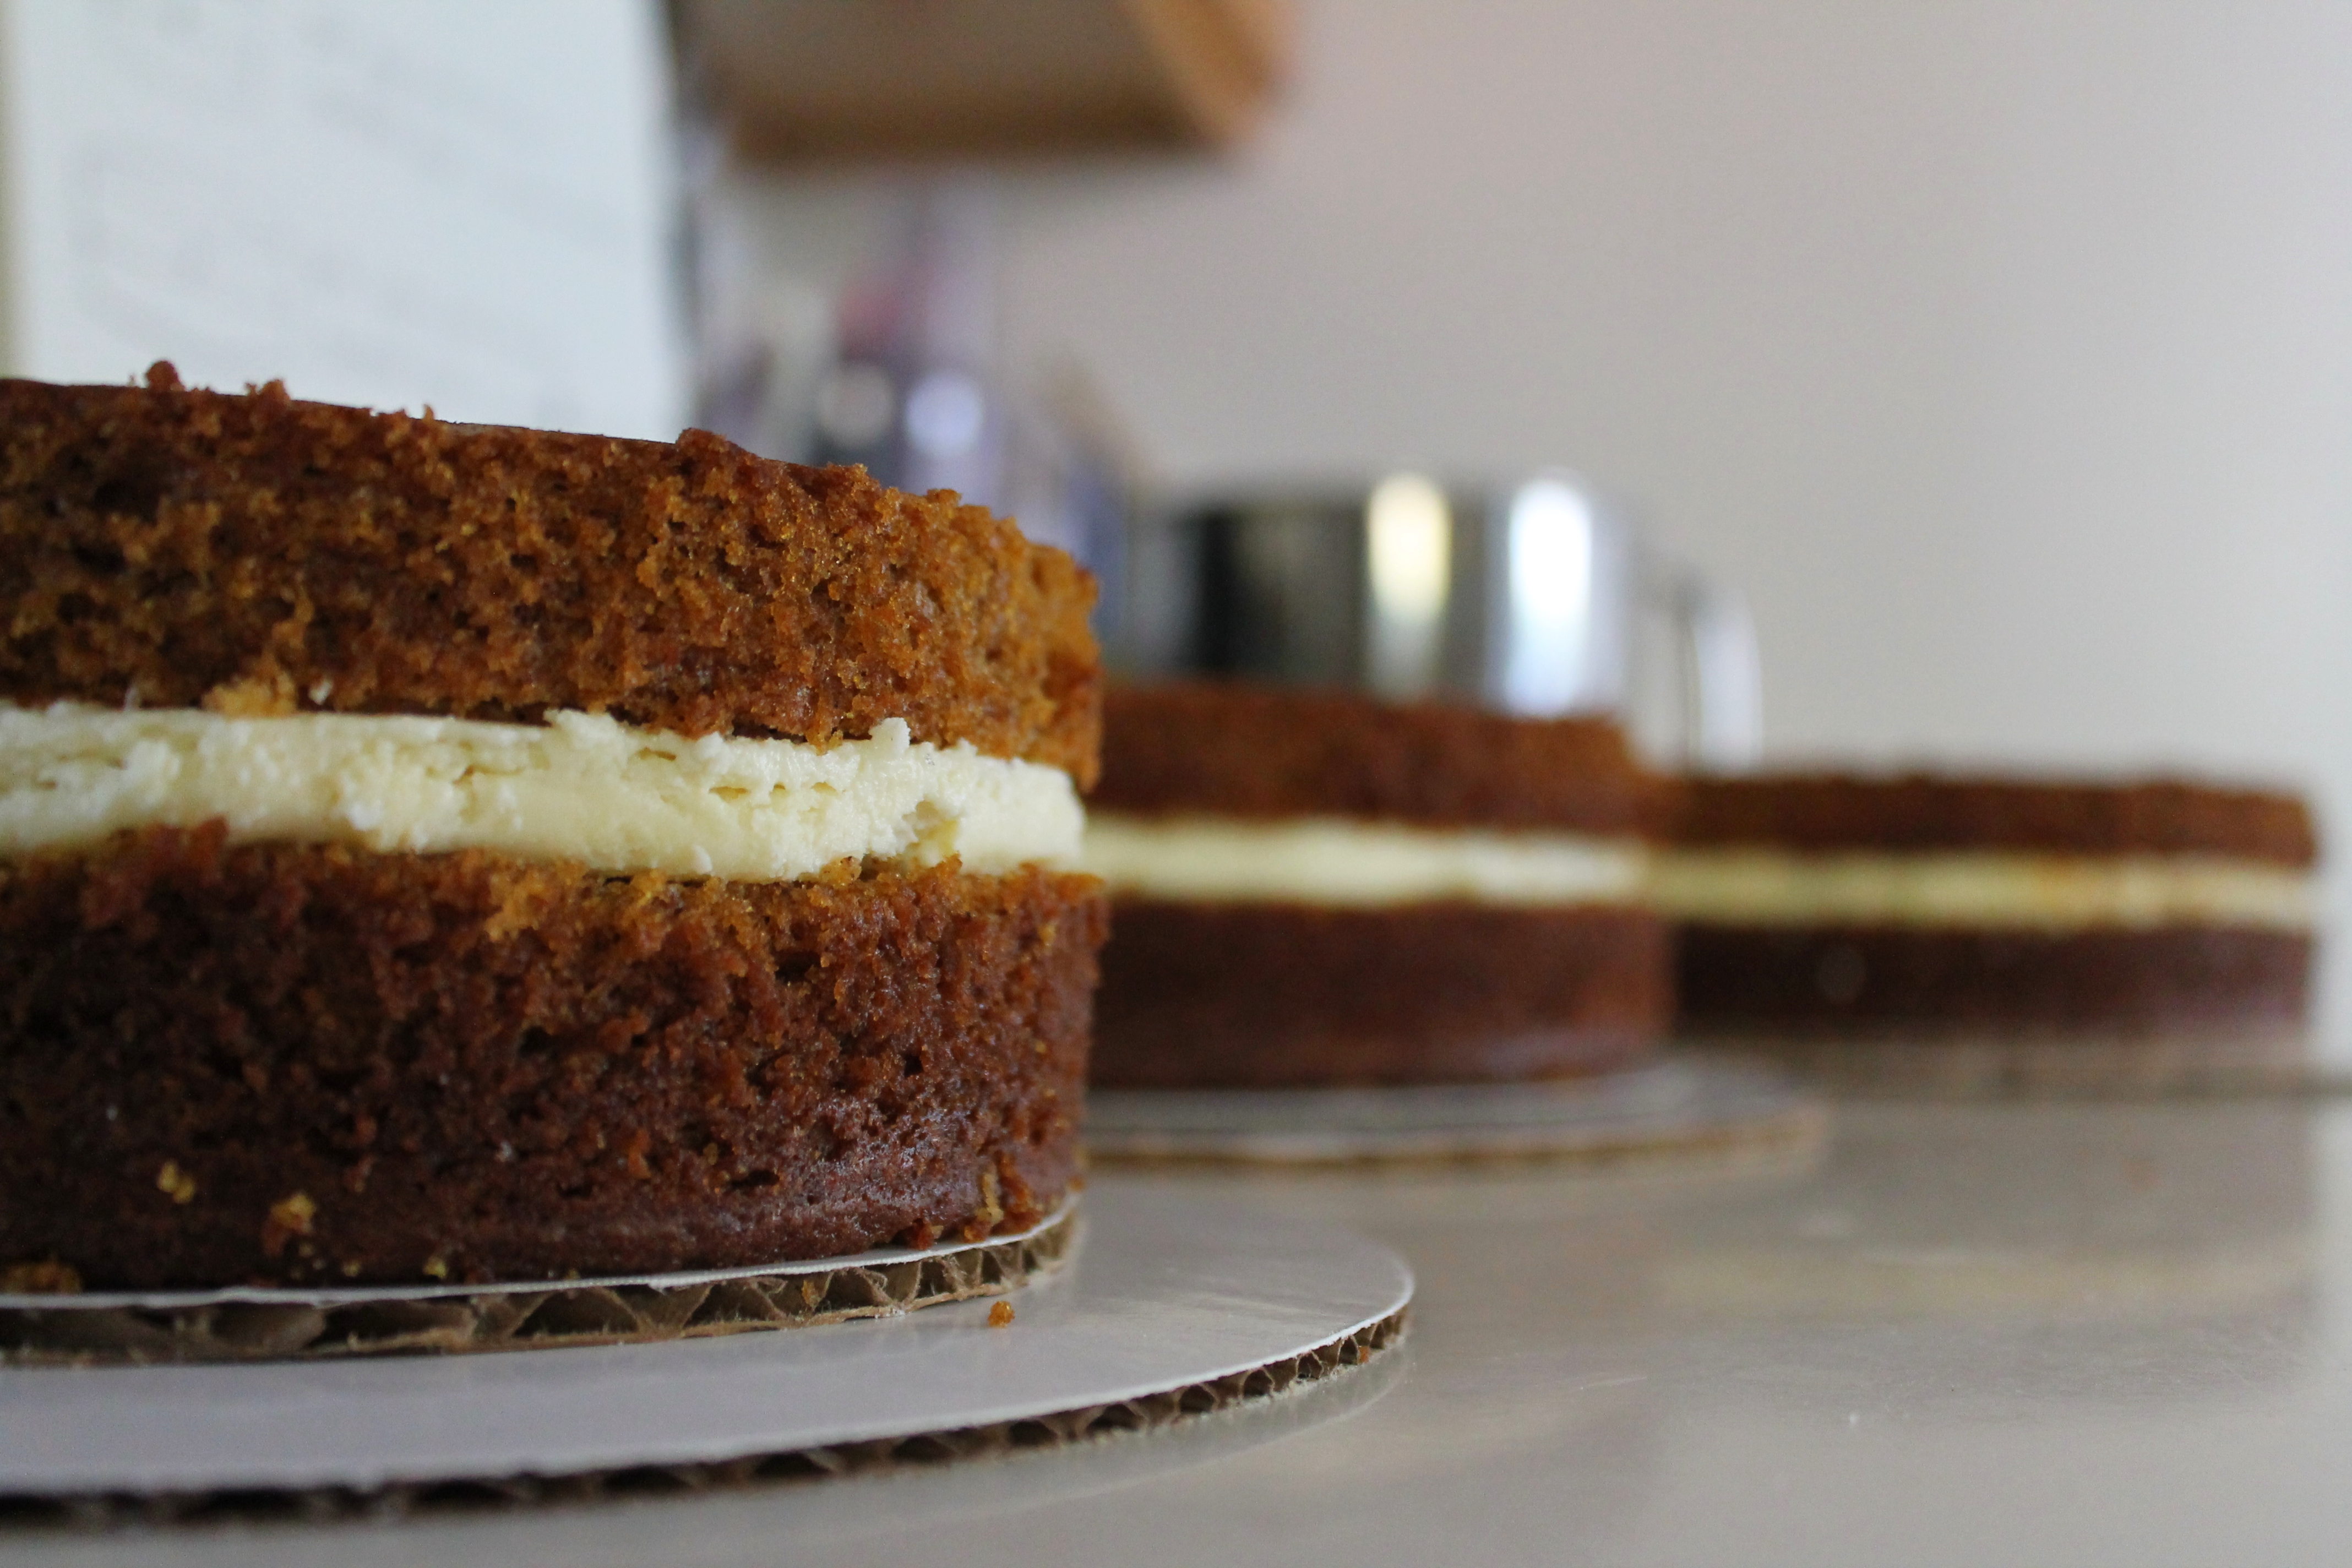 Fill the other two layers in exactly the same way, piping swirls to stick everything together and carefully lining all of the layers up so they are stacked evenly.
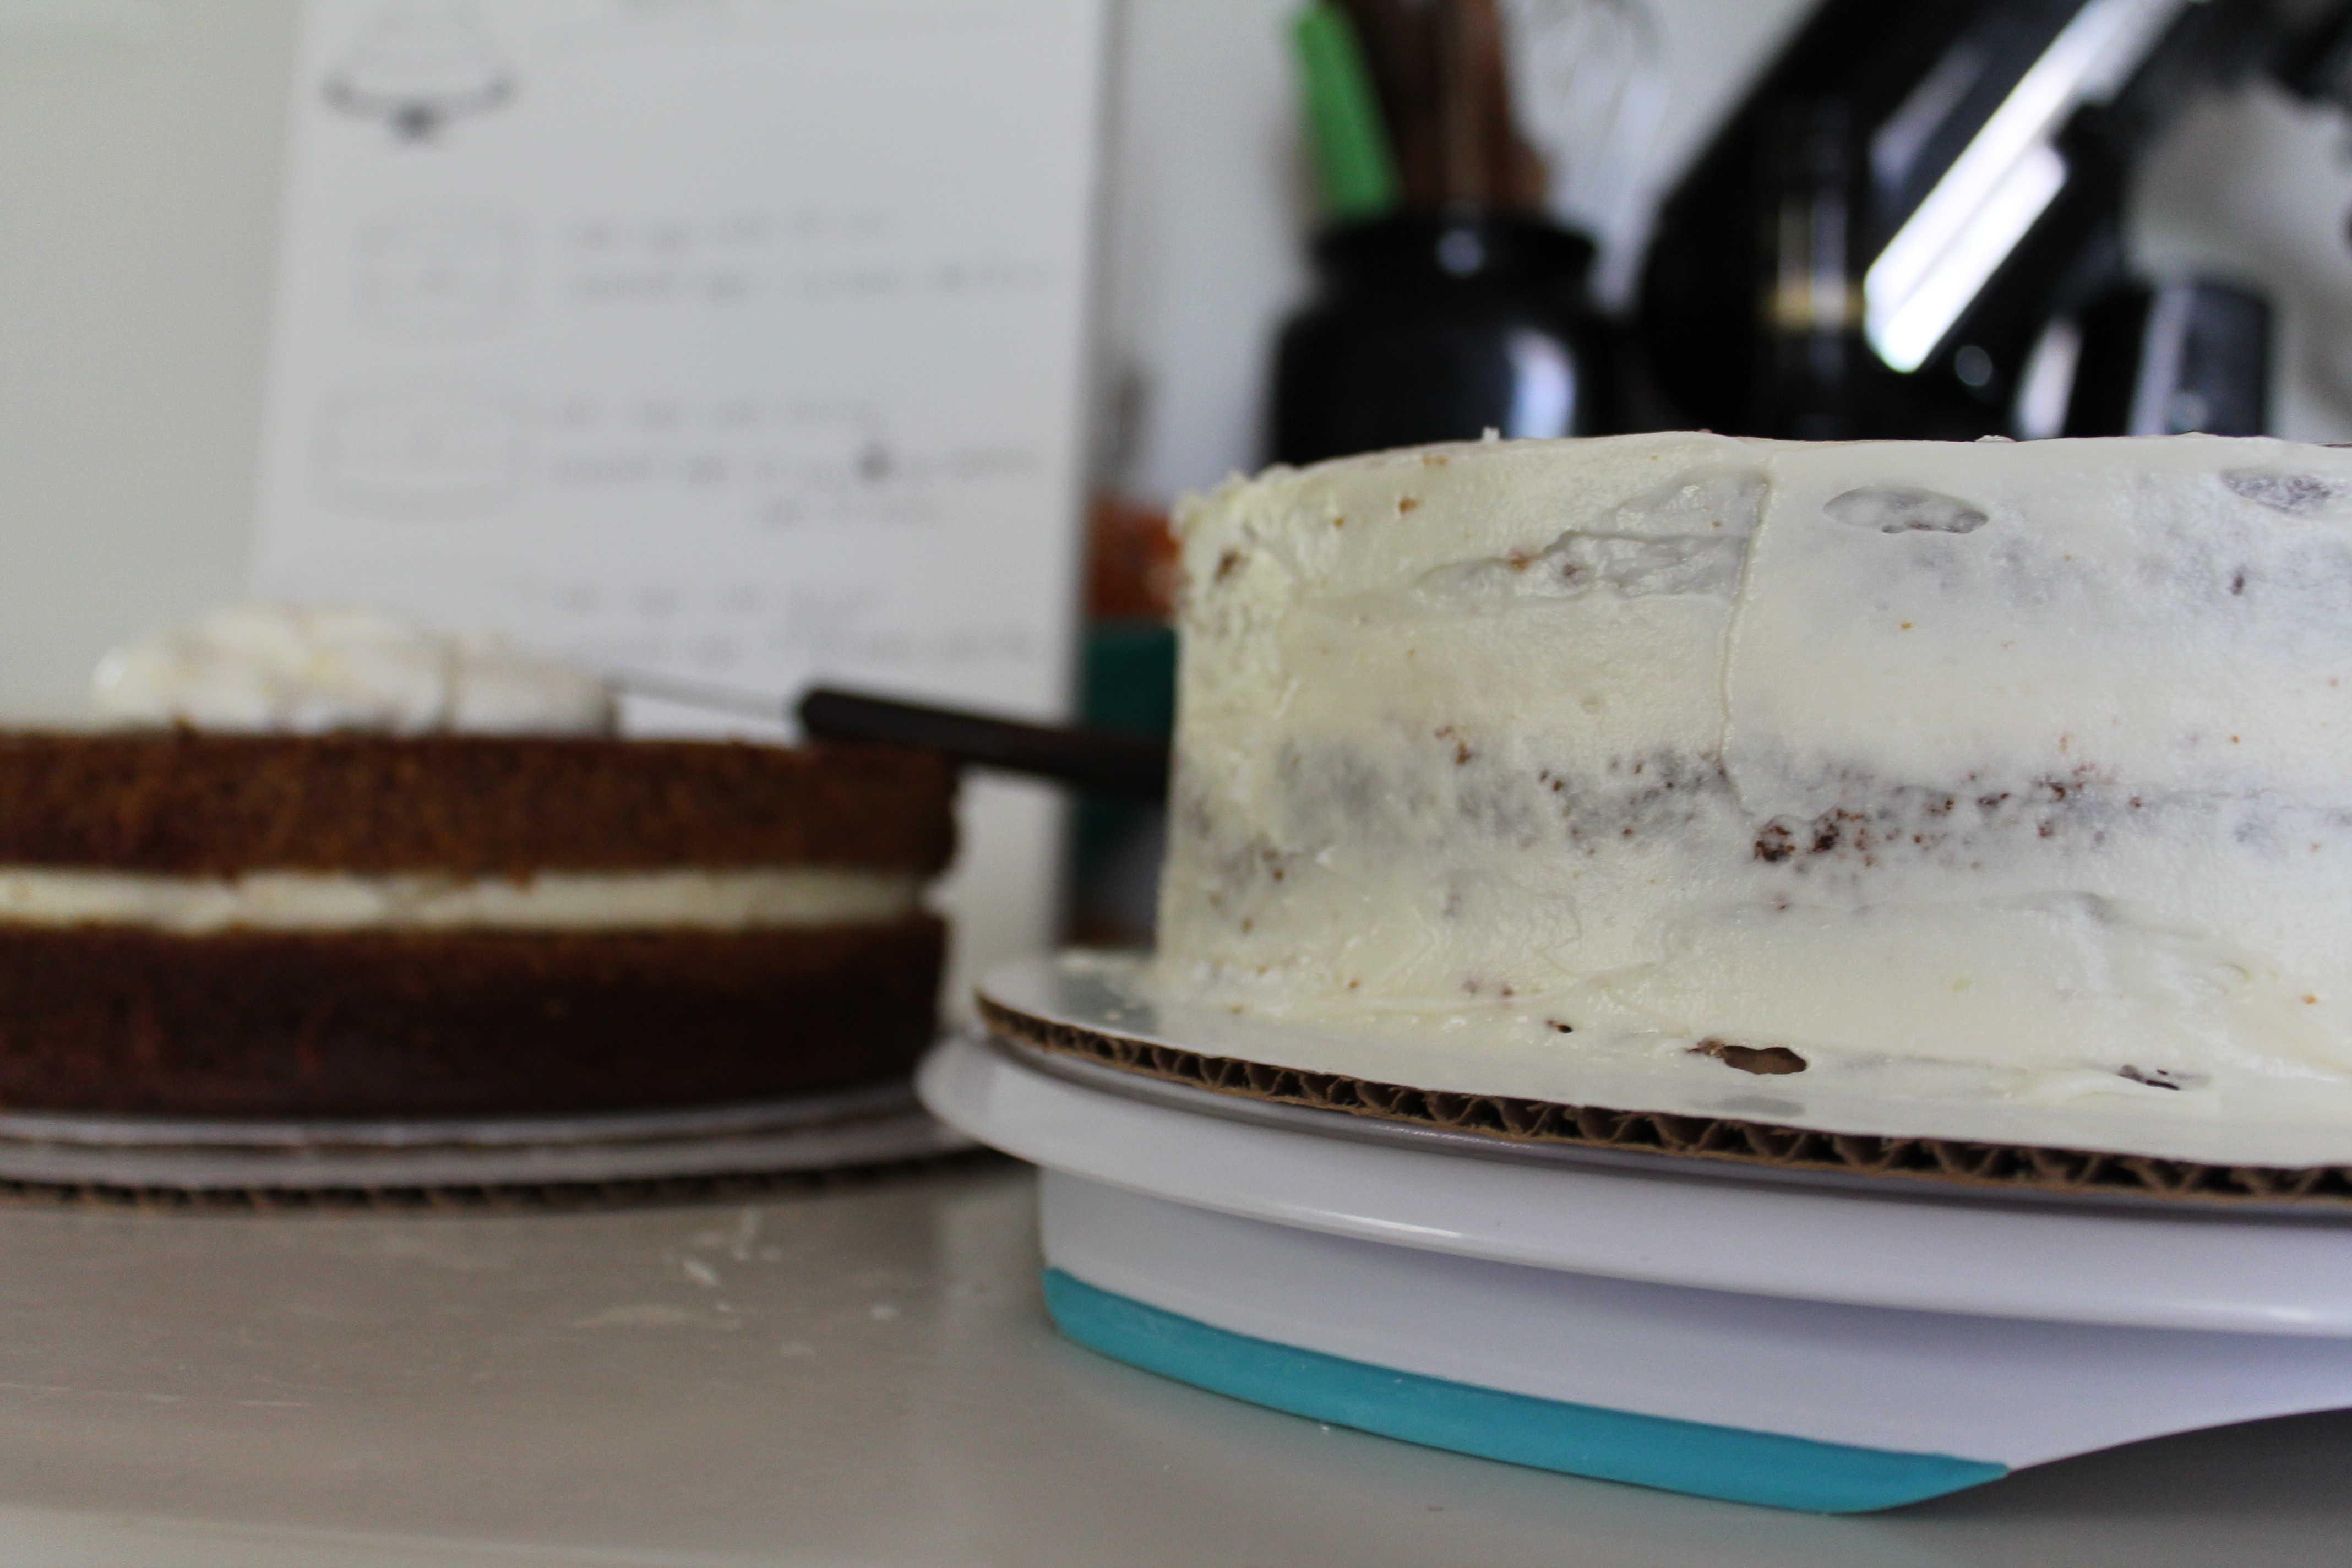 So. Crumb coat. With a cake like this, it is absolutely essential to do a crumb coat, which basically glues all of the stray cake crumbs to the cake so they won’t swirl around and show through the outside of the frosting. (If you were using fondant, a crumb coat would be all you needed before laying the fondant layer down.)
The key to a crumb coat is spreading thinly and relatively evenly, then chilling it! No need to get everything perfectly smooth. As long as you cover the whole cake with a bit of frosting, especially the edges where the cut cake meets the cheesecake filling, you will be good to go.
Set each cake layer in the freezer for a quick chill while you crumb coat the others. (Or, if you are not planning on doing the outer frosting immediately, place the cakes in the refrigerator so the crumb coat can set without freezing the cakes.)
 Once the cakes are crumb coated, you are ready to do the outer frosting.
This part requires a lot of focus. Call your relatives and ask them to babysit your toddlers (ahem…thanks, Kelly!). And make sure you have the right tools! The right tools make all the difference.
I still like to start with the biggest layer, which is the hardest one to frost evenly. After the biggest layer is done, the other two will seem like a breeze!
Set the cake squarely on the turntable. It will be so much easier to get the frosting smooth if you can slowly spin while you work!
Start by (relatively) thickly spreading frosting over the whole layer. Don’t worry yet about getting it perfectly smooth: just cover the cake.
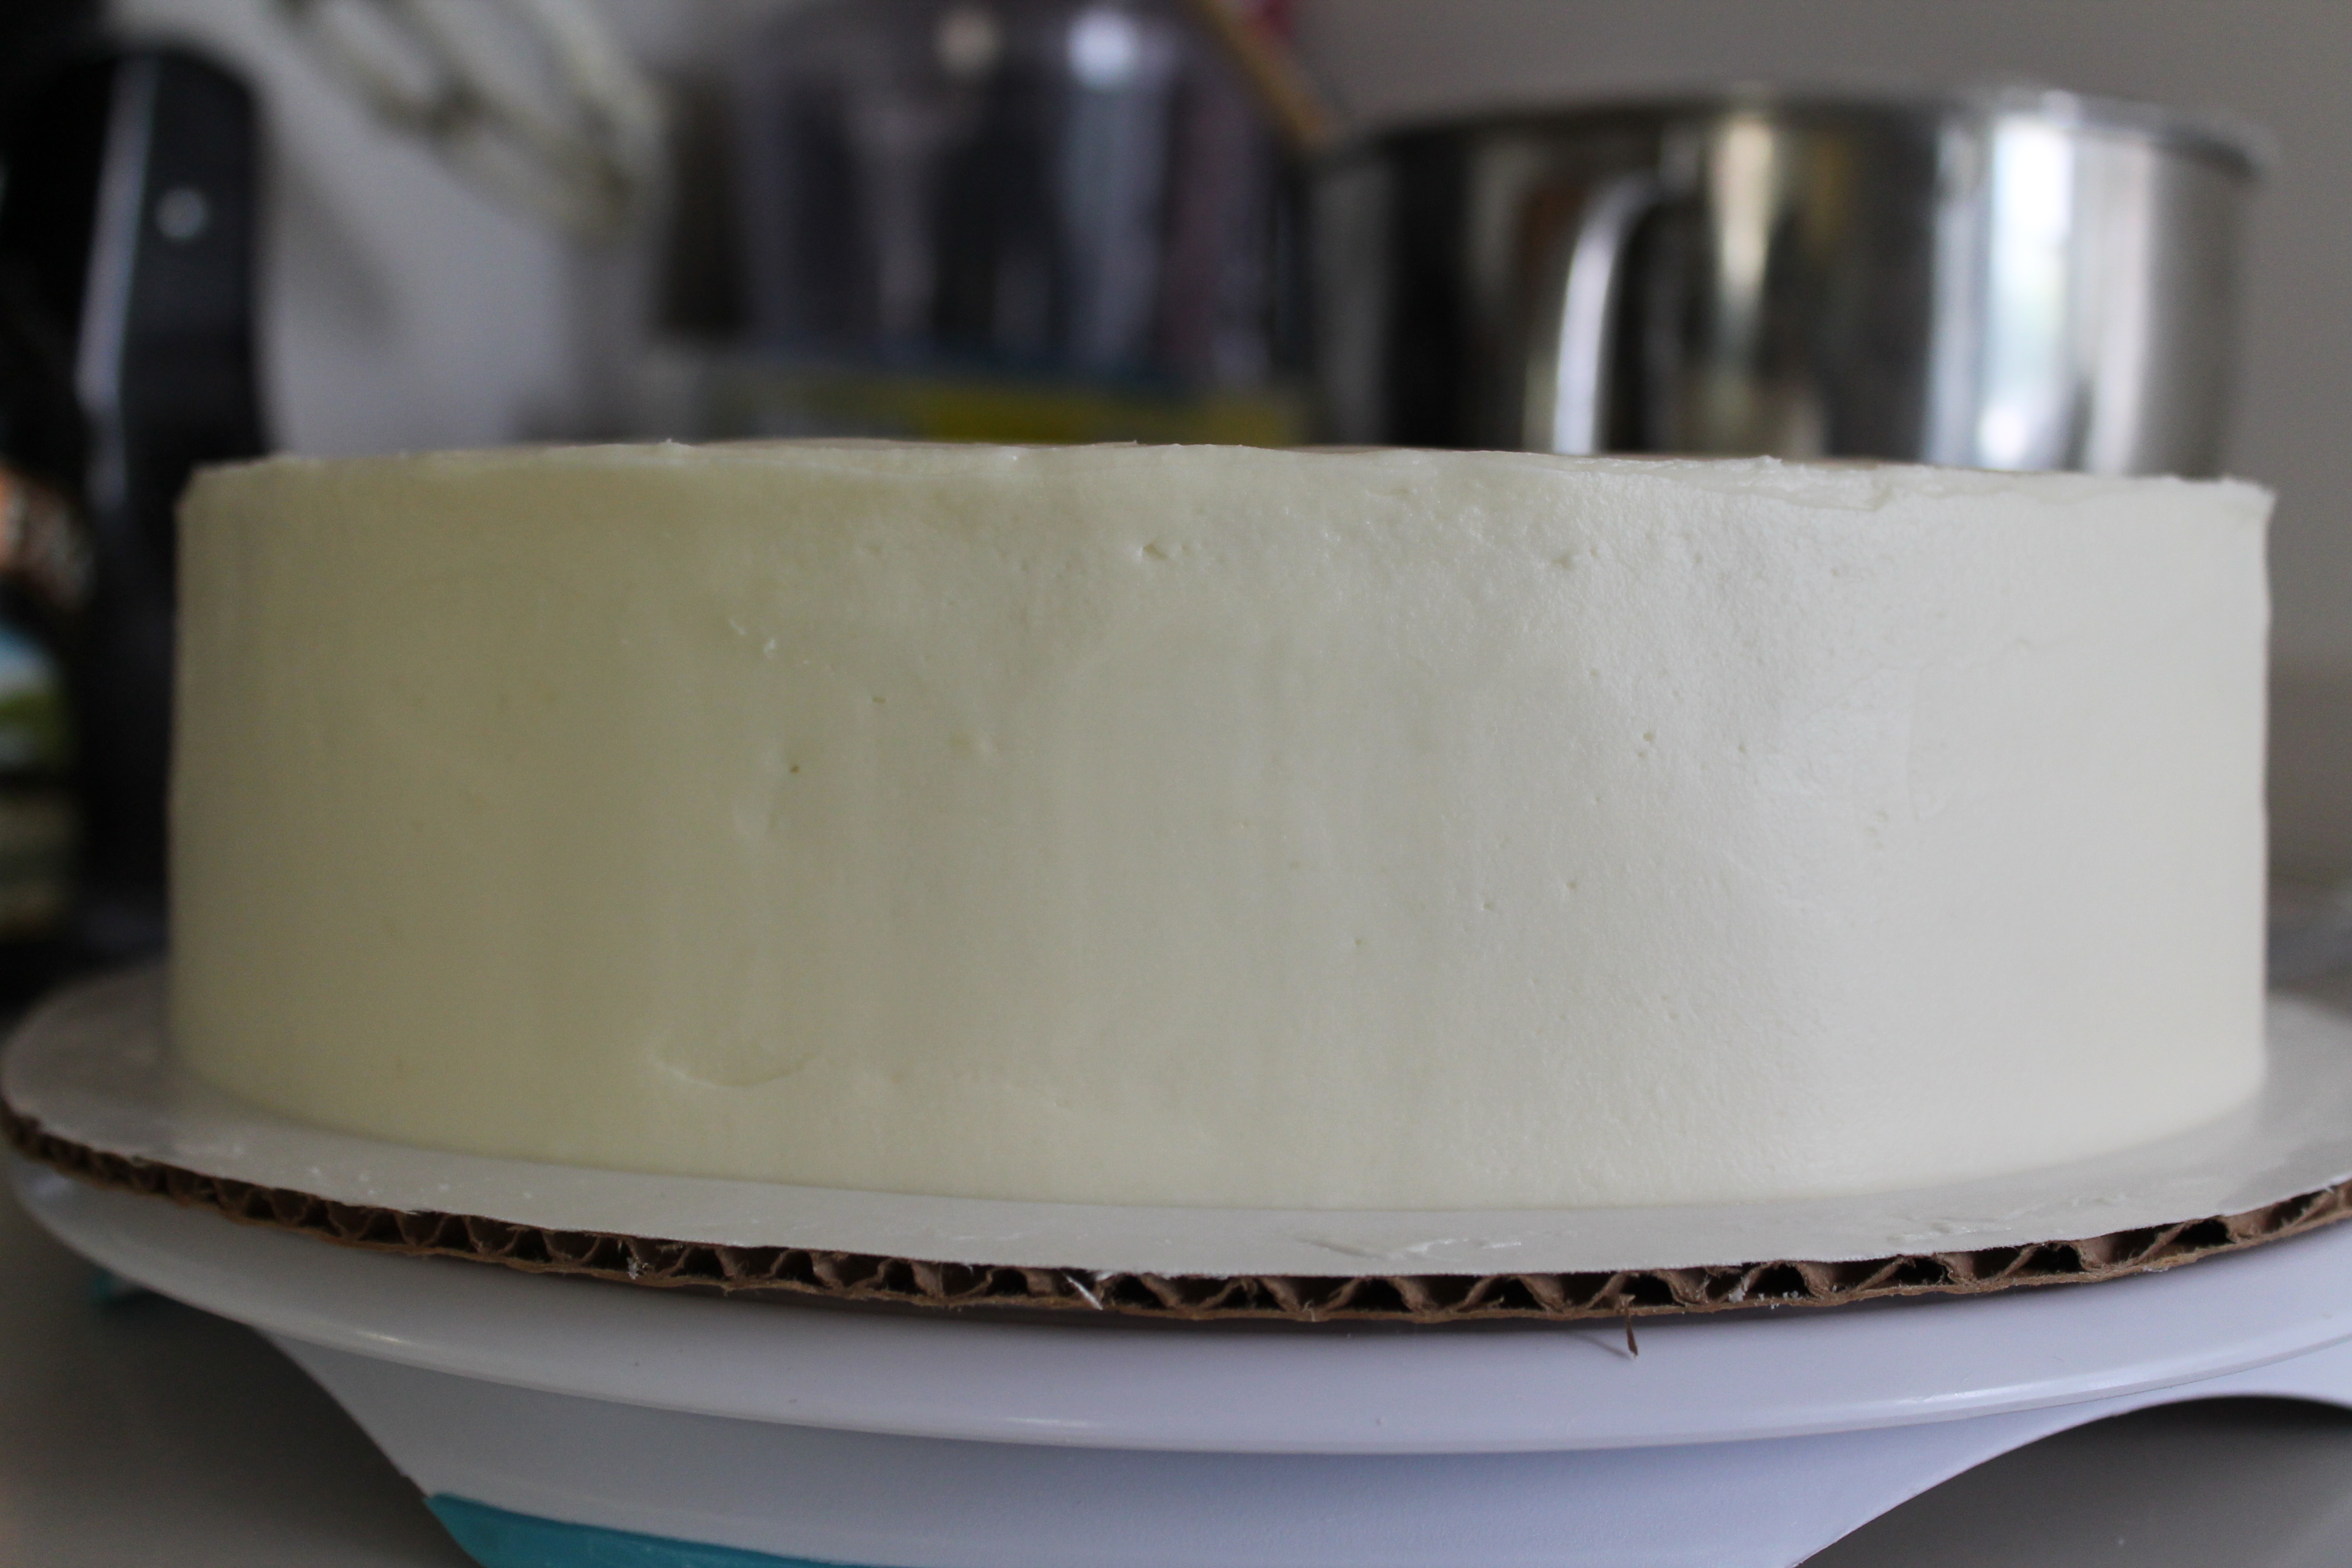 Grab the long, angled spatula and sweep it across the top, smoothing until you are satisfied. Remember, you are going to sit two other tiers on top of this one, so the edges are the most important part! It’s also very important that the frosting be totally level all the way around, or the stacked wedding cake will end up tilted.
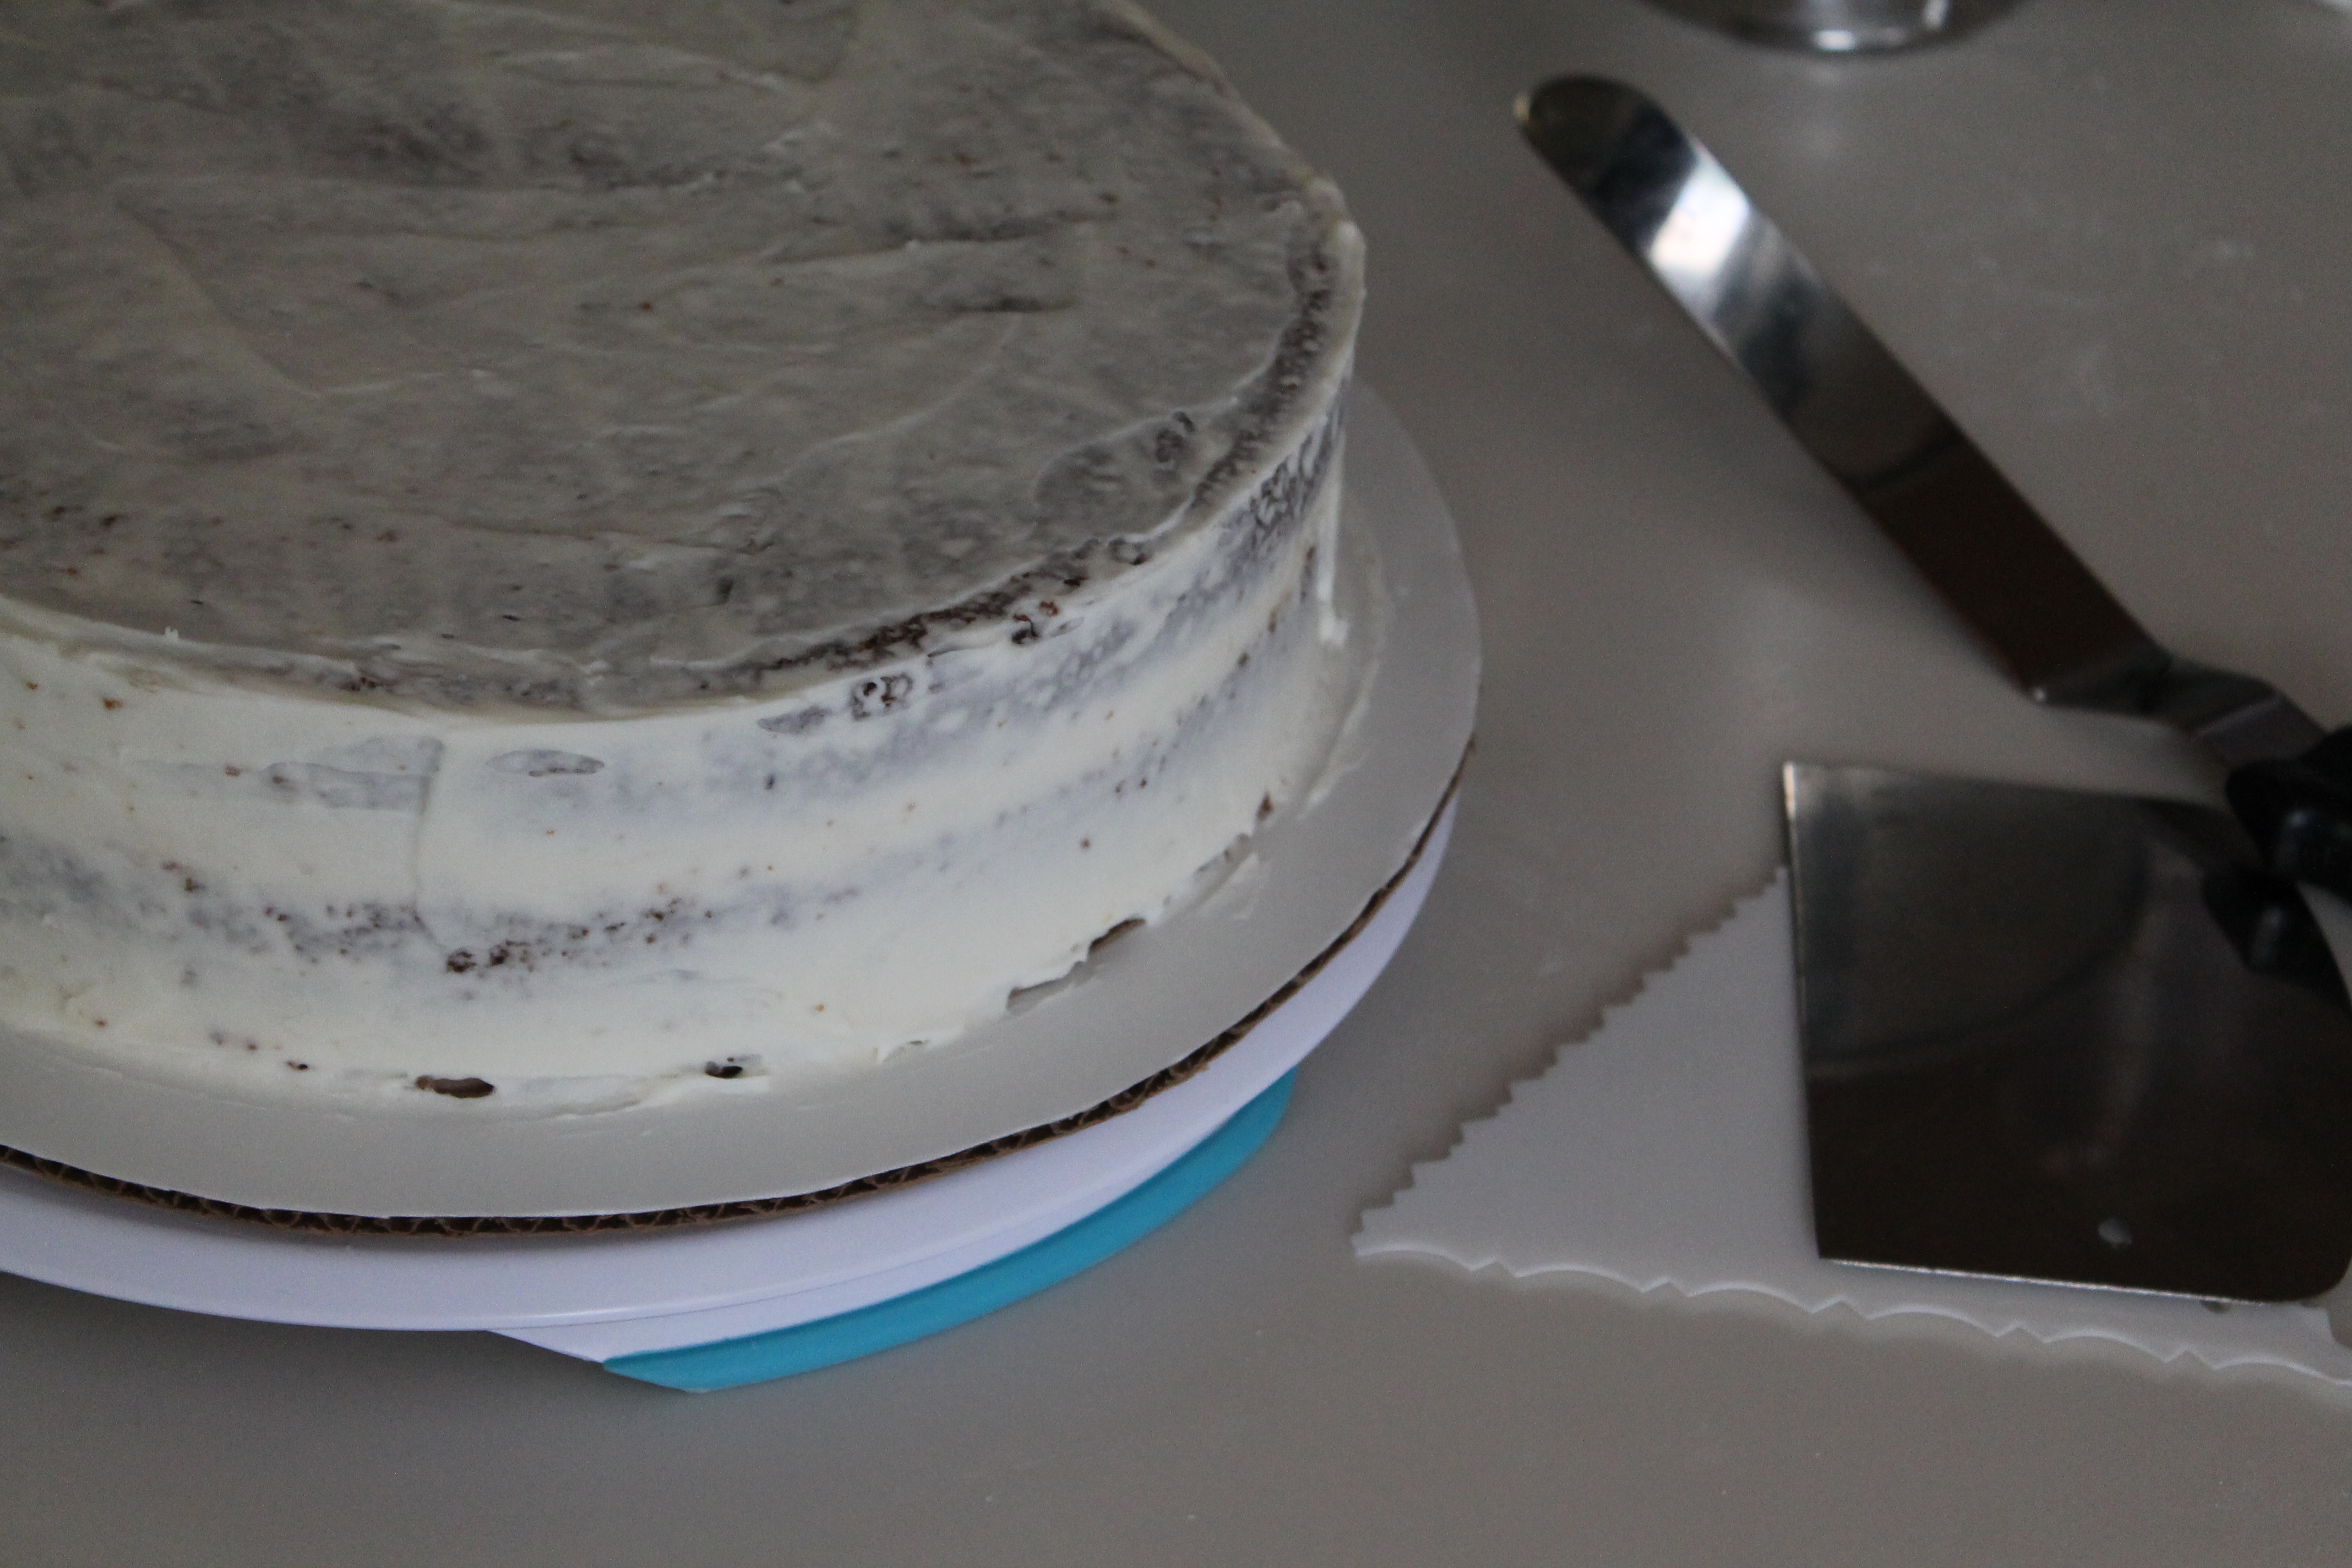
Now for the sides. The plain-edge smoothing tool is your best friend. I had my cakes set on larger cake circles (so one fitted circle and one larger circle per layer) to provide a steady base for frosting. Set the bottom of the smoothing tool flat against the lower cake circle and the flat, smoothing edge against the side of the cake. Spin the cake slowly on the turntable, running the smoothing blade along the edge of the cake in one smooth stroke. The excess frosting will come off on the smoothing tool.
Scrape off the smoothing tool and repeat the spinning, scraping motion until you are satisfied with the smoothness of the sides of the cake. Be careful not to take off too much frosting! I occasionally had to fill in small dimples or valleys and then run the smoothing tool around the cake again. It took several rounds before the cake was completely smooth.
If you are making a smooth, simple cake, then you are done! Carefully store the cake layer in a large box in the fridge overnight to help the frosting set.
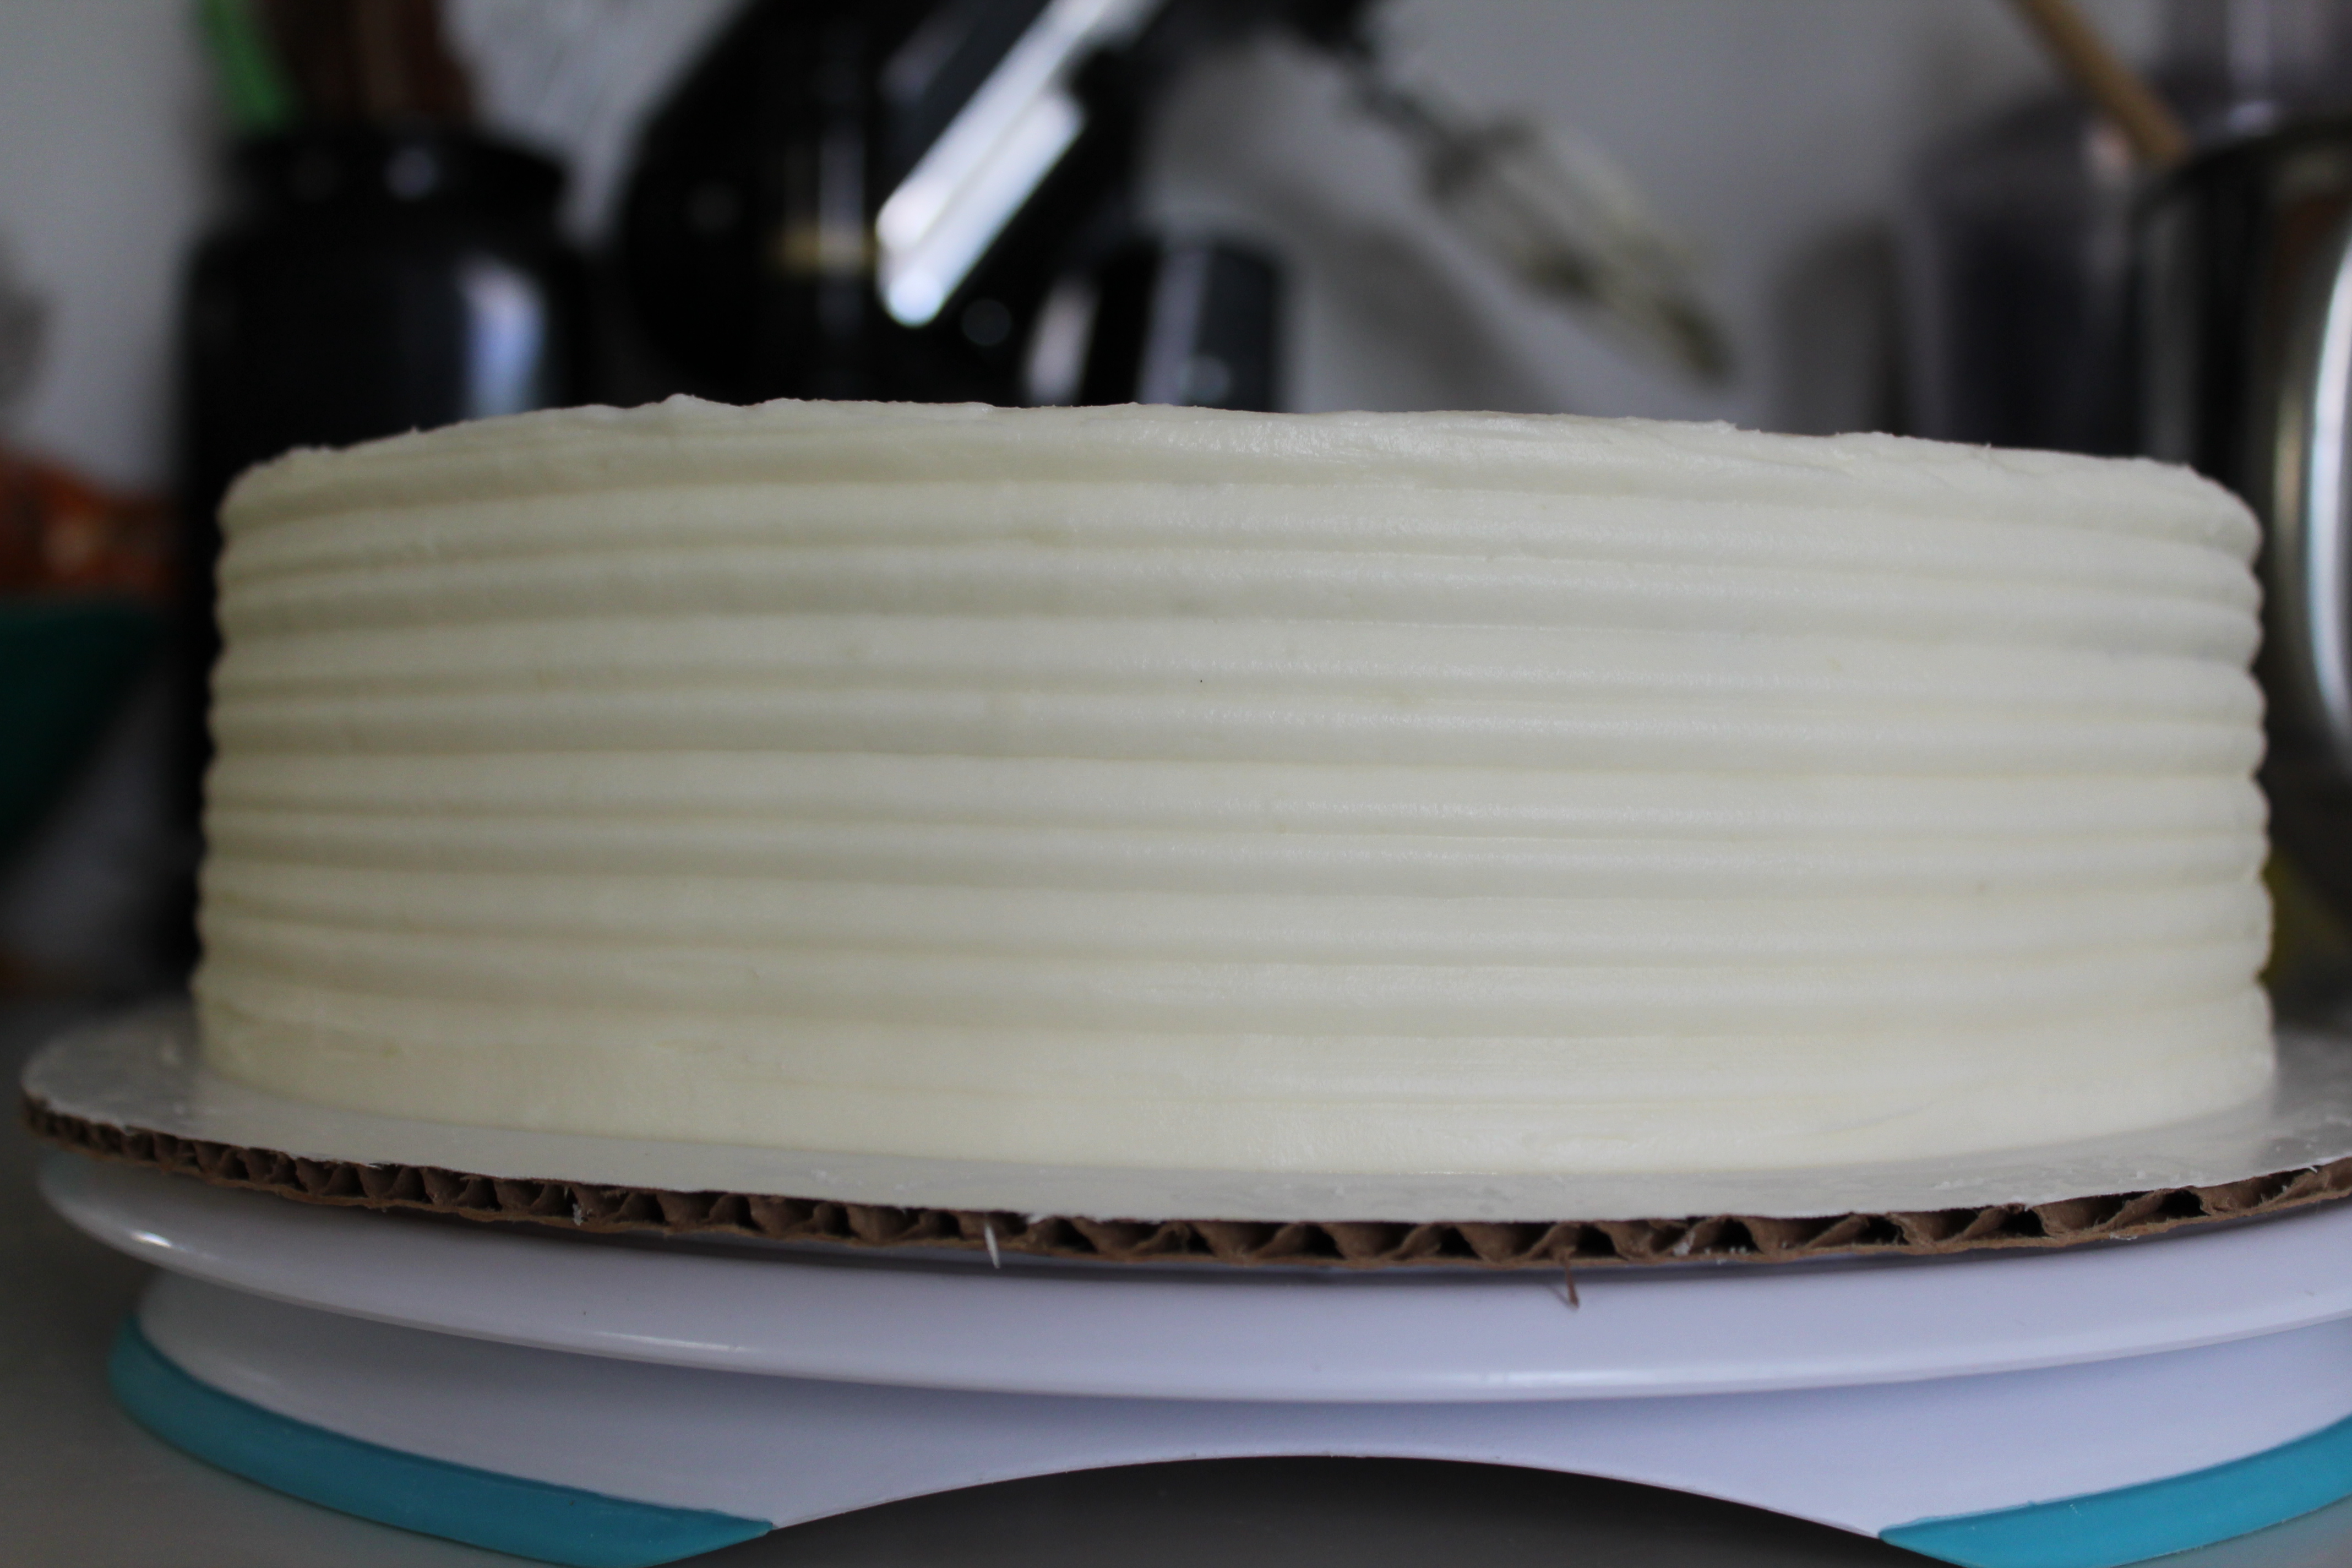
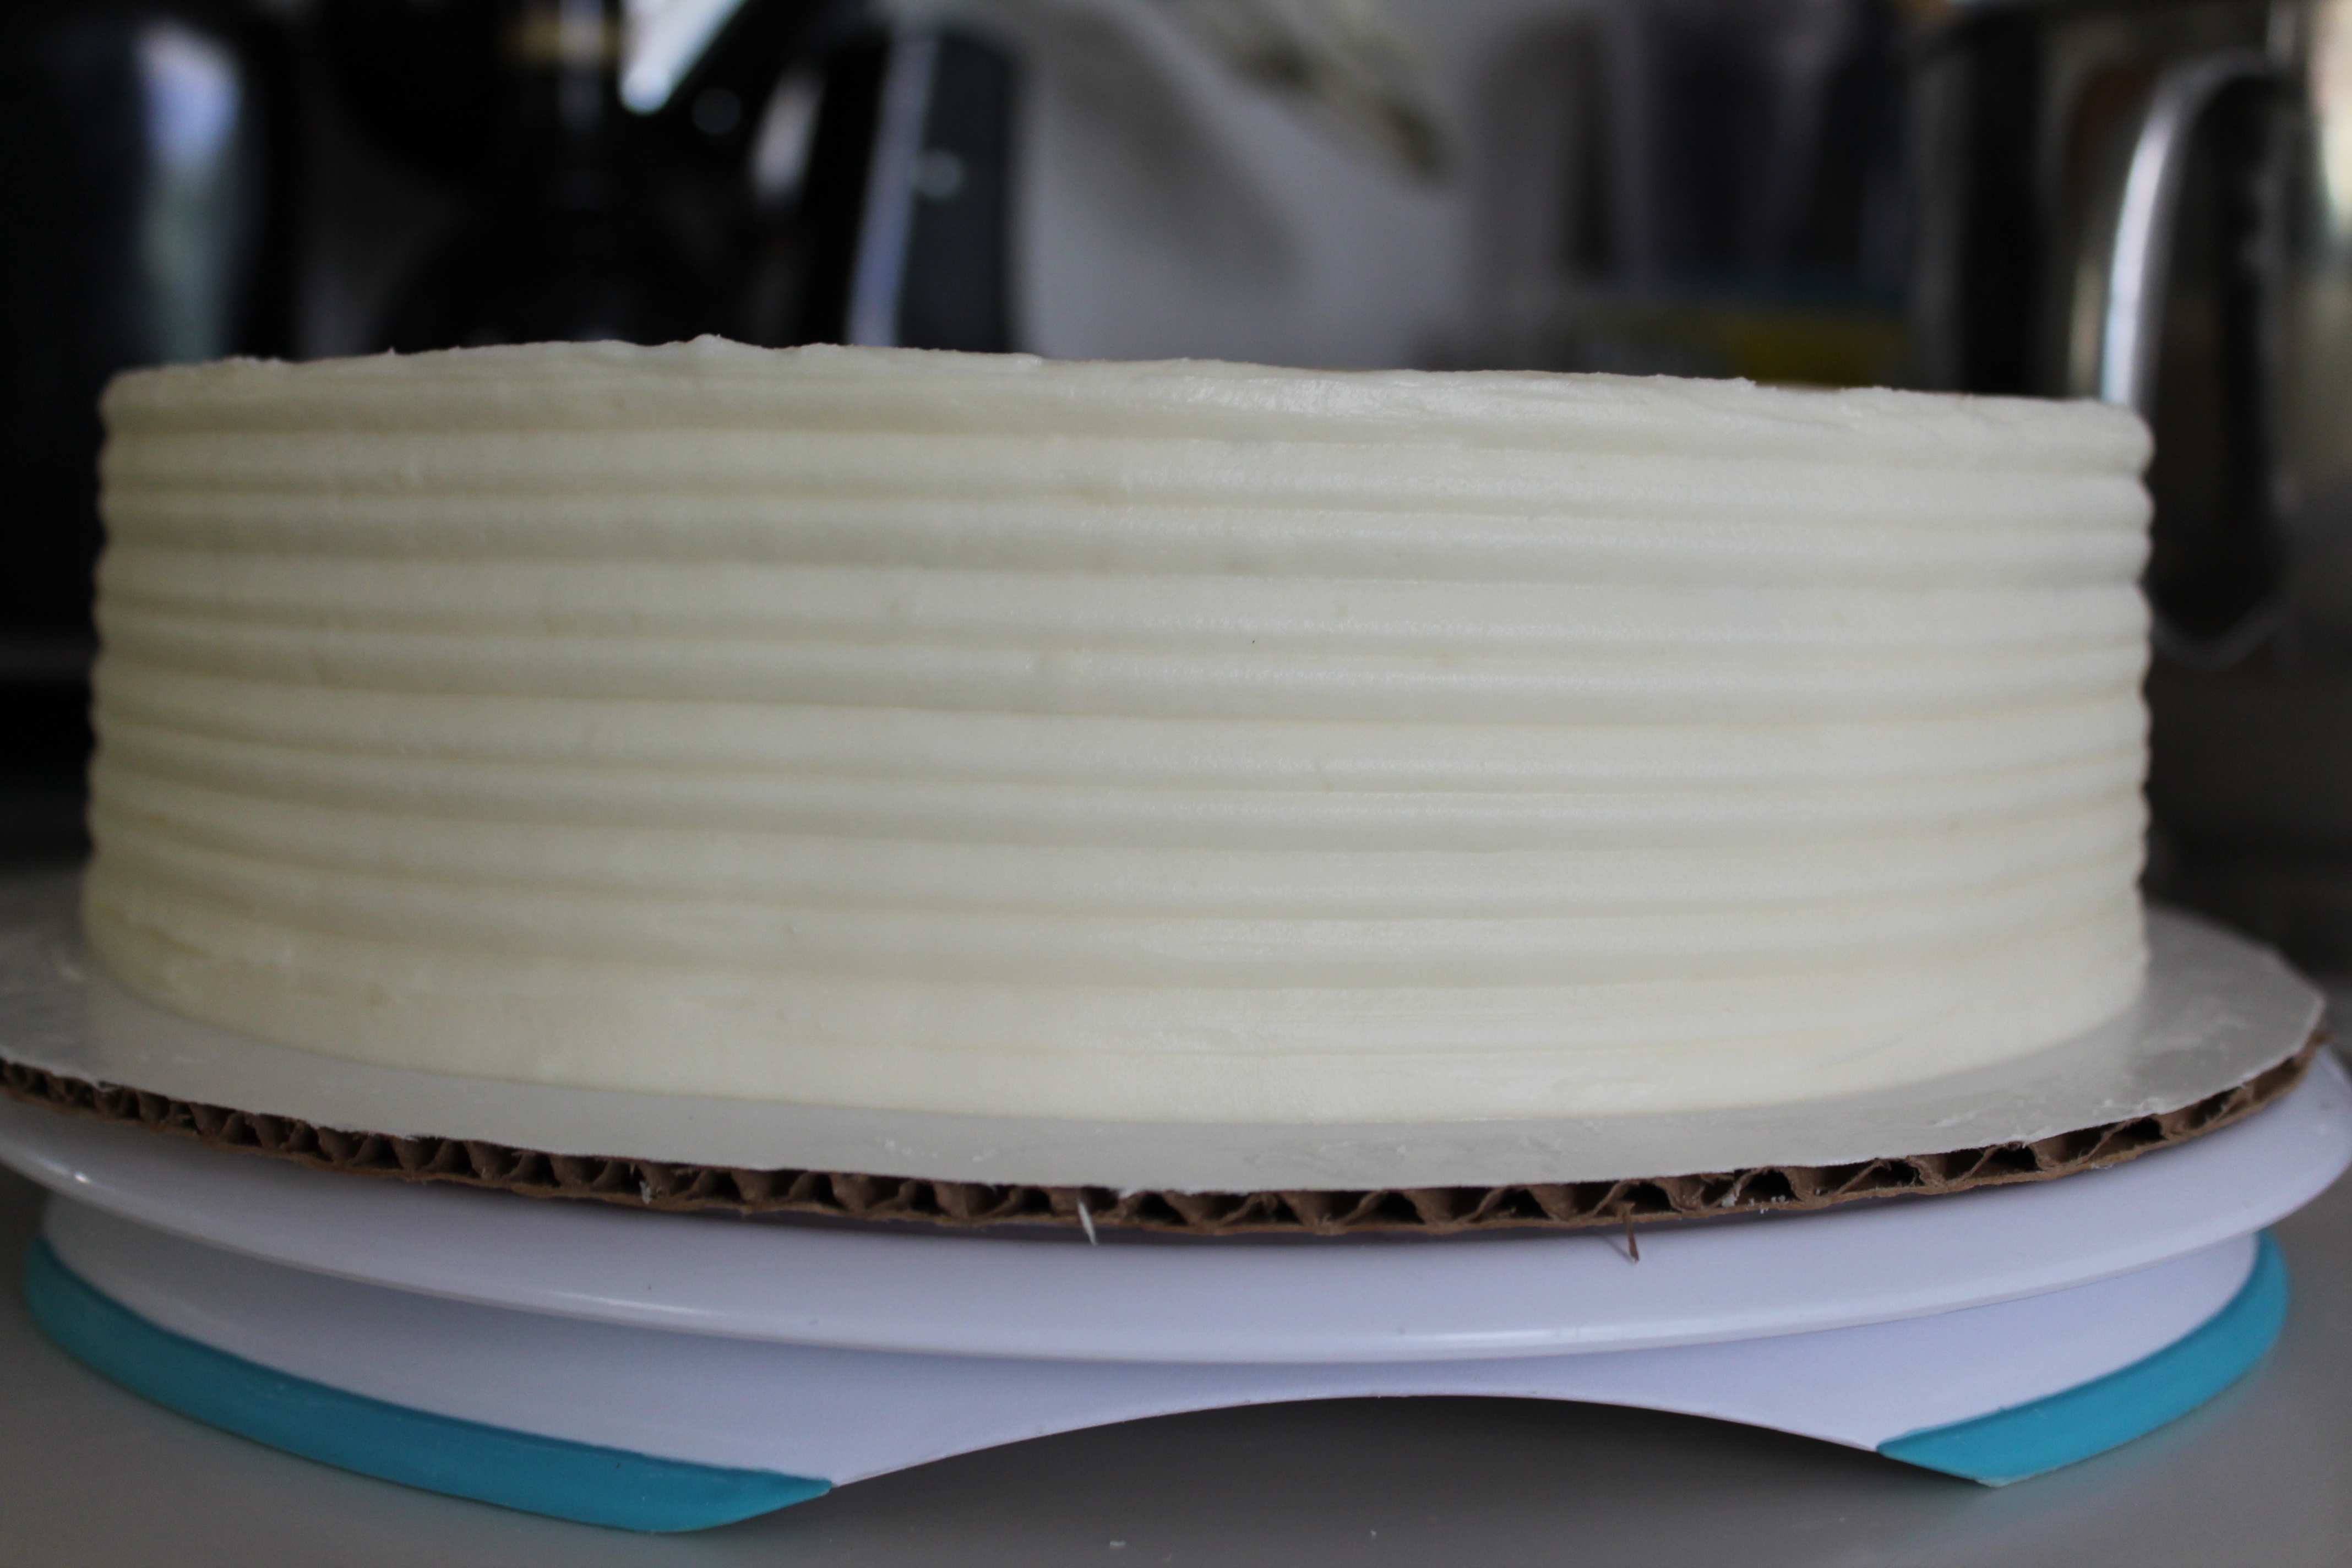
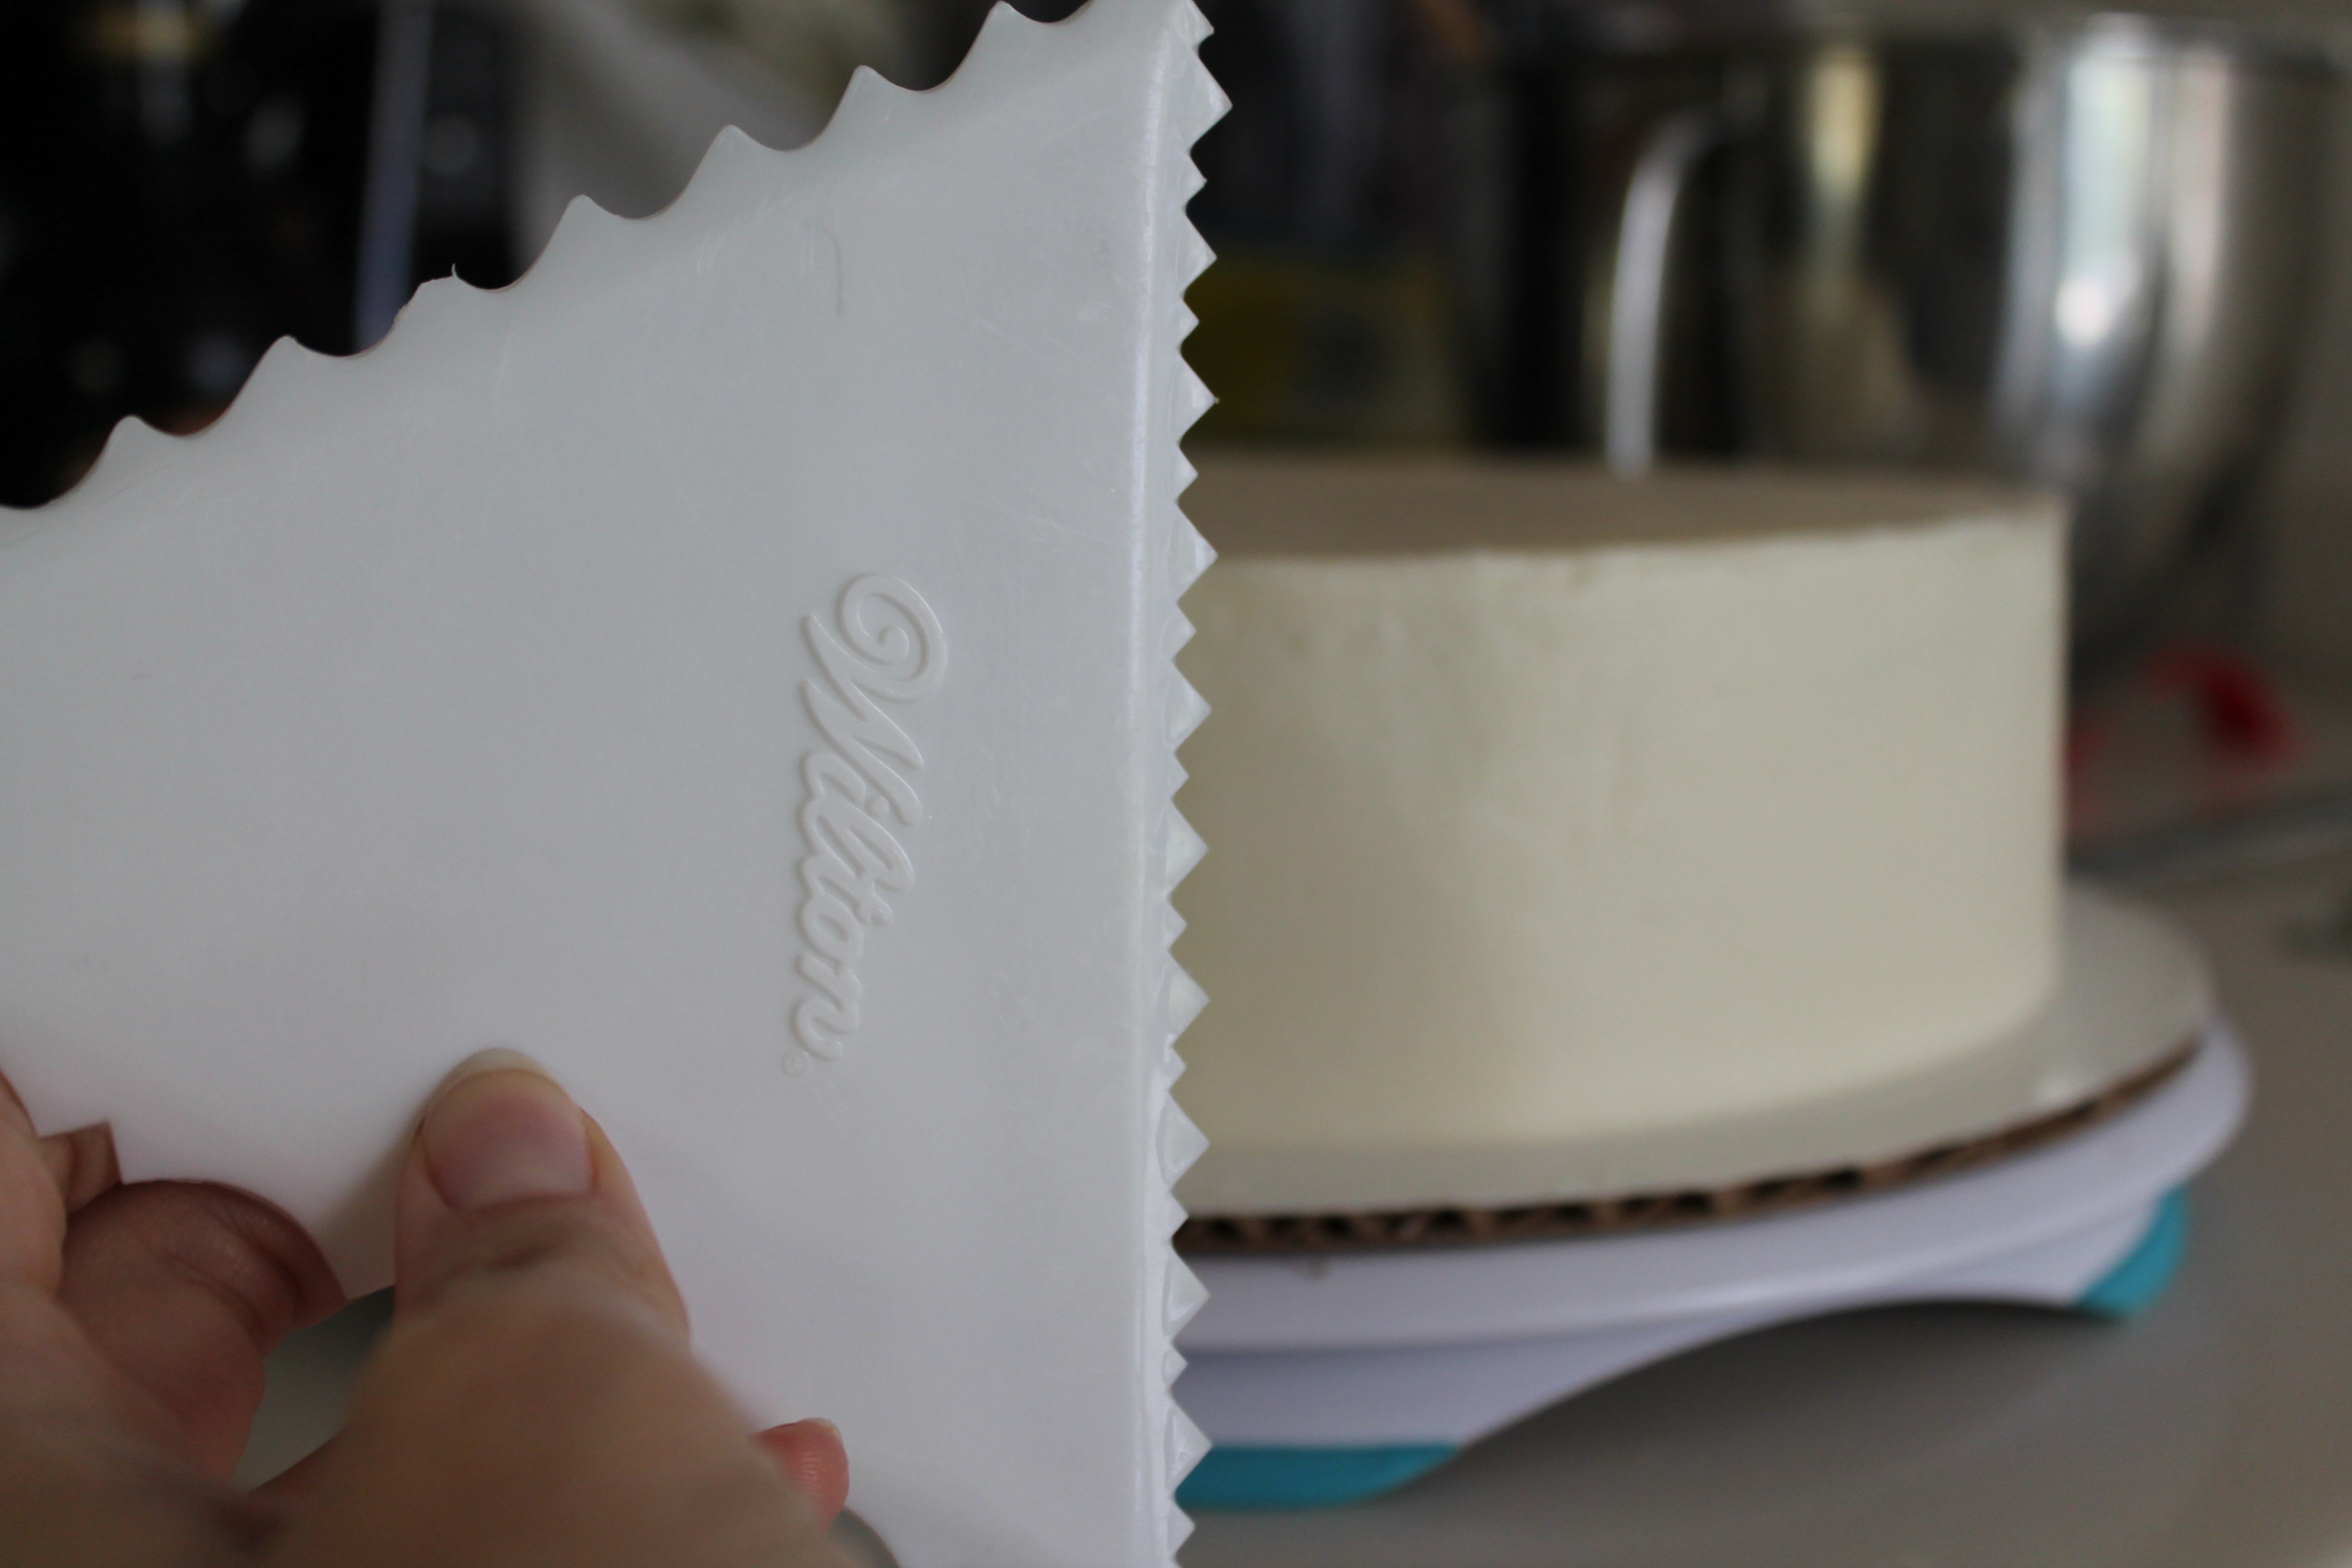 Back when I did my test cake, the bride and groom had loved the textured look of one of the test layers. So after I smoothed the sides to perfection, I whipped out the decorating comb and added ripples all the way around! This couldn’t have been easier; it used the same technique as the smoothing, and it looked great after one time around!
 So. Frost all three layers, carefully set them in boxes to keep them safe, and chill them overnight! Overnight chilling is the best because it sets the shape of the frosting and makes the cake somewhat more touchable with less incident (very helpful for the stacking process). Also, we made cream cheese frosting! So we must refrigerate.
By the way, I did ultimately make a third batch of the frosting recipe posted below, after working on the largest tier. One and a half pounds each of cream cheese and butter went into frosting this beautiful baby!
Baileys Cream Cheese Frosting
make 3 batches to frost a 3-tiered wedding cake (or, makes enough to thinly frost one 9″ cake or 18 cupcakes)
a Melissa original
Ingredients:
8 oz. full-fat cream cheese, room temperature*
8 oz. unsalted butter, room temperature*
1 lb. confectioner’s sugar
½ tbsp. Baileys Irish cream
Directions:
Beat the cream cheese and butter together for 3–5 minutes, or until light, fluffy, and well blended, scraping the sides of the bowl at least once.
Sift the confectioner’s sugar into the bowl about 1 cup at a time, beating each addition into the frosting until smooth. Scrape the sides of the bowl after each addition.
Add the Baileys and continue to beat the frosting another 5–8 minutes, until smooth and soft.
Use at room temperature to frost; store in the refrigerator.
*Note: If you can’t wait for 4 hours to let the dairy products soften on the counter, you may microwave these in very short increments, turning the blocks/sticks over at least every 5 seconds. Don’t melt them! But do get them completely soft all the way through. I believe the countertop method is much better than microwaving, but in a pinch…
Next time…
We will stack the tiers, add finishing touches, and admire the most beautiful (because we made it) wedding cake ever!
- One year ago: Apple Caramel Hand Pies
- Two years ago: Butternut Squash Galette
- Three years ago: Russian Teacakes